 FREE 1 to 3-Day Delivery on Orders $119+ Details
Best Sellers


How to Install Injen Aluminum Intercooler Pipe - Wrinkle Red on your Mustang

Shop Parts in this Guide
NOTE: DISCONNECT BATTERY BEFORE INSTALLATION!!!
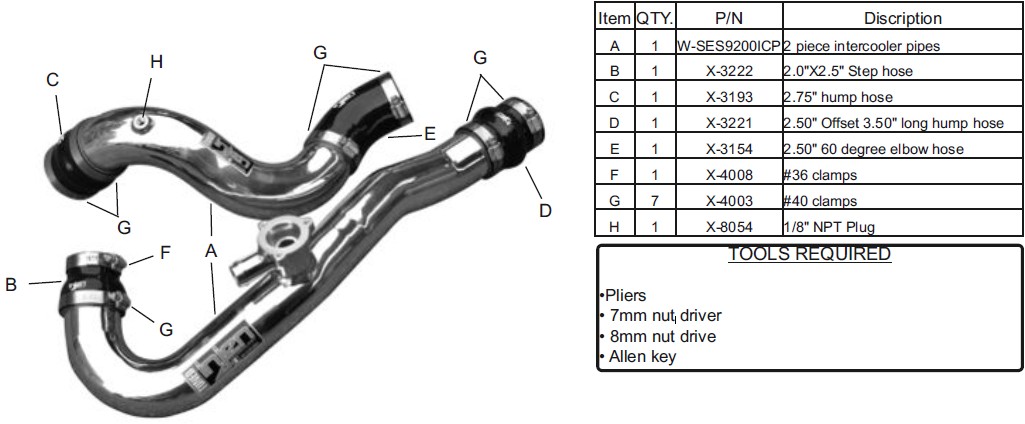
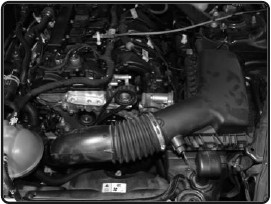
1. Remove the factory intake system or injen intake system from vehicle for installation of the new intercooler pipes. (See injen instruction sheet PF9091.)
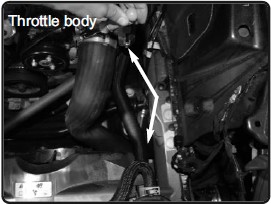
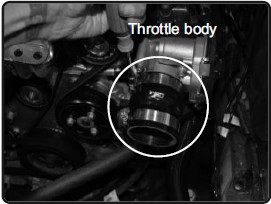
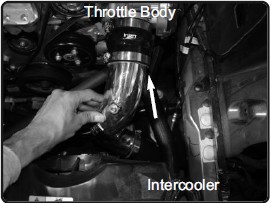
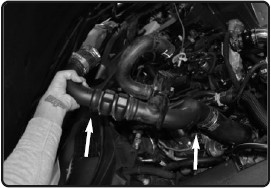
2. Loosen the clamp on the throttle body using 7mm nut driver. Loosen the clamp on the intercooler side also.
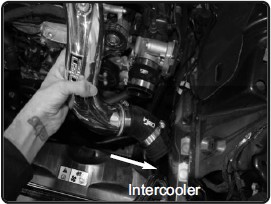
7. Carefully pull out the OEM rubber cold side intercooler hose out of vehicle.
3. Install the provided 2-3/4” hump hose to the throttle body using provided clamps, tighten the clamp on throttle body only.
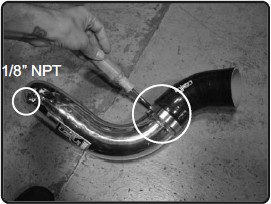
4. Secure the threadded fitting on intercooler tube if not using for auxilary boost/injection line with provided 1/8” NPT plug. Secure and tighten. Install the provided 2-1/2” elbow hose to the intake tube with clamps provided.
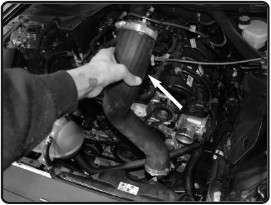
5. With soap water lubrication on the inside of the elbow hose, install the intercooler assembly into vehicle with clamp. This will allow for the elbow hose to slide on easier to intercooler. Do not tighten.
6. Now position the intercooler pipe into the hump hose on throttle body and secure. Adjust for proper fitment.
7. Tighten all clamps using 8mm nut driver.

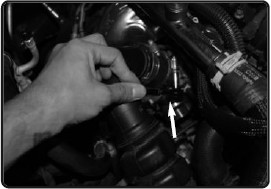
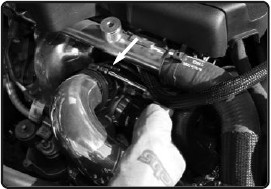
8. Loosen the clamp on the turbo for the hot side of the intercooler pipe using 7mm nut driver or ratchet. Loosen the clamp on the intercooler side also.
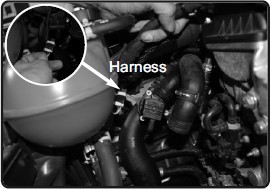
9. Disconnect the diverter valve harness. Pull line harness away from hot intercooler pipe.
10. Pull back the intercooler pipe from turbo.
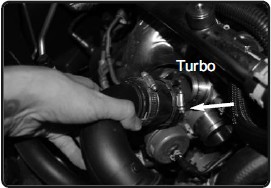
11. Now carefully lift up and remove the intercooler pipe out of vehicle.
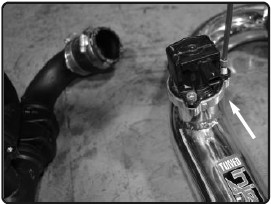
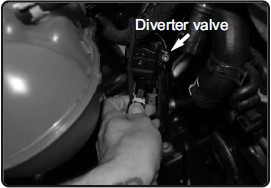
12. Loosen the 3 screws holding in the diverter valve using allen key. Carefully remove. Position new injen intercooler next to pipe for correct position.

13. Secure the diverter valve to the injen intercooler pipe using allen key. Secure using original screws.
14. With pliers loosen, loosen clamp and pull back line. Carfully remove and transfer to the new injen intercooler fitting.
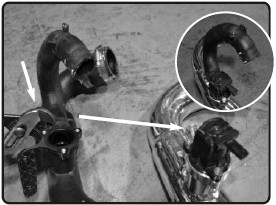
15. Secure the diverter line to the intercooler fitting.
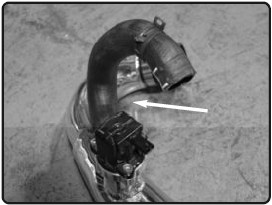
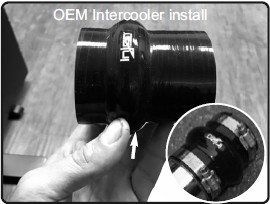
16. The 2.5” x 3.5”L hump hose seen above is for the installation with OEM intercooler only! DO NOT CUT!
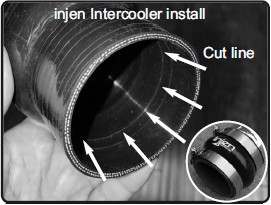
17. With injen Intercooler only, locate inside the hump hose for the cut indicator line. Cut back the intercooler hose at this 1” line. This will allow for the hump hose to be 2.5” x 2.5”L. Cut only with injen intecooler only!
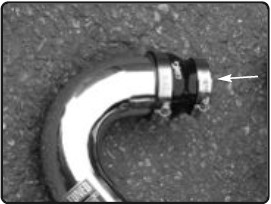
18. Install the step hose with clamps provided to the turbo side of the intercooler pipe.
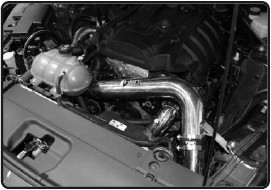
19. Install the hot side injen intercooler pipe into the vehicle. Position
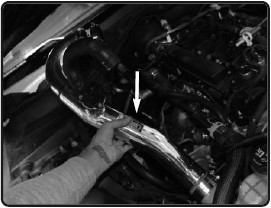
20. With soap water lubrication on the inside of the hump hose. This will allow for the elbow hose to slide on easier to intercooler. Tighten clamp using 8mm nut driver.

21. Secure the turbo side of the coupler and tighten using 8mm nut driver.
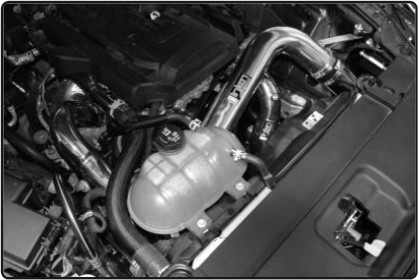
22. Re-connect the diverter valve harness.
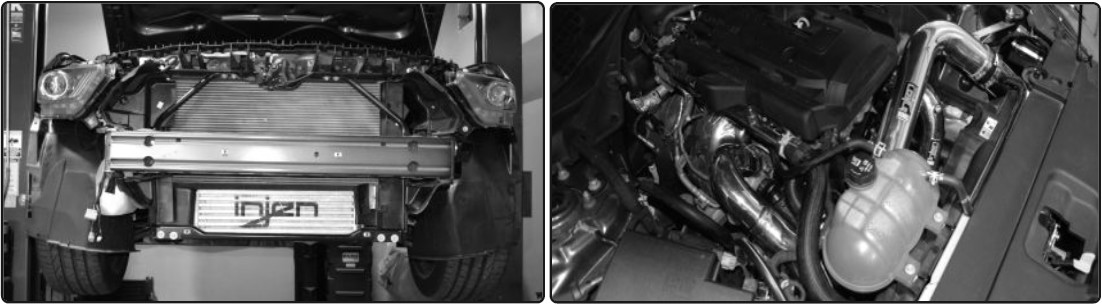
23. Re-install the intake system or stock air box. Make sure to connect the crankcase line and diverter valve return line. PF9091P intake system shown above.
Congratulations! You have just completed the installation of this intercooler pipe system. Periodically, check the alignment of the intake, normal wear and tear can cause nuts and bolts to come loose. Note: Check clearance and adjust if needed! Failure to check the alignment and adjust the intake can cause damage that will void the warranty. Injen Technology is not responsible for any damages caused by/from improper installation.
Test Drive:
1. With the transmission in neutral or park and the parking brake engaged, start the engine. Listen for air leaks or odd noises. If air leaks are detected, secure hoses and connections. For any odd noises, inspect entire system for cause and adjust intake as needed. The Injen intake will function identically to the factory system but will be louder and more powerful.
2. Perform a road test. Listen for odd noises or rattles and fix as necessary.
3. If there are no issues, continue to enjoy your added performance from the Injen performance Intake kit.
4. Injen Technology recommends you periodically check clearance and adjust if needed! Failure to check the alignment and adjust the intake can cause damage that will void the warranty. Injen Technology is not responsible for any damages caused by/from improper installation.
1. Upon completion of the installation, reconnect the negative battery terminal before you start the engine.
2. Align the entire intake system for the best possible fit. Once the intake has been properly fitted continue to tighten all nuts, bolts and clamps.
3. Periodically, recheck the alignment of the intake system and make sure there is proper clearance around and along the length of the intake. Failure to follow proper mainentance procedures may cause damage to the intake and will void the warranty.
4. Start the engine and listen carefully for any odd noises, rattles and/or air leaks prior to taking it for a test drive. If any problems arise go back and check the vacuum lines, hoses and clamps that maybe causing leaks or rattles and correct the problem.
5. Check the filter for excessive dirt build up. Clean or replace the filter with an original Injen filter (can be bought on-line at “injenonline.com”). Congratulations! You have just completed the installation of the best intake system sold on the market. Enjoy the added power and performance of your new intake system.
