 FREE 1 to 3-Day Delivery on Orders $119+ Details
Best Sellers


Mustang Le Mans Stripe Installation Guide
Installation Time
2 hours
Tools Required
- Scissors (x1)
- Razor blades (x2)
- Paper towels (x1)
- Full bottle of Windex cleaner (x1)
- Ruler (x1)
- Spool of twine/String (x1)
- Blue Painters Tape
- Flathead screwdriver (x1) (To remove hood scoop in necessary)

Shop Parts in this Guide
- SEC10 Lemans Stripes; Gloss Black; 12-Inch (79-23 Mustang)
- SEC10 Lemans Stripes; Gloss Black; 8-Inch (79-23 Mustang)
- SEC10 Lemans Stripes; Silver; 12-Inch (79-23 Mustang)
- SEC10 Lemans Stripes; Silver; 8-Inch (79-23 Mustang)
- SEC10 Lemans Stripes; White; 12-Inch (79-23 Mustang)
- SEC10 Lemans Stripes; White; 8-Inch (79-23 Mustang)

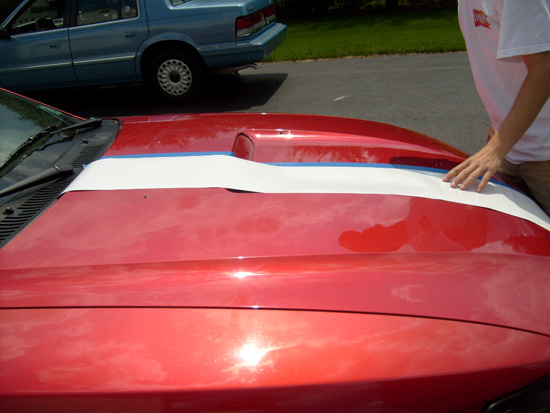
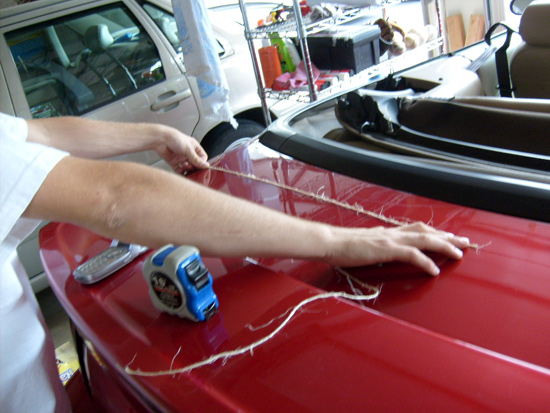
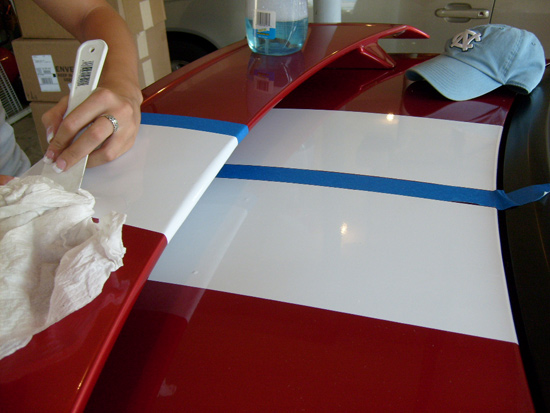
3. Before installing the stripes, it is important to know where they will go. They should be centered on the car so to do this, take a piece of string and measure the width of the hood of the car. Divide that number by two and that is the distance from one side of the hood to the center of the hood. To install the twin stripes on the hood, we need a piece of tape to act as a separator and a guide for laying down the stripes. I used a roll of 1.5” blue painter’s tape as a guide. This is illustrated below.
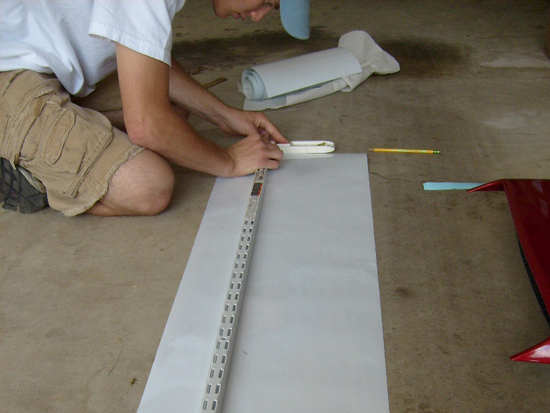
4. To start striping, take the roll of striping and lay it out where you want it to go. Cut longer than you need by about two inches so there is no mistake with the length. Cut the striping with a straight edge and a razor blade so the cut is straight and precise.
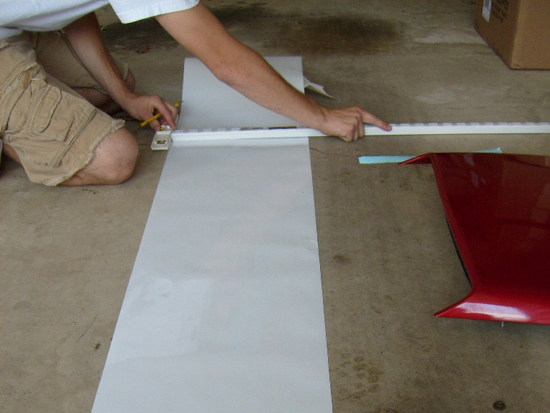
5. I added another step to my install, because I wanted my stripes to be 8" wide instead of 12" wide that come from AmericanMuscle, so I used a straight edge to cut four inches from one side of the 12 inch stripe.
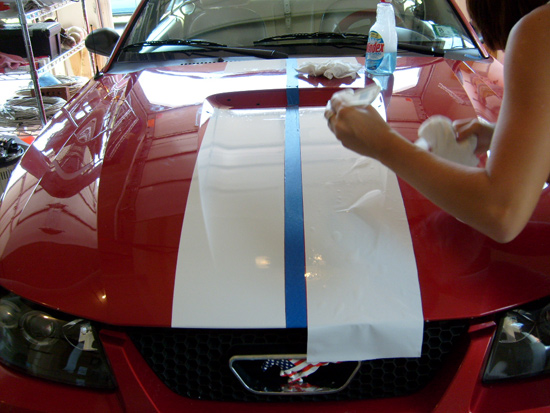
6. It is now time to start striping. Start by peeling the backing off of the stripe and spray it completely with Windex. The more Windex you use the easier it is to move the stripe around on the hood of the car, but at the same time it will take longer for the stripe to dry.
7. After the stripe and the car are covered with Windex, lay the stripe down and position it where you want it.
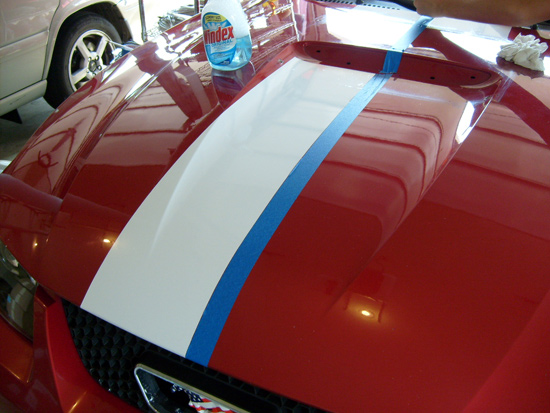
8. After the stripe is settled, take a plastic scraper so as not to scratch the paint and scrape all of the Windex out from under the stripe. Doing so will dry the stripe and make it stick almost instantly. When first scraping, be sure to hold the stripe so that it does not move. This is illustrated below.
9. After the stripe has been scraped of all the Windex, work on another section of the striping process and periodically check back to make sure that no air bubbles have formed in the stripe. If they have, then just work them out to the side of the stripe with the scraper. Sometimes it is hard to see bubble so you may need to move around a little to look from a different angle at the stripe. Also, you can lightly rub your hand over the stripe to feel for any imperfections.
10. After the front of the car was finished, I moved onto the back of the car. Since my car is a convertible, I had it easy. The installation of stripes on the roof of the car is the same as the hood and in fact, a little easier because it is a completely flat surface. Just measure the entire width of the roof and find the center. Then lay down the blue painter’s tape, and add the stripes. Below are some images of how I striped the back of the car. I did not stripe the top of the spoiler even though I wanted to. The angle at which the spoiler curves doesn't let the stripe sit evenly and it wrinkled constantly. This can be frustrating but with a little work the wrinkles can be eliminated.
11. Here you can see me measuring for the center of the deck lid (trunk). This the same as step 3 above for finding the center of the hood.
12. I laid down the blue painter’s tape down the center of the trunk to separate the stripes and started the striping process all over again.
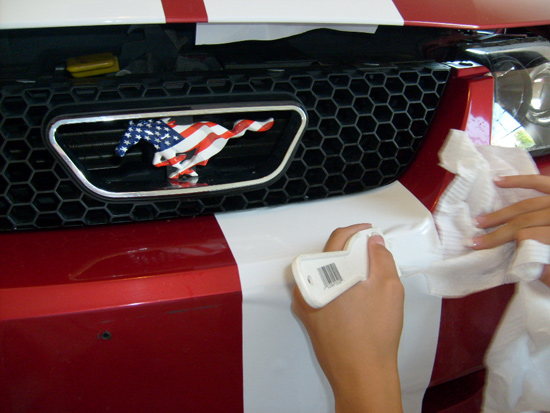
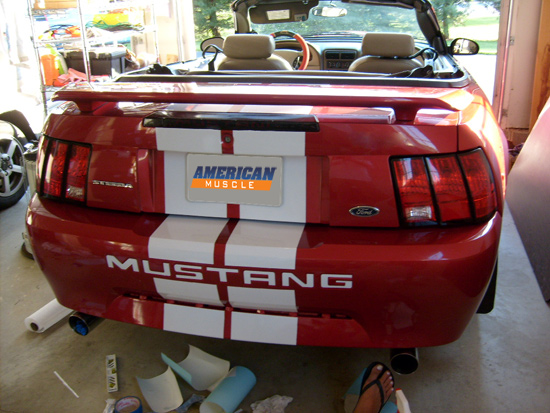
13. When it came to the bumper inserts, I just decided to cut the stripes square across and leave a space between the bumper insert letters and the stripes as shown below.
14. After positioning the stripes, wait a few Mins and squeegee out all the extra Windex that is left behind so the stripes can dry.
Note:Be extremely careful when removing the blue painter’s tape from the car as it may catch a small part of the stripe.
15. After the stripes are somewhat dry, go back and make sure that all of the air bubbles are out of the stripes. Leave the car in a cool and dry place for at least 24 Hrs so that the Le mans stripes have a chance to dry completely. Also, it is not a good idea to drive the car until the stripes are completely dry.
16. This is how I striped my 2001 Mustang convertible, there may be other ways to do this same job and you may know of a different or even better way, but I wrote this article to be example of what a regular Joe can do in his own garage.

I can’t take all of the credit for this installation article, I would like to thank my girlfriend, who helped me out tremendously with applying the stripes to my car.
Installation instructions provided by AmericanMuscle customer Will Rimmler 6.19.08
