 FREE 1 to 3-Day Delivery on Orders $119+ Details
Best Sellers


How to Install Maximum Motorsports Rear Ride Height Adjusters (05-14 All) on your Ford Mustang
Installation Time
2 hours
Tools Required
- Standard assortment of hand tools
- Floor jack and four jack stands
- ½” torque wrench
Shop Parts in this Guide
Read all instructions before beginning work. Following instructions in the proper sequence will ensure the best and easiest installation.
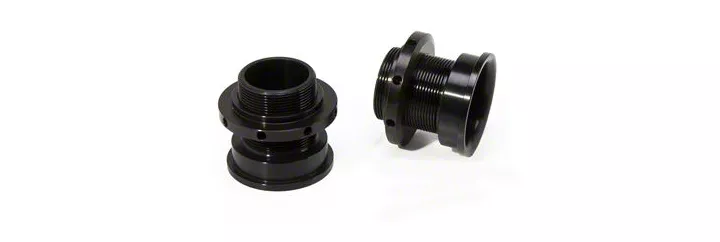
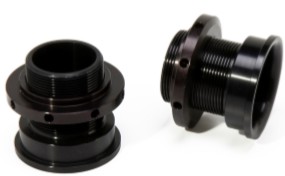
This Kit Contains

Component Identification

Preparation
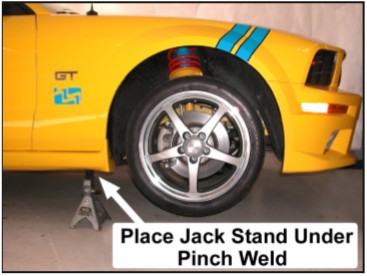
1. Raise vehicle and support it using jack stands beneath the pinch welds of the rocker panels.
WARNING: The vehicle must be lifted and supported under the rocker panel pinch welds (as specified in the Ford service manual) to avoid damage to the chassis.
2. Remove rear wheels.
3. Using a 15mm socket, disconnect rear swaybar end-links where they attach to each frame rail.
4. Support passenger side of the axle housing using a floor jack. Place floor jack just inboard of the control arm mounting bracket, onto axle housing.
5. Remove bolt retaining the brake hose bracket to the frame rail.
6. Remove bolt/nut retaining the passenger-side lower shock eyelet to the axle. Keep hardware for later use.
7. Slowly lower floor jack until spring tension is released.
8. Remove passenger-side spring.
NOTE: Keep lower spring isolator on the axle for street-driven vehicles to minimize any increase in NVH.
NOTE: If present, remove dustcap from factory spring register.
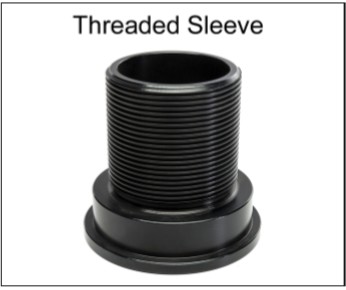
9. Thread a spring perch onto a sleeve until it bottoms out against the sleeve base. Make sure the raised lip on the spring perch faces upward.
10. Place a spring onto the threaded sleeve assembly and guide the top of the spring into the spring pocket on the bottom of the passengerside frame rail. Make sure you insert the tip of the rubber isolator, located in the pocket, into the spring’s center.
11. Slide the bottom of the threaded sleeve over the spring register on the top of the passenger side of the axle housing. If retaining the stock isolator, make sure the sleeve rests evenly on the isolator.
12. Jack up the passenger side until the lower shock eyelet lines up with the shock mount on the axle housing.
13. Place eyelet of the shock into the shock mount on the axle. Install the shock eyelet mounting bolt from the inboard side of the lower shock mount.
14. Lower the floor jack and repeat Steps 4 to 13 on the driver side.
Rear Installation Completion
15. Using a 15mm socket, install shock eyelet mounting nuts and torque lower shock eyelet bolts to 115 Nm (85 lb-ft).
16. Reattach the brake hose brackets removed in Step 13 and torque the mounting bolts to 20 Nm (177 lb-in).
17. Using a 15mm socket, reconnect rear swaybar end-links to the frame rail mounting brackets and torque mounting nuts to 115 Nm (85 lb-ft) .
18. Reinstall rear wheels and safely lower vehicle to the ground.
19. Torque the lug nuts to factory specifications.
