 FREE 1 to 3-Day Delivery on Orders $119+ Details
Best Sellers


Max Motorsports Clutch Quadrant and Steeda Clutch Adjuster Installation Guide
Tools Required
- Jack and Jack Stand or Ramps
- Wheel Blocks
- Ratchet with 1/4", 5/16", 3/8", and 3/16" sockets
- Socket Driver
- Needle-Nose Pliers
- Large Flat-Head Screwdriver
- Dremel Tool with Cut-Off Wheel (Preferred) or Various Cutting Implements
- Pry Bar or Large Breaker Bar
- Dust Mask (Recommended)
- American Muscle's Fender Gripper (Recommended)
Shop Parts in this Guide
Installation
1. Set the Parking Brake before beginning any part of this installation.
2. Remove the lower trim panel below the steering column. This will make it much easier to see the clutch quadrant components. Remove the two 5/16" screws at the bottom of the panel.
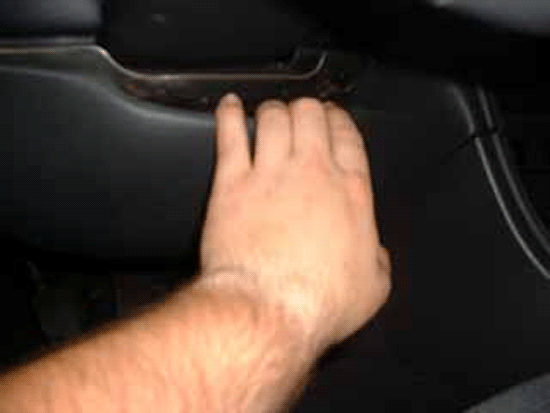
3. There are two clips holding this panel in, at the top. Grab as shown, and pull the panel out. Make sure to get both clips; the left one fell out when I did this. NOTE: Pushing the seat as far back as it will go will give you more room to work under the dash later. Maximum Motorsports recommends removing the seat altogether for the install, but I was working alone and the seat is heavy.
4. Raise the vehicle on jack stands or with ramps, and be sure to block the rear wheels for safety. Also set the parking brake.
5. Working under the car, locate the inspection cover on the bellhousing. On this 3.8 Mustang, the cover is located on the driver side of the bellhousing.
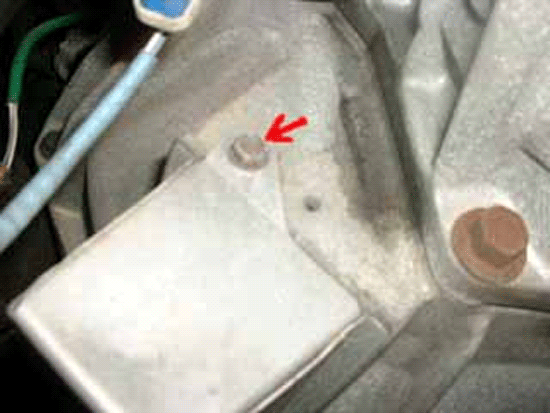
6. There is one 3/8" bolt holding this piece on (Indicated with the red arrow). Remove the belt and slide off the cover. Watch out for the dust in there, it is a carcinogen. A dust mask is recommended; do not blow on the components inside the cover.
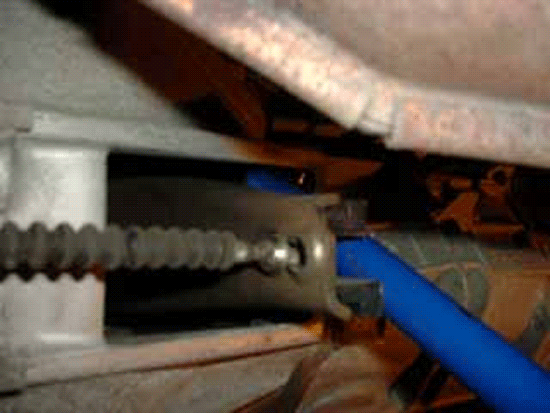
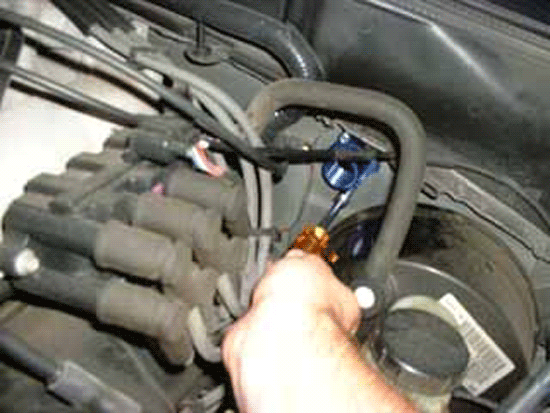
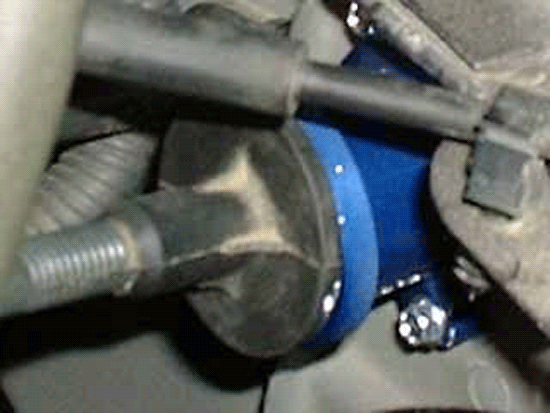
7. The clutch cable and clutch fork are easily visible once the cover is removed. Using a pry bar or large breaker bar, push the clutch fork forwards and slide the end of the clutch cable out of its hole in the fork. I used the blue handle of my jack in this illustration, instead of the pry bar, because it was easier to photograph.
8. After the cable has been disconnected at the bellhousing, lower the car if you're using jack stands. The rest of the work will take place under the hood or under the dash.
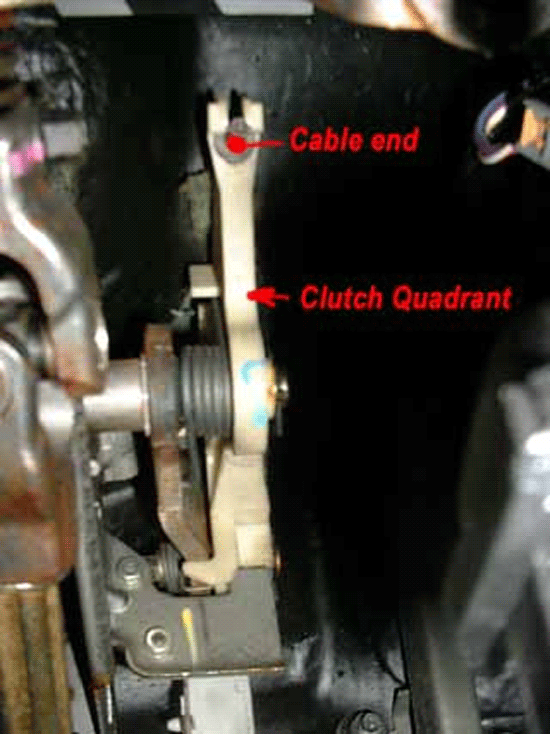
9. Working under the dash, pull the end of the clutch cable out from the notch in the clutch quadrant. This picture clearly illustrates the white plastic quadrant as it is installed in the vehicle. You can see that it is held in place with a hairpin tithe right, and is spring-loaded (Left). Near the bottom of the quadrant and to the left in the background, you can also see the spring coil for the adjuster pawl. All of these parts will be removed later.
10. Working under the hood, remove the clutch cable from the firewall by removing the two 3/16" bolts from the firewall holding it in place. A socket driver may be easier to use in this space than a ratchet. I used both, but you can make do with a ratchet.
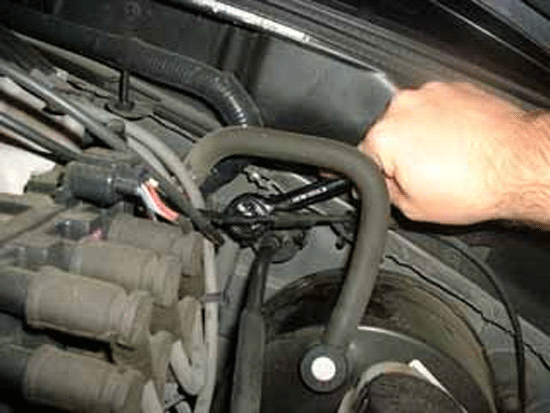
11. After removing the two bolts, pull the clutch cable out from the firewall. Be careful not to crimp the clutch cable unless you plan on replacing it with an adjustable one.
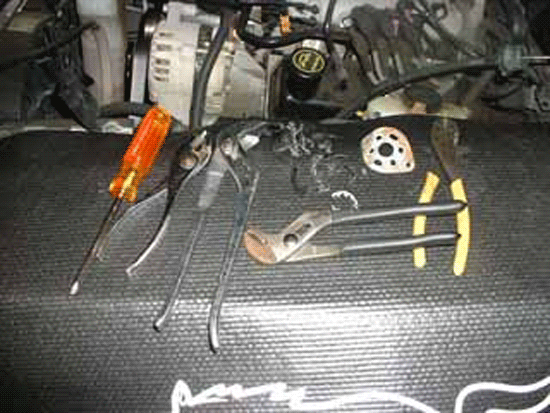
12. You can skip this step if you're installing an adjustable cable. If using a stock cable, you'll have to remove several parts of it. First, remove the metal retainer ring and plate that attached to the firewall. Then, unhook the plastic coupler that the metal plate was attached to and slide it forward. You will have to cut through it to remove it from the cable. A Dremel or similar rotary tool with a cut-off wheel comes in very handy here. I forgot mine, so I used the large cutters and pliers seen here to "break" it off the cable.
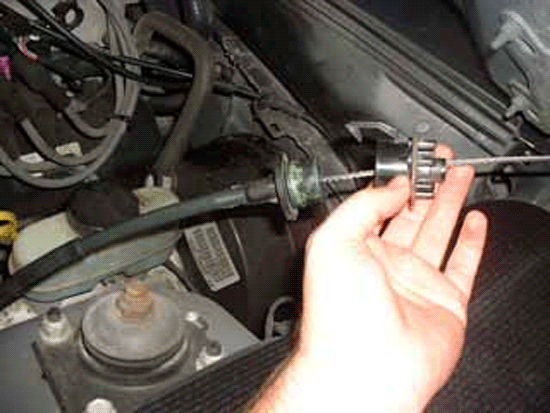
13. In the picture below, you can see all the parts that were removed from the stock cable and the tools that I used since I didn't have my Dremel available. Also, the American Muscle Fender Gripper provided a great working surface on my fender without damaging the paint or having to completely remove the cable. I'm really glad I added that to my order! Last, pull the rubber bushing off of the factory cable.
14. Place the brass insert inside the Steeda Firewall adjuster and press it onto the plastic guide-post that the bushing was riding on. Pull the firewall adjuster back off the clutch cable. It will be easier to install without the cable in it.
15. Using the two 1/4" bolts provided, install the Steeda Firewall adjuster on the firewall, using the existing holes. Feed the clutch cable back through the firewall adjuster. While completing the install, it will be easier to have the adjusting barrel tightened down all the way to maximize the slack on the cable.
16. With the firewall adjuster and cable installed, move back under the dash and pull the two hairpins holding the clutch quadrant and pawl in place, using needle-nose pliers. Be careful as these parts are spring-loaded and can cause injury. Also be sure to save the hairpins for re-use later.
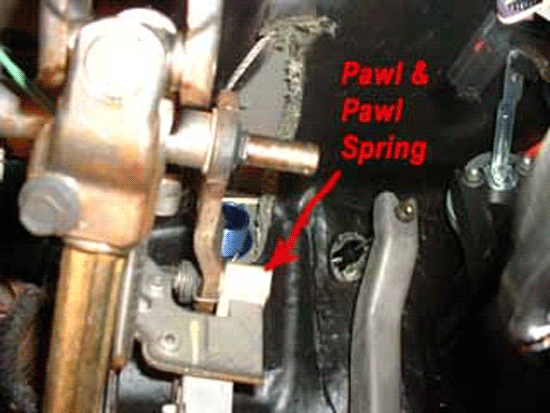
17. In the image below, the quadrant has already been removed so the pawl and pawl spring could be seen. The easiest way to remove the pawl is to force the spring off its post by shoving it to the left with a large flat-head screwdriver. Removing the pawl from the spring is the most difficult part of the install.
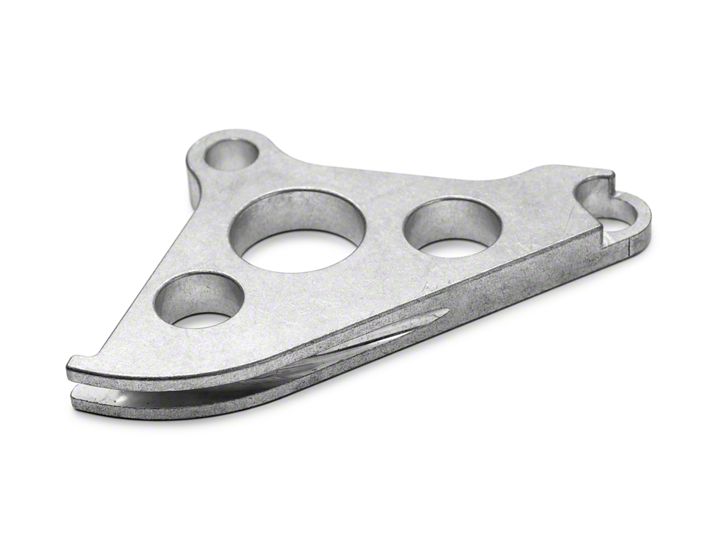
18. Install 2 thick spacers and 4 thin spacers on the shaft the clutch quadrant was on.
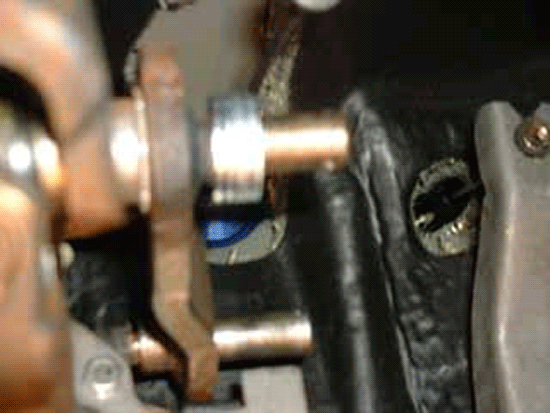
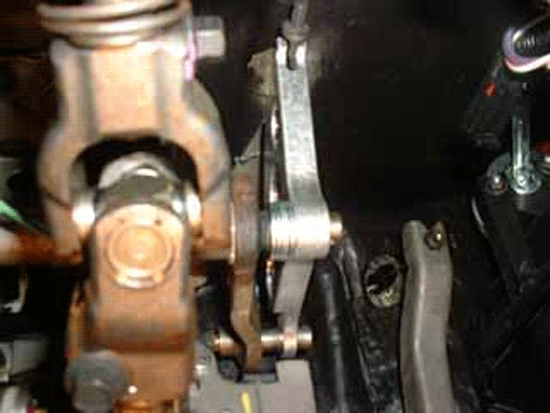
19. Install the Maximum Motorsports clutch quadrant by sliding it over the quadrant shaft and rotating it to align the rear hole with the pawl shaft. Add the three remaining spacers to the quadrant shaft, and remove them one at a time until the hair pin can be re-installed through the hole in the shaft. Re-install the pawl shaft hairpin (the rear shaft in the picture to the right) and slide the cable end into place on the new quadrant.
20. If you used jack stands, raise the car back up on them. Re-connect the clutch cable to the clutch fork using pry bar or large breaker bar.
21. Re-attach clutch cable to clutch fork.
22. Re-install inspection cover under the car and lower trim panel.
23. Adjust firewall adjuster so a small amount of slack is present. A small gap between the plastic clutch housing and the firewall adjuster when you pull back on the housing at the area in the picture means that the clutch is not partially engaged when the pedal is not depressed, and is desirable.
24. Check the clutch for proper engagement.
25. Re-install the lower trim panel (interior) and inspection cover (bellhousing).
26. Lower the car and test drive a short distance. Adjust the clutch at the firewall as necessary.
Installation instructions provided by AmericanMuscle customer Mike Strawbridge 8.17.08
