 FREE 1 to 3-Day Delivery on Orders $149+ Details
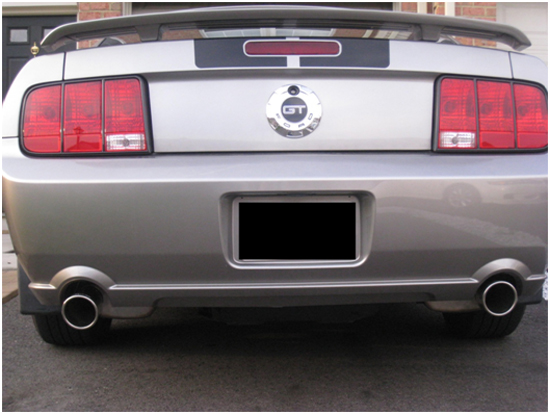
Pypes Violator Axle-Back Exhaust ('05-'10 GT) - Installation Instructions
Installation Time
2 hours
Tools Required
- Ratchet
- 6 inch ratchet extension
- 13mm socket
- 15mm socket
- 13mm wrench (ratchet type recommended but not required)
- WD-40 (or equivalent break-free spray)

Shop Parts in this Guide
Installation
Preparing the Wires
1. Place the car on ramps, jack stands or a lift. Make sure that you use the lift points identified in the cars user manual.
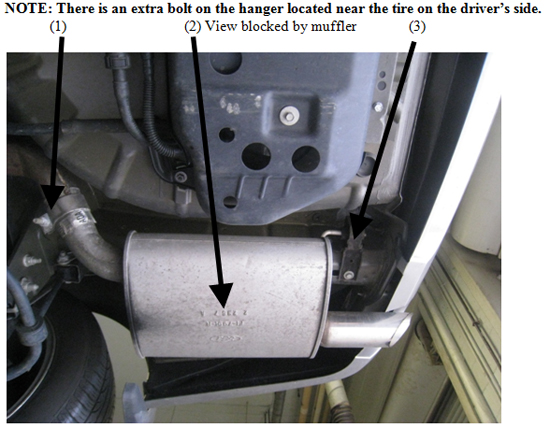
2. Spray all the bolts holding the exhaust hangers and the pipe clamp with a break-free spray and let it soak for about 5-10 Mins. There is one bolt on the pipe clamp connecting the axle-back to the mid-pipes (1), two bolts on the hanger nearest the tires (2) and two bolts on the hanger closest to the rear bumper (3).
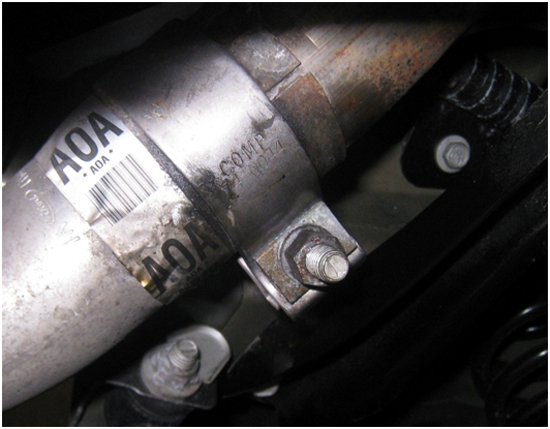
3. Use a ratchet and 15mm socket attachment to loosen the bolt holding the factory installed pipe clamps. Once the clamp is loosened, slide the clamp down the muffler neck. Due to road grime and rust, it may take some break-free spray or a few light taps with a hammer to loosen the clamp so you can slide it down. (Repeat for opposite side).
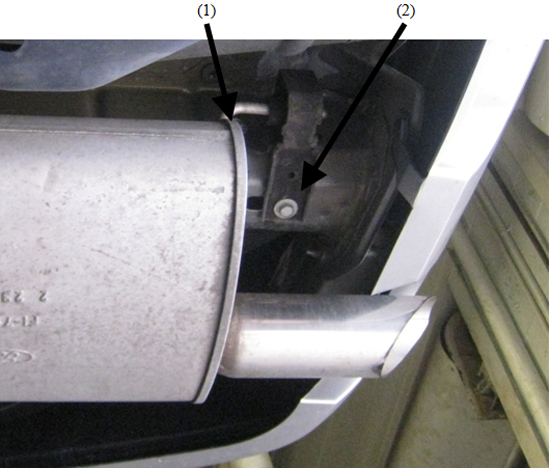
4. Use a ratchet and 13mm socket to remove the bolts holding the hanger closest to the tire. You will need to use a 13mm wrench to remove the bolt above the muffler because there is not enough room to fit the ratchet and socket. (Repeat for opposite side).

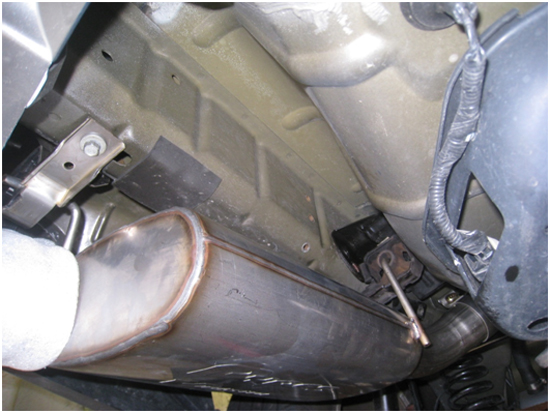
5. Use a ratchet and 13mm socket to remove the bolts holding the hanger closest to the bumper. Use the 6” extension for bolt (2) for easier removal. This will allow you to clear all components of the car and have more freedom of movement. Once all the bolts have been removed, you can remove the axle-back exhaust. You may have to wiggle and turn the exhaust back and forth to get it off of the mid-pipe. (Repeat for opposite side).
6. Place the new pipe clamps on the muffler necks and place the hangers on the steel bars the same way that they were placed on the factory bars, but do not tighten them yet. This will allow for easier adjustment of the pipes when lining them up with the bumper cut-out.
7. Slide the new muffler neck onto the mid-pipe and bolt the rear-most hanger to the frame. Do not tighten this bolt completely so that you can adjust the muffler as necessary while you place all the other bolts onto the frame. Continue replacing all the bolts that were removed in previous steps, making adjustments as necessary to ensure that the new pipes are properly lined up with the bumper cut-out. Once all the bolts are tightened, you can tighten the pipe clamp. (Repeat for opposite side).
8. Inspect the installation after 25-50 miles of driving to ensure that no bolts have come loose. Re-tighten any bolts if necessary.
9. Congratulations! You have installed your new Violator Pypes.
Installation instructions provided by AmericanMuscle customer Paul DeSanto 4.10.09
Related Guides
-
Installation
-
Installation
-
Installation

