 FREE 1 to 3-Day Delivery on Orders $149+ Details
RAM HDX Clutch - Installation Instructions
Installation Time
4 hours
Tools Required
- RAM HDX Clutch Kit
- Full Set of Tools
- Several Extensions
- New Pilot Bearing
- Transmission Jack
- Ford Factory Service Manual
- Gloves and Rags
- Spare Yoke or Plug
- Pry Bar

Shop Parts in this Guide
- RAM Clutches HDX 450HP Organic Clutch Kit; 10-Spline (86-Mid 01 Mustang GT; 93-98 Mustang Cobra)
- RAM Clutches HDX 450HP Organic Clutch Kit; 10-Spline (Late 01-04 Mustang GT; 99-04 Mustang Cobra, Mach 1)
- RAM Clutches HDX Organic Clutch Kit; 10-Spline (94-04 Mustang V6)
- RAM Clutches HDX 450HP Organic Clutch Kit; 10-Spline (05-10 Mustang GT)
Installation
1. Unhook the negative battery cable from your car.
2. Inside the car, unscrew the knob that is on your gearshift lever.
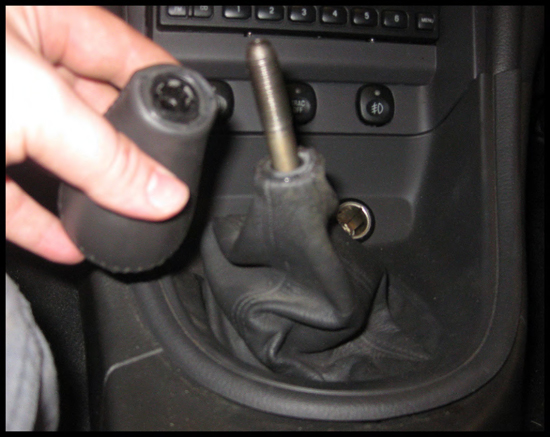
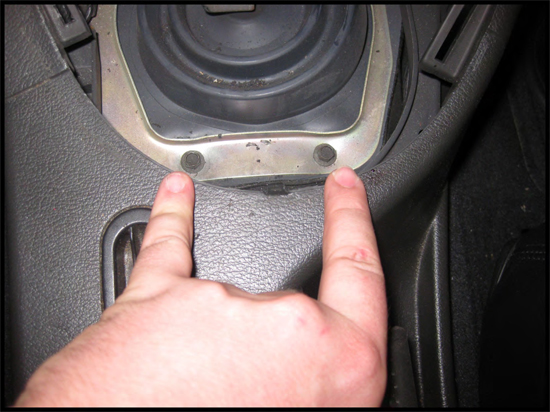
3. Pop out the console panel gearshift plate. You can do this by just sticking your hand under the side like pictured and pulling up to pop it out.
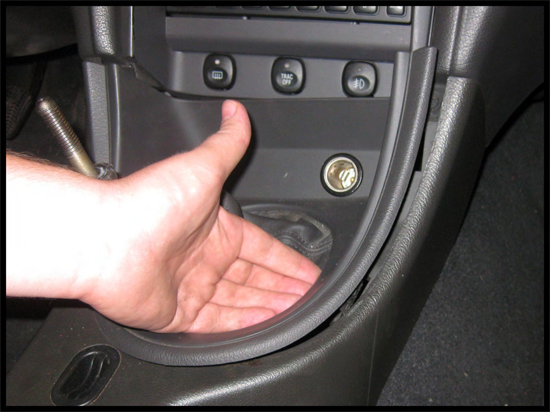
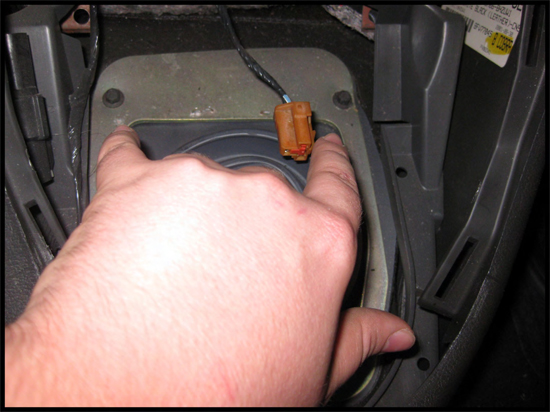
4. Make sure to unplug the cigarette lighter wiring.
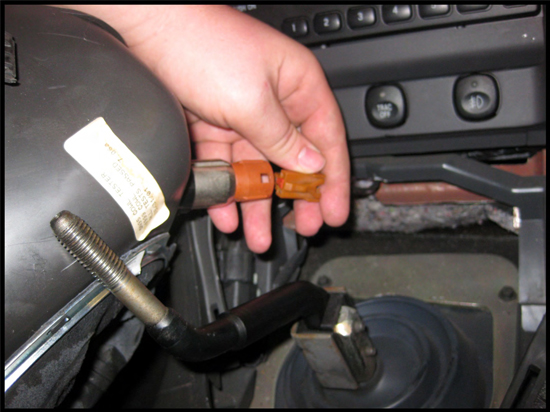
5. Remove the two bolts attaching the gearshift lever.
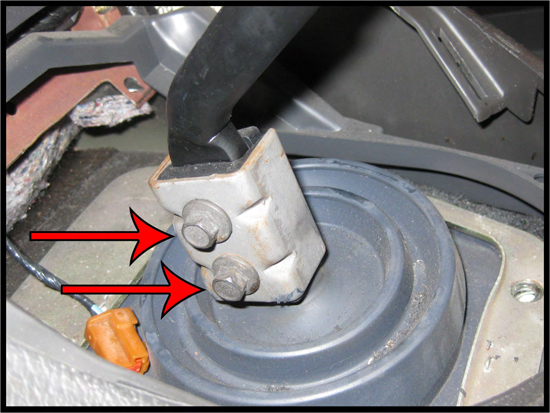
6. Remove the inner shifter boot by removing the 4 bolts.
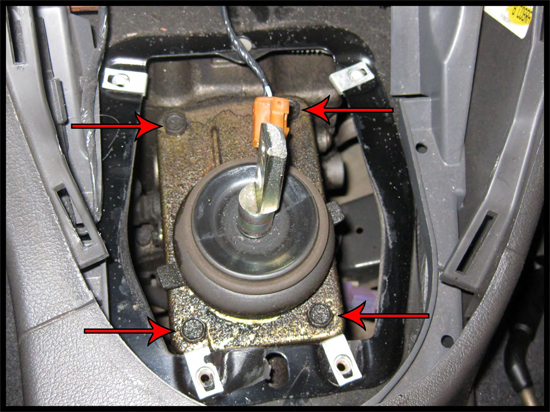
7. Remove the 4 bolts attaching the gearshift lever to the transmission.
8. Lift the vehicle.
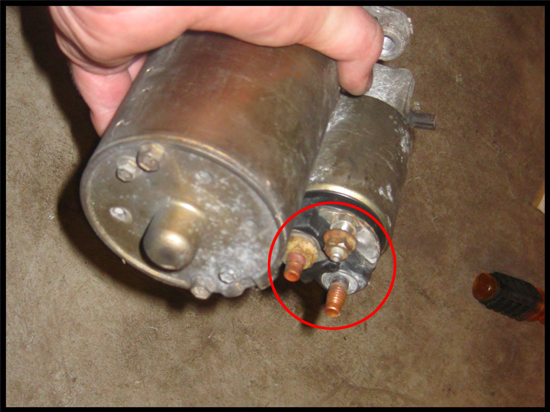
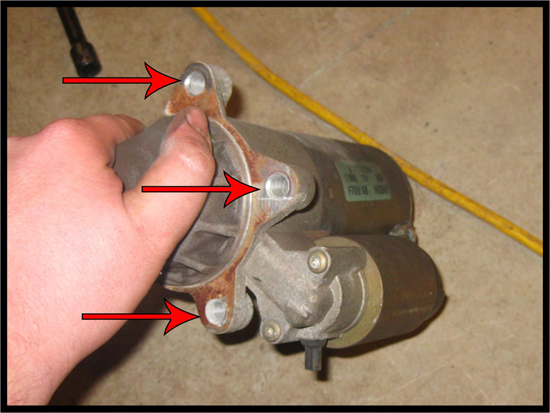
9. Now remove the starter. I had a lot of trouble removing the passenger side H-pipe and starter because of how little room there is to work. I found out that if I removed the starter first, I could remove the rest of the pipe. First you need to remove the starter’s little red cap on the back and unbolt the starter solenoid nuts and position aside the wires.
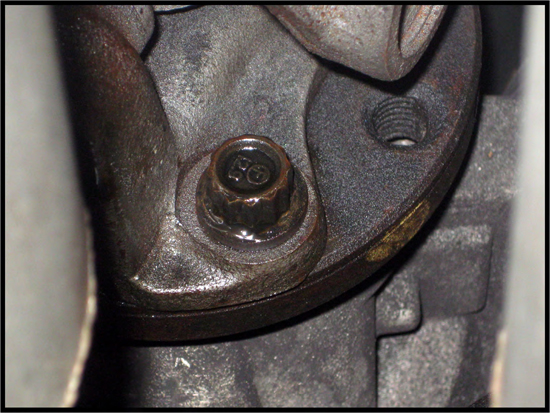
10. The only way I was able to remove the starter was coming in with several extensions from the front of the vehicle, through the motor mount. There are three bolts holding the starter in.
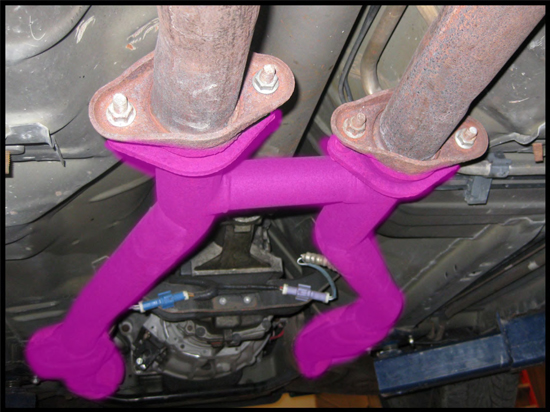
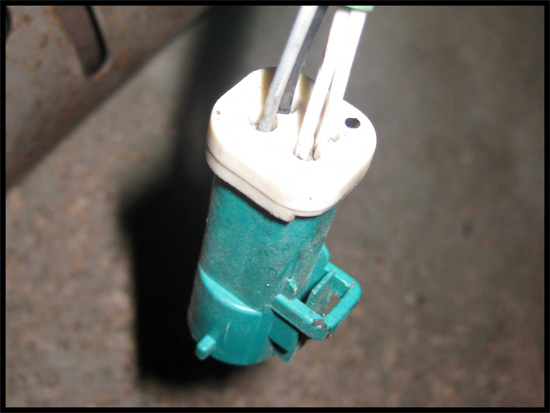
11. The second hardest part of this was for me was the front O2 sensors. Unplugging them wasn’t as hard as trying to plug them back in. People with small hands will find this to be easier. Unplug the front and rear O2 sensors and unbolt the H pipe.
12. Now unbolt the driveshaft. There are 4 bolts and they take a 12 point combination wrench to remove. The yoke should slide out of the back of the transmission with ease. The transmission will leak transmission fluid out of it through the rear now since there is nothing to seal it. I recommend zip tying a spare yoke in or plugging the hole to prevent the oil from draining.
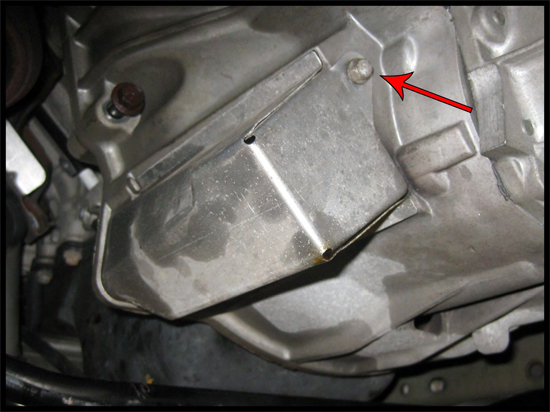
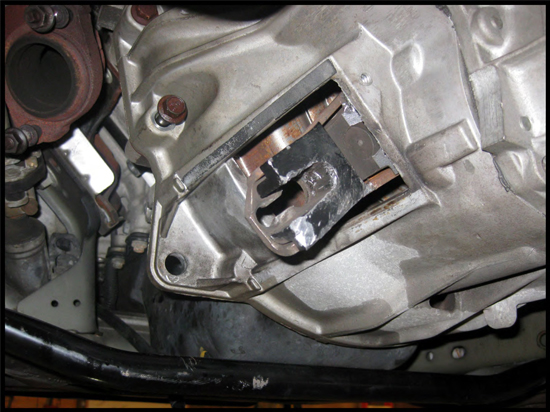
13. Remove the clutch release lever cover by removing the one bolt. Then disengage the clutch release cable from the fork by pushing the fork in (I used a pry bar) and lifting the cable out of the forks seat. Then remove the clutch cable retainer from the cable, and remove the clutch cable from the transmission.
14. Remove all the bolts around the bell housing.
15. Remove any remaining electrical connectors.
16. Drop the transmission by sliding it back and angling it down a bit at the same time. Often it has rusted from being clamped together for so many years so you might need to knock it with a mallet first.
Replacing the Clutch
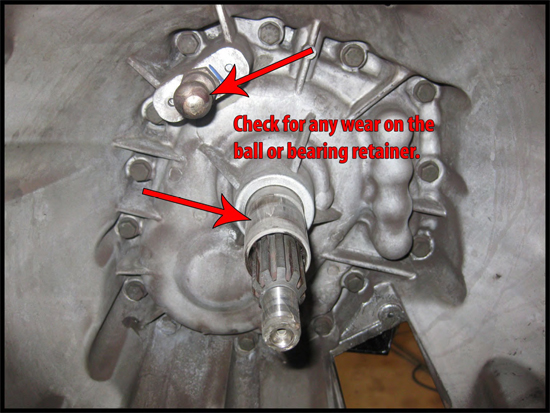
1. Inspect the transmission for any damage. Pull the fork out and inspect the ball that it rides on. Feel the ball. Also inspect the bearing retainer (the shaft that the TOB rides on) for any damage. If either is worn at all, it is recommended to replace.
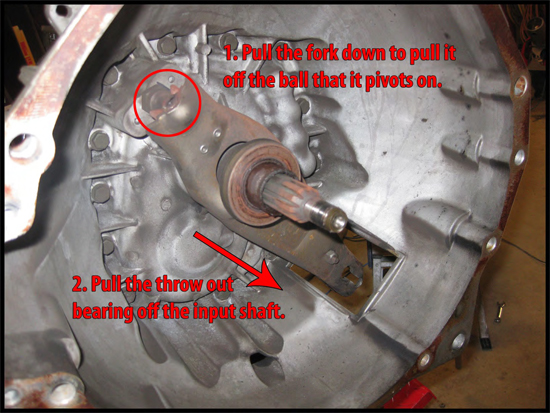
2. Pull out the old throw out bearing. The TOB comes out of the fork one way only; by sliding it off the grooves and then out. The new TOB goes on the same way the old one came off, as well as the fork. Take notice to make sure the fork is completely seated over the pivot ball. If it is not seated correctly, pedal effort will be hard.
3. It is recommended to resurface the flywheel whenever you replace the clutch. Resurfacing the flywheel removes any hot spots, scoring and warpage.
4. It is also recommend replacing the Pilot bearing at this time. To replace it you simply need to use a pilot bearing puller to yank the old one out of the crankshaft and then then insert the new one with a mallet or hammer with a piece of wood.
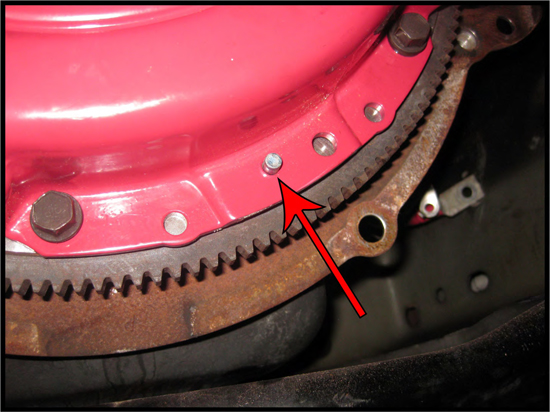
5. If you removed your flywheel to have it resurfaced, reinstall it now. Locktite is highly recommended for these bolts. Tighten the flywheel bolts to 63lb‐ft in a star pattern, similar to torqueing a wheel.
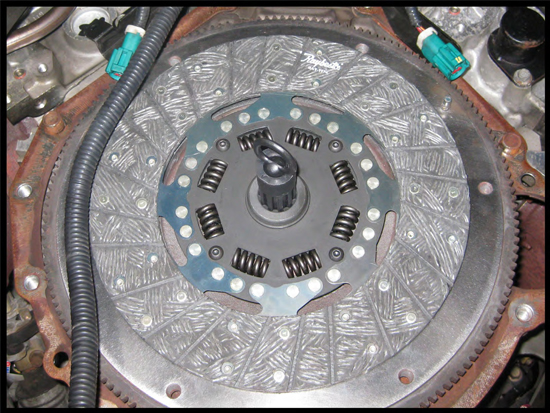
6. Position the clutch onto the flywheel using the clutch alignment dowel. The clutch is not bidirectional. There is a stamping on one side of the clutch, about 1 cm big, which should point towards the flywheel.
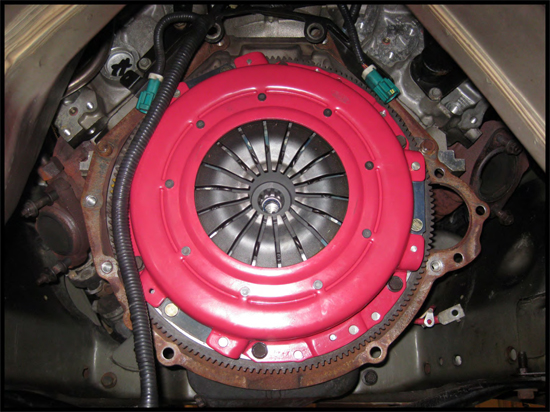
7. Align the clutch pressure plate onto the flywheel, lining up the dowel pins and tightening the six pressure plate bolts down in a star pattern, like the flywheel above. The Factory Service Manual recommends that for the 3.8L engine, tighten the bolts to 24lb‐ft and that for the 4.6L 2v engine to tighten the bolts to 16lb‐ft. For a 4.6L 4v engine, tighten all the bolts to 33lb‐ft and then tighten each one an additional 60 degrees.
1. Installing the transmission is identical to the removal. Specifications from the FSM:
- Transmission to Block bolts: 17lb‐ft
- Engine Plate to Transmission bolts: 20lb‐ft
- Driveshaft bolts: 83lb‐ft
- H‐pipe to Exhaust Manifold nuts: 30lb‐ft
- H‐pipe flange to muffler nuts: 26lb‐ft
- Gearshift lever to gear shifter: 27lb‐ft
- Gear shifter to transmission bolts: 13lb‐ft
2. Congratulations, you’ve installed a clutch! Break‐in is usually about 500 miles of driving.
Installation instructions provided by AmericanMuscle customer Joe Winn 2.15.10

