 FREE 1 to 3-Day Delivery on Orders $119+ Details
Best Sellers


SCT Mustang 4-Bank Eliminator Chip ('88-'04) - Installation Instructions
Installation Time
2 hours
Tools Required
- 10mm Socket
- 8mm Socket
- 7mm Socket
- 5.5mm Socket
- 1/16 Hex Head Wrench
- A Pair of Pliers
- Lint-Free Cloth
- Rubbing Alcohol
Installation
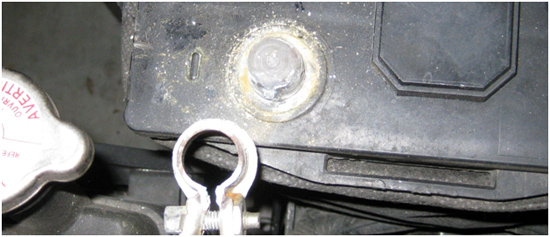
1. The first step is to make sure your car is not running and to pop the hood and take the 8mm Socket and remove the negative connection to the battery. It is very important that you not do not switch on the ignition for any reason. This means NO RADIO.
2. Next, you will need to remove the plastic paneling along the bottom door seal and the passenger kick panel. Just use your hands to gently pry your fingers under the plastic and pull straight up for the bottom door seal. Be careful not to damage any of the tabs.
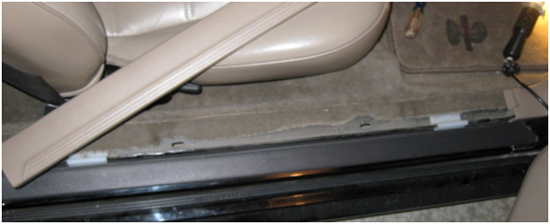
3. To remove the kick panel, just put your hand behind it and pull straight out on the tab. It comes right off.
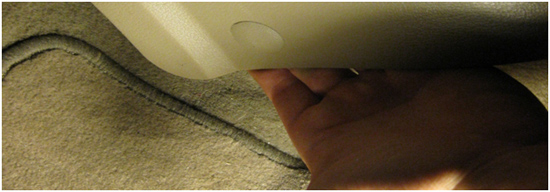
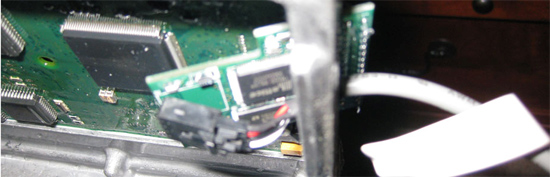
4. Once this is done, the computer should be clearly visible.

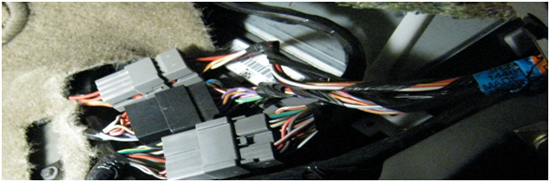
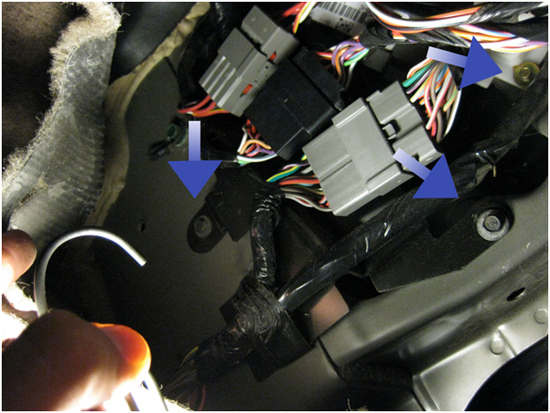
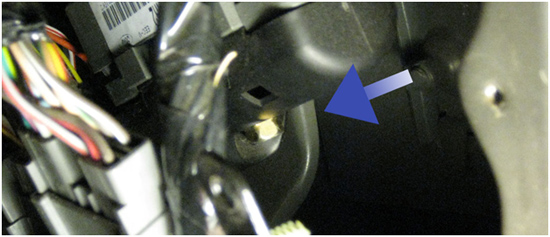
5. Next, you will have to take the 7mm Socket and remove the two bolts holding the bracket attached to the three connectors. After the bracket is free, you can now get your hands in towards the computer. Unscrew the one 10mm bolt on the bottom center of the computer and the one small golden 5.5mm bolt holding the plastic box that secures the computer.
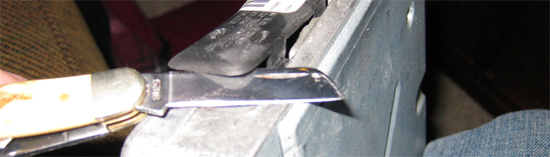
6. Once the bolts are removed, slide the computer out. The plastic covering of the J3 port needs to be removed. Take a screw driver or pliers, whatever you have around, and on the opposite side of the where the computer was connected, gently slide this item under the tab to remove it.
7. After that's been removed, you can clearly see that the connector is covered in some type of plastic, which needs to be removed for a proper connection.
8. Important: Be sure to take your time :Unscrew the computer case using a 5.5mm socket. Locate the J3 port where the connector is and take a tooth pick and CAREFULLY start removing the plastic.
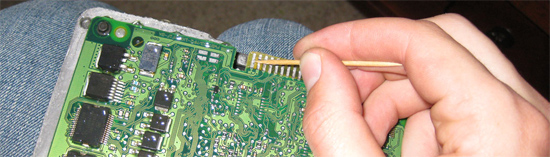
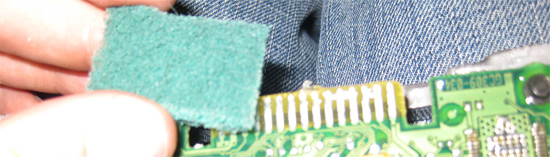
9. Being the great people they are, American Muscle has thrown in a scrubbing pad to aid in this task. Again, be CAREFUL doing this. You need to scrub off the entire coating on the connecting part. This part takes time, about an hour or so. Once you start to see copper on every tab, STOP! YOU DON’T WANT TO DAMAGE THE COMPUTER.
10. Then take your cloth and alcohol and clean the connection, freeing it from dirt and grime.
11. Now all you have left to do is reassemble the computer. Plug the cord into the chip and then plug the chip into the computer, being sure that the cord is facing the larger opening on the J3 port.
12. Then return the computer back to its location. Put the 10mm bolt back into the hold and fasten it into place. Plug everything back where it belongs, if you unplugged anything else.
13. Then put your negative wire back on the battery, using an 8mm socket. Set to the appropriate tune and test to see if the car runs. If the car only turns over and doesn’t start, then you probably did not spend enough time scrubbing to get and good connection, and will now have to do it again. If it runs great you have successfully installed the chip.
14. So you will now need to use the 5.5mm to secure the computer with the white plastic box, or use some zip-ties or duct tape. Just be sure NOT TO BEND THE CHIP.
15. Now reinstall the bracket holding the three connectors, using the two 7mm bolts.
16. All you need to do now is put back the kick panel and bottom panel by placing them in place and pushing hard on the tabs and it will snap right into place and you're done.
Installation instructions provided by AmericanMuscle customer Matt Funderburk 3.6.09
