 FREE 1 to 3-Day Delivery on Orders $119+ Details
Best Sellers


How to Install a Steeda Adjustable Panhard Bar for your 2005-2014 Mustang
STEEDA ADJUSTABLE
PANHARD BAR
Installation Instructions for
555-2551-A
Note: We strongly recommend that a factory shop manual be available for reference during the installation. If you are not confident you can complete the job safely, have the work performed by a certified technician who is familiar with the S197 Mustang.

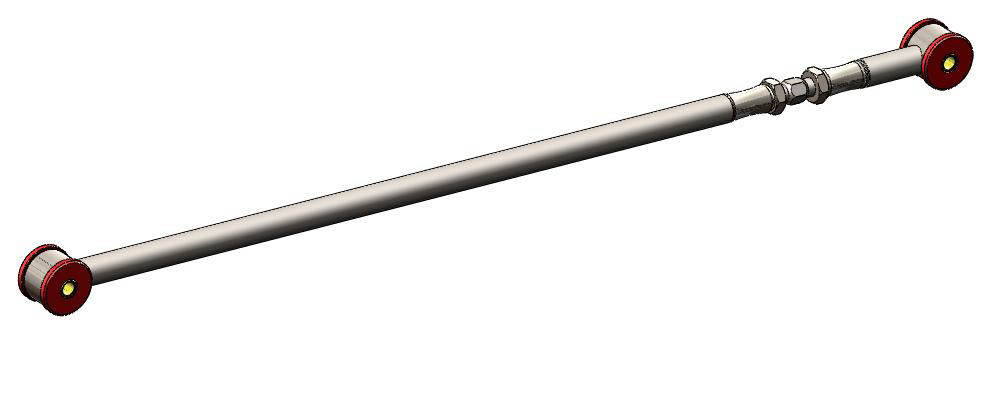
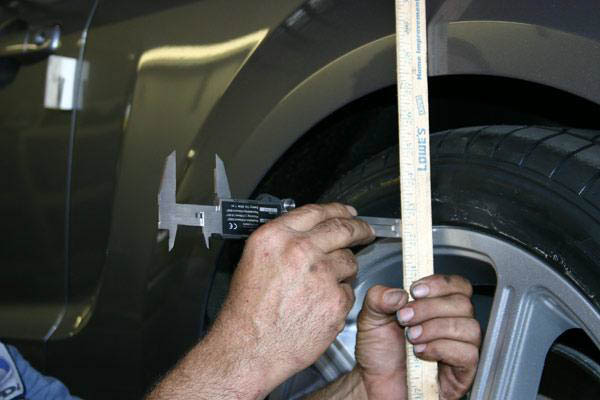
Figure 1
1. With the car on level ground, start by measuring the horizontal distance from both rear wheels to their corresponding rear fenders pic 1. The initial values can be used as references. Be sure to use a consistent location to measure your distance before and after your install. In addition, be sure your tire pressures are the same from side to side, and nothing other than regular items are in the trunk and cabin.
2. Lift the car in order to work underneath it. A drive on hoist would be best. Otherwise raise the rear of
the vehicle and place the car on jack stands mounted under the axle tubes.
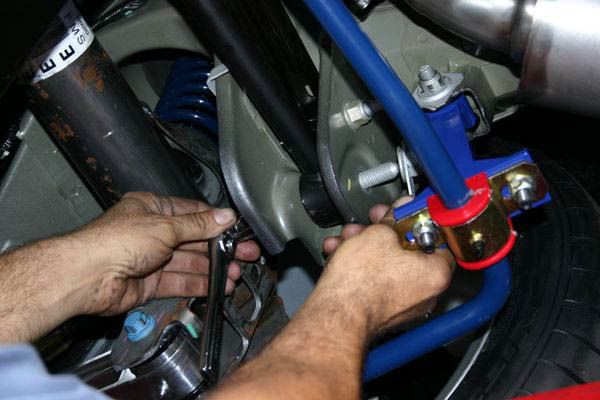
Figure 2
3. Remove the Panhard bar. It is secured by a nut and bolt at each end, pic 2.
4. Lay both Panhard bars side by side. Using the two bolts previously removed, set the starting length for the new Steeda Panhard bar to match the length of the factory piece, pic 3. Leave the jam nuts loose and back the jam nuts all the way off.
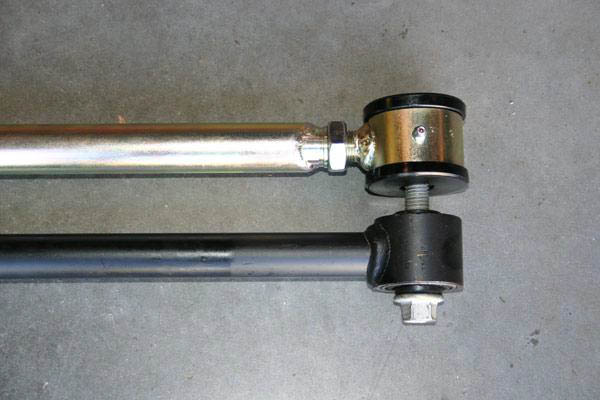
Figure 3
5. Generously spread the provided grease over the faces of the bushings and also at the axle and chassis mounting locations.
6. Install the new bar reusing the OE hardware. The left-handed thread is the short end of the bar. The left-hand threaded end should be installed on the driver side of the vehicle. The bushing sleeve bolts can be tightened with the vehicle raised.
7. Torque all hardware to factory specification. The use of thread locker is highly recommended on all bolt connections.
8. Once installed, lower the vehicle to the same condition as when you first measured, and remeasure.
9. Adjust the bar length to position the chassis in the desired position. Adjustments are made by turning the Panhard bar adjuster clockwise or counterclockwise (with the jam nuts backed all the way off). Once in position, thread the jam nuts up to the Panhard bar with your fingers. Then install a wrench over the adjuster and the jam nut, and tighten the jam nuts on both ends. Measure once more to make sure everything is still in place.
10. Carefully test drive your vehicle in a controlled environment then recheck all connections.
