 FREE 1 to 3-Day Delivery on Orders $119+ Details
Best Sellers


How to install a Willpak Rear Window Louvers on your 2005-2012 Mustang
Installation Time
1 hours
Tools Required
- 2nd Person to help maneuver louver (suggested not required)
- Paper towels or a lint free towel to dry window
- Wax crayon or some form of marker that won’t be permanent, dry-erase board markers work great
- Clear silicone
- Isopropyl Alcohol
- Adhesion Promoter (should come with louver)
- Flat Head screwdriver
- Measuring tape
Installation
Willpak Smooth Aluminum Rear Louver (05-12 All) – SKU 75002
Contents:
- 1 Smooth Aluminum Louver, (this is actually a 2 piece Louver that slides into itself)
- 6 Washers
- 6 Nuts
- 6 metal plates/brackets (3m tape on one side and a bolt on the other)
- 2 Side Splints (thin pieces of metal plates to hold 2 piece louver together)
- 1 Center splint (one side 3m, other is foam that rests on window)
**BE SURE TO CHECK FOR ALL MATERIALS AND TOOLS BEFORE BEGINNING**
TECHNICAL NOTE: MANY PARTS OF THIS INSTALLATION PROCESS WILL ONLY BE A ONE TIME ATTEMPT SO BE CAREFUL NOT TO MESS UP; MEASURE TWICE, STICK ONCE.
1. Clean the back window:
A. Be sure NOT to use any cleaner such as “WINDEX” or any other window or surface cleaners because the chemicals in them will interfere with the adhesion of the brackets.
B. Simply use soap and warm water to clean the back window.
C. Thoroughly dry window.
D. After drying, wipe with 50/50 Isopropyl Alcohol/Water solution with a lint free towel or paper towels, making sure to clean edges and corners thoroughly.
E. The glass must be above 60 degrees Fahrenheit for adhesive to bond securely.
2. Assembly of louver:
A. Lay down the 2-piece louver on a smooth or soft surface upside-down so that it won’t scratch the louver. The cardboard box or bubble wrap it was packaged in works great for this.
B. With the louver upside-down, slide the 2 pieces together. You may need to wiggle or bow the louver gently to angle it enough to slide in. BE CAREFUL!
C. Once the 2 pieces are now one and with the louver still upside-down, place the 3 splints onto the louver (2 side and 1 center splint). Be sure that the louver is now relaxed and straight (not bowing) when doing so. At this time, you can install both the center left and center right brackets as well using their washers and nuts to help keep the louver properly aligned (not required but this may help). If you chose to install the brackets, be sure to put the bracket in rotated as shown in the picture below so you’ll have space to place splints.
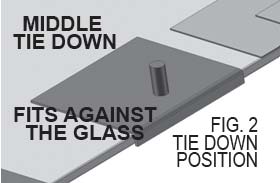
D. Peel off the 3m tape on each splint and press the two side splints on, one at a time. Be sure to add pressure to ensure adhesion of the tape.
*NOTE: In the picture below, the white arrows show the bracket and it being turned to access the splint area. The blue arrow shows the splint being placed.
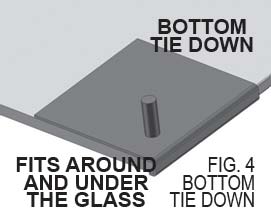
E. Now do the same with the center splint. Be sure the 2 pieces are fully together before placing splint. Foamy side facing you.
*NOTE: In the picture below, the white arrows show the louver pressed together before the splint is added and the green arrow shows the splint being added and pressed to ensure adhesion.
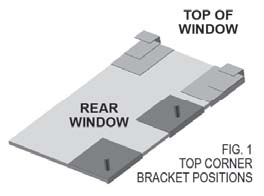
F. Now you need to bolt the 6 brackets, 6 washers, and 6 nuts onto louver (or the remaining 4 if you’ve done the 2 center brackets above). The install order should be, from top to bottom: bracket, louver, washer, and nut. Be sure to install them upside-down so that when louver is flipped, it will be right side up. Once all 6 brackets are on, it should look like the picture below.
*NOTE: White arrow shows my center splint not installed yet, I don’t know why it wasn’t installed yet and yours should be, the green arrow shows where the center splint should be, and the blue arrows show the two side splints already installed but hidden under the brackets.

G. Remember to put ALL washers and nuts on before moving louver. DO NOT REMOVE RED 3M TAPE FROM BRACKET AT THIS TIME.
H. Now your louver is fully put together and we’re ready to put it on the window.
3. Placement of louver on window:
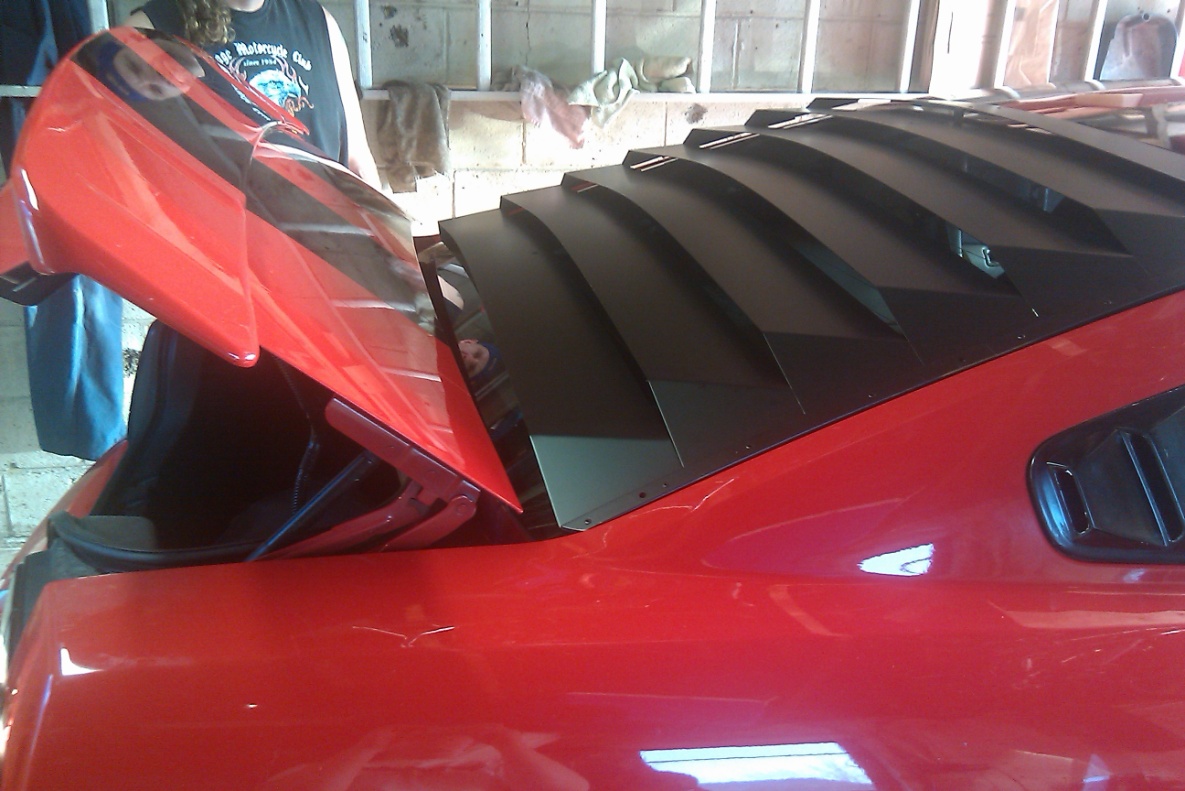
A. Carefully, with the help of another person, flip the louver over and place onto the window. Place the top of the louver along the roof line. The thinnest portion of the louver should be at roof.
B. Once the louver is resting on the glass, be sure to keep it aligned.
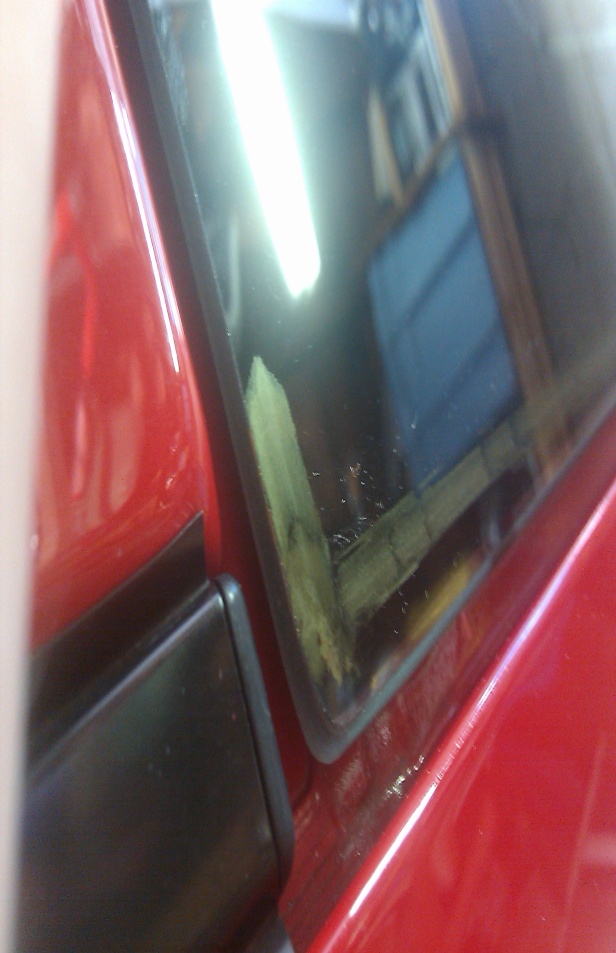
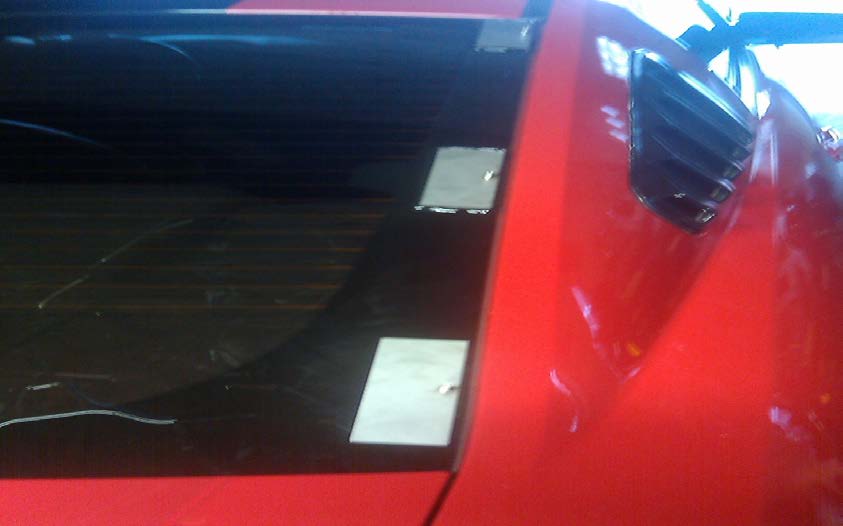
C. Mark the areas around the brackets, where they rest on the glass, with a crayon or marker as seen in the picture below.

D. You may want to gently lift a spot on the louver while doing this to ensure that your marks are visible once you remove the louver or you’ll have to remark.
E. Now before removing the louver check to see that it will not interfere with the trunk opening.
F. Now after you’ve checked for clearance, remove the louver and safely set aside to come back to later.
4. Adhering the 6 brackets to window:
A. Place adhesion promoter onto window in the areas where you’ve marked off.
B. Remove backing of the 3M tape from the mounting brackets. Make sure to be precise upon placing the louver with the brackets, as this can only be done once.
C. Remove louver from the rear window, leaving mounting hardware attached.
D. Add pressure to ensure proper adhesion for a couple of minutes. Repeat for all 6 brackets.
E. Add silicone around each edge of all brackets to guarantee that moisture does not seep under and reverse the affects of the adhesive tape.
LEAVE THE BRACKETS FOR AT LEAST 24 HOURS TO FULLY ADHEAR TO WINDOW. DO NOT DRIVE THE CAR, MOVE THE BRACKETS OR ATTEMPT TO INSTALL THE LOUVER DURING THIS PERIOD.
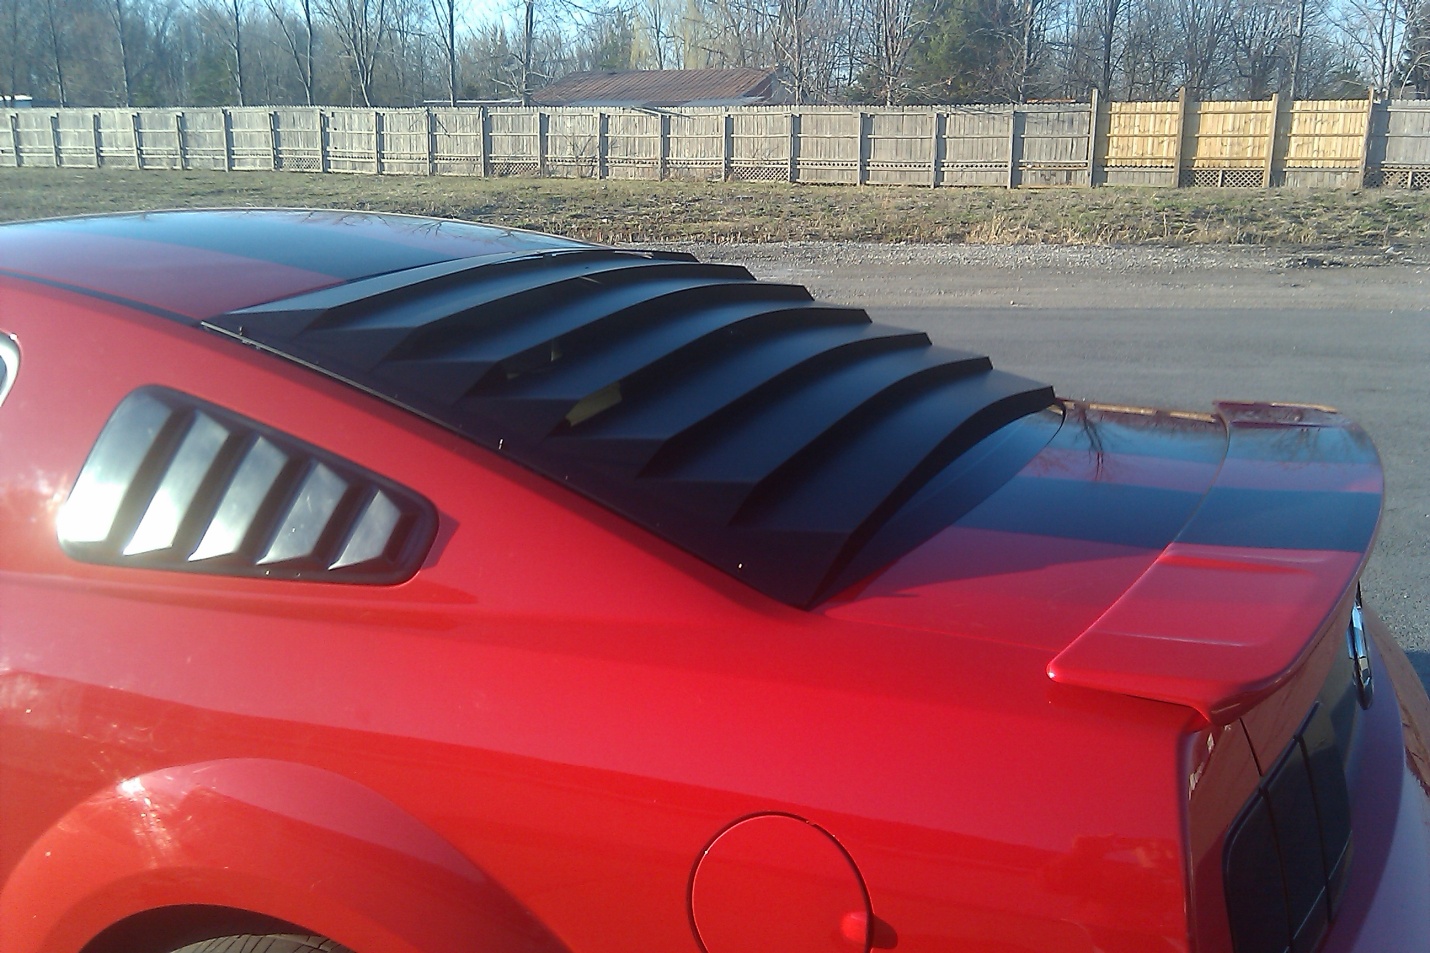
5. Final Installation of Louver:
A. After letting the adhesive cure completely overnight, the brackets should be attached very well.
B. Now simply lift the louver back on top of the car and slide rods into the holes on the louver and they should match up.
C. Complete installation with the washers and nuts. Be sure to use a flat head screw driver to tighten down the nuts well.
D. Last but not least, please do not take your mustang to any car washes or kept in extreme hot or cold temperatures for another 24 hours period to ensure the adhesive has more time to cure thoroughly.
ENJOY YOUR LOUVERS!
Installation Guide written by AmericanMuscle customer Jon B. 8/8/11
Best Sellers
Related Guides
-
Installation
-
Installation
-
Installation
