 FREE 1 to 3-Day Delivery on Orders $119+ Details
Talk to a Mustang Sales Tech
1-877-887-1105
M-F 8:30A-11P, Sat-Sun 8:30A-9P
Best Sellers


How to Install a BBK Off-Road X-Pipe on Your 1994-1995 5.0L Mustang
Installation Time
2 hours
Tools Required
- Jack (or lift, if applicable)
- Jack stands
- Socket set, preferably with a swivel
- Liquid wrench / penetrating oil
- Optional: (2) 2 ½ inch pipes, 19 inch length
- Optional: Welding gear, including torch
Installation
Pre-Installation:
- The first steps involve a little prep work. First off, you will need to disconnect the negative (black) terminal on the battery. This simply turns off all of the electronics in the car, as well as resets the car’s computer. Since you will be around electronics, this is a must.
- After disconnecting the battery, use the jack to lift the car up. A good rule of thumb is to have enough room to sit Indian-style under the car. There are several spots next to and around the suspension springs to use the jack on. Lift one side up at a time. Getting enough clearance under the car may require setting both jack stands and then raising each side a little at a time with the jack.
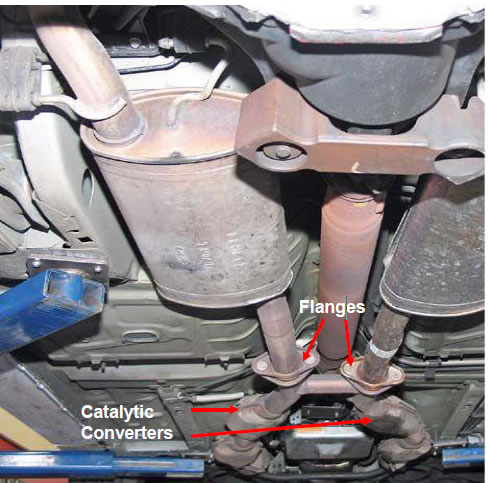
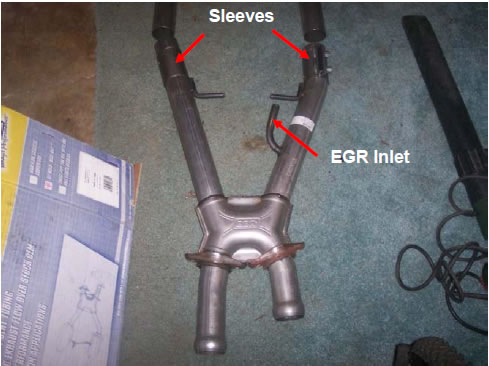
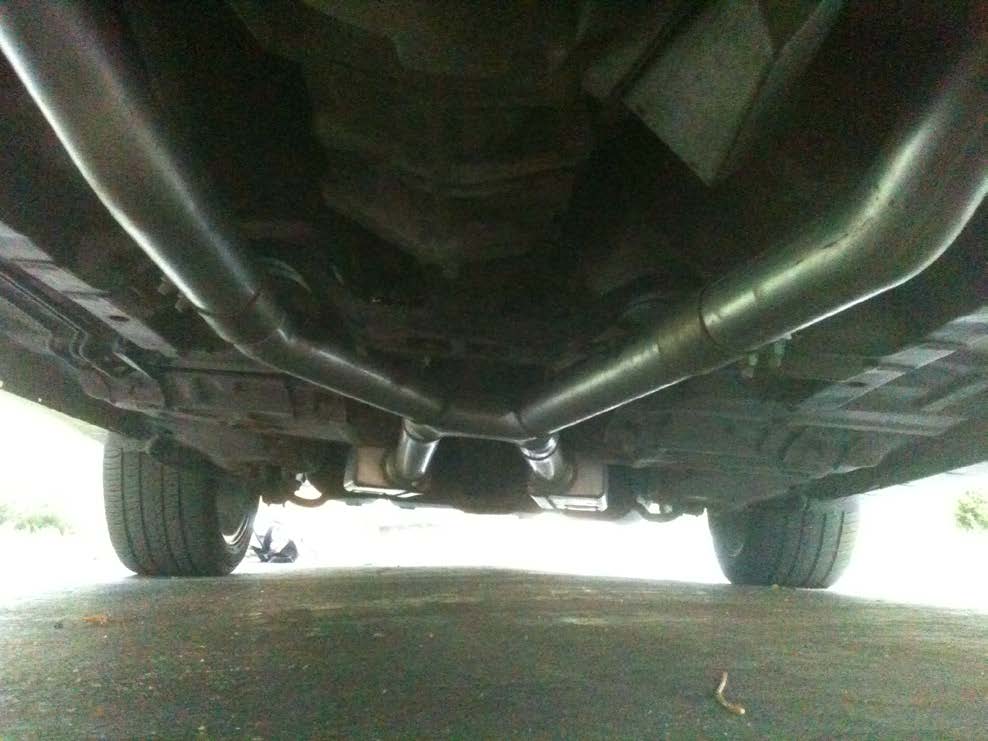
- The stock exhaust system consists of the headers, which bolt onto the cylinder heads. Next is the mid-pipe. The new x-pipe comes in three pieces: the actual “x” piece and then two separate pipes, which will connect the aforementioned piece to the exhaust header.
Installation:
- When under the car, first you will remove the stock h-pipe. Start this by removing the oxygen sensors from the system. This should require a 22mm socket.
- Next, you need to remove the flange bolts, which connect the h-pipe to the header (this is where penetrating oil becomes your best friend). A majority of cars will have rusted bolts here, so removing them will be difficult. Let the oil soak on the bolt for 10-20 minutes before attempting to remove.
- After removing the header bolts, focus on the air inlet tube connected to the h-pipe. It is located on the passenger side. This inlet tube is what scavenges exhaust gases for the car’s EGR system.
NOTE: In some instances, including mine, this tube will need to be cut for removal. In situations where the EGR system has been deleted from the car, the small inlet pipe will need to be welded shut, as it will cause an exhaust leak without the EGR tube connected to it.
- Next, the mufflers will need to be disconnected from the h-pipe. Remove the bolts connecting the existing pipe to the muffler inlet piping. Once done, the h-pipe can now be removed.
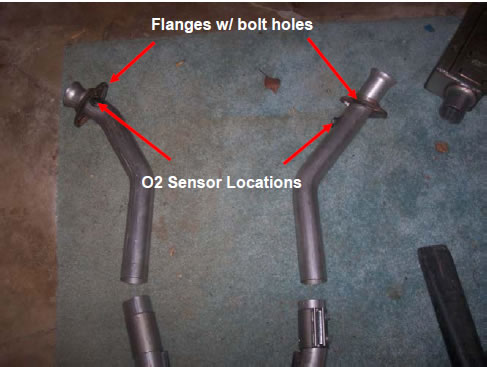
- With the new x-pipe, start by connecting the two bent pieces (the pieces with the header flange, each flange with two bolt holes) to the header. The new piping will come with all new hardware, so it is safe to throw the old rusted bolts away.
- Now you will see that the pipes are all the same diameter, including the “x” section. The piping will connect with a sleeve, included with the hardware. Each end of the pipe will be slid halfway into the sleeve, which is then fastened together. This allows for an adjustment period in order to get everything lined up accordingly. Once adjusted, the x-pipe can be attached using the hangers in the same fashion the stock pipes were.
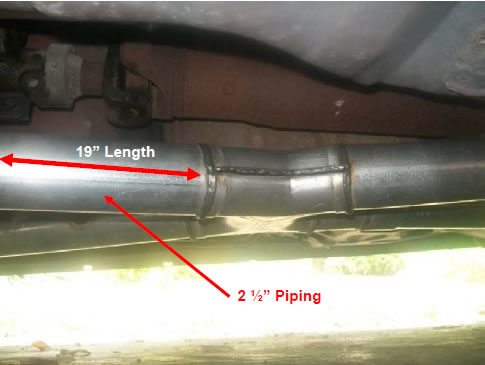
- If you are upgrading to aftermarket mufflers, they will most likely have a 2-½” inlet/outlet diameter. This matches that of the x-pipe. To fill the gap, some fabrication work was required.
- The hardware includes the bolts and flanges to attach the x-pipe to the inlet pipe of the stock muffler. However, welding will be required for those upgrading mufflers. After cutting out and installing the new mufflers, there will be about a 19” gap between the x-pipe.
- Right now, you can either cut the needed length of piping to fill the gap or you can cut and reuse the stock piping. If cutting and welding in new pipe, I recommend a 2-½”diameter to accommodate for the x-pipe’s increased diameter. However, the stock piping is 2-¼”so keep this in mind.
- Once everything is welded into place, the x-pipe should fit snuggly. The oxygen sensors can now be reattached to the system.
- Check over all bolts to make sure they are tight. If this is not done, an exhaust leak can occur making the car run poorly and risking premature exhaust damage. If needed, the pipes can be welded to the headers to prevent such leaks.
- At this point, the exhaust should be connected properly. The car can now be lowered to the ground, and the negative battery terminal connected. Start the car and listen for any hissing noises.
NOTE: You may notice your Check Engine Light come on. This is a normal coincidence when installing a new off-road mid-pipe. It is mainly the oxygen sensors telling the computer there are no longer any catalytic converters. A tune can remove this Check Engine Light easily.
Installation Instructions written by AmericanMuscle customer Ethan Duncan 9.1.11
Best Sellers
Related Guides
-
Installation
-
Installation
-
Installation
