 FREE 1 to 3-Day Delivery on Orders $119+ Details
Best Sellers


How to Install a Headlight Nose Panel on Your 1999-2004 Mustang
Installation Time
2 hours
Tools Required
- Philips head screwdriver
- Offset Philips head screwdriver (optional but recommended)
- 1/4 or 3/8" ratchet set
- 7/16 socket and 8mm socket
- Flat head screwdriver or trim pad remover

Shop Parts in this Guide
Installation
Removal and Installation of Headlight Nose Panel, SKU 94375
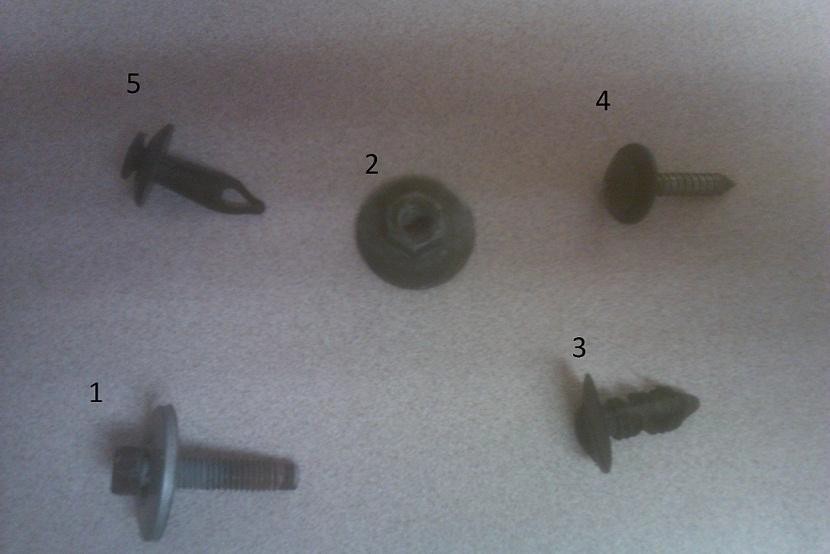
What you should have:
- (8) bolts (washer attached) - #1 in picture
- (4) bolt nuts (washer attached) - #2 in picture
- (2) plastic rivets - #3 in picture
- (2) screws (washer attached) - #4 in picture
- (6) plastic screw down anchors - #5 in picture
NOTE: This task is relatively easy; however, please use caution during removal and installation as you may cause damage to other parts if done incorrectly. Please use safety and verify your work area is safe before beginning any tasks.
Removal of current headlight panel:
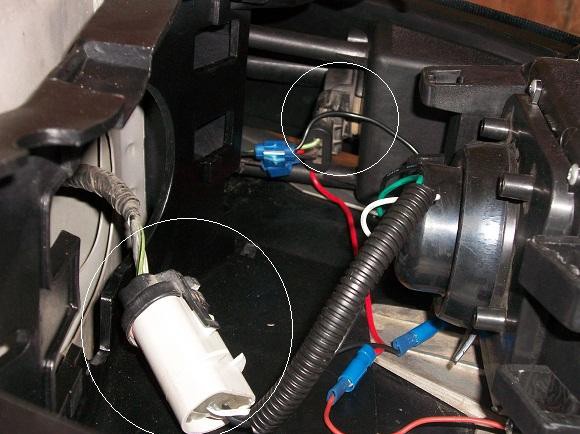
STEP 1: To start off you will need to remove your headlights. To do this, first disconnect the negative battery terminal. Remove the two tabs that secure the headlights to the headlight nose panel and disconnect the wiring harness from the headlight. Do this for both headlamps and set the headlights aside. (Be careful when removing the terminal as you may break off one or more of the securing prongs).
STEP 2: Now that the headlights are off, the bumper needs to be removed.
A. First, start by removing the two rivets on the bottom of the bumper, under the car. The rivet type may vary; only remove the outer most rivets on each side.
B. Next, remove the screw that attaches the bumper to the splash guard on both sides. It may be difficult using a straight Philips screwdriver. Using an offset screw driver or an apex adapter may be easier.

C. Now, you can pull the splash guard away from the bumper enough to gain access to the bolts holding the bumper to the fender. Remove the nuts and bolts that are securing the bumper using the ratchet and 7/16 socket (two bolts on each side).
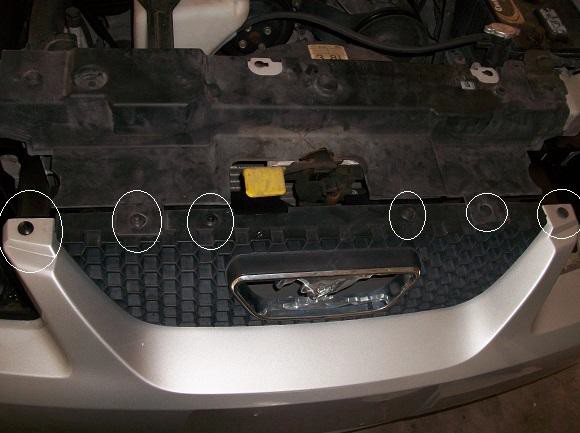
D. Now, remove the (6) plastic screw down anchors from the top of the bumper. I found that applying just enough pressure to turn the screw made it much easier for the plastic screw to back out. If you apply too much pressure, the screw will just spin in place and you will not be able to remove the anchor.
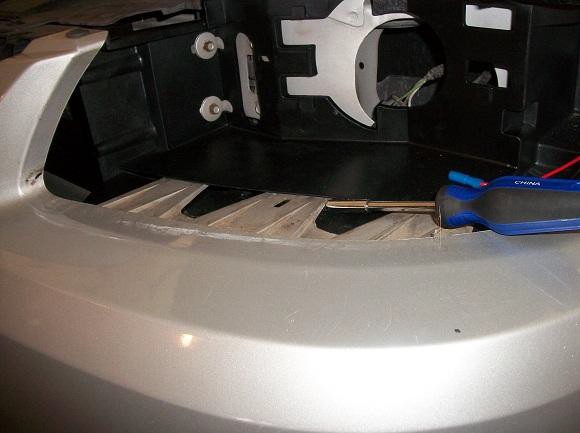
E. Now, release the bumper tabs from the header nose panel and pull the bumper off and set aside. To release the tabs from the headlight nose panel, you can use the Philips screw driver to pry open the slit in the headlight nose panel enough for the tabs to be released.
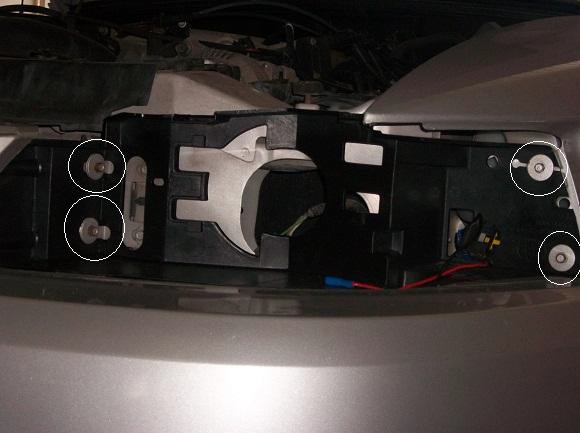
STEP 3: Now that the headlight nose panel is completely exposed, it can removed. To remove the headlight nose panel, you must remove all (8) bolts securing the panel. Once the bolts are removed, the panel comes right off.
Installation of replacement headlight panel:
STEP 4: Now that the headlight nose panel is removed, time to install the replacement. Reference previous photographs as needed.
A. Bolt down the new headlight nose panel using the same (8) bolts you just removed. Be sure not to tighten the bolts down too hard as this may cause damage.
B. Re-install your bumper being sure to fit the three tabs on each side into the slit on the new nose panel. Make sure all three tabs go into the slit and all holes lines up properly to ensure proper bumper alignment.
C. Feed the side bumper bolts through the bracket on the fender and secure the bumper with the (4) nuts. You may have to work on both sides to assure the bumper sits flush with the fender and is aligned properly.
D. Now, re-insert the (6) plastic anchors onto the top of the bumper. To do this, unthread the screws enough so the anchors can close. Slide the anchor into the hole and tighten down the plastic screws.
E. Install the (2) screws (one on each side of the bumper) that hold the splash guard to the bumper.
F. Install the (2) rivets on the bottom of the bumper.
G. Connect the both headlight wiring harnesses and seat the lights into the slot in the headlight nose panel.
H. Secure both headlights with the (4) tabs (two for each headlight).
I. Re-connect the negative battery terminal to the battery.
Congratulations you now have your new headlight nose panel installed & you can get your pony back on the road!
Installation Instructions written by AmericanMuscle customer Kyle Waldron 8.30.11
Best Sellers
Related Guides
-
Installation
-
Installation
-
Installation
