FREE 1 to 3-Day Delivery on Orders $119+ Details
Best Sellers


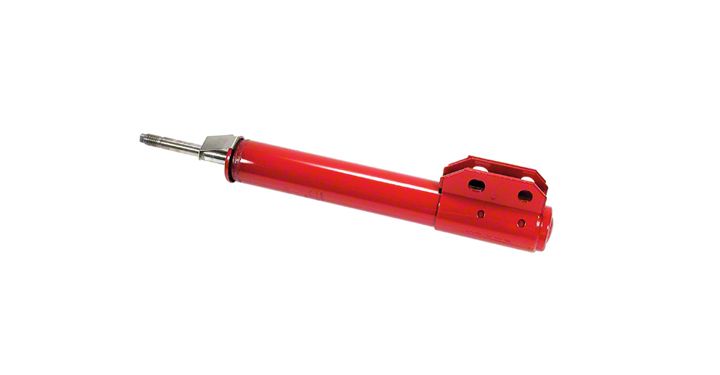
How to Install a Lakewood 70/30 Front Street/Strip Strut on your 1994-2004 Mustang GT
Shop Parts in this Guide
Installation
INSTALLATION INSTRUCTIONS FORD / MERCURY FRONT REPLACEMNT STRUT
Read this instruction sheet and any instructions printed on the parts package carefully prior to removing the strut from the vehicle.
Do not grip polished piston rod with any tool. Nicks or scratches will cause decreased service life.
Part number on unit may differ from part number on carton. The unit is correct for the vehicle.
WARNING - if this unit is gas pressurized, do not heat or open.
REMOVAL PROCEDURE
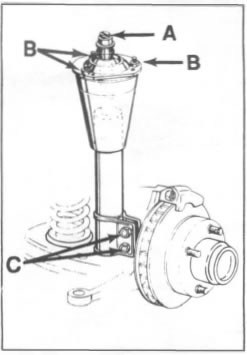
1. Open hood and loosen the 16mm upper rod retaining nut (A). Do not remove it completely. Use a large screwdriver in slot end of rod to keep rod from rotating while removing rod nut.
2. When removing gas charged units, it may be necessary to remove upper mounting plate by removing the three small nuts (S) securing it to the body. do not remove the mounting plate if it is not necessary. Alignment is required if plate is removed.
3. Raise front of vehicle using a hydraulic floor jack under the lower control arm and position a jack stand under the frame jacking pad behind the front wheels. Remove front wheels.
CAUTION: Make sure the vehicle is properly supported.
4. Position the floor jack as close to the brake rotor as possible. Remove the two (2) lower mounting bolts and nuts (C) which attach the strut unit to the spindle carrier and save for reuse. On some models, it is necessary to remove the brake caliper from the rotor to allow access.
5. Compress the strut, remove and discard the upper rod nut (A). Pull unit down and remove from vehicle. Remove compression bumper from rod and save for reuse.
INSTALLATION PROCEDURE
IMPORTANT: Gas units are shipped in a locked down position. The rod must be extended before installing on vehicle. to extend, remove external tie down or rotate uupper end of rod counter clockwise.
6. Inspect all original parts as removed for wear and damage. Obtaio replacements when necessary. New lower bolts and nuts are available in AK-27 kit.
7. Place compression bumper on rod.
8. Insert the new replacement strut up thru the dust shield and extend the rod stem into the upper mounting.
9. Install new rod nut (A) furnished and hand tighten only. It will be torqued later.