 FREE 1 to 3-Day Delivery on Orders $119+ Details
Best Sellers


How to Install a Rear End Installation and Bearing Kit - 8.8in on your 1986-2013 Mustang
Installation Time
4 hours
Tools Required
- Jack Stands – 5
- Floor Jack – 2
- Oil Pans – 1
- Wheel Blocks – 2
- Differential Oil – 3 qts
- Friction Modifier – 3 bottles
- Tube of Black RTV
- Torque Wrench (ft-lbs)
- Beam-Style Torque Wrench (in-lbs)
- Break Bar
- Rubber Mallet
- Hammer
- Needle Nose Pliers
- Chalk
- Gloves
- WD – 40
- Assortment of ratchet sockets and wrenches - Sockets needed which weren't readily available: 1-1/16” & 3/16”
- Assistant
- Rebuild Kit
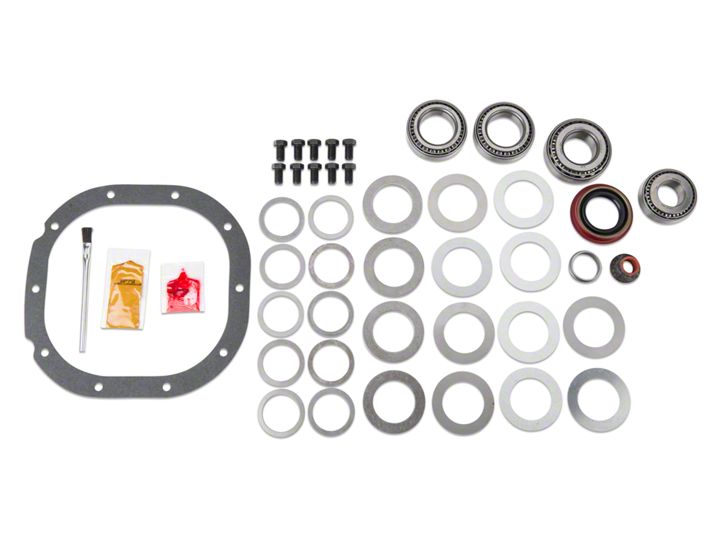
Shop Parts in this Guide
In this How-To, you will be rebuilding the rear-end of your mustang. For these steps, I did not install new gears as I already had 3.73s installed. Because of this, I did not need to measure or swap shims. If you were to install new gears, you would need to measure shims. You would need to make sure that your ring gear shows proper wear marks using the given gear marking compound. You can find tables for proper wear online with a quick search.
Installation Instructions
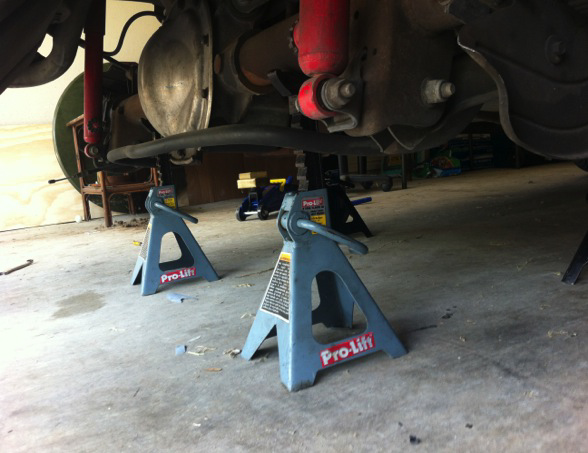
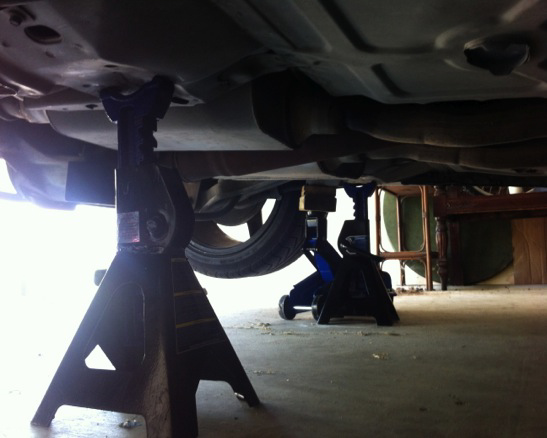
1) To begin, place the wheel blocks on the front wheels. Put the car in neutral and release the emergency brake. Then raise the car near the differential. Jack the car up as high as safely possible. Place 2 jack stands underneath the axle and two jacks under the subframe.
2) Remove wheels, calipers, and rotors:
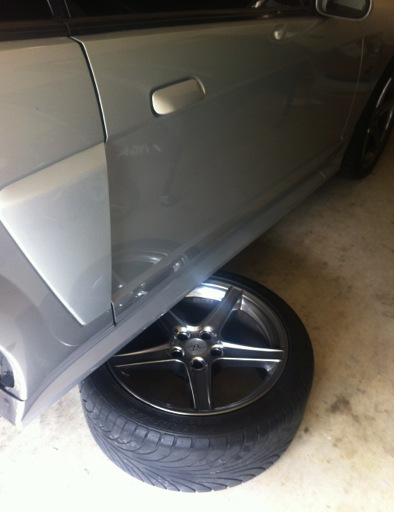
1. Remove your rear wheels, unbolt the caliper and caliper bracket, and remove your rotor. For safety precautions, place the rear wheels underneath the the car.
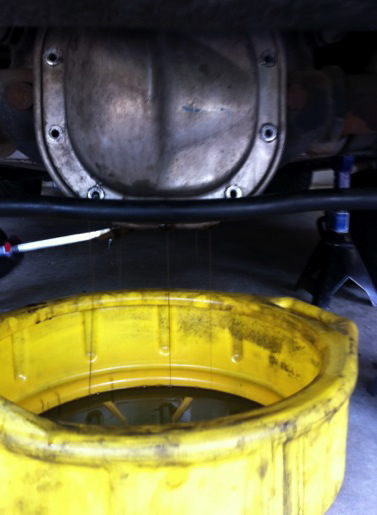
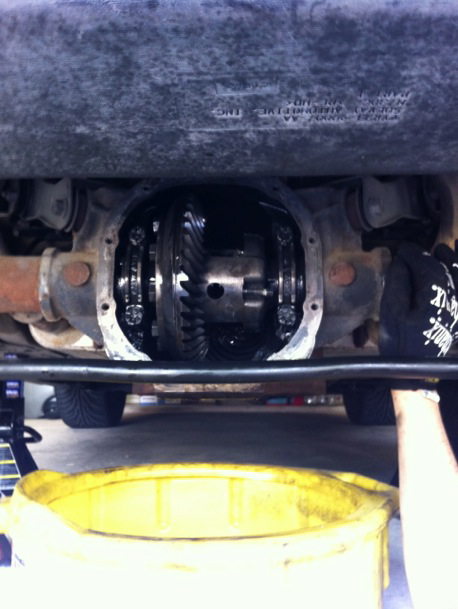
3) Drain the rear-end:
1. Place a pan underneath. Start by removing the bottom 3 bolts first and work your way to the top. Pry out the bottom of the cover with a flathead screwdriver to loosen the cover. The oil will start to drain.
2. Finish removing the cover by going from the top around to the bottom. The remaining oil will drain.
4) Remove the pinon bolt:
1. Using a 5/16” socket (it's fairly tight) loosen the small bolt.
2. Once out, rotate carrier to get your hand behind the pin and remove the pin.
3. If you feel slight resistance when taking the pin out this is OK, but you shouldn't have to more than lightly tap it with a thick punch. If you do encounter resistance check to make sure it isn't hitting something or binding somewhere. Usually it just slides right out.
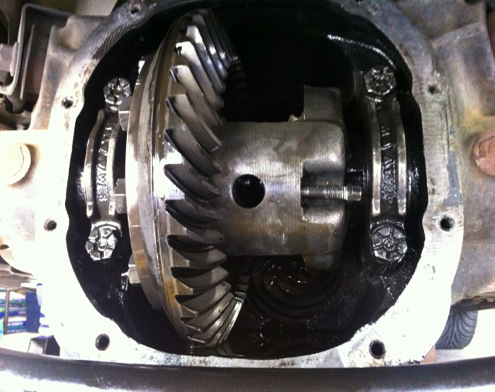
5) Remove the axles:
1. With the cover of the differential off, you can see the c-clip. We want to remove that by first pushing in the axles.
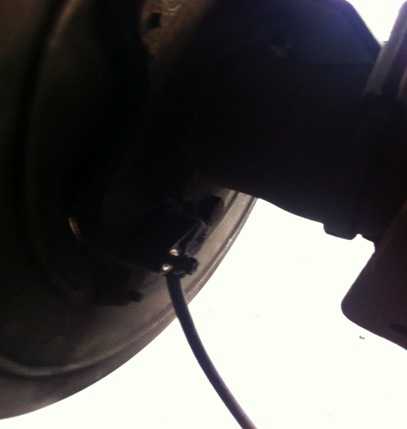
2. Before pushing in the axle, remove the ABS sensor as shown in the picture. It won't hurt anything to remove it. Just be gentle with it. If you bend this sensor, they cost roughly $55 new.
3. Once the ABS is removed, push in the the axle towards the center of the vehicle.
4. Once it is pushed in as far as it can go, remove the C-clip holding the axle in place with a flat head screw driver. Do this for the other side.
5. Slide the axles out carefully. Set them aside
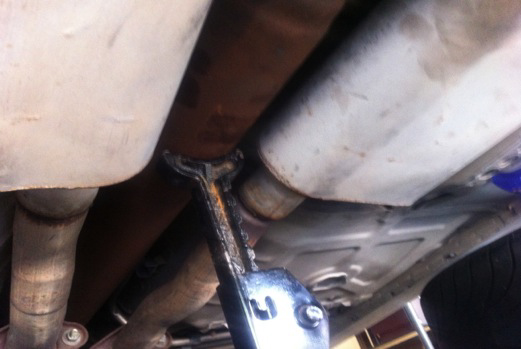
6) Remove the driveshaft: 1. Using a 12mm wrench, remove the 4 bolts from the rear u-joint and rear differential. You may need to soak them with WD-40. Make sure to mark the orientation of the driveshaft relative to the pinon flange, as you will want to replace it in it's original position.
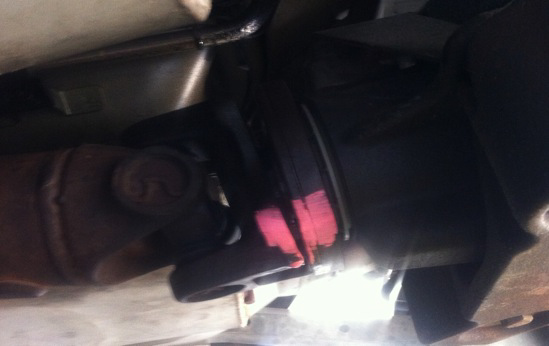
2. You will need to put the car into gear to lock the drive shaft in place so that you can loosen the bolts (manual transmission). Put it into neutral to rotate the driveshaft around to get the remaining bolts.
3. One the driveshaft is loose, raise it and gently place a jack stand underneath it to support it away from the rear-end.
7) Remove the carrier:
1. Unbolt the 4 bolts on the 2 caps that hold the carrier into place. The carrier will be heavy so be careful when setting it down on some cloths. You don't want to damage the ring gear.
2. Place the LEFT and RIGHT components on separate towels or cloths. They must be kept together.
3. Carefully remove the carrier. Shims will fall out so keep these to their relative sides as well.
8) Unbolt suspension components: 1. Remove the shock bolt from the rear-end mount, the LCA bolt from the rear-end mount, quad shocks, and the UCA bolts from the rear-end housing. Also remove the rear sway bar. NOTE: Keep all bolts, nuts and whatever else you remove in cups to keep hardware from different sides separate.
9) Remove the rear-end:
1. Lift the differential up by the 2 jack stands. Once the differential is supported by the floor jacks and NOT the jack stands, remove the 2 jack stands from underneath.
2. Now SLOWLY lower the floor jacks. The entire rear-end will come down with the floor jack and the car will still be supported by the remaining 2 jack stands.
3. Now that you have all the components apart and the differential opened with no lubricant, you are ready to set the rear-end on 2 jack stands to begin the tear down.
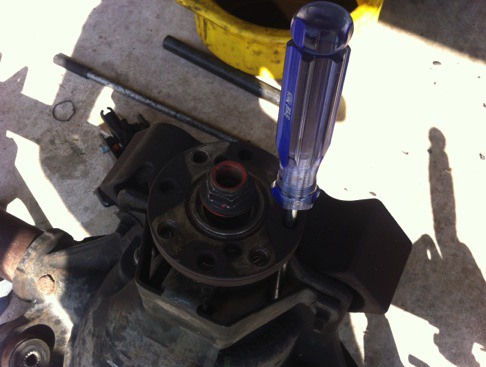
10) Removing the pinon shaft:
1. Place a long screwdriver down a NON-thread hole so that when you loosen the nut, the flange will not
2. spin. The screwdriver will set against the rear-end as a counter force.
3. Once the nut is loosened, leave it on until it is flush with the end of the pinon shaft.
4. At this point, use a hammer and hit the NUT until you have lots of play in the flange.
5. Now brace the pinion shaft and remove the nut entirely and the pinion shaft will fall out. NOTE: When reassembling, use the new pinion nut.
For the bearings, I would HIGHLY recommend taking it to a professional shop and having them remove the old bearings (2 on carrier and 1 on pinion shaft) and pressing on the new bearings from the kit. It'll cost between $25-50 to have machine shops to this. They have the necessary tools to do this job. If you would like to do it yourself, here is how to do it. NOTE: If you have a machine shop replace the bearings, skip to step 13.
11) Removing and replacing the carrier bearing:
1. Grab the two-jaw puller.
2. Put the two-jaw puller around the bearing and use an impact wrench to remove the bearing off. It'll take
some force to get it off.
3. Do this to both sides of the differential assembly.
4. To replace the carrier bearings, bring the entire assembly to the press.
5. Place the carrier bearing onto the edge of the assembly, and use a wooden block on either side to press the bearing until it's seated. Do this to the other side with the last bearing.
12) Removing and replacing the pinion bearing:
1. Bring the pinon shaft to the press with the bearing separator.
2. Place the bearing separator underneath the bearing.
3. Using the wooden blocks as your counter force, use the press to force the bearing off.
4. To replace the bearing, flip the pinon upside down and reverse the previous steps.
5. Replace the crush sleeve.
13) Replacing the races:
1. Pull out the old races from the carrier and the pinion.
2. Clean out the area where the race was sitting.
3. Place the new races on the physical bearing when replacing the carrier along with their respective shims.
4. For the pinion you must knock out the races with a flat head and then press them back in with an object
such as a wooden stick that is the size of the race. Press it into place until it is properly seated. Do this for
both races.
14) Now that you have replaced the bearings and races, you are ready to reinstall everything. From here you just have
to reverse the disassembly steps.
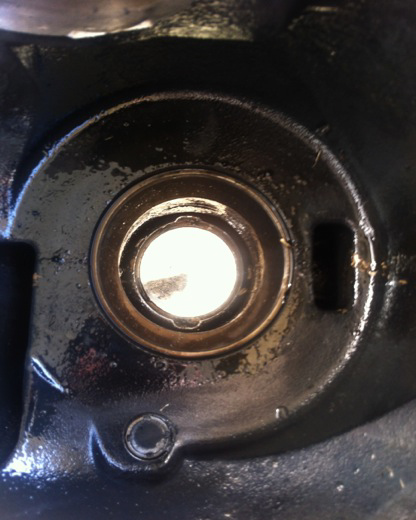
15) Replace the pinion seal and bolt the pinion nut back on. You will have to use a lot of force to bolt down the pinion
nut because you are literally crushing the sleeve with the force that you are applying. Use a 1-1/16” socket for the
pinon nut.
1. Here is where it gets tricky. You must tighten the pinion nut until there is no movement in the flange.
2. Once there is no movement, you must check with a beam-style torque wrench and see how many in-lbs
it takes to rotate the pinion nut. This is called the bearing preload. With new bearings, it should be
between 20-28 in-lbs to rotate the pinion.
3. Keep going back and forth between 1/8 turns when tightening it and then going and checking the bearing preload. Do it LITTLE BY LITTLE. You don't want to over tighten it or you will have to start all
over and purchase a new crush sleeve.
16) Replace the carrier with the shims and races. Tighten the bearing caps with 70-90 ft-lbs.
17) Slide in your axles, put in the c-clips, place the pin into the carrier, and tighten the small bolt.
18) On the differential cover, scrape off the residue of the old RTV until the surface is completely clean. Use some RTV and make a large contact surface with the new tube of RTV so that no oil will be able to leak out. Let it sit for at least 1 hour and then go back and tighten again.
19) Filling your differential with oil:
1. Unbolt the refill hole on the top of the differential housing. It takes 2.5qts and one bottle of friction modifier.
2. Place the end of bottles of friction modifier and lubricants into this hole and fill it up.
20) Now that everything is put back onto the rear-end, bolt suspension and brake components on.
21) Replace your driveshaft in reverse of how you removed it while keeping an eye on the orientation mark. Tighten to
70-100 ft-lbs.
22) Place your wheels back on.
23) Raise your car, remove the jack stands, and then lower your car down slowly.
You're done!
Installation Instructions written by AmericanMuscle customer Martin Salomon 6/7/2012
