 FREE 1 to 3-Day Delivery on Orders $119+ Details
Best Sellers


How to Install a SR Performance Black Cold Air Intake on your 1999-2004 Mustang V6
Installation Time
1 hours
Tools Required
- 10mm socket
- 8mm socket
- Flat Head Screw Driver
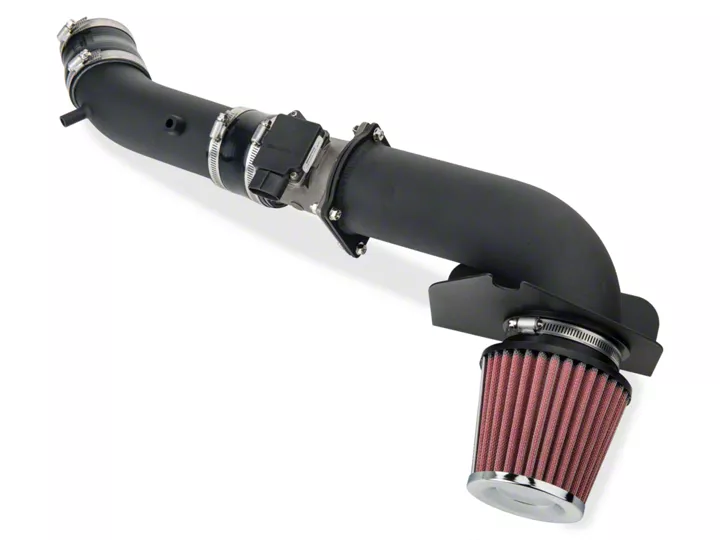
Shop Parts in this Guide
Before Install
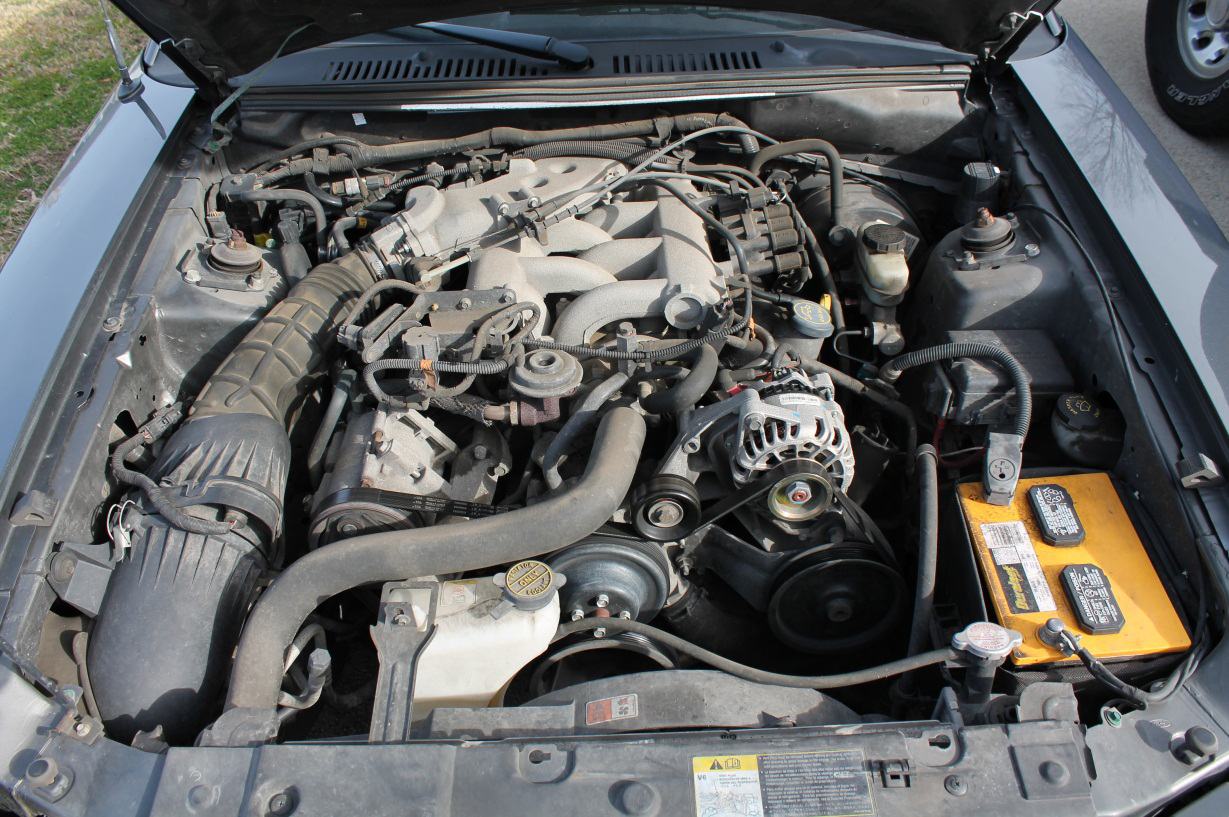
1. Remove the Stock Air Intake
A: This will require you to Disconnect the Mass Air Flow Sensor Wire Harness Just behind the Air filter housing you will find the Cable coming off the Air intake.
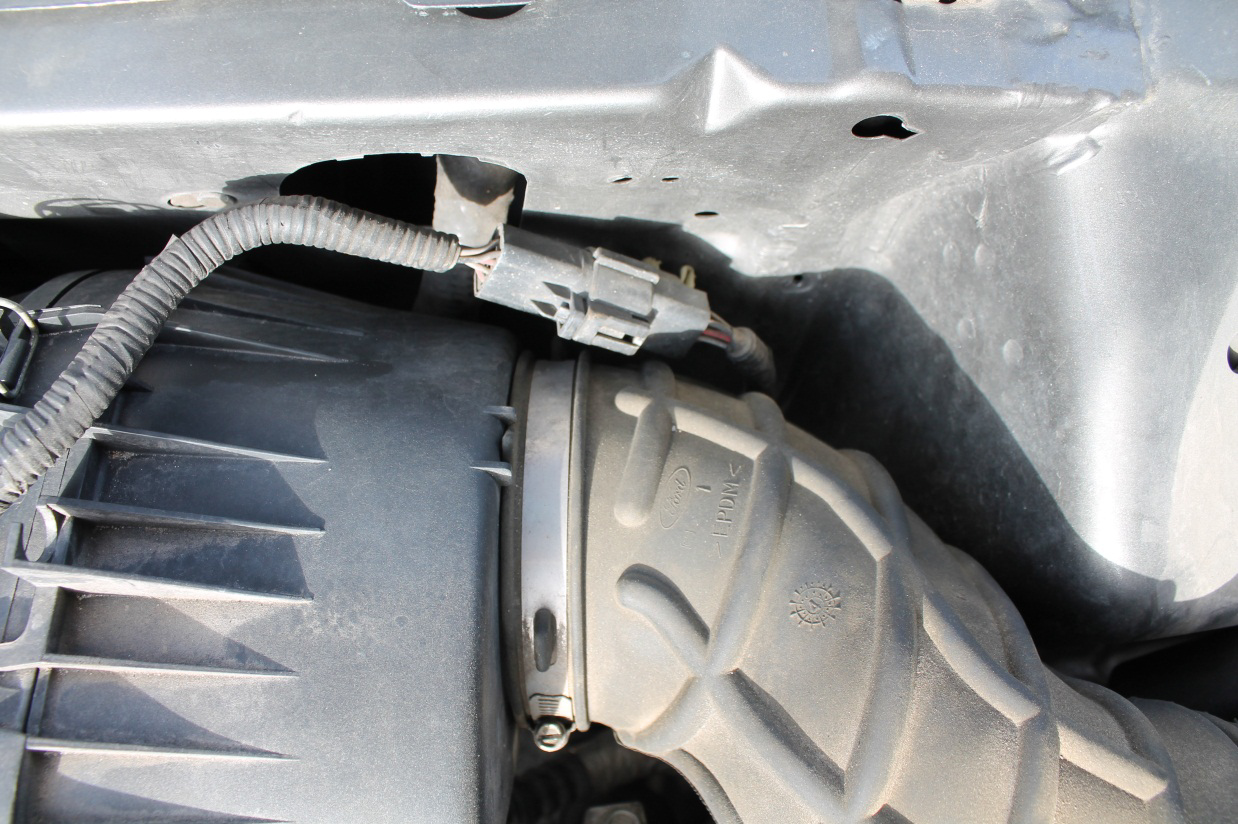
B: Disconnect the Vent Line that is connected close to the throttle body on the Air intake. On some but not all Cars there will be another air sensor on your intake remove this and be Careful not to damage it.
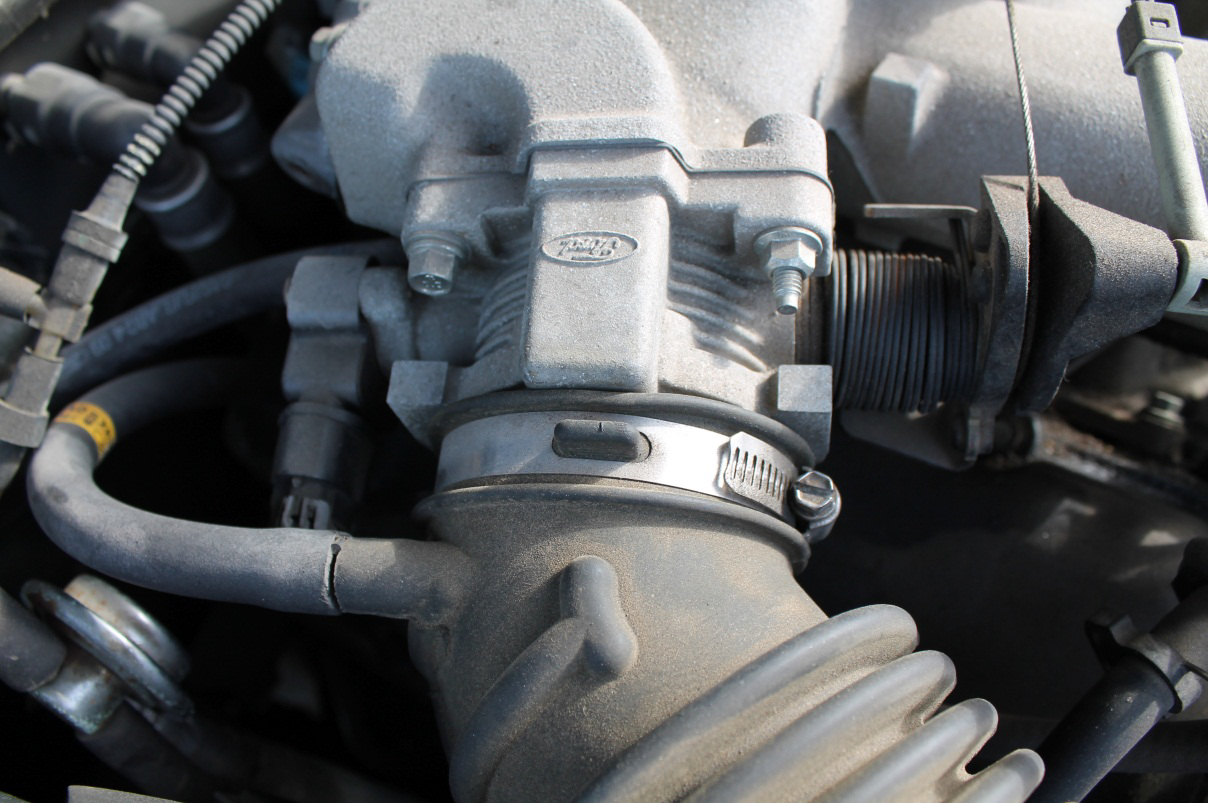
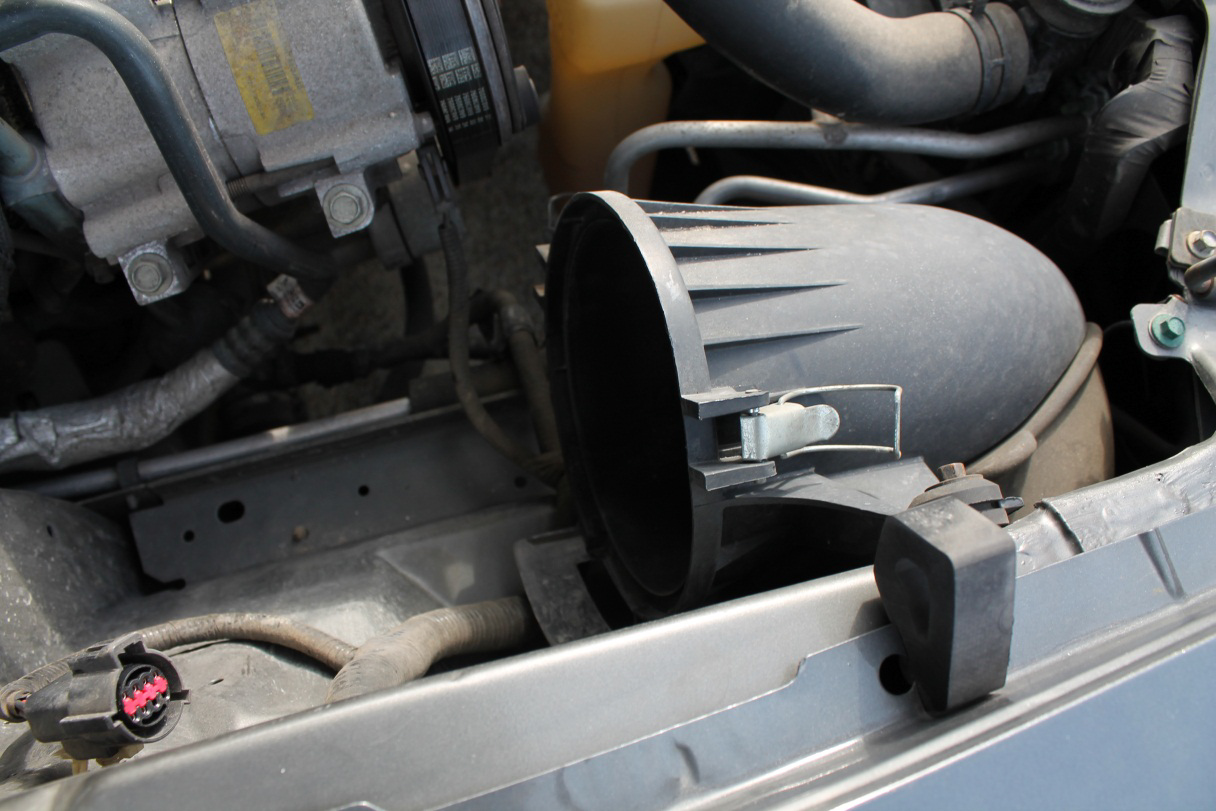
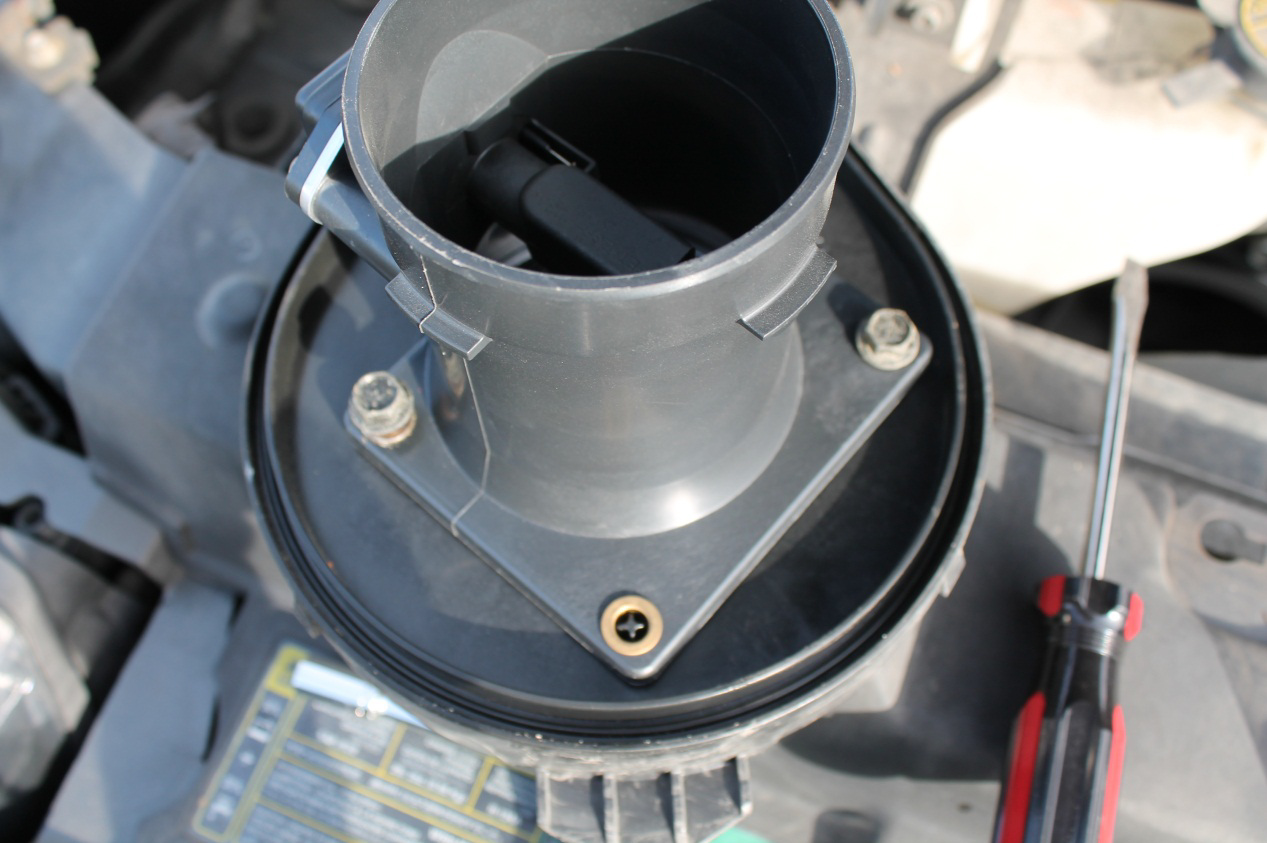
C: Now remove the Ring clamp at the throttle body and slide the stock air intake off.
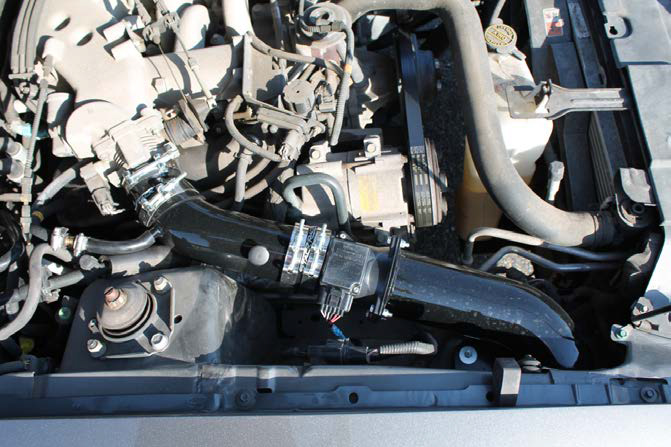
Image for Steps B and C
D: Open the Air filter Housing and remove the upper half of the air intake.
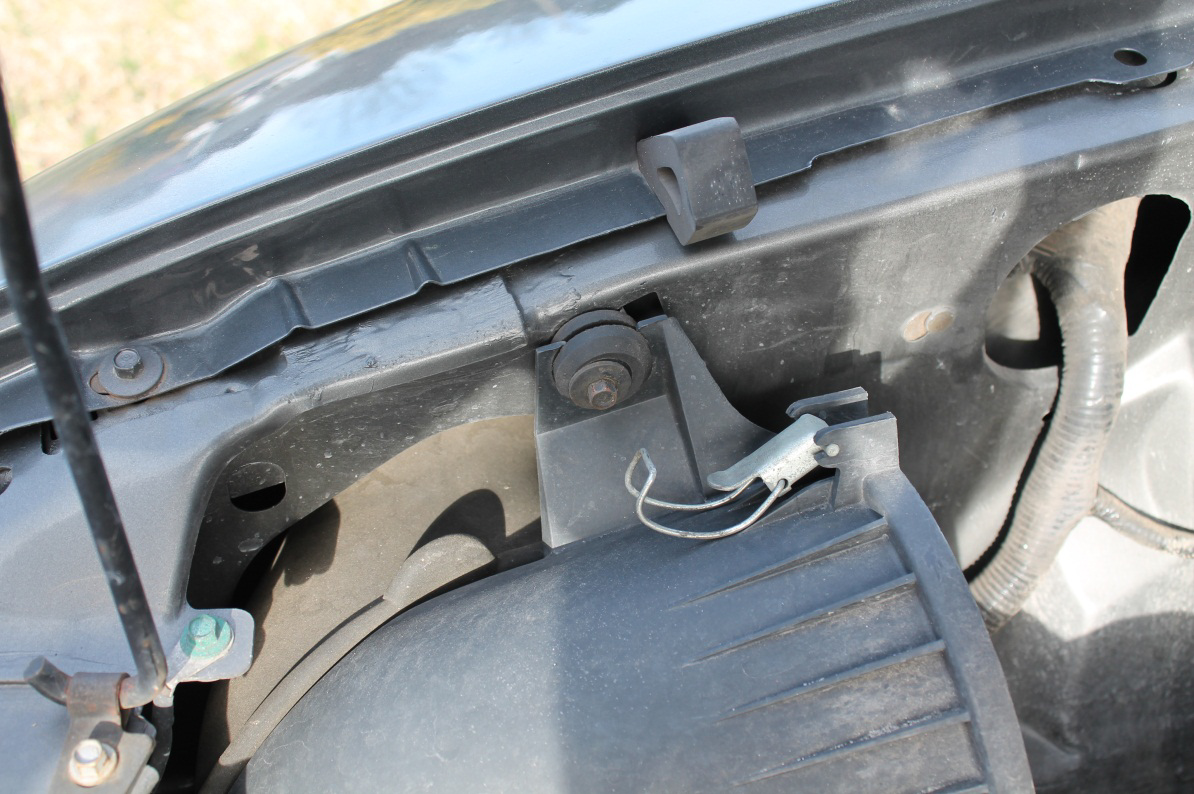
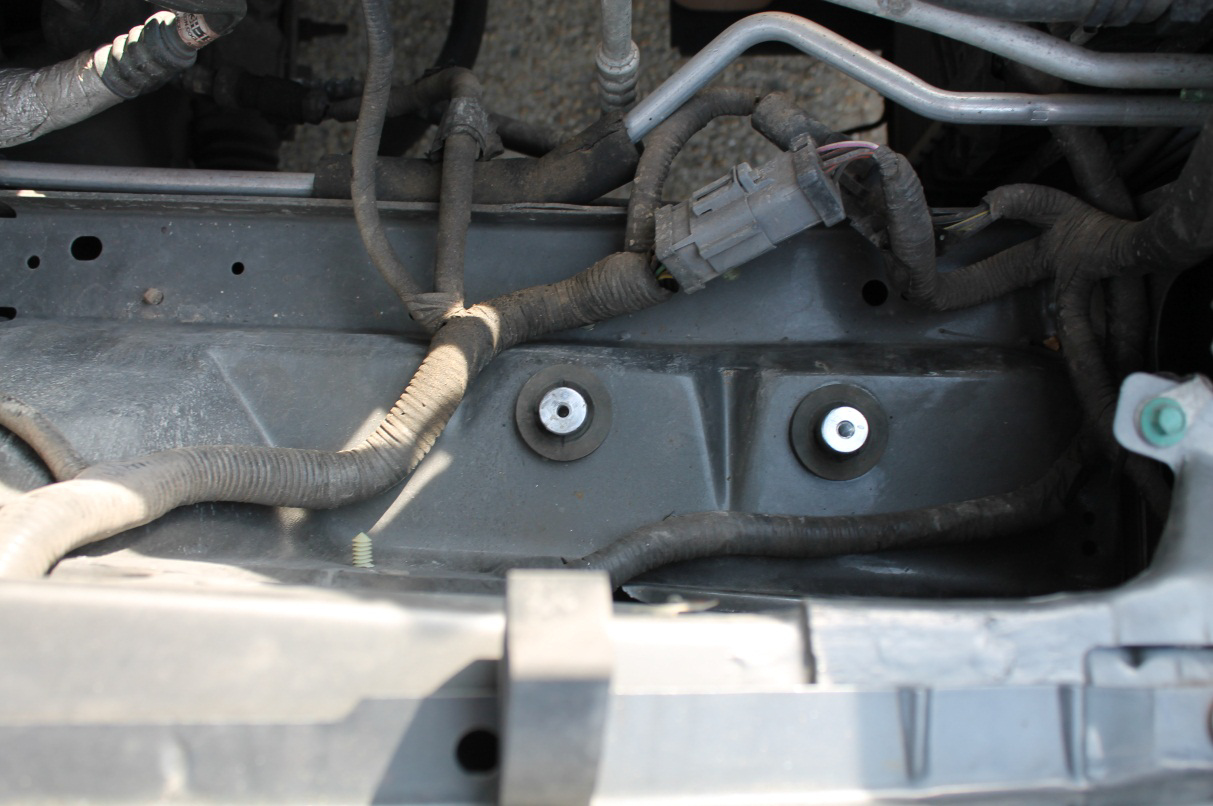
E: For the bottom half you will need to remove one bolt on the fender Use an 8mm socket for this. Now you will be able to remove the 2nd part of the stock air intake. Keep the 2 rubber mounts that are on the bottom and place them back in the 2 mount holes below where the air filter housing was. Also Keep the Mount from the Fender to use later.
2. Install New Cold Air Intake
A: Install the rubber mounts listed from Step 1:E and install mounting Hardware from your new Air Intake.
B: Using a flat head screwdriver open the Stock Air intake Mass Air Filter Housing tabs. Take Care not to damage the Mass Air Flow Sensor as it is not cheap to replace.

C: Remove the Mass Air Flow Sensor Wire Harness from the Old Air intake Housing Using your fingers pushing in from one side and working your way around. If you have issues use a flat head screw driver.
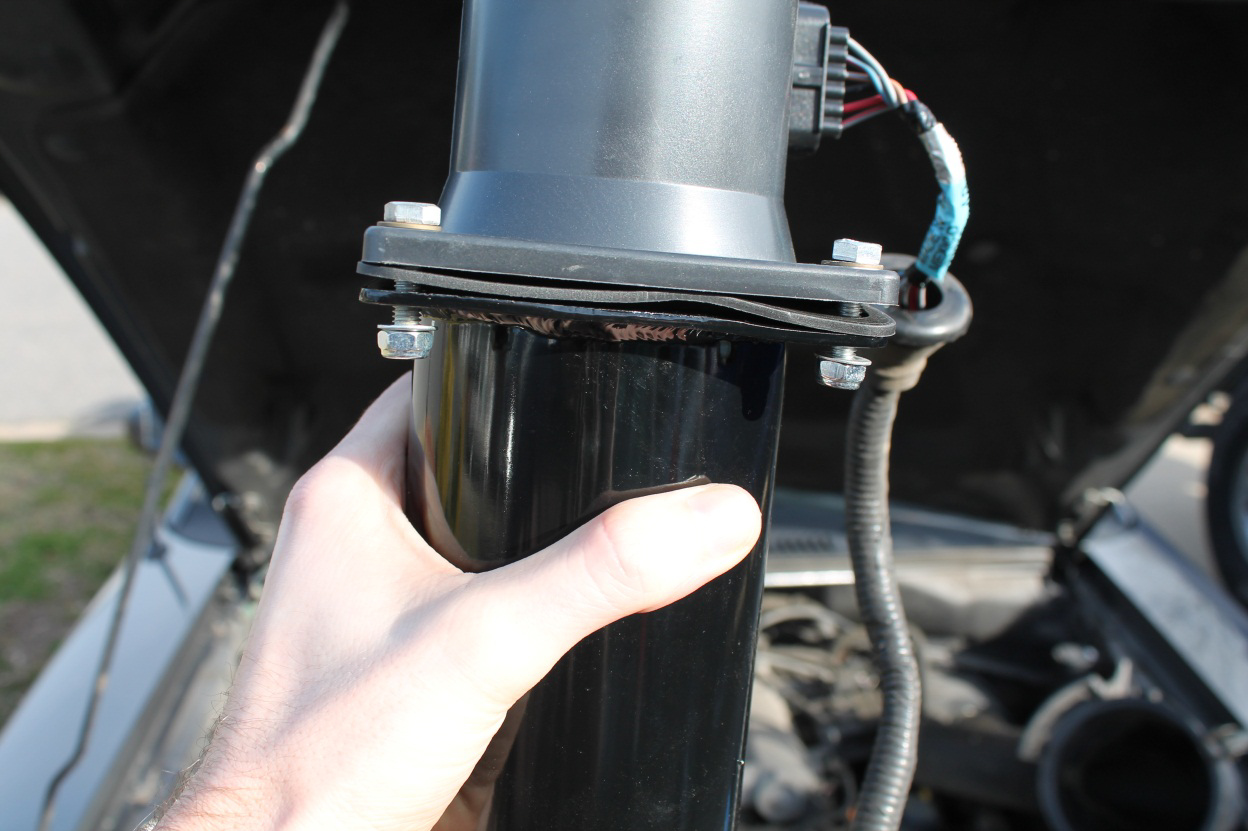
D: Remove the Mass Air Flow Sensor from the Old air intake with a 10mm Socket.
E: Install the Mass Air Flow Sensor to the new air intake matching the one Round edge. Use 4 bolts and Gasket mounting hardware found in the new air intake. There are 2 versions of the Mass Air Flow Case one Plastic and one Metal with both be careful on how much you tighten the bolts as you will not want to damage the Part.
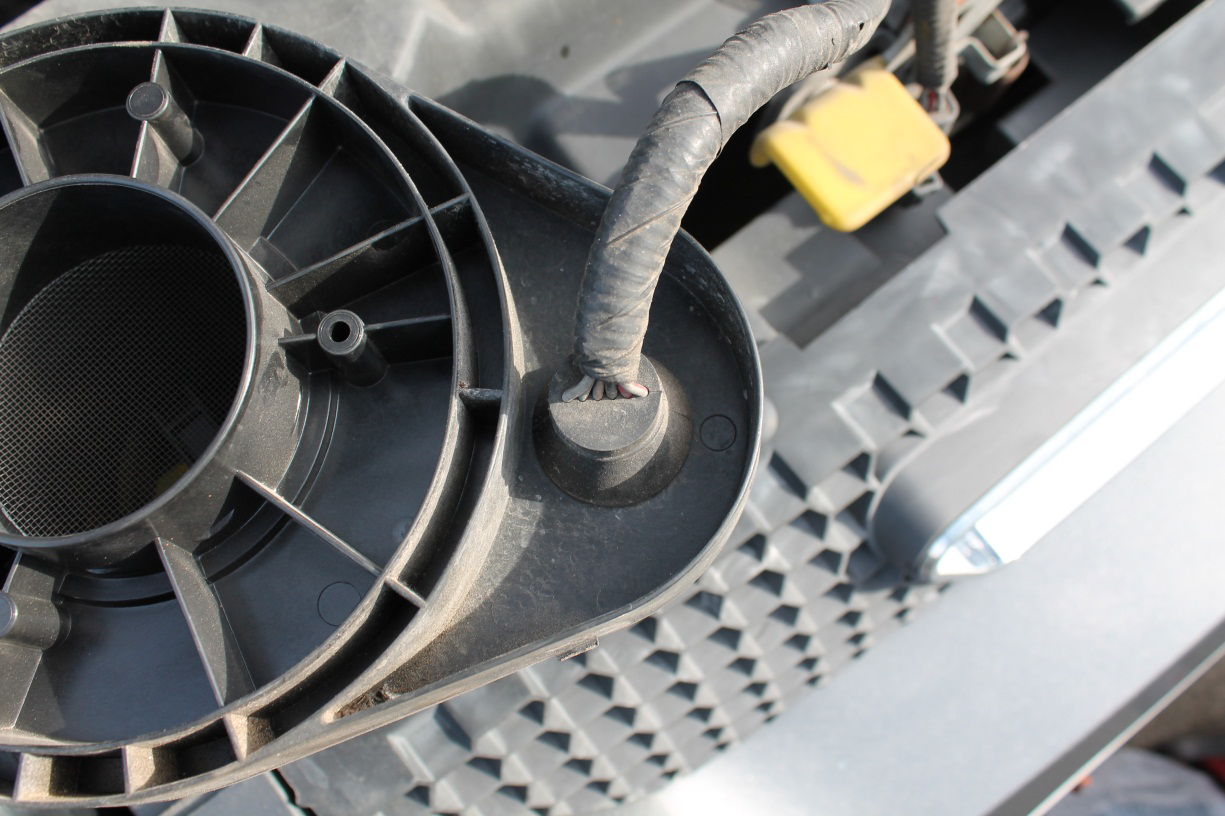
F: Install the Mounting Bussing from Step 1:E on the fender mounting bracket. Now slide the New Air Intake Bracket on the Lower Tube that has the Mass air flow sensor. And install the Air filter From your New Air Intake using a Ring Clamp.
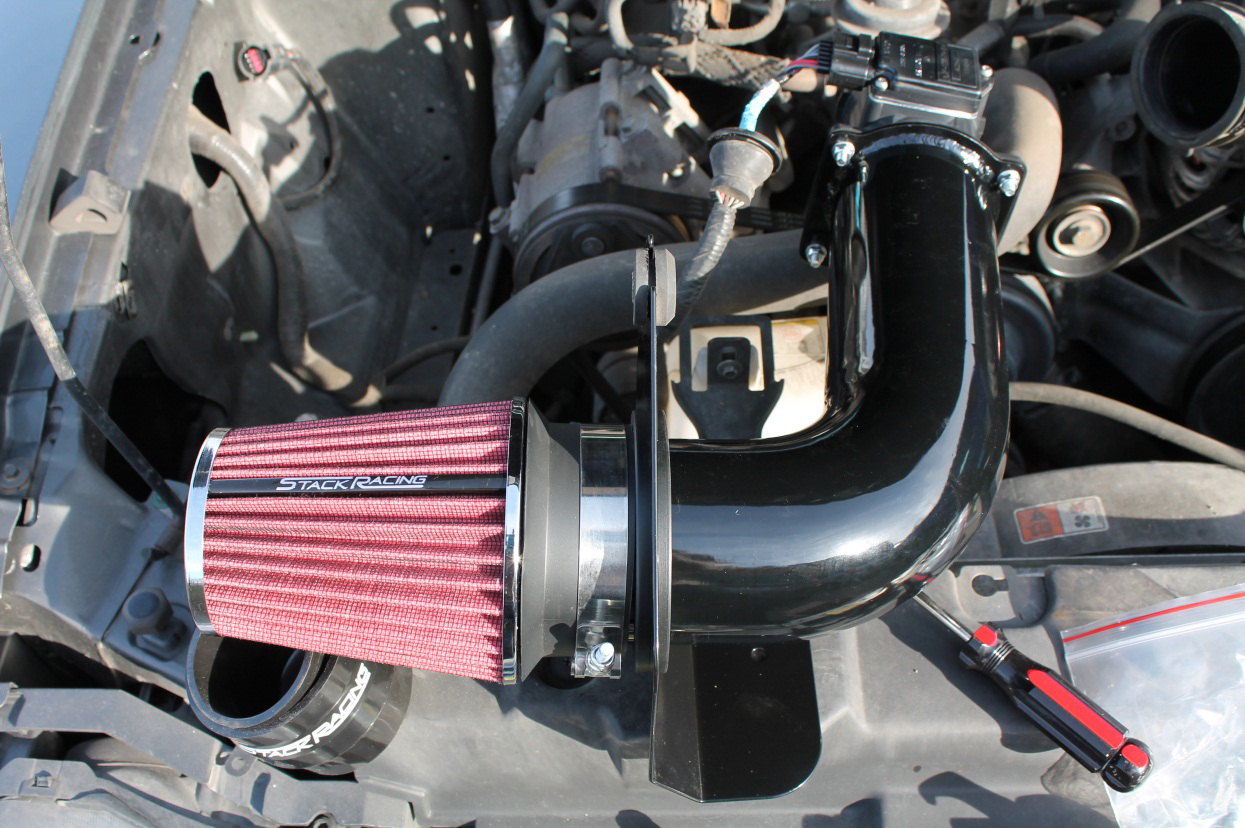
G: Install the bottom half of the Air Intake and use the Original bolt to install the Fender Bracket. Use the 2 new bolts for the bottom mounts.
H: Install the Throttle body Rubber Coupler Using Pressure to Slide it on and work around. Slide the upper half of the new Air intake in to the Coupler use 2 Ring Clamps. Take the 2nd Rubber Coupler and slide it up the top half of the air intake.
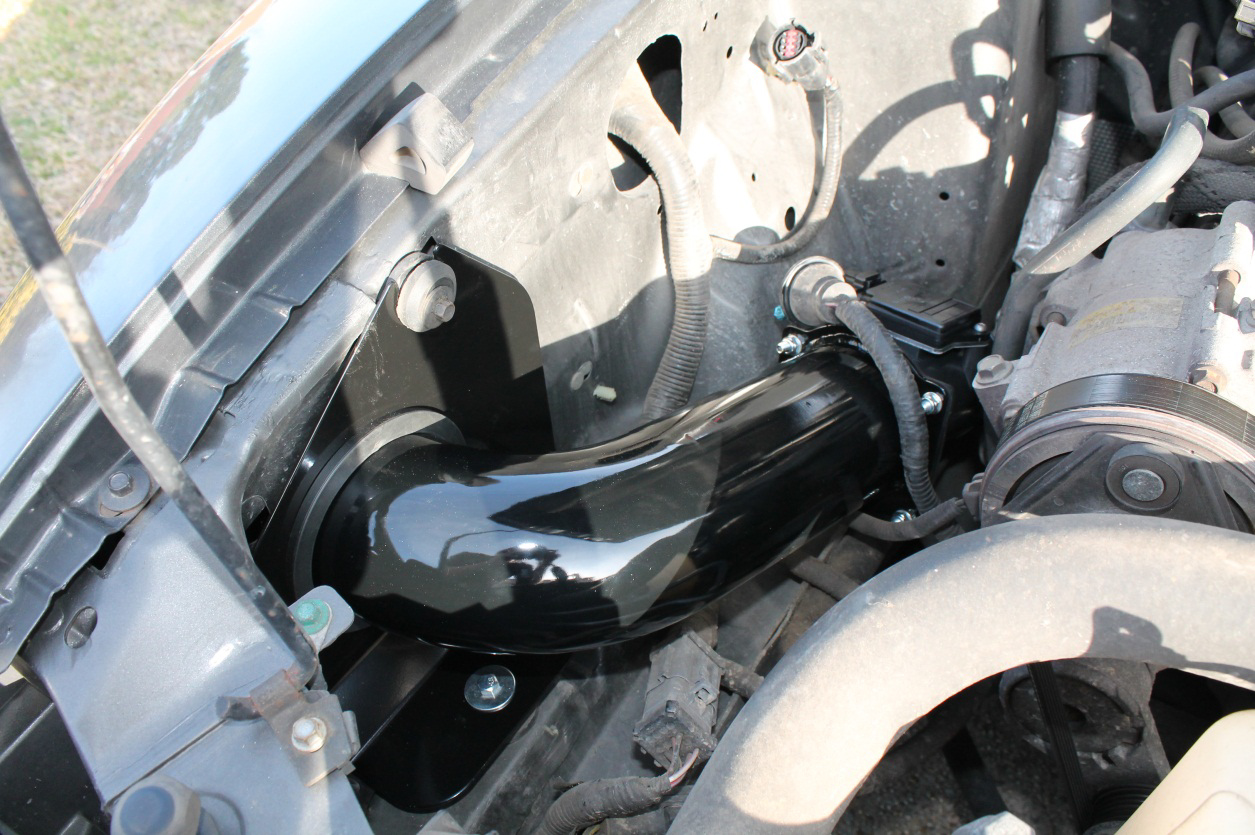
I: Align the bottom half and upper half of the Air Intake and Slide the Rubber Coupler down to cover both the Upper intake and the Mass Air Flow Sensor. Install the last 2 Ring Clamps needed.
J: reconnect the Mass Air Flow Sensor Harness. Reconnect the Vent Hose (Side note on my setup I needed to use the Original Hose as the new one was the wrong Diameter for the Mounting on the Valve Cover. This also need an Extension with part of the new hose and used 2 ring clamps and a brass Coupler.)
After Completed Install

Start the Car to check your work make sure you have no check engine light. Take the Car for a test drive and recheck all connections to see if any are loose.
Installation Instructions Written By AmericanMuscle Customer Jason Creek 4/17/2013
