 FREE 1 to 3-Day Delivery on Orders $119+ Details
Best Sellers


How to install a Front Sway Bar End Link on your 2005-2014 Mustang
Installation Time
1 hours
Tools Required
- Jack
- Jack Stands
- Wheel Chock
- 8mm, 18mm, 19mm Wrench
- 21mm Socket
- Torque Wrench
Shop Parts in this Guide
Overview:
These end links are an OEM replacement for worn out front sway bar end links. A lot of Mustang owners have problems with the original equipment over time. For example, one side of my driver’s side link was seized (which I did not know until I removed it). Some owners also complain about the bolts coming loose after re-installation of the OEM end links following sway bar replacement or maintenance. Even if you are not having noticeable issues related to your OEM end links, replacement of worn out end links should ultimately improve the handling of your Mustang. Installation is simple and should take the average do-it-yourselfer about forty-five (45) minutes to complete when using a jack and jack stands. The photos and bolt/nut sizes provided in this guide are from a 2007 Mustang GT.
Front Sway Bar:
1. Loosen the lug nuts on both front wheels using a 21mm socket. Raise the front of the car and place onto jack stands. Place wheel chocks behind the rear wheels to ensure car does not roll back. After the front of the car is in the air and is secure, remove both front wheels.
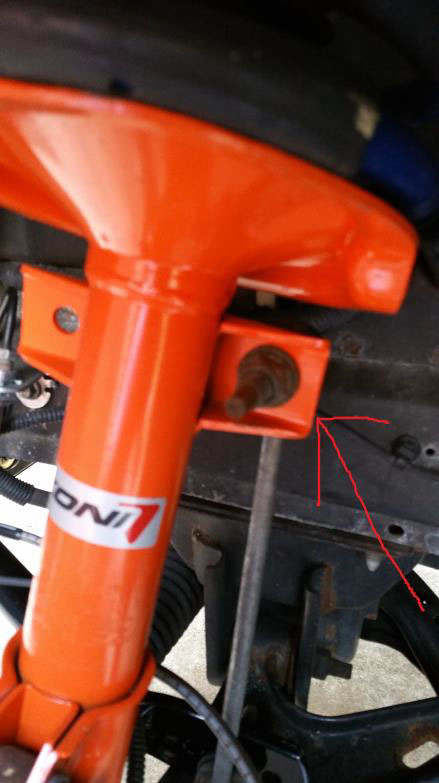
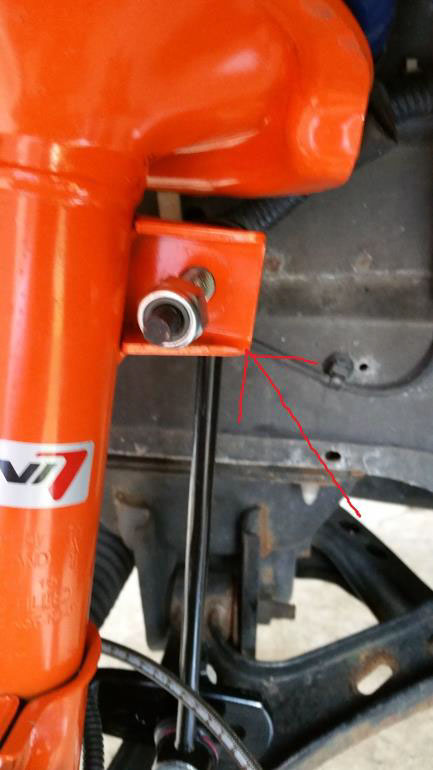
The OEM end links are indicated in the picture below (note: the sway bar in the picture is an adjustable SR Performance model – the OEM bar has only one hole):
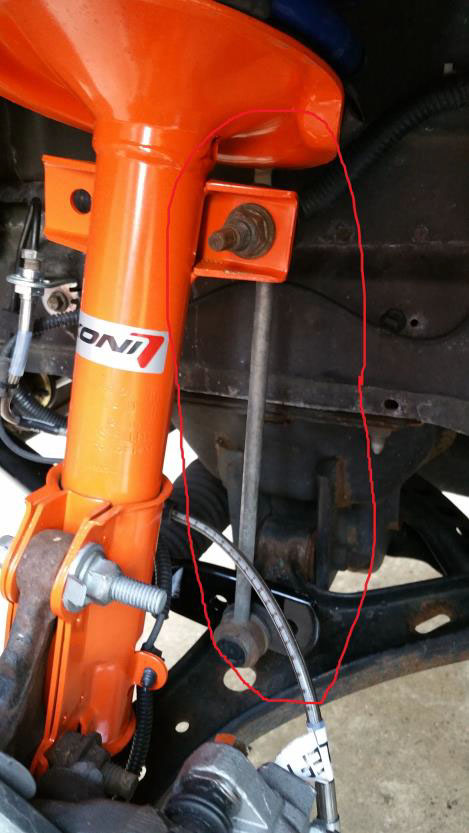
2. Remove the top end link nut from the sway bar using an 18mm socket. You will probably need to use an 8mm wrench or adjustable wrench on the back of the end link to keep the end link from spinning. If the end link does not require the 8mm wrench to keep it from spinning freely, it’s probably seized.
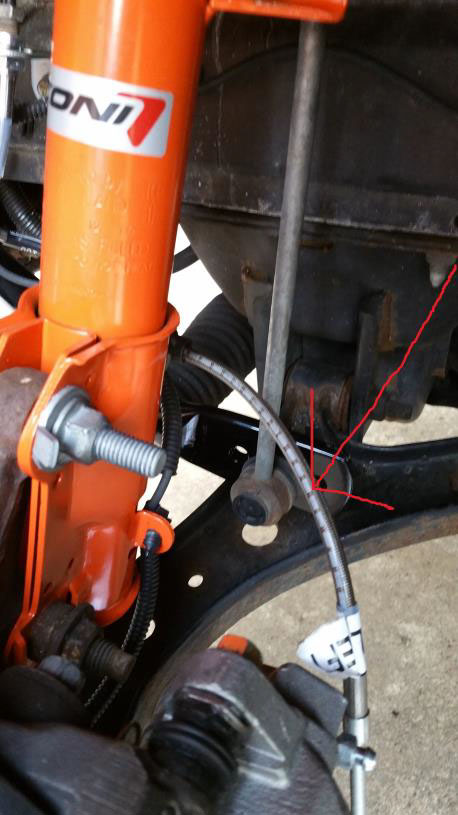
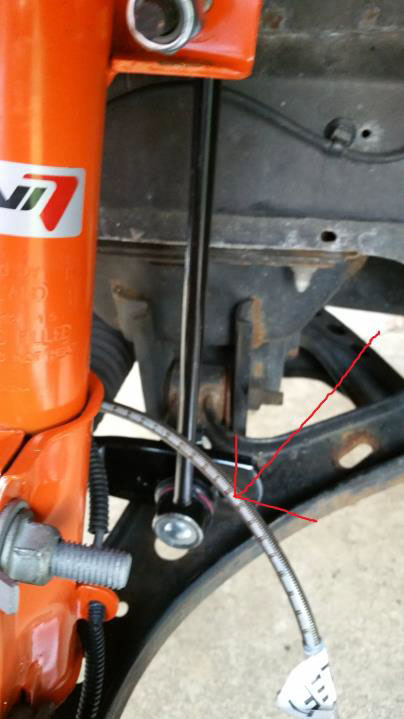
3. Next, remove the bottom end link nut from the shock mount using an 18mm socket. Same as the top nut, you will probably need to use an 8mm wrench or adjustable wrench on the back of the end link to keep the end link from spinning. Remove the end link and put the end links and nuts aside – the parts will not be reused.
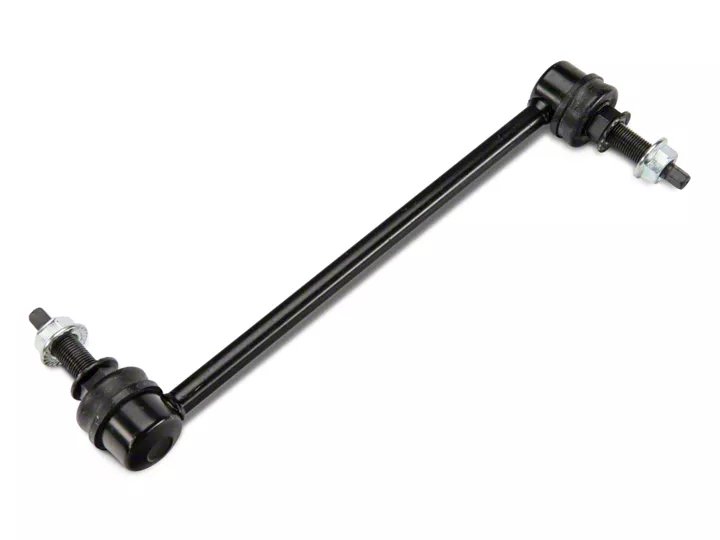
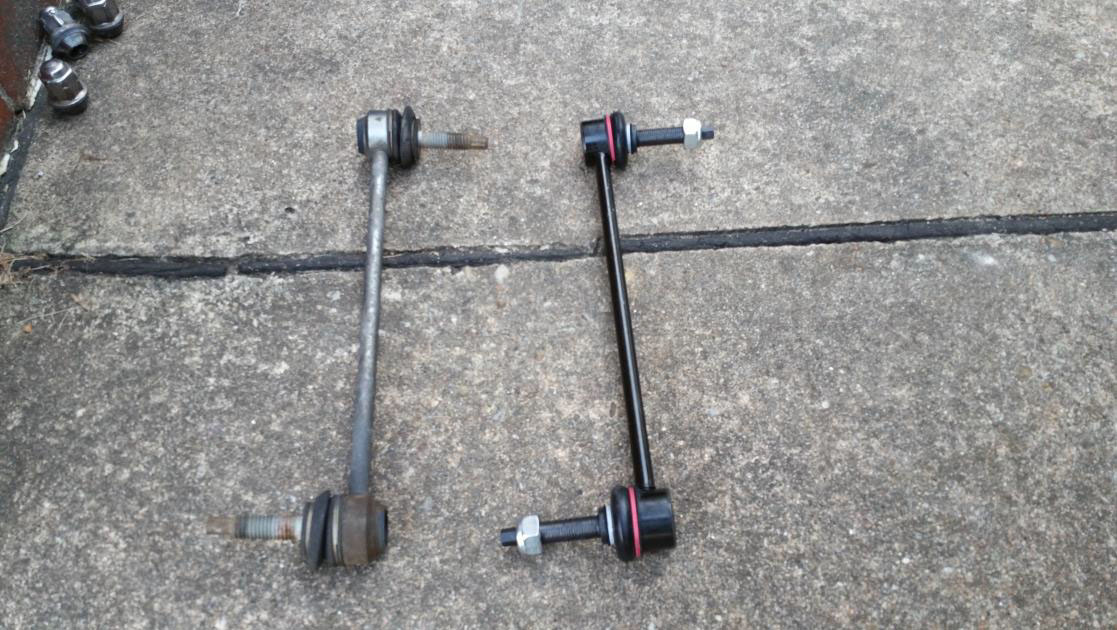
Here is a comparison of the OEM end link vs. the American Muscle replacement end link. The American Muscle parts appear to be of slightly higher quality and are painted black:
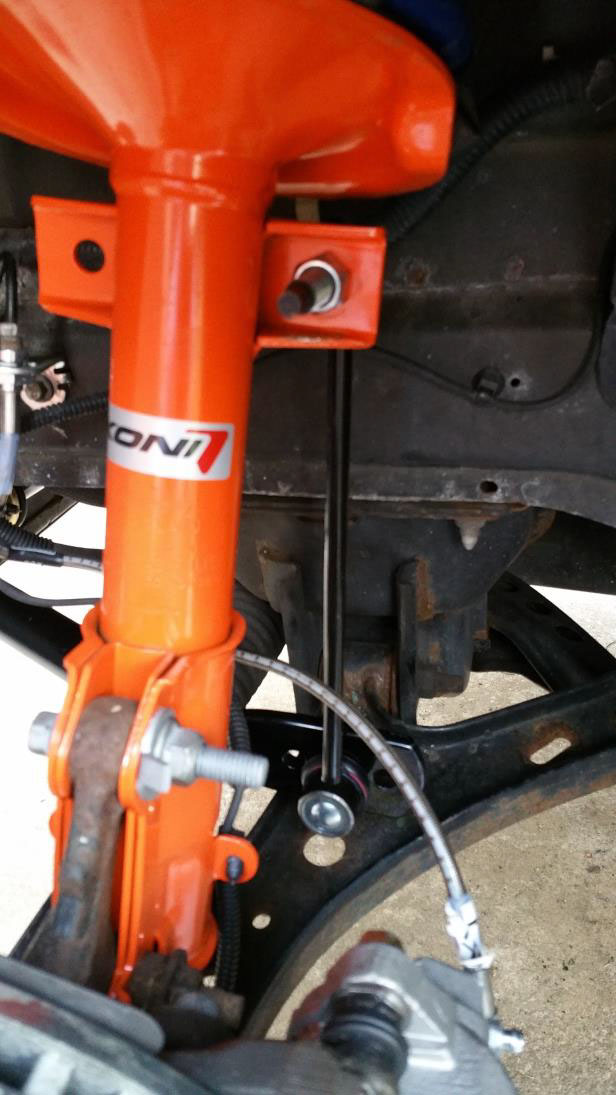
4. Place your new end link into the sway bar and shock mount in the same manner as the OEM end link.
5. Install the top end link nut onto the end link using a 19mm wrench while keeping the end link from spinning by using an 8mm wrench on the back of the end link. Do not fully tighten the end link.
6. Install the bottom end link nut onto the end link using a 19mm wrench and 8mm wrench.
7. Tighten both end link nuts down to 85 ft/lbs with your torque wrench.
8. Reinstall the wheels back onto the car, remove the jack stands and lower the car. Make sure you adequately tighten the lug nuts and take the car for a test drive enjoy the improved handling. Note: if you hear any additional suspension noise from the front end (most likely rattling), check to be sure the end links are adequately tightened.
You’re Done! Here is what the final installed product looks like:
Installation instructions provided by AmericanMuscle customer Kevin Plessner 9/17/2015
