 FREE 1 to 3-Day Delivery on Orders $119+ Details
Best Sellers


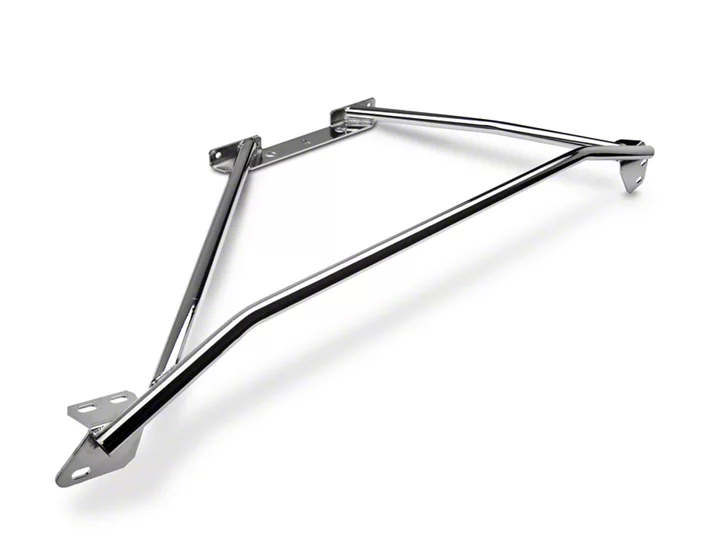
Chrome Mustang Strut Tower Brace ('94-'04 GT/V6) - Installation Instructions
Installation Time
2 hours
Tools Required
- Power Drill with 3/8 Bit
- Ratchet with 7mm and 11/16 Sockets
- 9/16 Wrench
- Tape Measure
- Permanent Black Marker
- Jack and Stands
- Flat-Head Screwdriver
- Razor Blade or Dremel Tool with Cutting Wheel
Shop Parts in this Guide
Installation
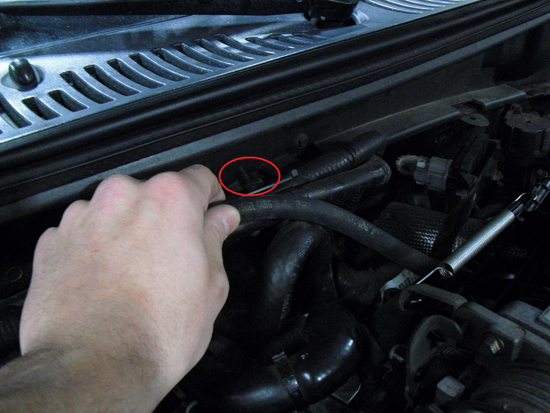
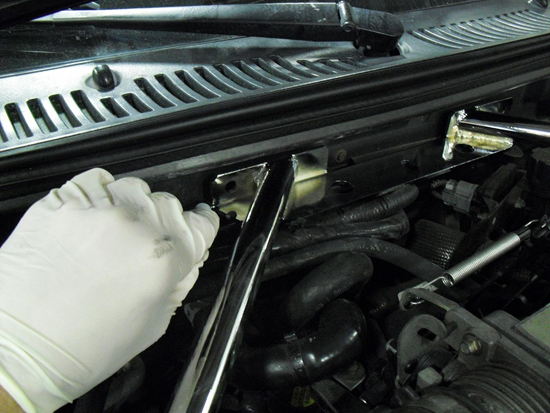
1. Remove wire clips from firewall mounting tab and tuck wires under tab.
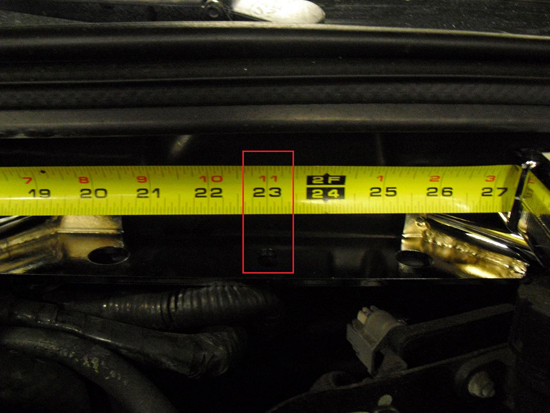
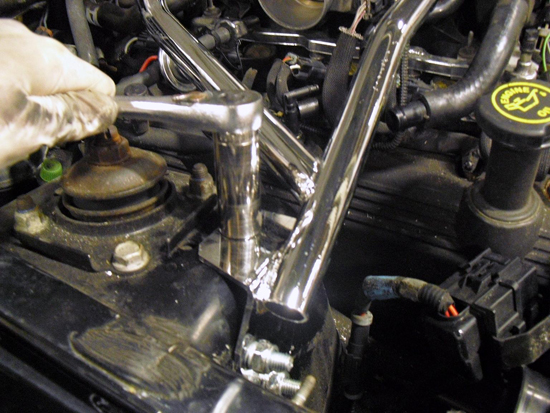
2. Place strut tower brace over engine and using a tape measure, measure 23” from the passenger side inner fender to center the brace on the brace as shown. Use the center hole on the brace for reference.
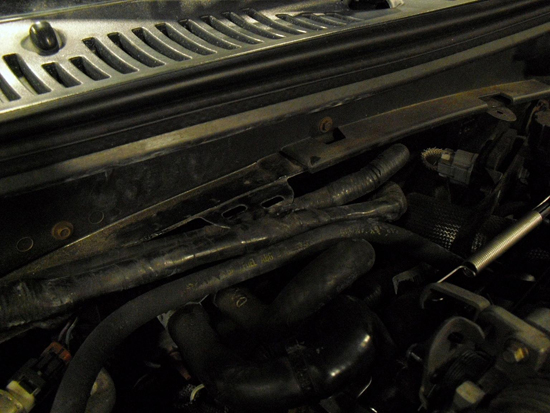
3. With brace properly aligned, carefully close the hood and make sure there is proper clearance. When you are certain that the brace is properly aligned and there is no interference when closing the hood, trace an outline of the rear of the brace onto the plastic firewall cover as shown. Make sure to push both down and back on the brace when tracing to ensure that it is resting on the firewall tab.
4. Remove the brace from the car. Remove the windshield wipers, rubber molding on firewall, and upper cowl panel. The plastic upper cowl is an extremely fragile piece so be very careful when removing it. Pull up with slight pressure between the windshield and panel and it should pop out easily. Before removing it completely, make sure to disconnect the washer lines.
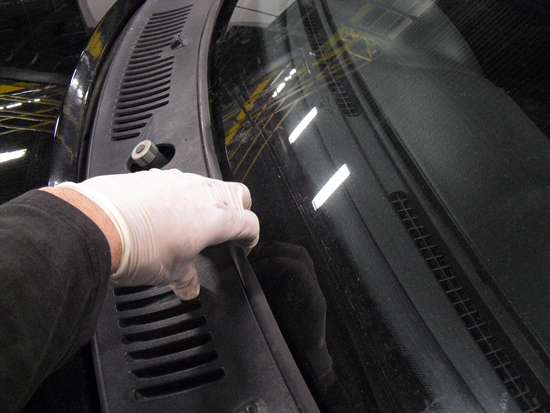
5. Remove the eight 7mm bolts holding the plastic cover to the firewall, and remove it from the vehicle.
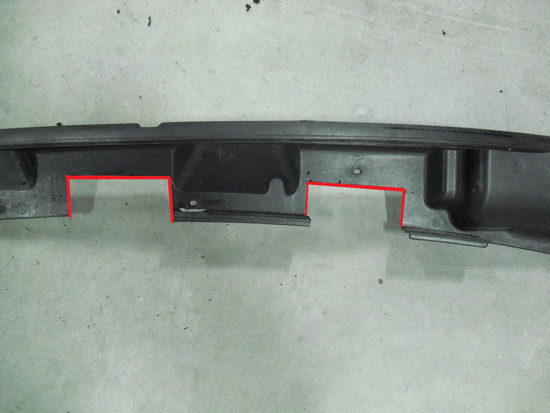
6. Using either a razor blade or Dremel Tool with a cutting wheel, cut out the area on the plastic cowl panel that you traced in Step 3.
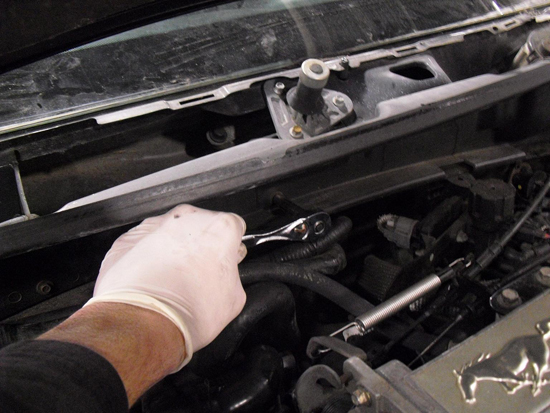
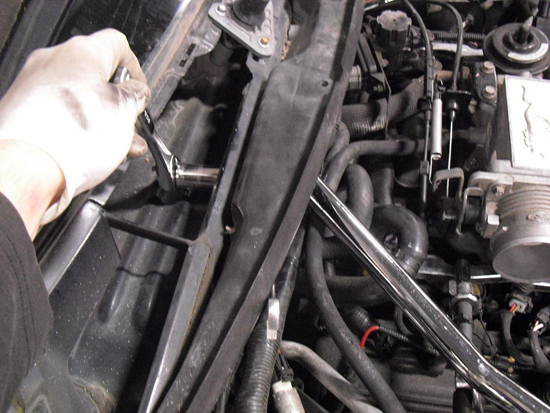
7. Re-install plastic firewall cover on vehicle with the eight 7mm bolts you removed in Step 5. Place the brace back on the car, making sure that it is properly aligned. Using the brace itself as reference, mark the eight holes that will need to be drilled to install the brace. After all holes are marked, remove the brace from the vehicle. Using a 3/8” drill bit, carefully drill the eight holes that you have marked above.
Note:It may help to remove the air intake ducting to ensure that you drill straight holes through the passenger side strut tower. If you do, make sure to cover up the throttle body opening to ensure that metal shavings do not enter the intake track.

8. Once all of the holes are drilled, jack up the front of the car until the wheels are just barely off of the ground. This will help to get a wrench up and under the strut towers to tighten the hardware. Use the supplied hardware to bolt brace to the vehicle. It may help to hand tighten all hardware first, then go back and tighten with appropriate sockets and wrenches when everything is aligned properly.
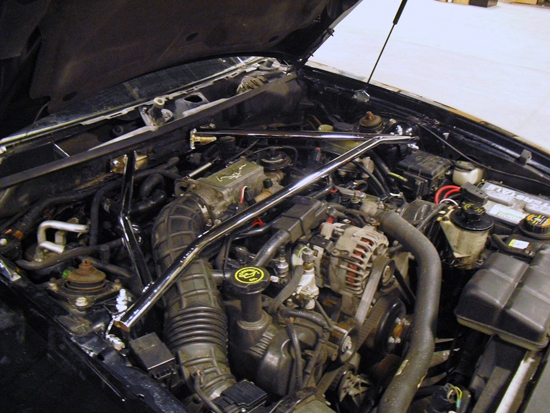
9. Once the brace is fully aligned and tightened, reinstall the rubber firewall molding, plastic cowl panel, and windshield wipers to complete the installation.
Installation instructions provided by Manufacturer
