FREE 1 to 3-Day Delivery on Orders $119+ Details
Best Sellers


How to Install X-Force Varex Axle-Back Exhaust on your Mustang
Installation Time
1 hours
Tools Required
- X-Force Varex Exhaust and included hardware
- Jack Stands
- Jack,
- Chocks,
- 13 mm socket
- 17 mm socket
- 14 mm open end wrench
- socket wrench
- 6 mm Allen key
- torque wrench
- WD-40
- equivalent lubricant
Shop Parts in this Guide
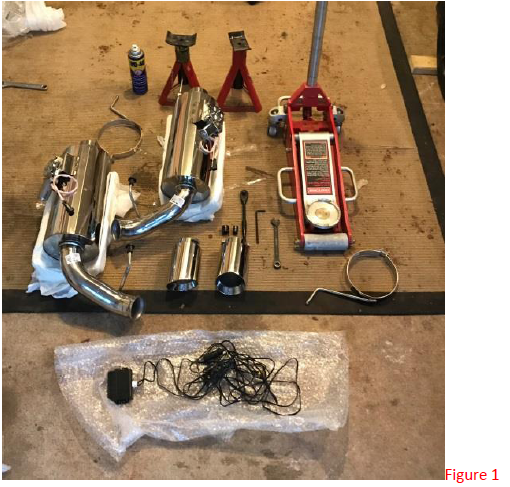
List of Tools: X-Force Varex Exhaust and included hardware, Jack Stands, Jack, Chocks, 13 mm socket, 17 mm socket, 14 mm open end wrench, socket wrench, 6 mm Allen key, torque wrench, and WD-40 or equivalent lubricant (optional)
Note: In order to complete this install, the car must be jacked up from the rear
1. Engage the parking break and ensure that vehicle is in gear, for automatic transmissions put in park
2. Chock the front wheels
3. Jack vehicle from the rear
4. Locate the rear pinch welds, and place jack stands on each side of the vehicle (note that jacking both sides simultaneously is optional although recommended for efficiency)
5. Once the vehicle is safely lifted, you may start the removal process of your stock axle-back mufflers
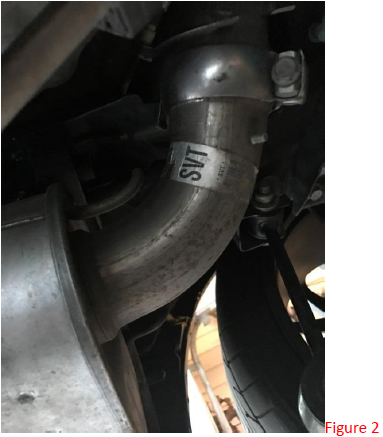
6. Use your 13 mm socket and socket wrench and locate the clamp (Figure 2)
7. Loosen the band clamp until the axle-back muffler is no longer connected to your over-axle exhaust piping. In order to disconnect the two pipes, you may have to jiggle the connected area after loosening the clamp.
8. Once the pipes are disconnected, there are three hanger rods attached to the stock exhaust which must be removed
9. Locate the rear most hanger rod and remove it from the rubber gasket (Figure 3)
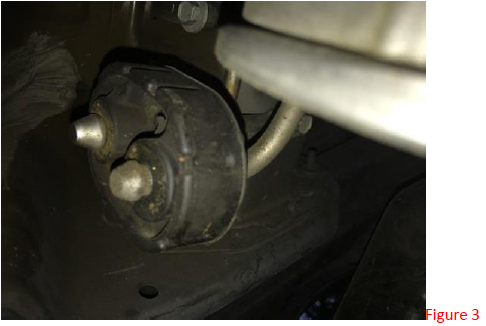
Note: Use WD-40 or a similar lubricant on the hanger rods and rubber gaskets, this will greatly aid in the removal process
Once the rear most hanger rod is removed, the exhaust will be able to hang downward
10. Push the exhaust towards the front of the vehicle in order to free the exhaust from the remaining two hanger rods (Figure 4)
11. Once your stock exhaust has been freed from the remaining hanger rods, safely lower the exhaust down
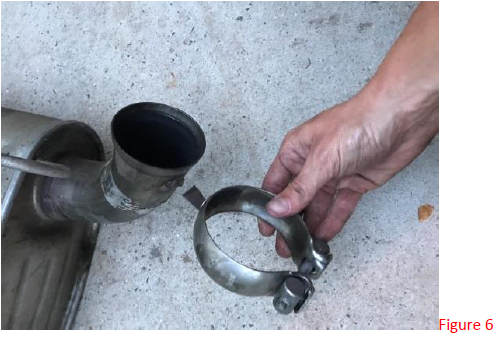
Note: In order to complete the installation of your new X-Force system, you must reuse your factory exhaust clamps. The stock clamps are attached to your stock system with a small weld. In order to remove them, you will need to pull the clamp back, and bend back and forth until it snaps off (Figure 6)
12. Repeat these steps in removal of the other side
13. Once the stock exhaust has been removed, it is time for the installation of your new X-Force Varex System
14. Unlike the stock system, the rear most hanger is not welded to the body, and must be installed
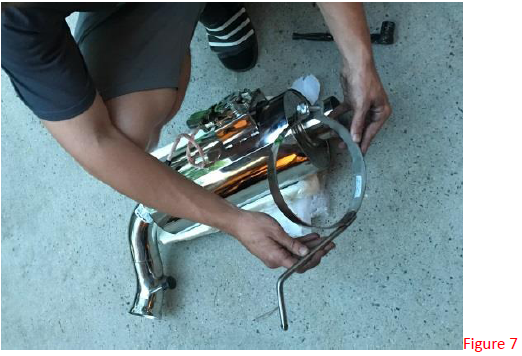
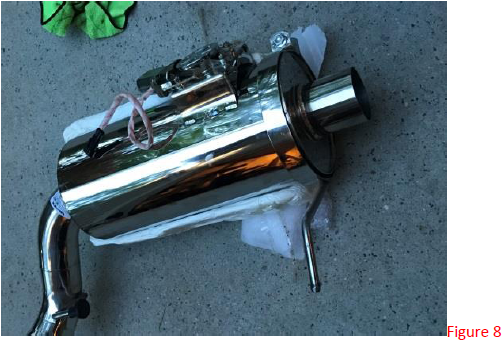
15. Locate the two hangers, labelled with either a right (passenger side) or left (driver side) sticker, and slide them around the body of the exhaust. The clamps will be taut, and do not require tightening until they are installed on the car (Figure 7 & 8)
16. Take your stock exhaust clamps and slide them around the mouth of your axle-back pipe, which connects to the over-axle pipping
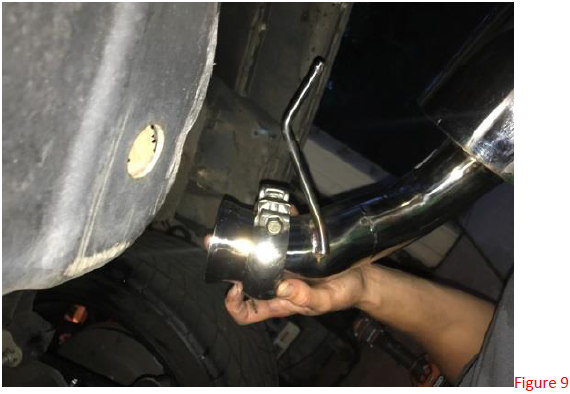
17. Once the stock clamps have been place on your new exhaust system, get the exhaust under the vehicle and slide the front most hanger rod into the rubber grommet, without tightening the exhaust clamp (Figure 10)
Note: The X-Force System only utilizes one hanger on the front most section of the exhaust unit. Your factory hangers can accommodate two hanger rods in the front, although you will on utilize the inner most rubber grommet with the new system
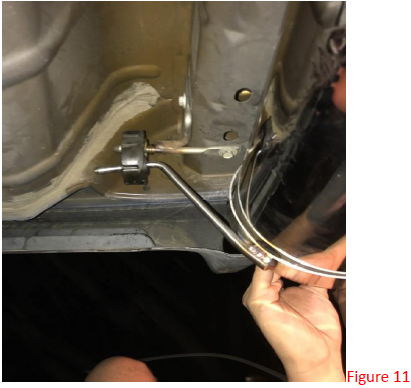
18. Attach the rear most hanger rod next (Figure 11)
19. Once both hanger rods are slid into place, use your 14 mm open end wrench and 17 mm socket to tighten down the rear hanger band (Figure 12)
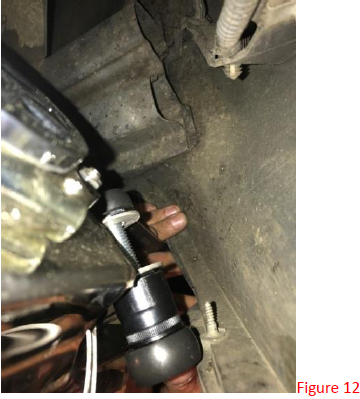
Note: The top bolt (14 mm) must be kept in place while the bottom bolt (17 mm) is tightened. The bolts are located on the outer most part of the car and require working in a tight space. Although it is difficult to tighten, it is key that you leave that band loose until you have adjusted the exhaust with the rear most hanger rod in place.
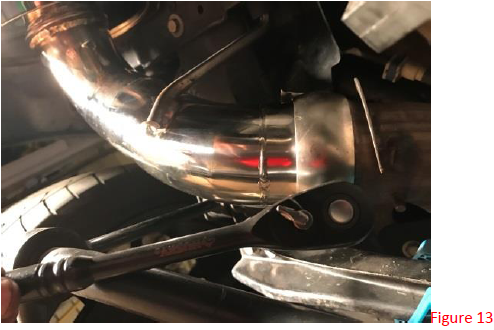
20. You may now tighten the band clamps, tighten the bands clamps to 40 ft/lbs torque (Figure 13)
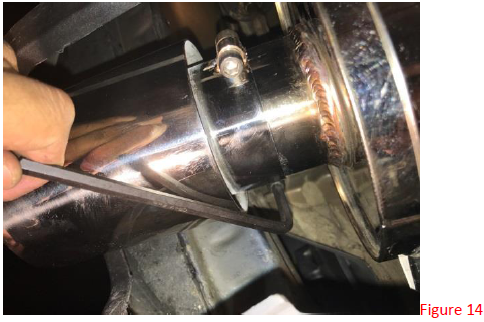
21. Lastly, you must install your 4” exhaust tips using your 6 mm Allen key
22. Facing your rear bumper slide the tips over the exhaust outlets and tighten with the 6mm Allen key (Figure 14)
Once step 22 is complete it is time to wire your mufflers
Wiring Installation
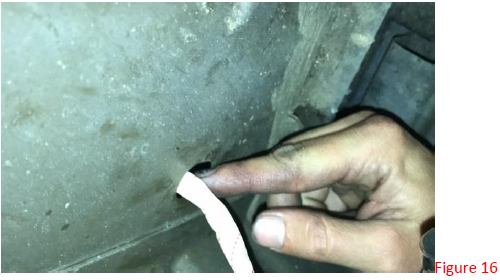
1. Find the frame rubber grommets located directly above the rear most part of your muffler (figure 15)
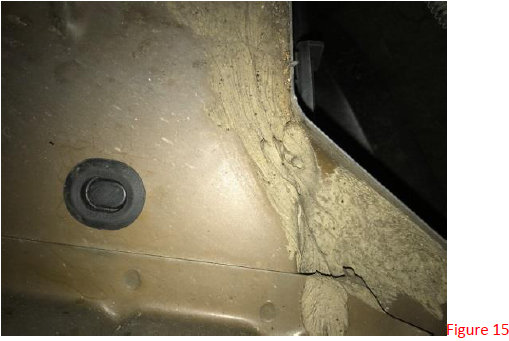
2. Using your finger push the grommet up, this will push the grommet into your trunk, and allow a space for you to thread the 2 pin female port into your trunk.
3. Locate the 2 pin female port, which will be attached to the exhaust actuator, and push it through the frame, where the rubber grommet was removed (Figure 16)
Note: From here on out, the rest of the installation will be done in your trunk and vehicle cabin. You may now safely lower the vehicle.
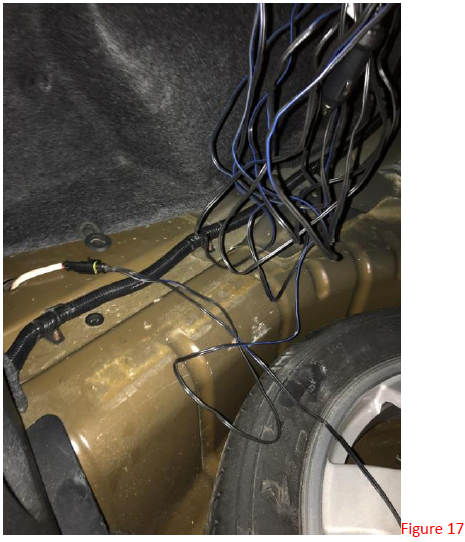
4. Enter the trunk and attach the, now threaded through, 2 pin female port to your 2 pin male ports located on the harness (figure 17)
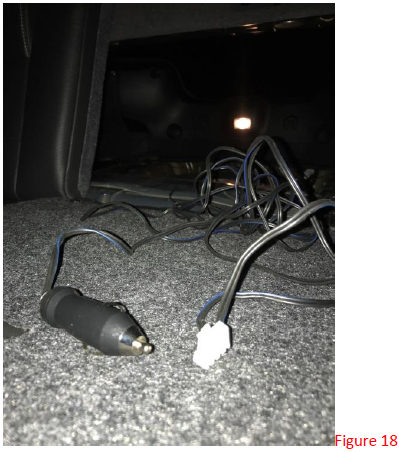
5. Once both sides are connected, lower your back seat and thread the remaining parts of the harness (12 v plug and 4 pin male port) into the cabin (figure 18)
6. Once the rest of the harness has been threaded into the cabin, you can put your back seat back in place. Wire concealing methods are personal preference, and do not affect functionality. Simply ensure that the 12 v plug is plug pulled through enough to reach a proper power source inside the cabin
7. Plug the 4 pin male port into the module, and plug in the 12 v plug (figure 19)

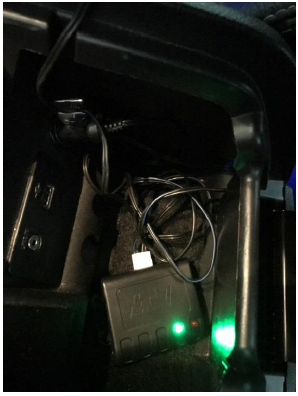
8. If all connections are properly made, the module should show a green dot. Conceal the module and harness in the safety of your console (figure 20)
9. Use your supplied key fobs to open and close the valves. Button A closes the valves and Button B opens them
FINAL PRODUCT