 FREE 1 to 3-Day Delivery on Orders $119+ Details
Best Sellers


BBK Electric Mustang Fuel Pump Kit - ('86-'97 V8) - Installation Instructions
Installation Time
2 hours
Tools Required
- Floor Jack
- Car Ramps or Jack Stands
- 12" Board
- Siphon (if needed) and Bucket
- 1/2" Socket with an Extension 1/2" Drive
- 5/16, 1/4" and 10mm Socket w/Extension 3/8" Drive
- Flathead Screw Driver
- Rubber Hammer
- Wire Splicers
- Flashlight
- WD40 or Other Lubricant
- Goggles
- A Friend
Shop Parts in this Guide
Installation
1. Disconnect the battery.
2. Siphon the fuel out of the gas tank.
3. Using the floor jack (and safe jacking procedures), jack the rear end of the car up from the center of the axle. Next, either support the car with jack stands (beside the tires on the axle), or use car ramps to support the weight of the car.
4. Now you can remove the jack. It will be used later to support the fuel tank.
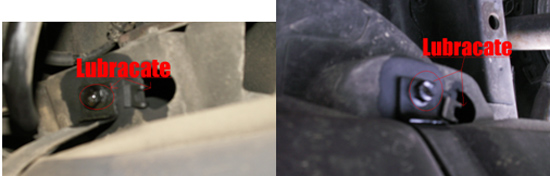
5. Spray the two ½” bolts (see pictures below) on the front side of the gas tank that hold the gas tank straps to the car with WD40 or some other lubricant to help loosen them. This step really helps, as mine were a little rusty and tight all the way off. (You might want to check into putting in a new fuel filter while you are under the car)
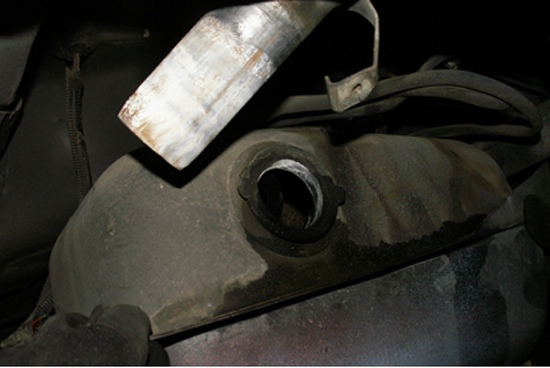
6. While the bolts are soaking, use a 5/16” to undo the 3 bolts that are inside the fuel door and remove the gas cap. Stick a clean rag into the hole to keep dirt out. Use a 10mm to remove the 4 bolts from the underside of the gas cap. These hold a rubber plate to the fill tube. Also, there is a ring that goes around fill tube that is held to the gas tank by a flat head screw. This also needs to be removed.

7. Now that the whole fill tube assembly is loose, it needs to be pulled up and out from the tank filling cavity. There is a rubber grommet where the fill tube enters the gas tank that will not allow the tube to come out of the tank until the tank has been dropped down some.
8. The tank bracket bolts should be lubricated and able to be loosened. If not Squirt some more WD40 and give it some more time to soak. If the bolts are loose DO NOT REMOVE THEM until you have the tank supported with the jack and a board to disperse the weight.
9. Put the jack under the center of the tank, with the board in between the jack and the bottom of the plastic covering of the fuel tank. Once the weight of the tank is supported by the jack and board, you can remove the bracket bolts. I was able to work the board to an angle and allow the straps that hold the tank up to drop out of the way. DO NOT LOWER THE TANK without disconnecting the electrical connection in the middle of the back of the fuel tank.
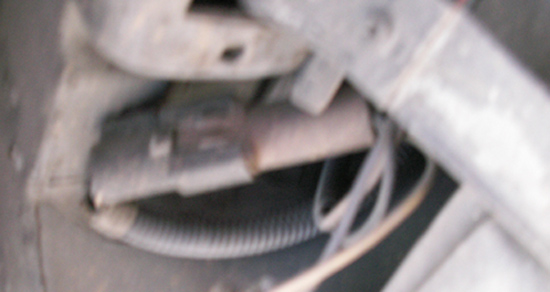
10. Now it is safe to lower the tank so that the fuel lines can be unplugged from the top of the tank and you can work the fill tube out of the tank. Two people are needed here: one to lower the jack while the other keeps the tank steady and unhooks the fuel lines (the driver side wanted to fall faster). The tank was able to drop to the ground without any stress being put on the lines, but this may not be the case for all models.
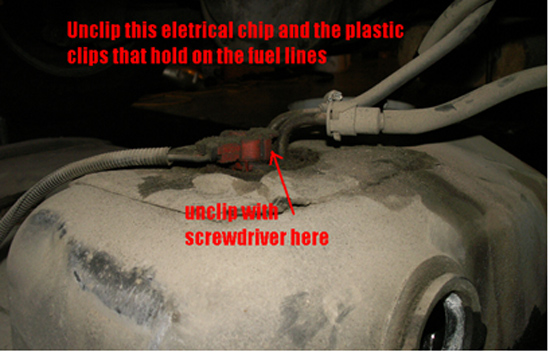
11. The fuel pump assembly is located on part of the passenger side of the tank. (I cleaned this area off good to keep any of the dirt from getting into the tank) The red electrical plug can be removed by using a screwdriver to carefully pry the connector clip open and pulling the plug up with your other hand. The clips that hold the lines onto the metal lines are different. One is a plastic hairpin clip and the other clip has two tabs that need to be depressed. This clip will stay with the metal line. Remove the clips and with a little working the lines should come off from the metal lines.
12. The fuel pump assembly is held in the tank by a big locking ring. It has tabs sticking up on it that are used to loosen it. There are three tabs with the ends bent up that hold the ring to the tank. Using the upwards tabs and the flathead screwdriver, rotate the ring counter clockwise. A hammer and extension can be used if the ring is on tightly,but be careful not to create sparks.With the ring off the fuel pump assembly, it should now be free to come out of the hole. The pump assembly has an offset, so I had to pull it up some then rotate the pump about half a turn to get it out.
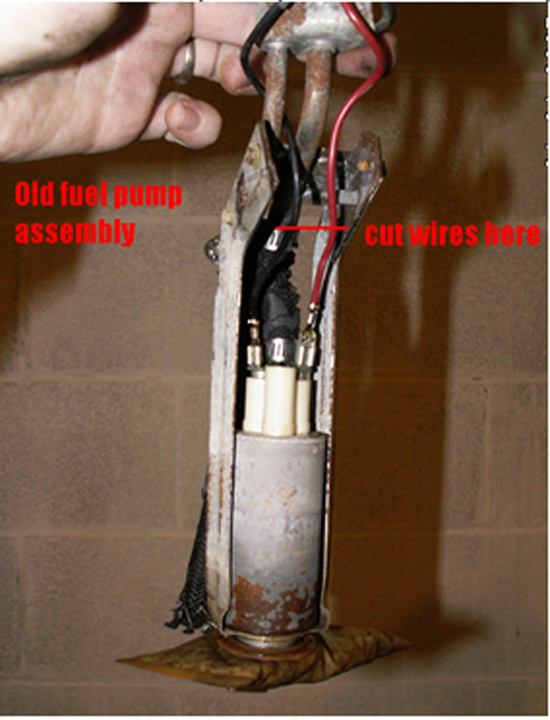
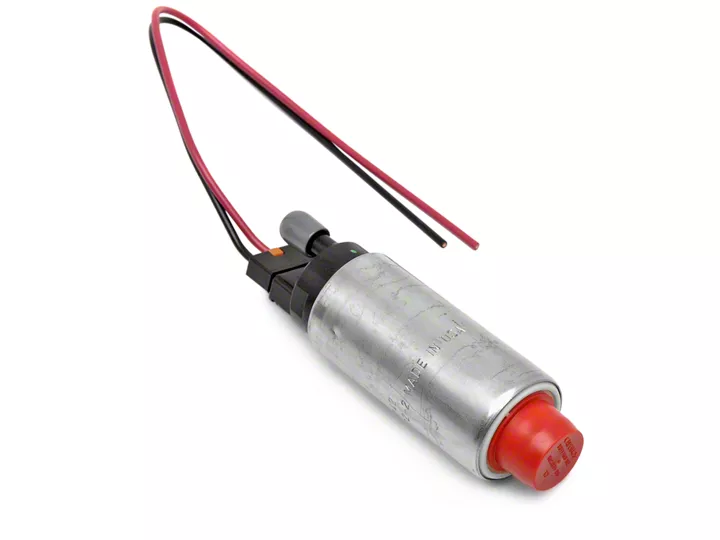
13. With the pump assembly out of the tank, the strainer can be taken off the bottom of the assembly and the four (¼”) bolts can be taken out. This allows for the metal casing around the pump to be taken off. The 2 female ends that run tithe pump can now be disconnected and a flat head screwdriver can be used to disconnect the rubber hose that connects the pump to the metal lines.
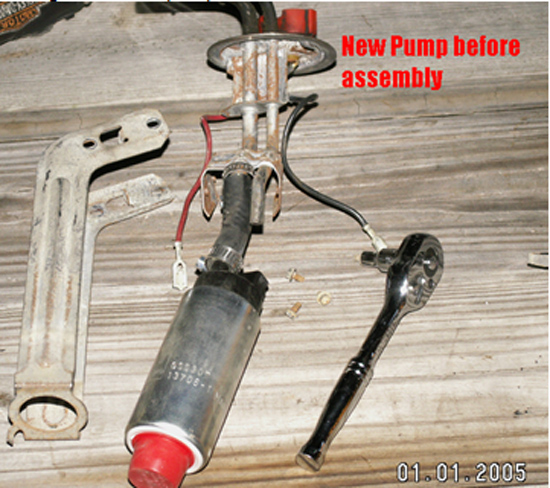
14. The red wire needs to be cut and stripped so that it can be connected (using the supplied wire connectors) to the new red wire, in order to the new fuel pump. Same procedure for the black wire. Next, the supplied hose is connected to the new fuelpump and the metal line by hose clamps. These can be tightened down by using the flat head screwdriver. (My hose fit better when it was cut in half). Plug the new electrical clip into the fuel pump and reassemble the metal bracket around the pump. Now the new gasket and fuel strainer can be placed on to the bottom of the pump.
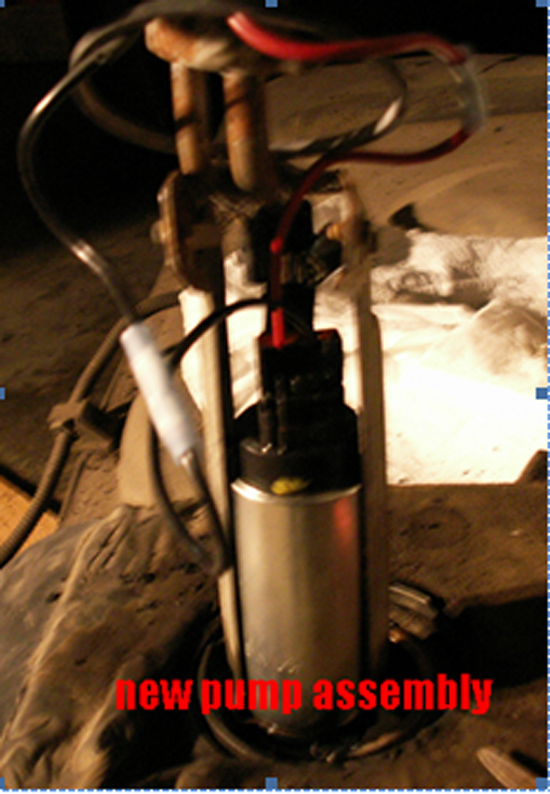
15. Install the pump assembly and tank in the reverse of these directions.
Installation instructions provided by AmericanMuscle customer Derek Proctor 1.12.09
