 FREE 1 to 3-Day Delivery on Orders $119+ Details
Best Sellers


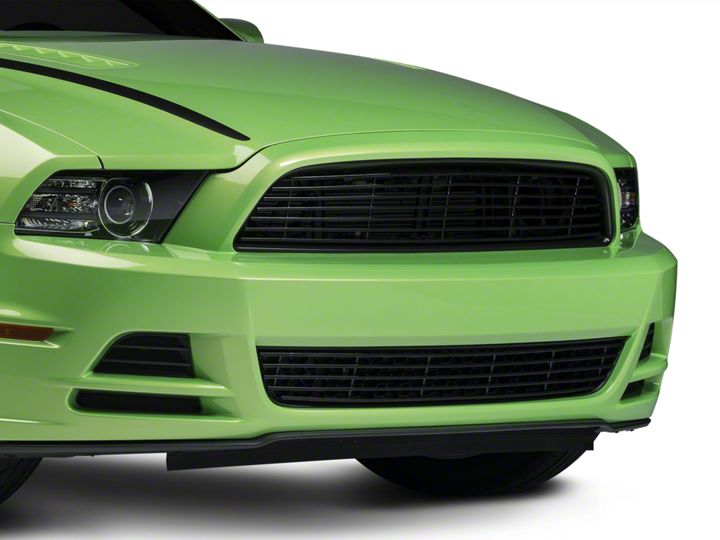
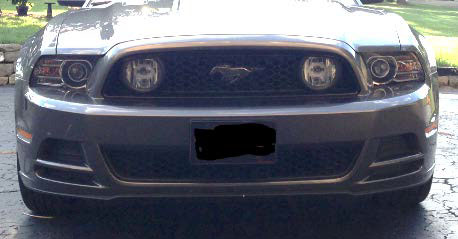
How to Install Billet Replacement Grilles on your 2013 Mustang GT
Installation Time
30 minutes
Tools Required
- Modern Billet Black Retro Grille - Combo (13-14 GT)
- Flat Head Screwdrivers - Small and Medium sizes
- Medium Phillips Head Screwdriver
- 7mm and 8mm Sockets
- Jack and Jack Stands
- Safety Glasses
- Drill and 3/16" Drill Bit
Shop Parts in this Guide
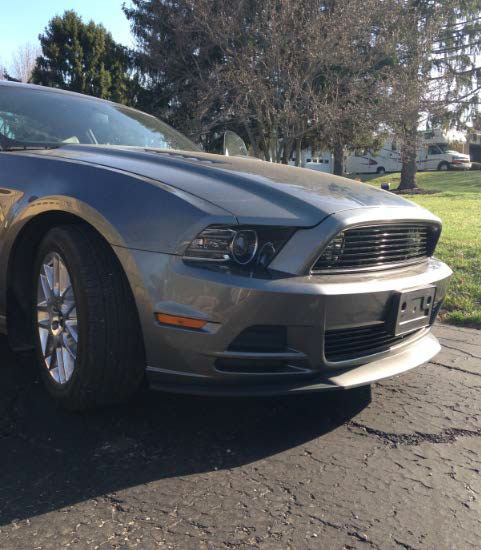
2013 Ford Mustang GT
Tools Required:
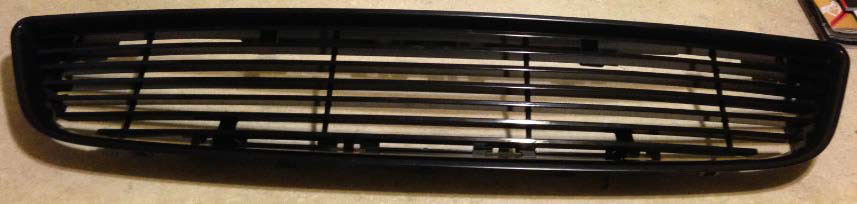
Modern Billet Black Retro Grille - Combo (13-14 GT)
Flathead screw driver – small and medium sizes
Medium Philips head screw driver
7 and 8 mm sockets
Jack and jack stands
Safety glasses
Drill and 3/16” drill bit
Prior to Installation:
Part 1: Bumper removal
Not required but recommended for easier installation. Elevate the car on jack stands, a lift, or ramps for easier access.
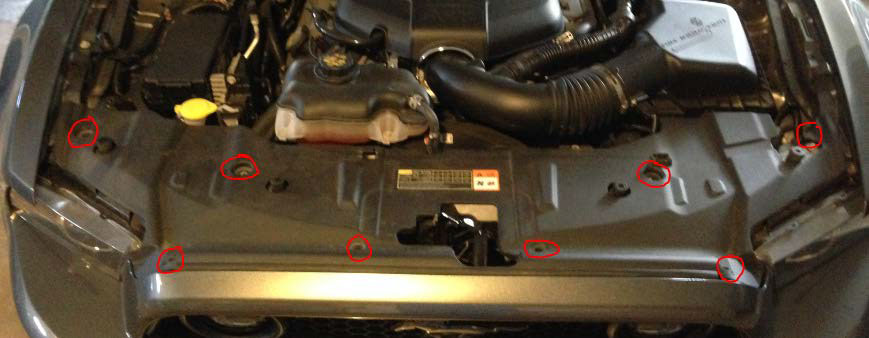
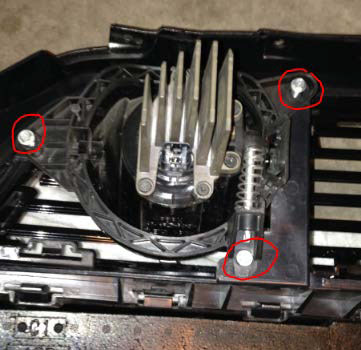
1: Using a small flat head screw driver remove the 8 plastic clips circled below attached to the radiator cover. Then lift off the radiator cover. Set aside for reinstallation.
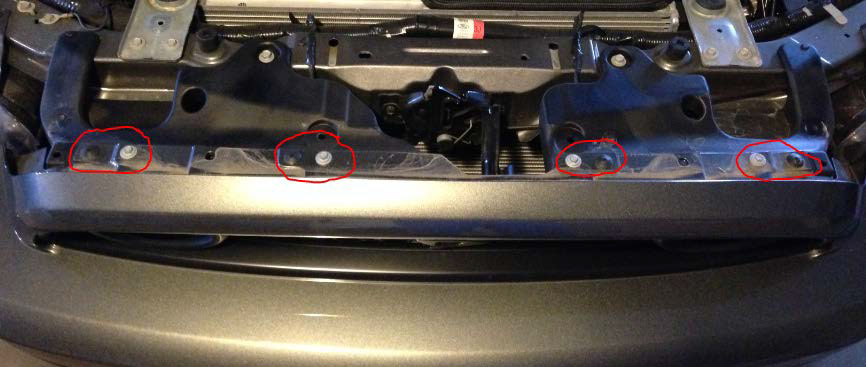
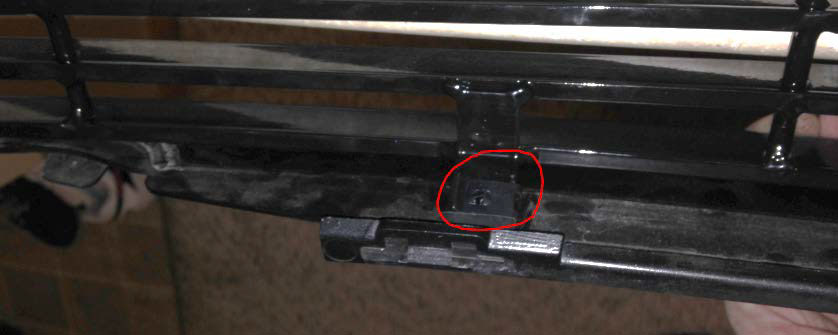
2: Remove the 4-8mm bolts and 4 plastic clips with a Philips screw driver. Each pair is circled below. Set aside for reinstallation.
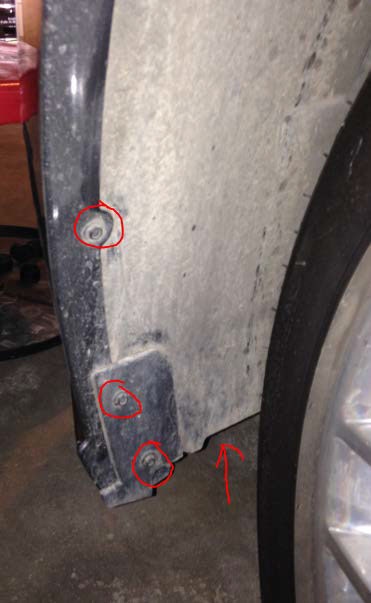
3: On each side, remove the 3-7mm bolts circled below attached to the bumper on the front side of the wheel well. Remove the 1-7mm bolt as shown by the arrow from the bottom of the wheel well closest to the outside.
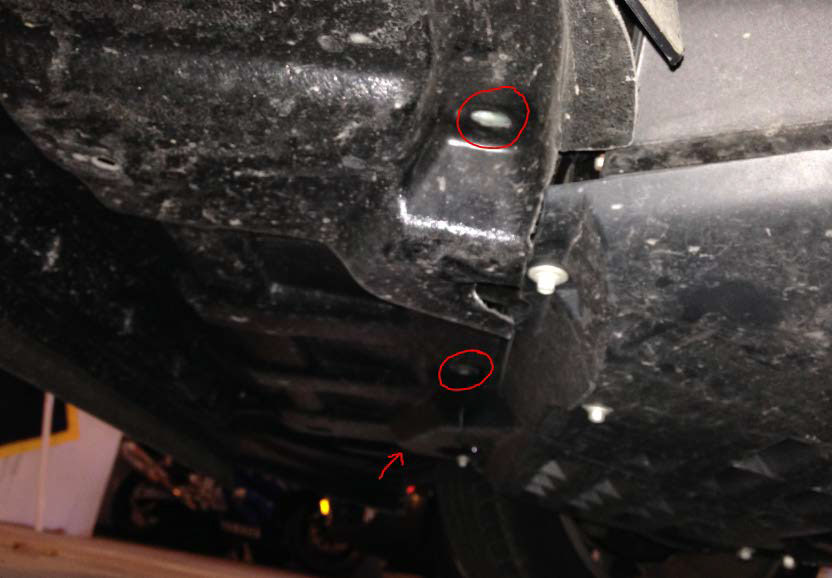
4: Remove the 3-7mm bolts attached the air deflector furthest back near the oil pan cover. 2 are circled below and the remaining is shown by the arrow below.
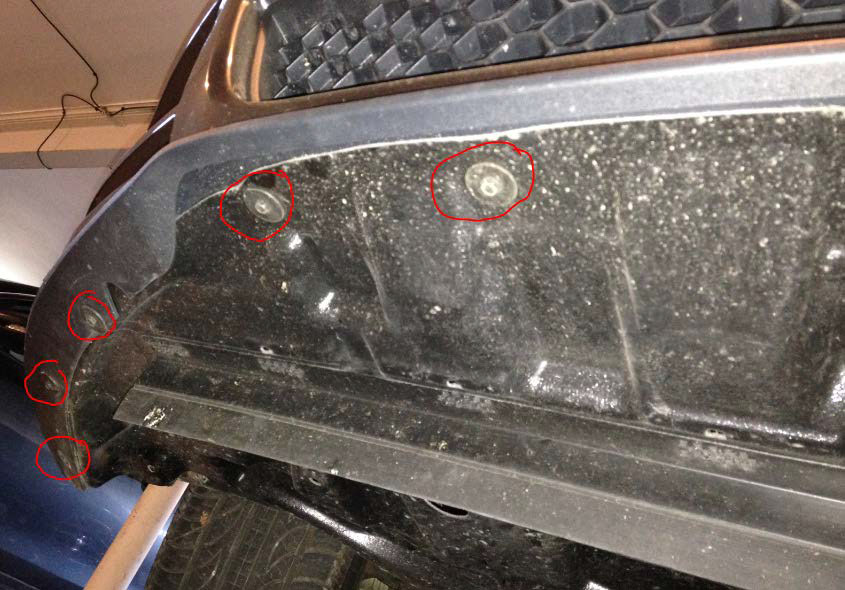
5: Along the front of the factory splitter, remove the 12-7mm bolts holding on the air deflector. 5 are shown circled below – the remaining 7 follow the same pattern along the front of the splitter.
6: Slide the air deflector back and out of the way.
7: Unplug the side marker on each side by turning the plug so the flat side faces down before sliding out.
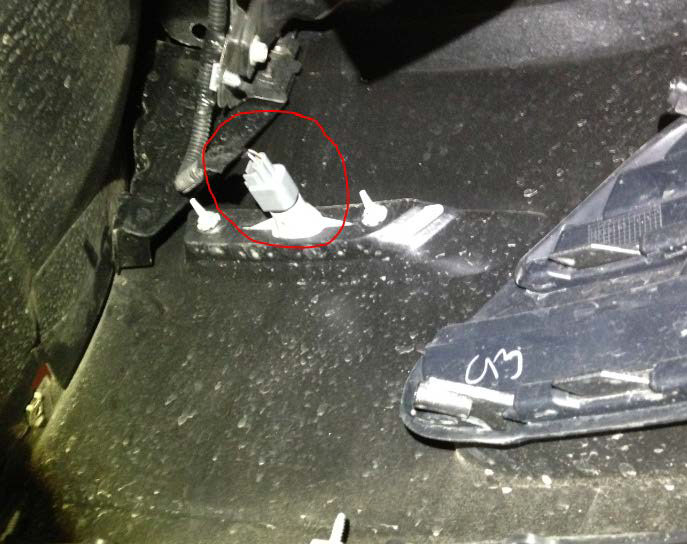
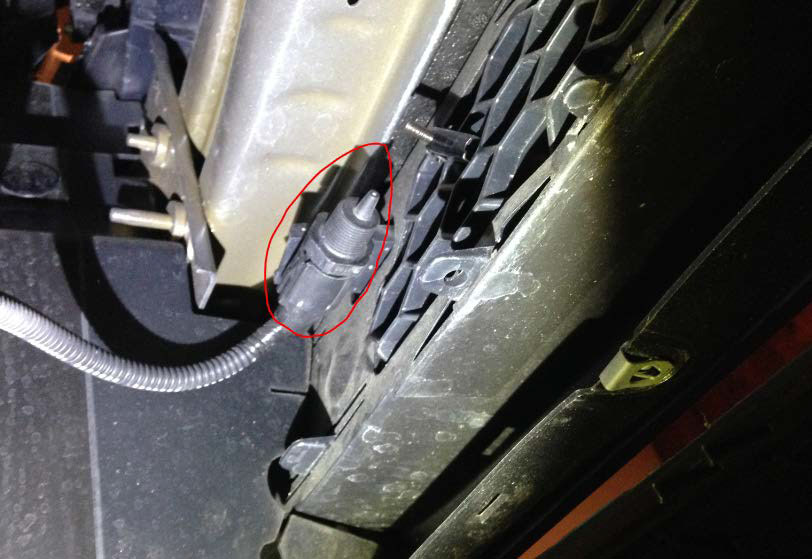
8: Unplug the ambient air thermometer by pulling downward.
9: On each side, pull out on the top half of the bumper to remove the tabs holding it in place.
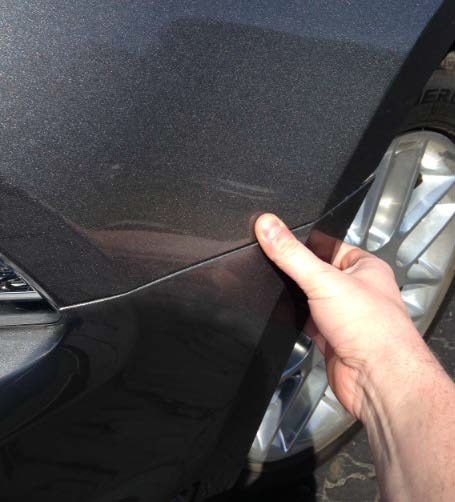
10: Holding the top of the bumper, pull out and down until the bumper is removed.
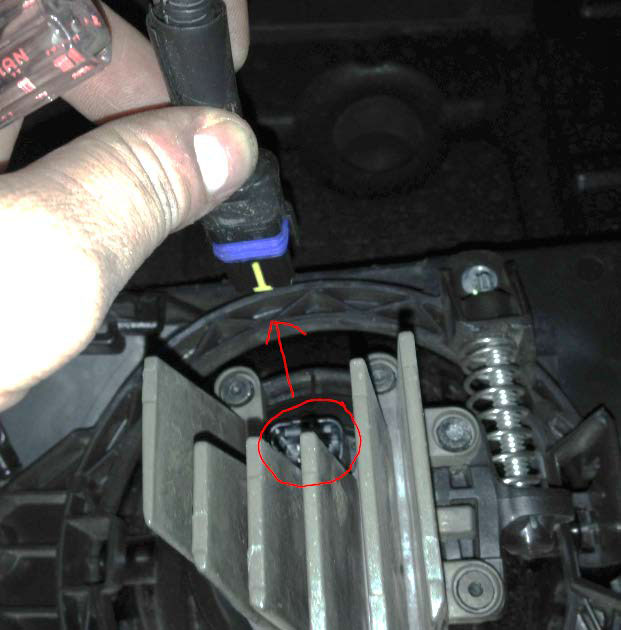
***IF YOU HAVE FOG LIGHTS, be sure to disconnect the wiring before pulling the bumper off completely. I rested the bumper on a stool so that I had both hands free to use a small flat head screw driver to pop the harness from the fog light before removing completely.
11: I recommend laying something soft like towels on the floor to rest the bumper on its’ face.
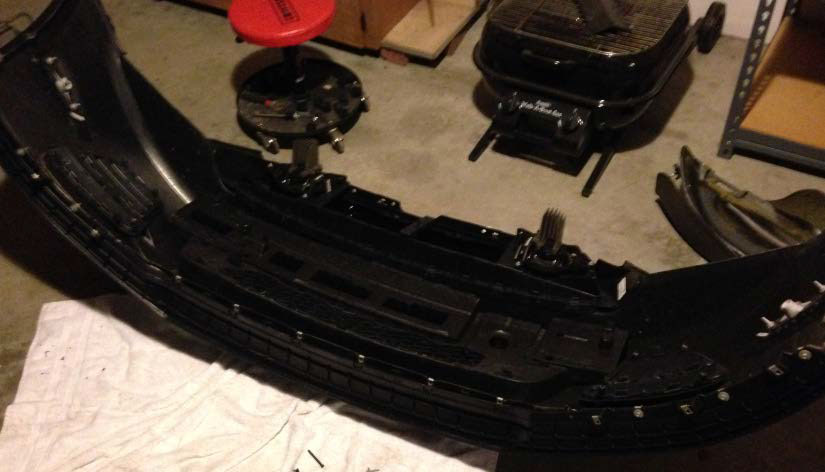
Part 2: Upper Grill Removal and Installation.
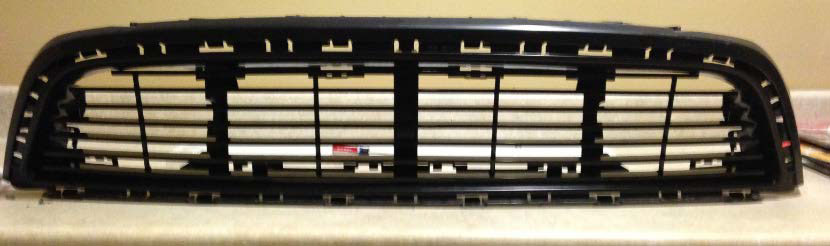
There are 3 parts to the grill that need to be removed which are the outer grill, the inner grill, and the honeycomb. These parts will be reinstalled except for the honeycomb, which will be replaced by the billet grill.
12: Remove the fog lights from the grill by removing the 3 bolts from each fog light. Reinstall with the billet grill is optional depending on personal preference.
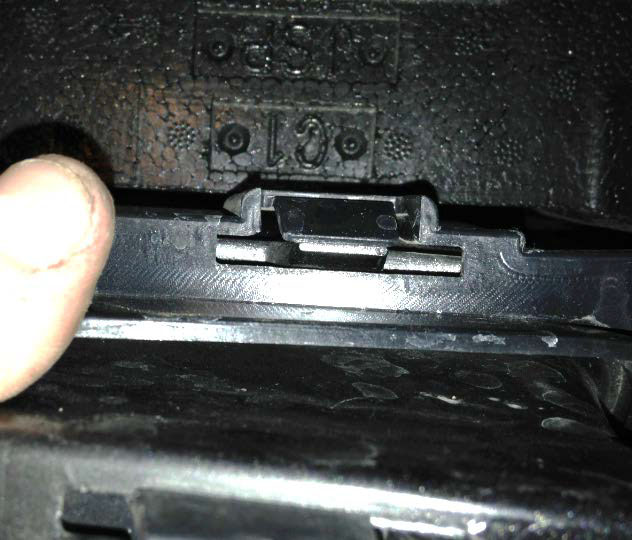
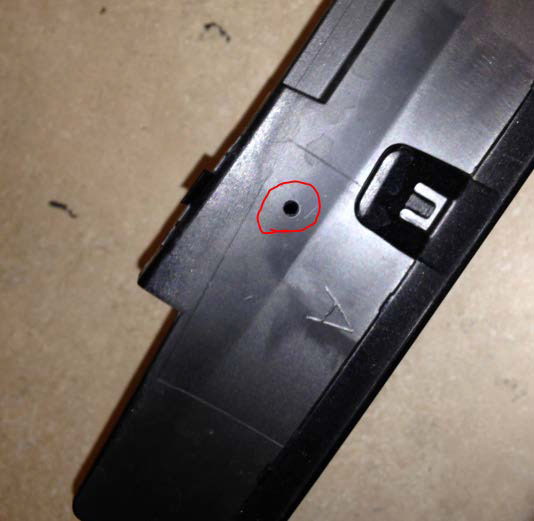
13: Remove the outer grill from the bumper by releasing 13 clips – 6 on the bottom, 5 on the top and 2 on the sides. Use a flat head screw driver to release the clip and the grill will slide out the back. Tabs for this step look like the one below.
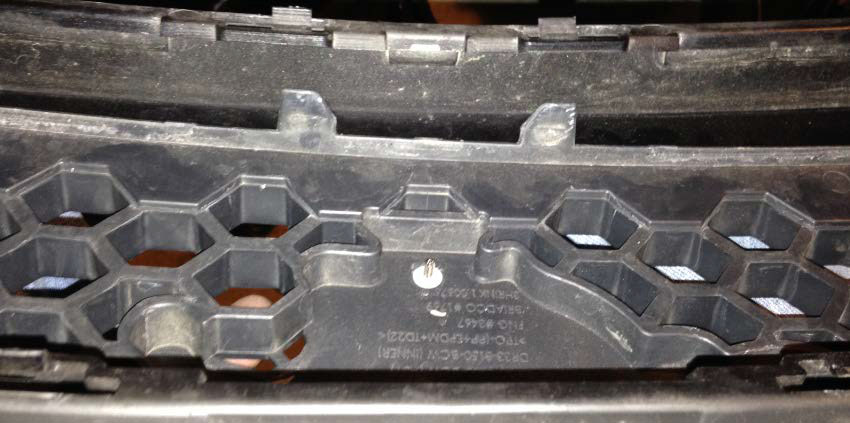
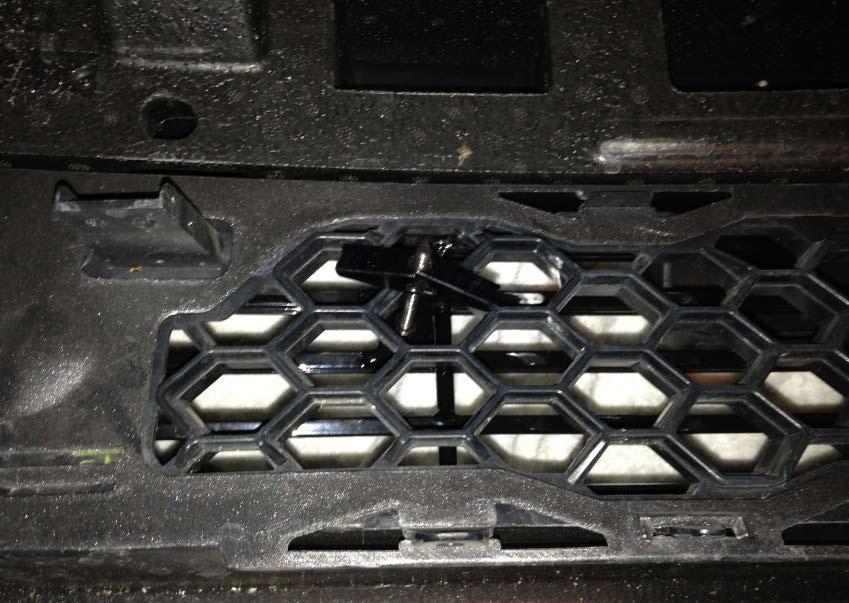
14: Remove the inner grill from the outer grill by releasing 12 clips – 5 on the bottom, 5 on the top and 2 on the sides. Tabs for this step look like the ones below.

15: Remove the honeycomb from the inner grill by releasing 12 clips – 4 on the bottom, 4 on the top and 4 on the sides. These are the only clips remaining.
16: Take the intermediate grill and center the new upper billet grill inside. Once centered, take the 3/16” drill bit and drill 2 holes on the bottom of the intermediate grill lining up with the tabs on the billet grill.
17: Install the U clips on the bottom end of the grill and attach the billet grill to the intermediate grill using the phillips screws.
18: Flip the assembly over and repeat steps 16 and 17 for the 2 upper tabs of the billet grill.
19: Reinstall the intermediate grill in the outer grill by pressing the grill back into the tabs. Lightly tap the grill in place until all tabs are reconnected.
20: Reinstall the entire assembly into the bumper. Lightly tap the grill in place until all tabs are reconnected.

21: If desired, reinstall the fog lights using the 3 bolts for each light removed in step 12.
Part 3: Lower grill installation.
22: Overlay the lower billet grill on the outside of the honeycomb.
23: Install the 2 supplied bolts from the outside of the grill. Attach to the carriage bolts with the flat side facing the front of the bumper (U facing outward). Tighten the bolts with a phillips screw driver but be careful not to over tighten.
Part 4: Reinstallation
24: Reinstall the bumper to the car. To complete, follow steps 1-11 in Part 1 in reverse order.
ENJOY!!!
Attached are various pics of fog lights installed for those trying to decide whether or not to install with the new grill.

Installation Instructions Written by AmericanMuscle Customer Mike Marcantonio 4/6/2014
