 FREE 1 to 3-Day Delivery on Orders $149+ Details
Steeda IRS Differential Cover Brace ('99-'04 Cobra) - Installation Instructions
Installation
1. Raise the entire vehicle. If working from the floor, secure-with jack stands.
2. Remove both sides of the exhaust from the cat back. Each side is held in by 3 rubber hangers and bolted to the flange of the mid section of the exhaust system.
3. Using a floor jack underneath the differential, gently support the weight of the rear end assembly. Do not raise the vehicle any higher.
4. Remove the two rear differential mounting bolts. Next, remove the two nuts and bolts mounting the front of the differential to the #4 crossmember.
5. Remove the #4 crossmember.
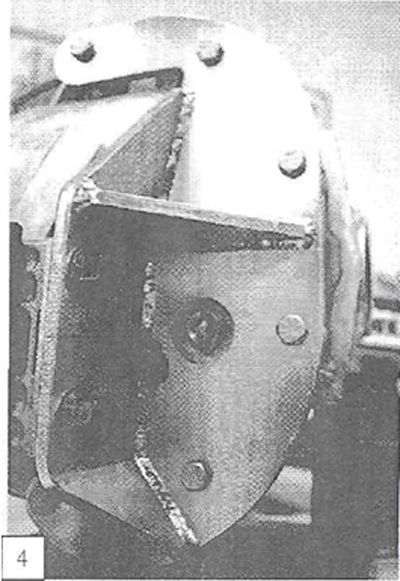
6. Remove the two upper and lower center differential cover bolts as well as the four bolts on the passenger side of the cover. See Pic.4 for the referenced bolts locations.
7. Place the Cover Brace (A.) in position. It will be necessary to move the differential around to maneuver the brace into position. Once in position, place the Rear Mount Spacer between the brace and the differential cover. Slide the two new 12mm bolts through the brace, spacer, and the differential holes.Do not screw them into the sub frame isolator at this time.
8. Bolt the brace to the differential with supplied 5/16th bolts and lock washers. Start with the bolts on the top and work to your way around. You will need to adjust the position of the differential in order to install all 6 bolts. Start and run down all bolts by hand to avoid cross threading. Then, torque the bolts to 24 Ib-ft
9. With the mounting bolts at the proper torque, start and run down the 12mm rear mounting bolts by hand. Torque the mounting bolts to 70 Ib-ft.
10. Remount the front of the differential by reusing the two nuts and bolts removed in Step 4. Then replace the crossmember and the exhaust system. Before tightening the exhaust flange it may be necessary to hold the passenger side exhaust down and away from the brace so, they do not touch. Tightening the flange while holding it away will help to eliminate any rattling.
11. Check to insure that all bolts are fastened securely. Carefully lower the vehicle. It is important to take a slow speed test drive before normal driving is resumed.
Installation instructions provided by Steeda
Related Guides
-
Installation
-
Installation
-
Installation

