 FREE 1 to 3-Day Delivery on Orders $119+ Details
Best Sellers


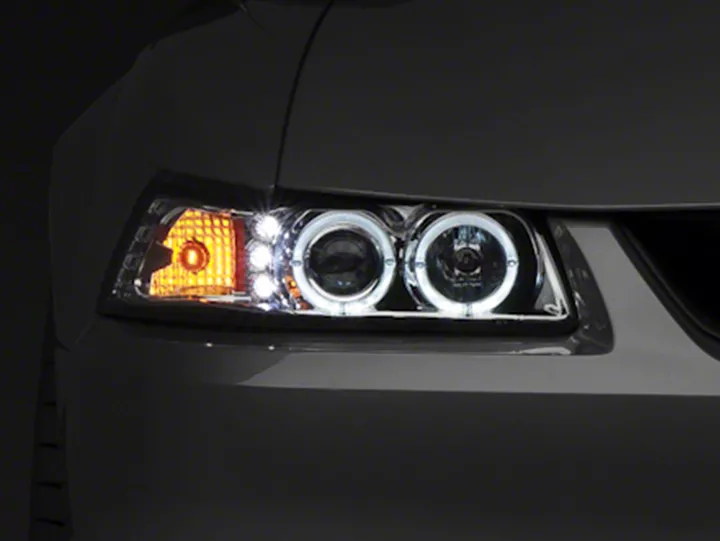
Dual Mustang Halo Projector Headlights - LED ('99-'04) - Installation Instructions
Installation Time
2 hours
Tools Required
- Wire Cutter/Stripper
- Wire Crimper or Pliers
- Electrical Tape
- 14 or 16 Gauge Wire
- Wire Connectors
- Phillips Head Screw Driver
Shop Parts in this Guide
Installation
tallation
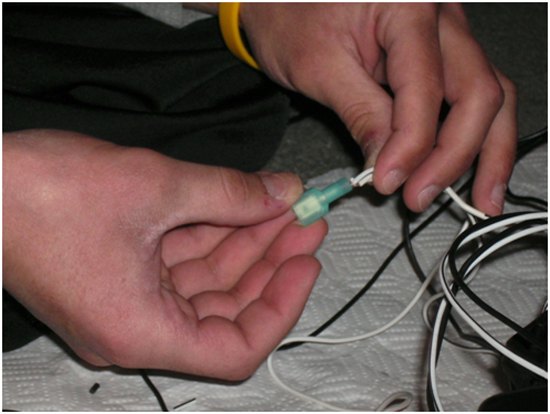
1. The first thing you need to do is bundle all of the white wires and all of the black wires into connecters. The connecters used can be found at any auto parts store. They come in a pack with male and female ends, and will allow you to easily unplug the wires if needed. You can bundle the wires into either the male or female ends, just make sure that you do them the same.
2. Then connect about 6” of either 14 or 16 gauge wire to one of the connecters, using the opposite end of what you used to bundle the black and white wires.
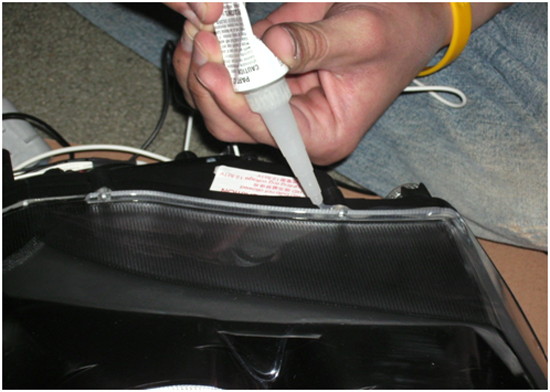
3. Now you need to seal the light housing to prevent moisture from seeping in. Use a clear silicone sealant to fill the gap where the clear plastic cover meets the light housing. You just need to apply a bead of silicone into the gap.
4. It’s a good idea to only do half of the light at a time. Start by sealing the tops of both lights and allow them to dry for about 30 to 45 Mins, or until the silicone is dry to the touch.
5. Then turn the lights over and seal the bottom half. Be careful not to get the silicone on the clear plastic on the front of the lights.
6. Now you can remove the stock headlights from the car. With the hood open pull up on the two retainer pins to remove the lights.
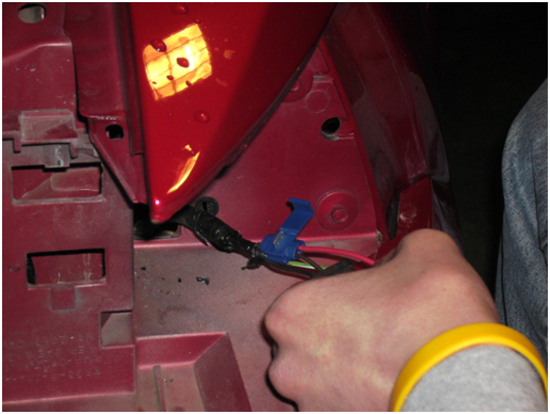
7. With the lights loose, unplug the light wires from the light housing. In order to protect your car’s finish from scratches, you may want to put a towel or rag over the bumper.
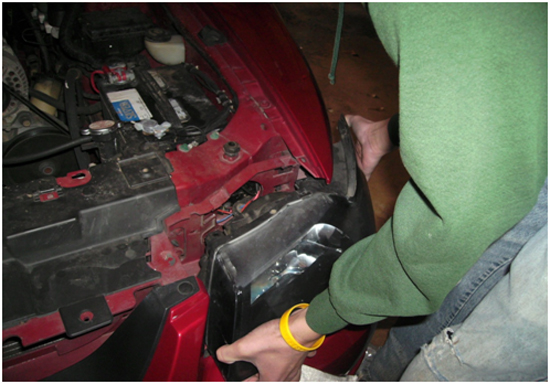
8. At this point, you will need to either disconnect the battery or remove the fuses for the headlights.
9. Now strip the plastic tubing that bundles the wires for the running lights. This will be the wire that was connected to the amber lights.
10. Using the connecters provided splice the 14 or 16 gauge wire into the middle, brown wire and another wire into the black wire. This is done by sliding the provided connecter over the wire and then inserting the new wire into the connecter, then using pliers to crimp the connecter. (NOTE: This will be done on the wire that connects to the amber lights not the headlights.)
11. Connect the white wires from the new lights to the wire going to the brown wire and the black wires to the black wire.
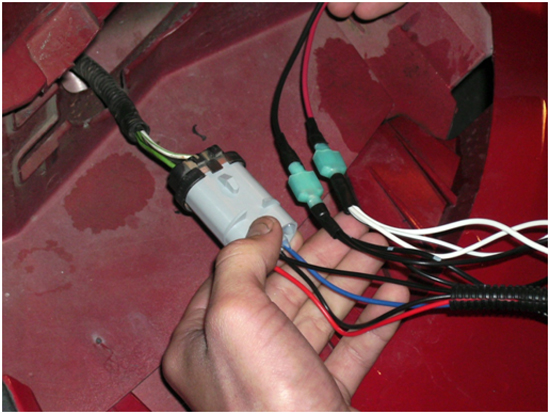
12. Now plug the headlight and amber light connecters into the new light housing. You will need to use the amber light bulb from the stock light housing or you can just replace the amber lights bulbs. If they haven’t been replaced recently, it’s a good idea to replace the amber bulbs at this time.
13. Now the new light housing can be installed. Make sure all of the connections are secure and out of the way of the retainer pins. Make sure the housing is properly in place and re-insert the retainer pins.
14. Now reconnect the battery or fuses and test the lights. The halo lights and L.E.D. lights should come on with the park lights, if they don’t come on, then you will need to check to be sure that all of your connecters are secure.
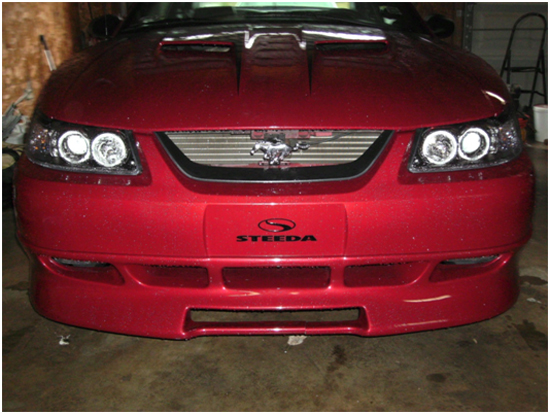
15. Enjoy! These lights will definitely make your Stang stand out from the rest. I hope you find this guide helpful in the installation of your new Halo projector headlights.
Installation instructions provided by AmericanMuscle customer Levi Hallman 3.15.09
Best Sellers
Related Guides
-
Installation
-
Installation
-
Installation
