 FREE 1 to 3-Day Delivery on Orders $119+ Details
Best Sellers


Stack Racing Mustang Styling Bar ('99-'04 Convertible) - Installation Instructions
Installation Time
4 hours
Tools Required
- Electric Drill
- 1 Hole Saw
- 1 Hole Saw
- 1/8 and 3/4 Drill Bits
- Rivet Gun
- Trim Removal Tool
- Ratchet and Extensions
- 7mm and 10mm Sockets
- 1/4 Allen Wrench
- T-50 Torx Bit
- Center Punch
- Putty Knife
Installation
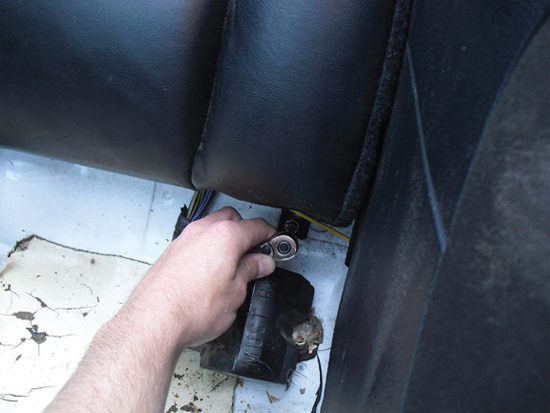
1. Use a flat-headed screwdriver to push in the retaining clips that hold the lower rear seat in place. Remove the seat from the vehicle.

2. Remove the two 10mm bolts holding the upper rear seat in place. Once removed, pull up on the seat to release the upper clips holding the seat to the vehicle.
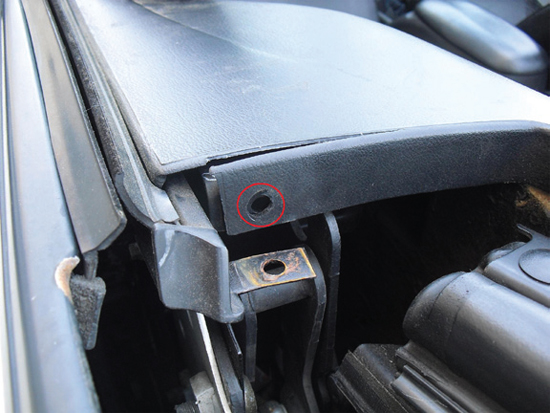
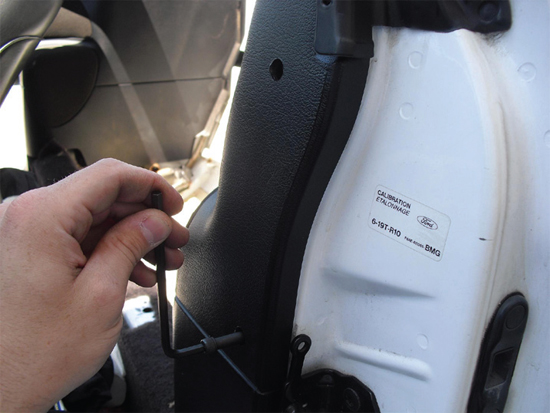
3. Using a trim removal tool, remove the upper trim panel pin and the two rear trim panel pins that were hidden by the rear seat.
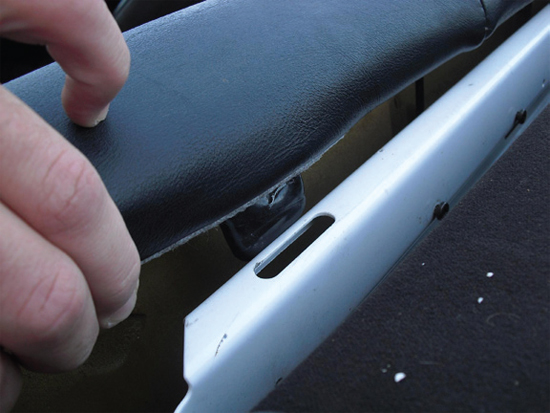
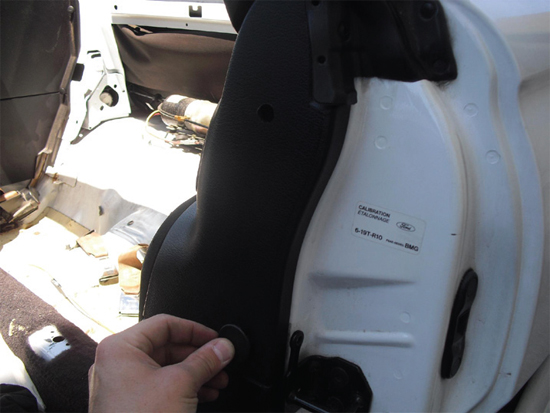
4. Remove the two pins holding the rubber seal to the trim panel, as well as the upper speaker grille using a flat-headed screwdriver to carefully pry the grille away. Use a torx head bit to remove the lower part of the seatbelt from the vehicle. Remove the rocker sill cover by carefully pulling upwards and removing from the vehicle. The interior panel should be free now and you will be able to remove it from the vehicle. Repeat Steps 3 &4 above to remove trim panel from opposite side.
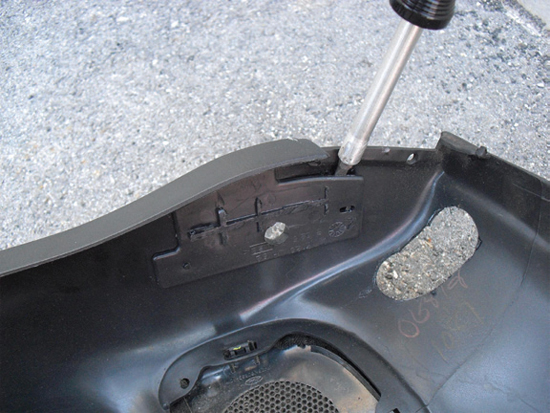
5. Using the provided template shown below, drill 1/8” pilot holes through each of the cross sections. Once the pilot holes are drilled through the panel, follow with a 1” hole saw through the outside of the panel.
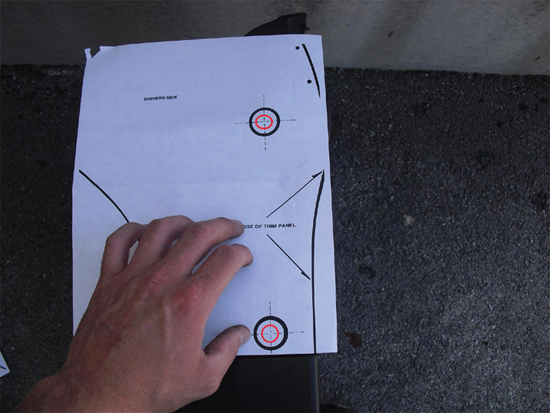
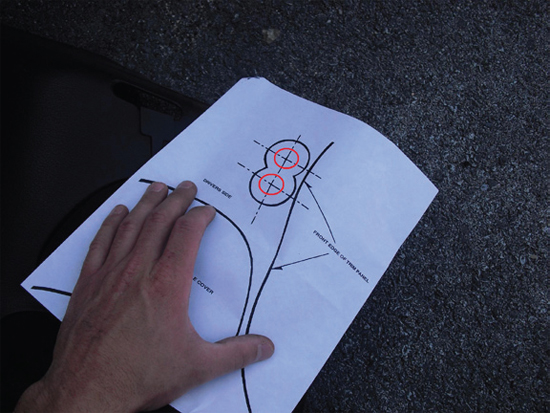
6. Using the provided template shown below, drill 1/8” pilot holes through each of the cross sections. Once the pilot holes are drilled through the panel, follow with a 1 ¾” hole saw through the outside of the panel. These holes will intersect and you may file them to make one uniform oval as shown if you choose. Once all holes are drilled, pry upper trim mounting clip from the panel as it is no longer needed.
7. Remove the rear speakers from the vehicle by removing the two 7mm bolts that hold them to the body of the car.
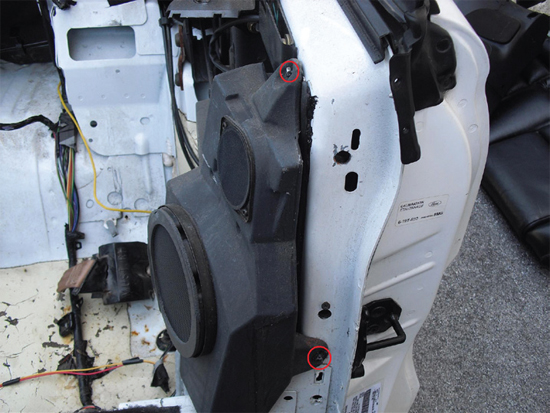
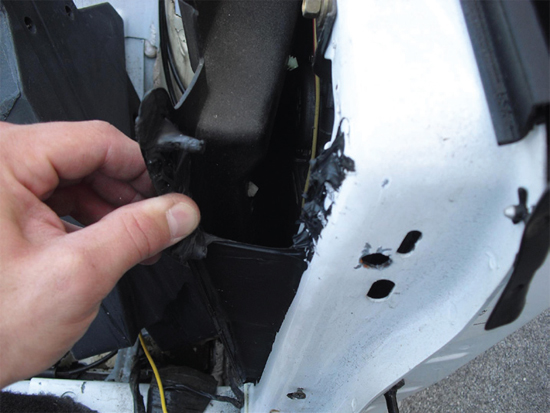
8. Loosen the inner quarter panel covers by prying them away from the body with a putty knife. They are held on from the factory with black RTV sealant. Do not scrape the sealant from the panels as it will be used to re-seal the panels when the installation is complete.
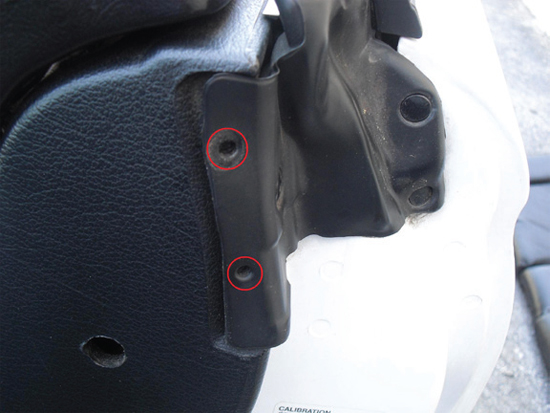
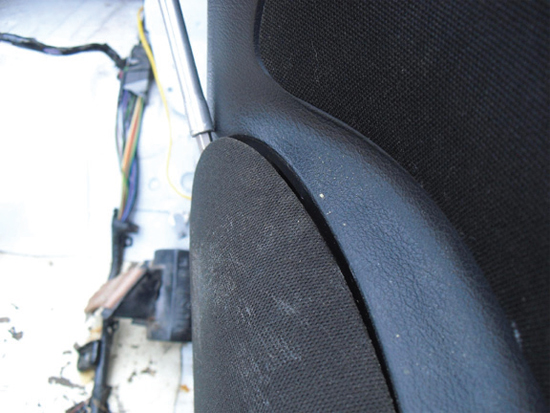
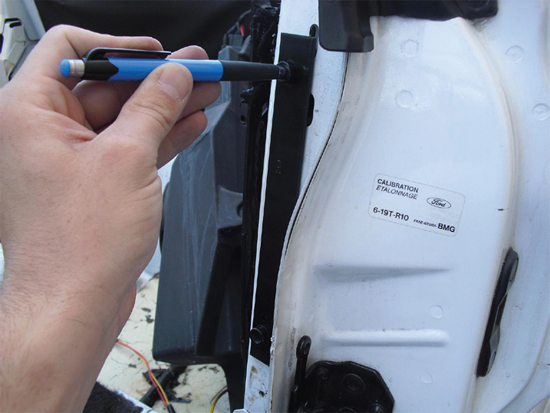
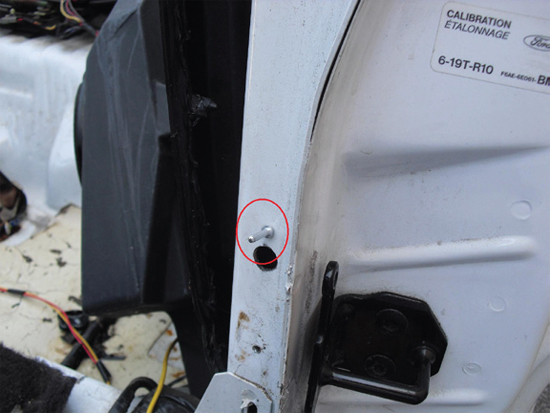
9. There are two brackets included with your styling bar, one marked L for Left and one marked R for Right. The crimp nuts are off-set on each bracket so you will need to use the opposite side bracket on each side of the vehicle to mark the holes that need to be drilled through the body. This will ensure that when installed on the proper sides the holes line up as they should. Using the bracket marked “R”, line up the bracket with the small hole on the lower portion of the bracket matching up with the unused hole in the body of the car. Make sure that the bracket is running parallel to the B-pillar of the car as shown. When you have the correct placement, use a center punch to mark the body of the vehicle through the holes of the two criminates. Drill 1/8” pilot holes where you have marked, enlarging them to 3/4”.
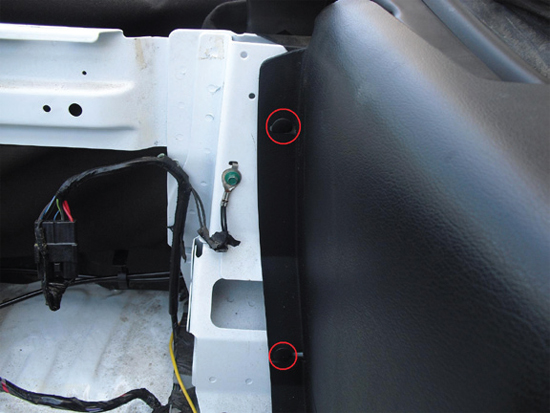
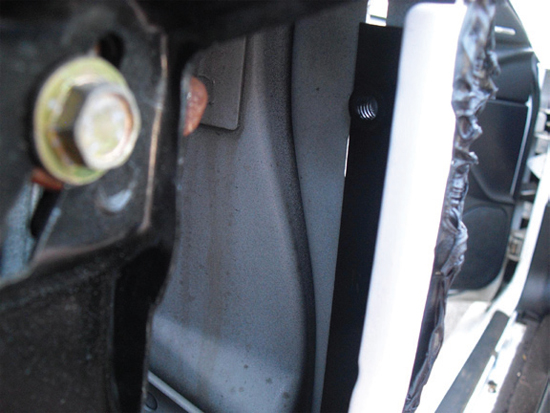
10. Place the brackets on the inside of the B pillars on the correct side of the vehicle, and use the supplied rivets to secure them to the body. Make sure that the brackets are flat against the inside of the pillar and that the crimp nuts are facing the rear of the vehicle as shown, or styling bar will not tighten properly once installed in vehicle.
11. Once the brackets are properly secured to the body of the vehicle, re-install the inner quarter panel trim and out trim panel by reversing Steps 3 & 4 above.
12. Use a flat-headed screwdriver to push in the retaining clips that hold the lower rear seat in place. Remove the seat from the vehicle.
Installation instructions provided by Stack Racing
Best Sellers
Related Guides
-
Installation
-
Installation
-
Installation
