Talk to a Sales Tech
1-877-887-1105
M-F 8:30A-11P, Sat-Sun 8:30A-9P

Project Foxbody - an AmericanMuscle Mustang Build

A Foxbody Mustang isn't usually the first pony someone picks to dedicate a fully flushed out build to, but at AmericanMuscle we don't shy from experimentation. In this build, we take a junkyard ready Fox and bring it back in full Cobra glory.

1993-gt-foxbody-project-car-build-completed.JPG

Table of Contents
  1. Stage 1 Through 4 Build Videos
  2. Project Foxbody - Stage 1
  3. Project Foxbody Before Restoration
  4. Stage 1 Parts List
  5. Project Foxbody - Stage 2
  6. Stage 2 Parts List
  7. Project Foxbody - Stage 3
  8. Stage 3 Build Photos
  9. Stage 3 Parts List
  10. Project Foxbody - Stage 4
  11. Stage 4 Parts List
Shop Foxbody Mustang Parts

Restoring an old classic is both a fun process, a frustrating endeavor, and a rewarding experience. Make sure you have all the parts you need before starting your restoration.

Foxbody Parts

Project Foxbody - Stage 1

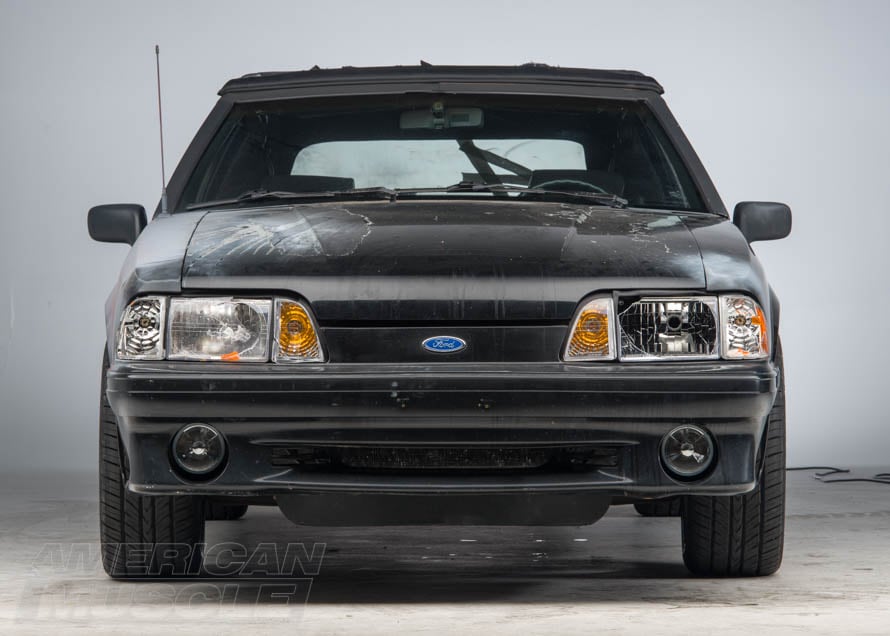
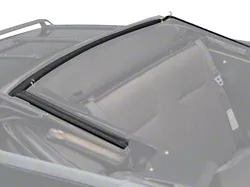
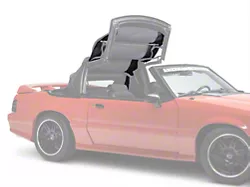
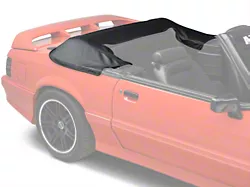
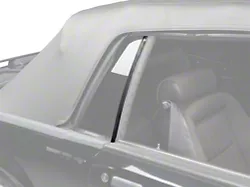
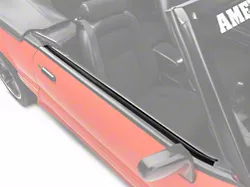
All you have to do is take a look at the pictures below to see where this project started. To say this car needed some work is a severe understatement. On the plus side, we got to make this Foxbody one to remember and save it from a junkyard fate. Everything there is on this car needed work. Bodywork, paint, interior, headlights, and what was left of the convertible top just to name a few.

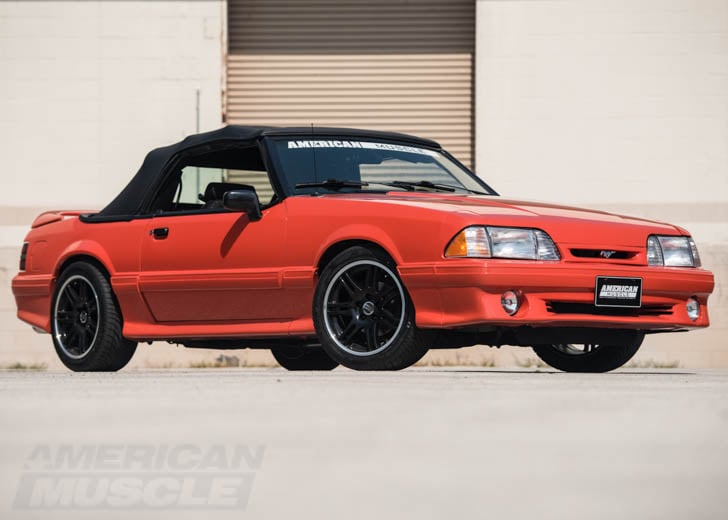
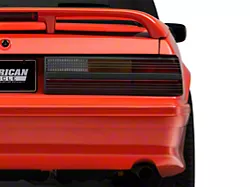
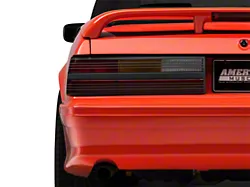
So what were our initial thoughts going into this build? Needless to say, a simple restoration was out of the question. This Foxbody build needed something more, and so we decided to recreate a Cobra Foxbody. The first of its kind from SVT, the Cobra Foxbody was a set the precedent for performance. At least in terms of an off the showroom setup. As you may already know, however, the SVT Cobra Fox was never offered as a convertible. Why not make our very own convertible Cobra, a configuration never offered from Ford? 

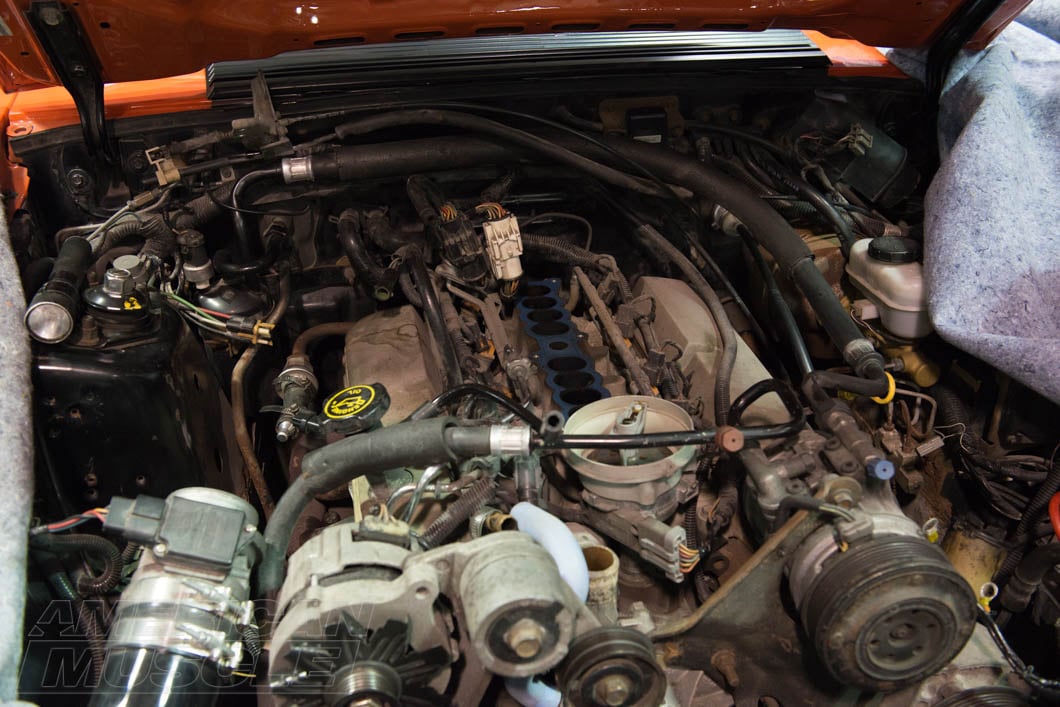
Before we could install any of the performance parts we needed, we had a laundry list of basic maintenance to complete. With any 100,000+ mile car, especially a car that's over twenty years old, a drivetrain and body refresh is just about mandatory. That was the goal for Stage 1 (stages 2 through 4 is where the real fun is). Time to get the old GT running properly and a new paint job because clearly, the body was in rough shape.

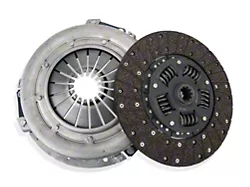
Since the plan was to pump Cobra power through this old girl, a factory replacement clutch wasn't going to cut it. For this build, we decided on an Exedy Mach 350 stage 1 clutch alongside the SR Performance clutch adjuster kit. This clutch is designed to handle up to 430 ft-lbs of torque. The clutch adjuster replaces the gummed up factory cable with an adjustable one as well as the plastic quadrant in lieu of a brand new billet aluminum piece. Basically, we strengthened our overall shifting experience.

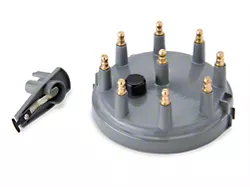
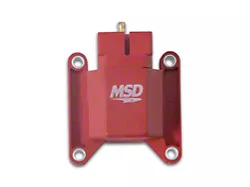
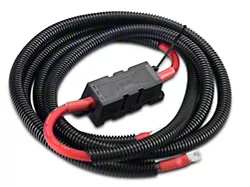
The 302 engine was running extremely roughly, misfiring all over the place and by extension down on power. A serious tuneup was in order. A set of iridium plugs, new wires, a brand new distributor cap and rotor, and a brand new serpentine belt. Justin points it out in the video, but it's worth repeating here. We highly recommend using a little anti-seize on all your spark plug threads because nothing is worse than getting a stuck spark plug (at the very least, it's up there on the list). Dielectric grease is another way of preserving the life of your ignition parts. Smear a little on all the contacts to keep water out.

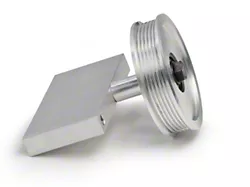
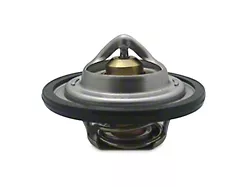
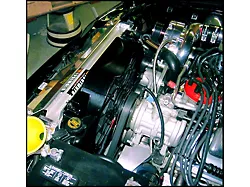
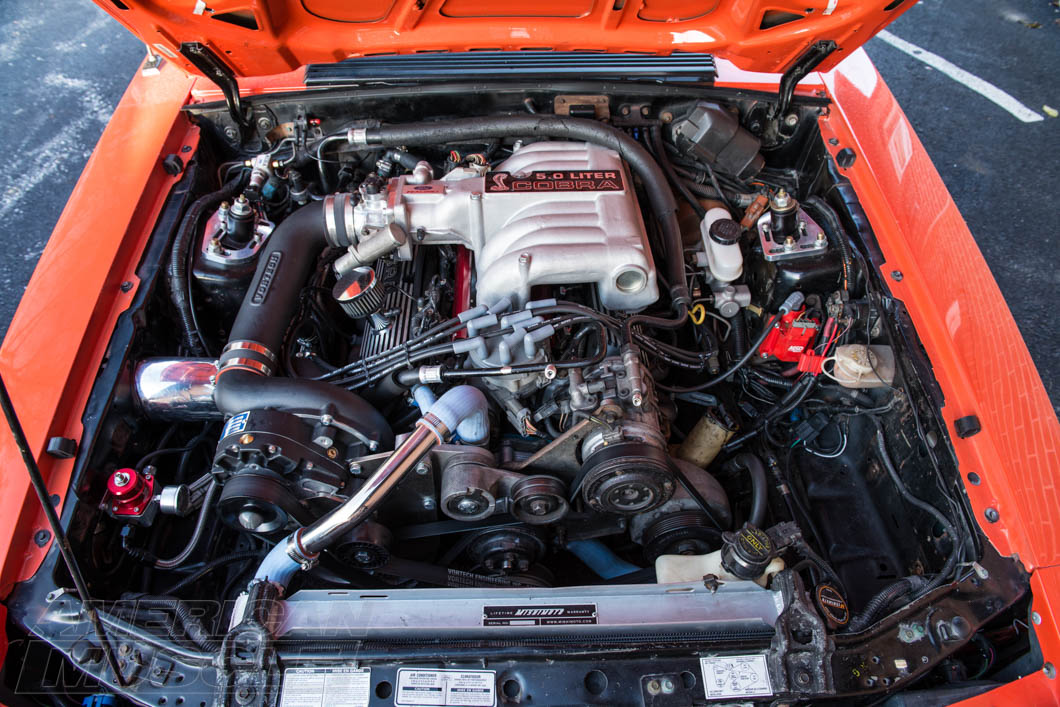
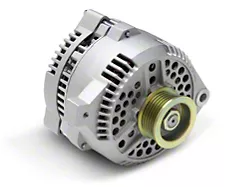
After the tuneup, we inevitably discovered another issue (as it goes with builds like this): our 302 was on the brink of overheating. We replaced the radiator and mechanical fan with a Mishimoto aluminum unit along with one of their electrical fans. Ditching the mechanical unit does free up drag on the belt system, thereby giving us a few extra horsepower, but don't expect to feel this sort of change on the butt dyno. In the spirit of replacing everything that could fail (or was probably about to fail), we also swapped out the thermostat and installed a new set of hoses from Ford Racing.

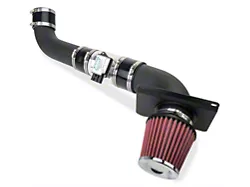
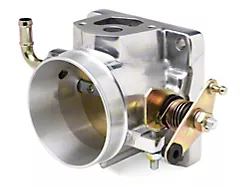
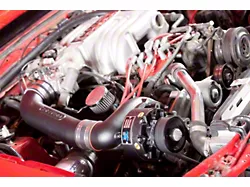
As is the other side of these builds, we discovered a medley of madness that was this GT's intake system. The easiest thing to do was to replace it all with a brand new cold air intake supplied by SR Performance. Sure this netted us a small amount of power, a slight change in sound, but most importantly, got rid of the eyesore underneath the hood. Another bit of free power involved SR Performance's smog pump delete kit. Running a smaller belt and removing the smog completely was indeed a possibility, but better to do everything right the first time and not run into problems later down the build process.

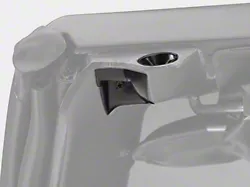
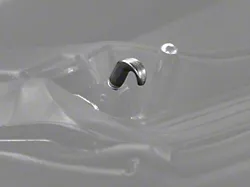
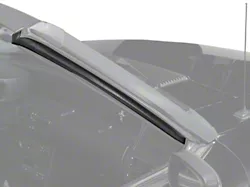
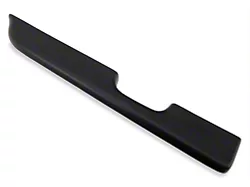
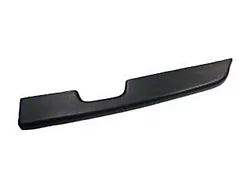
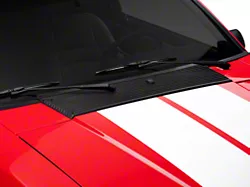
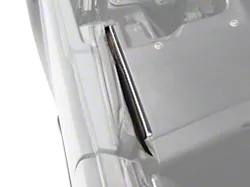
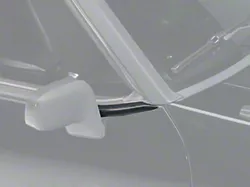
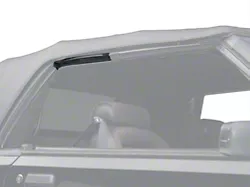
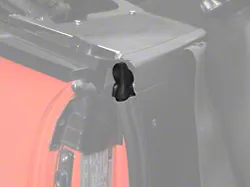
The only thing worse than the running condition of our GT was the physical condition. The more serious bodywork and paint were handled offsite, but before we could send it away we had to take care of the headlights, one fender, and the rear deck lid.  Originally we were going with a set of one-piece, blacked out headlights, but that changes in stage 2. After all that though, is where the Cobra body kit and rear wing came in.

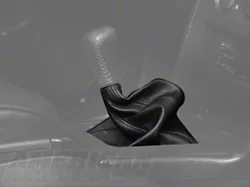
Stage 2 will see our interior restored.

Stage 1 Parts List

Project Foxbody - Stage 2

With any car build, sometimes plans change. Like we had mentioned earlier, we decided to forego the one-piece headlights out in favor of the OEM style three-piece headlights. The Cobra's appearance is certainly on track thanks to the new paint and body kit, but at this point we were still missing a vital part of our car's exterior styling. The wheels and tires. For our Cobra it only made sense to stick with Cobra styling. We chose black, 17x9 10th anniversary Cobra wheels, and why not, since they mark the 10th anniversary of the car we're putting together. The obvious upgrade here is a 5-lug conversion setup, especially since our wheel of choice is indeed a 5-lug option. Conversion kits are a great idea for a number of reasons. The first being it's rather cost effective. Everything you need to complete the conversion comes with the kit, including 28 spline axles. We end up swapping out the drum brakes in stage 3 which not only improve braking performance but also curbside appeal.

Another look piece is the Cobra tail light lenses. Despite being a small part of our Foxbody restoration, they should flow well with our Cobra body kit and help complete the look. The last few small eyesores we had to take care of are at the front end. Thing like windshield molding (it wouldn't do to have our restoration leak water), a cowl vent grille, new wiper arms, and stubby antenna.

The biggest portion of stage 2 was without a doubt the convertible top. Aside from replacing just the top, we made a point of replacing the hardware as well: boot cover, all the J-hooks, alignment pins, a new cable, and every piece of cracked and worn out piece of weatherstripping and moldings. Installing any weatherstripping can be a little bit intimidating at first, but it's really not all that bad. Most of it either slides or snaps into place with a few exceptions needing a random rivet or two. Keep in mind you want to use a short or stubby rivet because the window operates behind said weather stripping, and you don't want to interfere with its operation.

As far as the interior is concerned there was the factory dash to content with. No doubt a lot of you Fox guys are aware that it's getting harder and harder to find a factory dash in good condition. We elected for the next best thing and painted ours. In this case we used SEM's black interior paint. We gave it a slight scuff with some fine grit sandpaper, and then cleaned the dash with alcohol. An adhesion promoter or vinyl primer is also a great idea to make sure the paint looks its best and doesn't flake prematurely.

Next on the chopping block is the old carpet. If you too are in the process of restoring a Foxbody carpet, DON'T THROW OUT THE OLD CARPET! The old carpet will serve as a template to cut the necessary holes in your new one since it doesn't come pre-cut. Replacing a carpet isn't necessarily hard, but it is a time consuming job since you have to just about everything bolted to the floor. The finishing touches on the interior included a new arm pad for both the doors and the center console, some miscellaneous switches, a new leather shift boot and knob, and a mint condition factory radio.

Now with stage 2 complete, it's time to add horsepower.

Stage 2 Parts List

Project Foxbody - Stage 3

There's no doubt that stage 1 and 2 were necessary for the proper operation of our GT, but what's the point of having all those Cobra parts if we don't have the performance to back it all up? Welcome to stage 3. 

Our main goal with this build was to replicate Foxbody Cobra levels of power. Starting with a trio of parts from Ford Racing, it's time to get to work on the ole 5.0. First up, Turbo Swirl GT40X aluminum heads. These heads are a variation on the original GT40 heads found on the '93 Cobra with a few improvements. For one, they're made out of lightweight aluminum versus the heavier cast iron, and they're designed to flow better than the original GT40s.

To make the most of the GT40 heads, we needed to replace the stock cam. We decided on the Ford Racing E303, a hydraulic roller cam. An excellent choice for any street car thanks to its low to mid-range torque, it also provides a great lope at idle, but it's not radical enough that we'd worry about stalling out at every stop. 

The cherry on top for our 302 is the Ford Racing intake manifold which is becoming increasingly rare in the aftermarket space. This manifold, paired with the Ford Racing heads and cam, is going to allow this old 5.0 to flow some serious air and will complete our Cobra transformation under the hood along with a set of Cobra valve covers.

When you mess with an engine's breathing, it's good practice to change our the exhaust as well. For our Fox, we reworked our entire exhaust from the headers all the way back. We selected a set of ceramic shorty headers designed to work specifically with those GT40 heads. From there we got BBK's off-road H-pipe which does feature mandrel bent, 2.5-inch stainless steel tubing. Lastly, the exit is Flowmaster's American Thunder Catback exhaust which features those iconic 44 series mufflers. This exhaust features 100% stainless steel throughout, including 2.5-inch mandrel bent tubing, and OE style polished tips. 

Now that we've gotten Cobra power out of the way, we need to fix our handling issues. No reason not to treat the suspension like we did the engine: go big or go home. For starters, a set of Koni STR shocks and struts are in order. We've paired those up with the SR Performance lowering springs which brings the Foxbody down about an inch and a half on all four corners, and like we promised back in stage 2, the drum brakes are gone in favor of disks. 

When lowering any build Mustang, you have to readjust the alignment. In our case, we installed the SR Performance caster/camber plates which should get everything back into spec without issue and offer a little bit more adjustment in the future if need be. 

Since our car is a convertible, we are losing out on some structural rigidity. To combat this, we've installed the SR Performance subframe connectors. These subframe connectors, along with our springs, shocks, and struts remove the floatiness associated with older muscle cars and has it handling the way a sports car should. 

Before all of our power mods, the '93 GT was pushing 194 horsepower and 266 ft/lbs of torque. Tack on a tune with our power mods and our stage 3 Fox is putting down 279 horsepower and 317 ft/lbs of torque, making for a solid gain of 85 horsepower over our baseline numbers. The car did even better throughout the power band, picking up as much as 103 horsepower and 107 ft/lbs of torque throughout the curve. 

This is where we intended the Foxbody build to end, but thanks to some generosity from our vendors, we managed a stage 4.

Stage 3 Parts List

Project Foxbody - Stage 4

Stage 4 of our Foxbody build didn't come until months after stage 3, and this stage 4 is all about forced induction. Our friends from Vortech supplied their high output supercharger kit in this very sleek matte black finish which does look great under the hood. Their high output kit pushes 7-9 lbs of boost as opposed to usual 5 or 6 which is normal for entry level kits. If you've ever had any experience with forced induction then you know you can't just slap on a big blower and go without addressing some other areas of your car, especially when you're dealing with a 20+ year-old car like the Foxbody. 

First up on the list of needs is more fuel. A blown 5-liter with all the trimmings is going to be thirsty. Starting closest to the block and heads, we went with Edelbrock's 60lb injectors which are a massive upgrade over the week, 19lb factory injectors. In order to feed those massive injectors, we needed to upgrade our fuel rail, so we did that and then some. We installed the Aeromotive high flow fuel rail kit which does center around two anodized red fuel rails. The full kit includes brand new stainless braided fuel lines, a new Aeromotive fuel regulator, and gauge, all being fed by a massive fuel pump.

Now that we obtained boost and fuel, we needed a tune. With said tune we redid the spark tables, the fuel tables, making as little changes as we could. We've got a 20-year-old car with a stock bottom end, and while we wanted to push as much power as possible, it needed to be streatable. In the end, the tune plus boost netted us 466 horsepower and 450 torque at the wheels. Stock bottom end, stock T5. New gear ratio.

As any Foxbody owner will tell you, the rear ends of these things aren't known to be bulletproof. The axles are basically glass, and the stock 2.73 gear ratio is less than ideal at the drag strip. To solve the axle problem we went with a very popular upgrade, the 8.8 spline axle kit. The kit does include brand new 31 spline axles, Ford Racing 4.73 set of gears, a brand new Trak-Loc differential, and everything else needed to ensure the Foxbody was ready for some hard launches down the track.

Since we expected to be under 12 seconds, we did bolt in a cage and add a 5-point harness for safety. Project Foxbody surprised everyone, pulling 11.6 at 120mph on its second pass before the clutch gave out. We still had the Exedy clutch rated for 430 ft-lbs of torque, a little less than what we dynoed stage 4 at. Needless to say, a replacement is in order, but overall this concludes Project Foxbody.

1993-gt-foxbody-project-car-stage-4-with-vortech-supercharger.JPG

Stage 4 Parts List