 FREE 1 to 3-Day Delivery on Orders $149+ Details
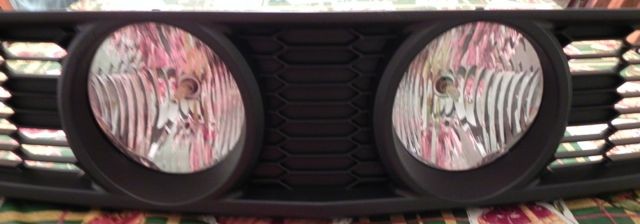
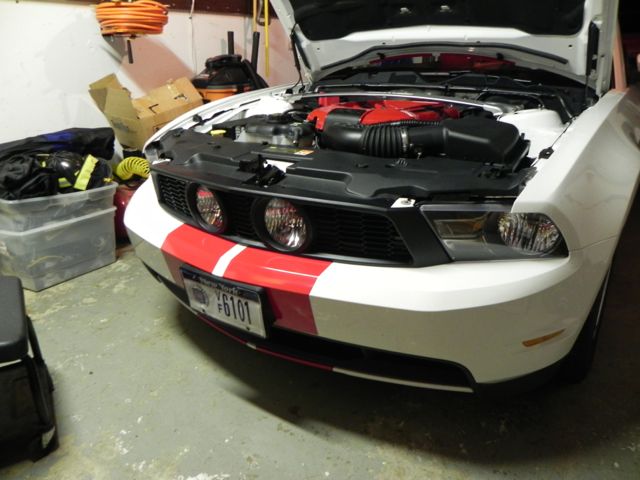
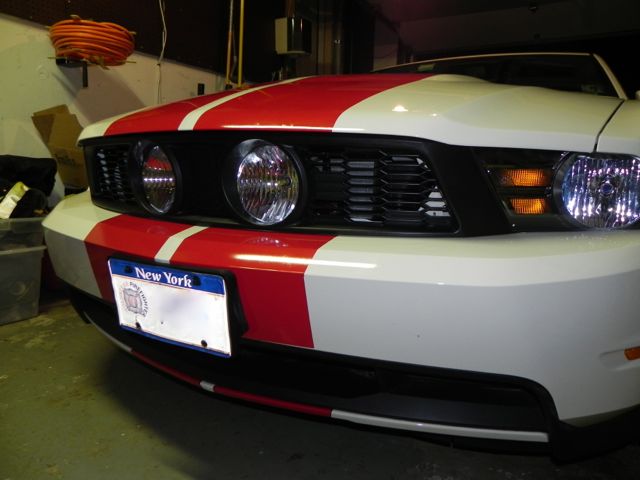
How to Install a 3DCarbon Eleanor Style Center Fog Light Grille on Your 2010-2012 Mustang GT
Installation Time
30 minutes
Tools Required
- Medium Flat Head Screwdriver
- 8mm Socket
- 7mm Socket
- Appropriate Socket Driver
Installation
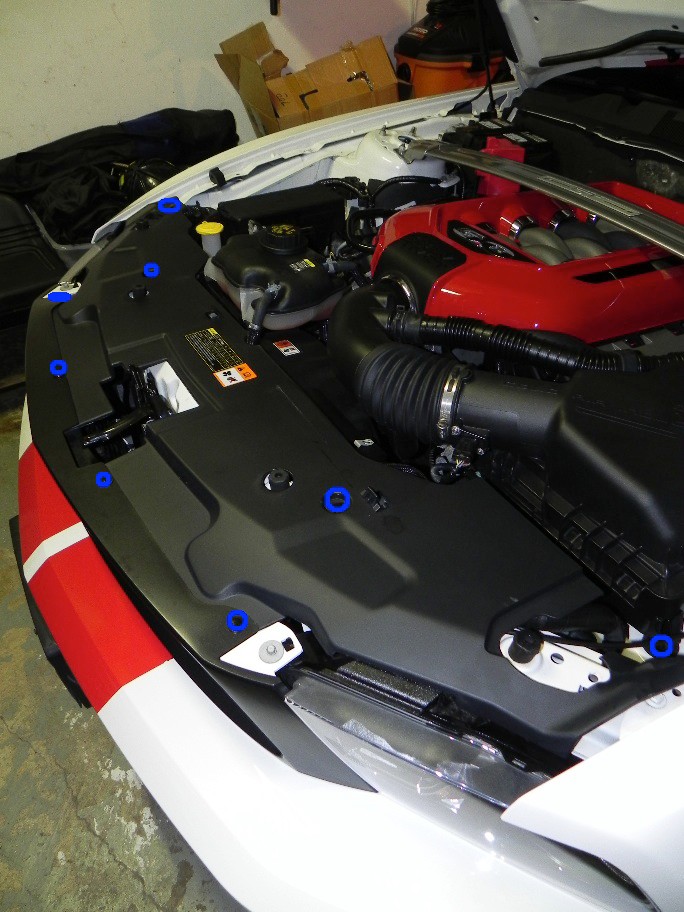
- Open hood and locate the eight (8) pop clips that retain the black plastic shroud. This piece goes from the grille and over the radiator. There is one clip that is lower down on the driver’s side. Simply pry out the center of all the clips and lift for the entire clip to come out.
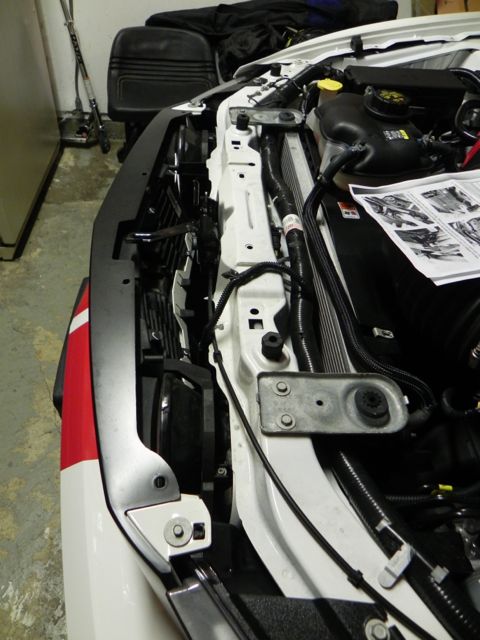
2. Once the (8) clips are removed, slide the cover toward the back of the car while lifting up and it will slide free.
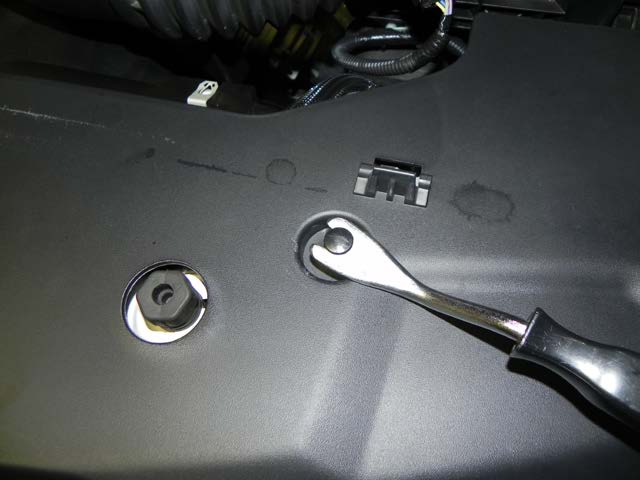
3. Remove the (2) 8mm bolts found in the body colored section by the ends of the grille. See picture below for reference.
4. Pull up on the body colored sections to release the grille. You should now be able to move the top of the grille forward.
5. Unplug the fog light connectors at this time.
6. There are (2) clips on each side of the grille and about (6) tabs across the bottom where the grille “pokes” through the bumper. These clips simply use pressure to hold the grille snugly in place.
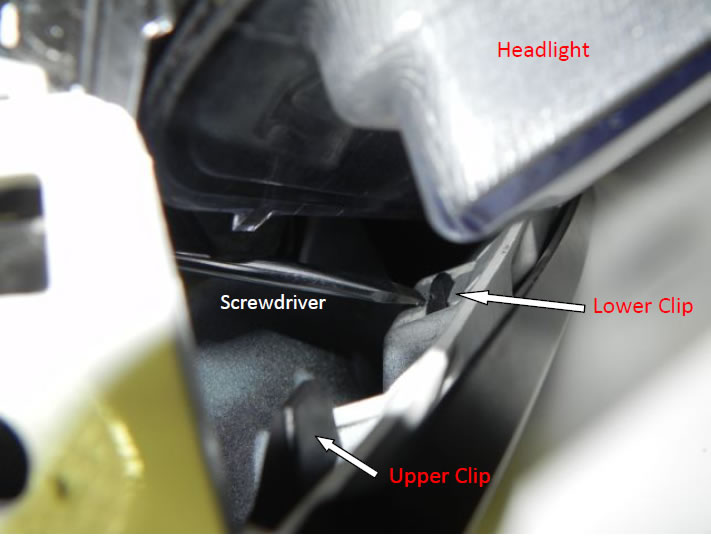
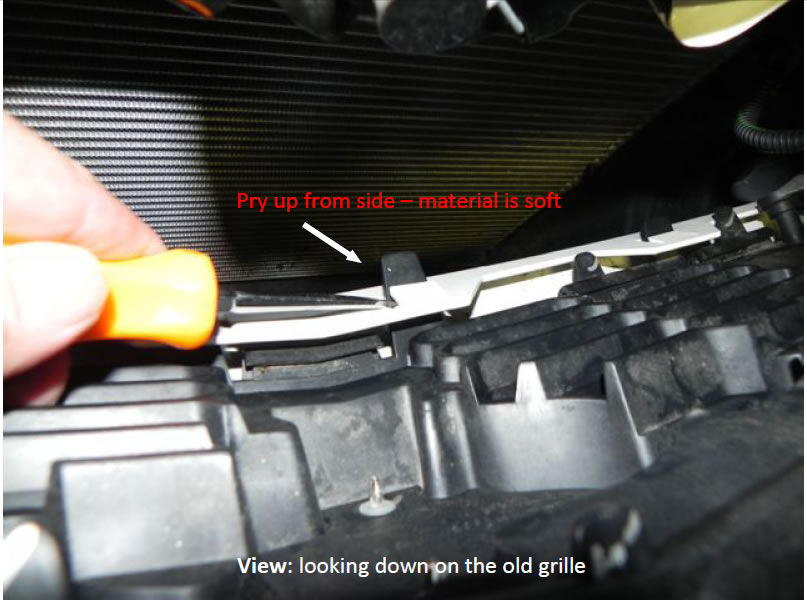
7. The side tabs are released by putting the small screw driver against the grille and pushing toward the headlight assembly until you hear a small click. Driver’s side is shown below with the top clip still locked for reference.
8. The tabs across the bottom of the bumper are released by gently prying up the center. Once they are all free, the grille slides out and you can pull the old grille away from the car.
9. Using the 7mm socket, move the fog light housings from the old grille to the new grille. There are (3) screws per light. Re-use the same hardware from the old grille and REMEMBER to keep the right and left in the proper place.

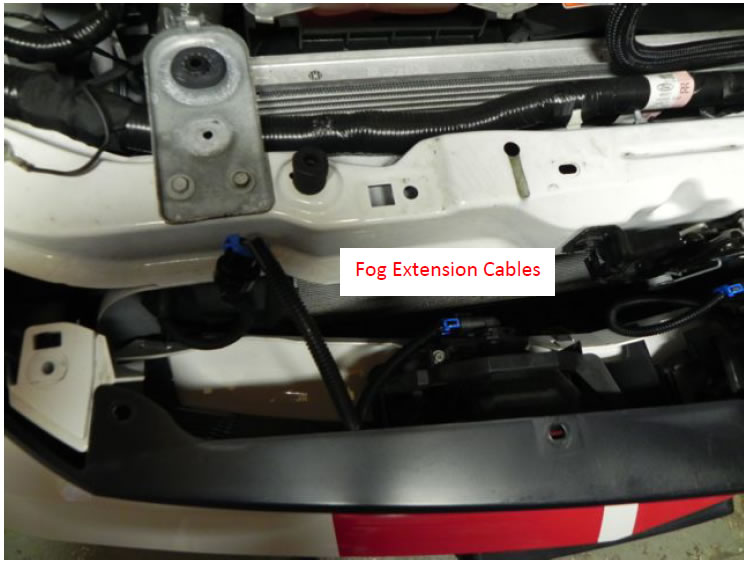
10. Using the supplied wiring, clip the fog light extension cables in place. As you bring the grille in for installation, connect both cables to the fog lights. This would be a good time to test the fogs to ensure everything works.
11. Push the grille in place, making sure all tabs seat properly and everything lines up.
NOTE: The new grille DOES NOT have as many tabs. This is normal!
12. Reinstall the (2) 8mm bolts to the body of the car to secure the grille. Slide the cover back in place under the new grille making sure to line up all (8) holes. Reinstall the (8) clips and you are all done!
Installation Instructions written by AmericanMuscle customer Jeffrey Reed 10.6.11
Related Guides
-
Installation
-
Installation
-
Installation
