
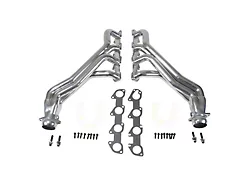


Installation Time
(approx) 2 Hours
Difficulty Level:
Light to Moderate mechanical skill required.
 FREE 1 to 3-Day Delivery on Orders $149+ Details

$794.99 kit
CONFIRM THIS FITS YOUR VEHICLE!
Saved - View your saved items
We're sorry. We couldn't save this product at this time.
or use

Features, Description, Reviews, Q&A, Specs & Installation
| Brand | MBRP |
| Exhaust System Type | Cat-Back System |
| Exhaust System Material | Aluminized Steel |
| Exhaust System Tip Finish | Chrome, Polished |
| Exhaust System Tubing Diameter | 3.00 Inch |
| Exhaust Loudness | Moderate |
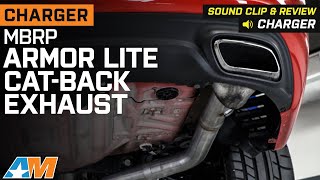
CAT-BACK PERFORMANCE. The MBRP Armor Lite Cat-Back Exhaust is engineered to enhance the sound and performance of your vehicle by replacing the exhaust system from the catalytic converter back. This upgrade delivers improved exhaust flow, providing a deeper tone and a more aggressive presence while maintaining a refined street-friendly sound. It's an essential enhancement for enthusiasts looking to elevate their Charger's auditory experience and performance without sacrificing daily drivability.
CONSTRUCTION AND APPEARANCE. Constructed from aluminized steel, this exhaust system offers durability and corrosion resistance suitable for dry environments. The Armor Lite series provides a cost-effective solution with factory-quality materials and a sleek finish that complements the vehicle's undercarriage. The design incorporates precision welding and a robust dual rear exit setup for both aesthetic appeal and optimal sound delivery.
INSTALLATION. Installation of the system is straightforward, designed to align with factory mounting points without the need for drilling or cutting. This allows for a hassle-free upgrade that can be completed by most enthusiasts within a reasonable timeframe, using basic hand tools.
WARRANTY. This product includes a 3-year warranty, ensuring reliability and peace of mind for the user throughout the service life of the exhaust system.
APPLICATION. Specifically designed to fit the 2015-2016 5.7L HEMI Dodge/Chrysler Charger models, ensuring precise compatibility and performance tailored to this vehicle configuration.
MBRP S7119AL
CA Residents:  WARNING: Cancer and Reproductive Harm - www.P65Warnings.ca.gov
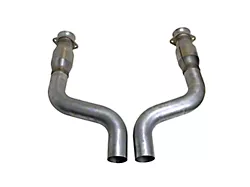
Installation Info
Installation Time
(approx) 2 Hours
Difficulty Level:
Light to Moderate mechanical skill required.
What's in the Box
Tech Guides:
Sponsored