 FREE 1 to 3-Day Delivery on Orders $149+ Details
How To Install A Convertible Top Hydraulic Lift Cylinder For Your 1999-2004 Mustang
Installation Time
1 hours
Tools Required
- Screw Driver
- 10mm, 11mm, 13mm Wrenches
- Push Pin Removal Tool
- T-20 Torx wrench
- T-40 Torx wrench
- Small Funnel or Small Oil Pump Can
- Small Container
- Cable Tie
- Optional: Modified Screw Driver

Shop Parts in this Guide
Install Difficulty: Moderate
1. Lower the top.
2. Adjust both front seats to the most forward position. Remove seat belt from the seat belt guide.
3. Remove the rear seat. Lift the edge of the cushion and locate both left and right cushion retaining tabs.
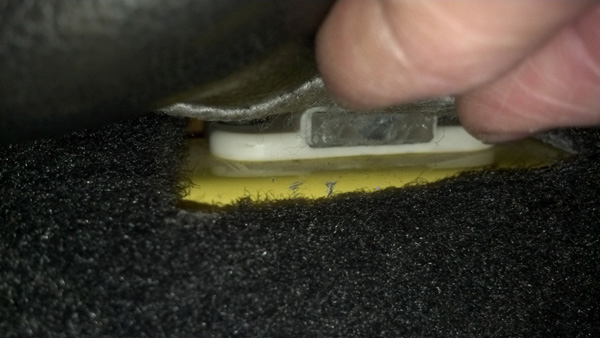
4. Press inward on the release button with a screw driver while lifting upward to release the cushion. Perform the same action to the opposite side. Once both tabs have been released, carefully remove the cushion from the vehicle by lifting up the cushion while pressing downward on both Mustang seat belt buckles. Set the cushion aside.
5. Remove both of the attaching bolts at the lower edge of the seat back with a 10mm wrench.

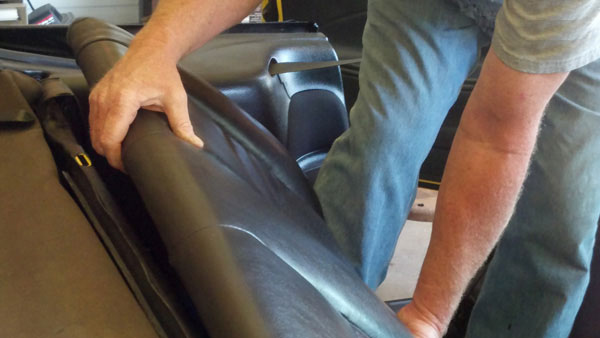
6. Lift up on the lower edge of the seat back while pulling up on the upper edge. Once the top seat retaining clips have unlocked, remove the seat from the vehicle and set it aside.
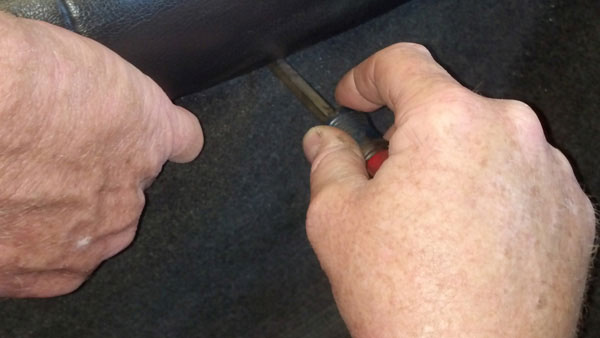
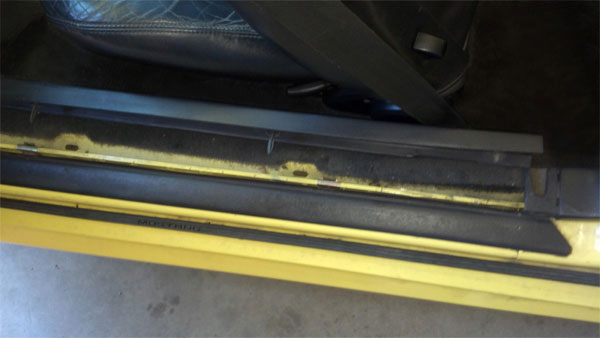
7. Remove the door sill plates by removing the screws and carefully pulling upward on one end of the trim with a slow constant force. The trim will lift out from the metal retaining clips. Remove the trim and set it aside.
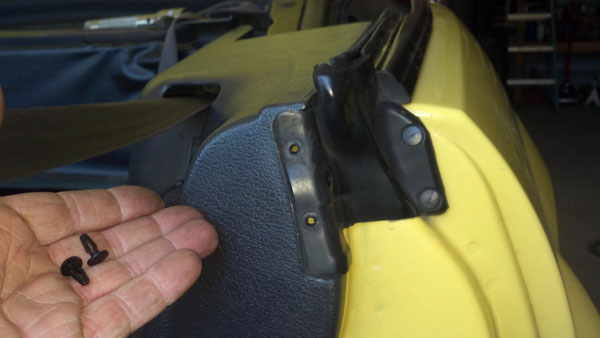
8. Remove rear quarter trim panel. To start, remove the four plastic push pins from the trim panel with a push pin removal tool.
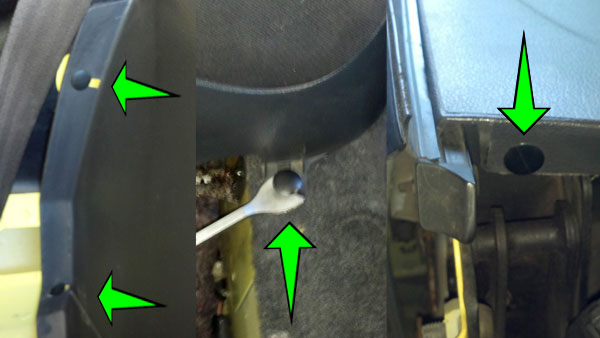
9. Remove two small push pins from the panel.
10. Lift the panel upward and away from vehicle. Place the panel against the front seat. Keep the seat belt attached.
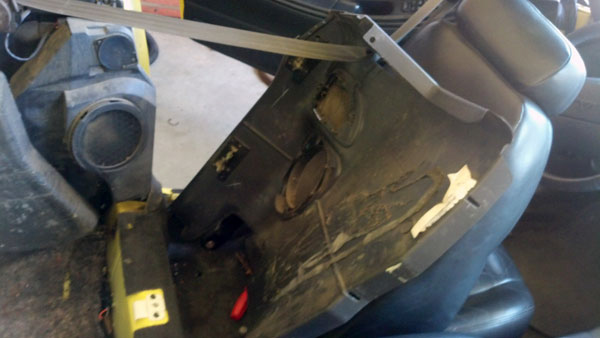
11. Remove the foam piece if it has become detached from panel

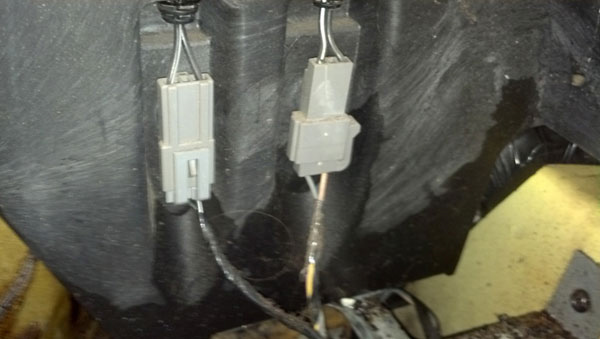
12. Remove the speaker assembly. To start, disconnect both speaker electrical connectors.
13. Remove the three attaching screws with a T-20 Torx. Remove the speaker assembly from vehicle.
14. Raise the convertible top.
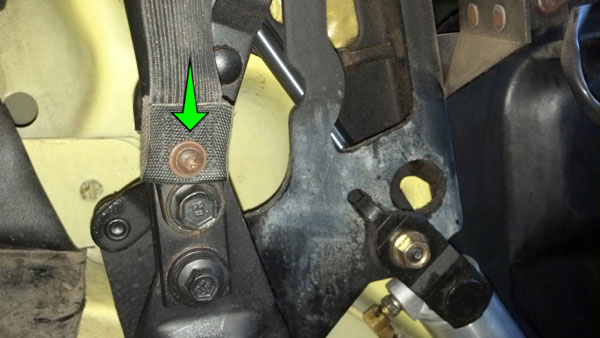
15. Disconnect the strap for the convertible headliner. Remove the attaching screw with a T-20 Torx. Fold the strap up and inside the headliner.

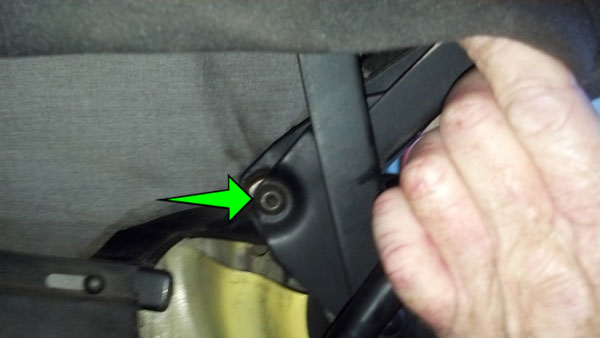
16. Remove the cylinder rod attaching pin. Lift the headliner upward to expose the screw. Remove the attaching pin with a T-40 Torx. Guide the cylinder rod down and away from the top.
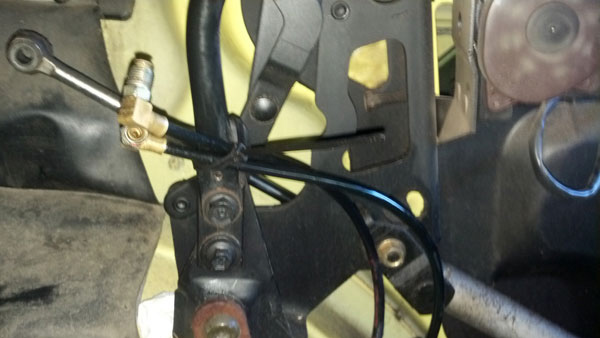
17. Remove the hydraulic lines. Warning: Lower the parking brake. This will ensure that the hydraulic system cannot be pressurized while lines are disconnected. The hydraulic system uses Dexron II automatic transmission fluid (ATF).
18. Place a container under the hydraulic fitting. Mark the lower line so it can be identified later.
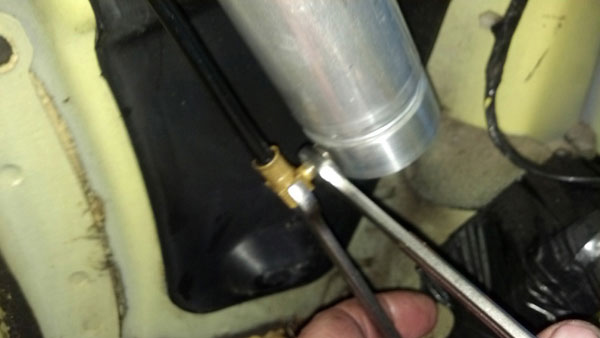
19. Remove the hydraulic lines with 10mm and 11mm wrenches. Hold the fitting body with a 10mm wrench while turning the nut counterclockwise with an 11mm wrench.
20. Allow the fluid to drain from the cylinder and the line directly into the container.
21. Repeat steps 18-20 for the top fitting.
22. Move both lines up to the frame and attach them with a cable tie. This will hold the lines up and not allow any fluid to leak. It also keeps the lines free and clear of the work area and other components in the area.
23. Remove the cylinder. To start, remove the pin plate attaching nut with a 13mm wrench. Remove the pin plate. Then, remove the cylinder from vehicle. Pull back the insulation pad. Clean the area with an appropriate degreaser to remove all ATF that may have leaked from the worn cylinder.
24. Install the new cylinder. Remove the two plastic protecting plugs from the cylinder ports. Fully extend the cylinder rod.
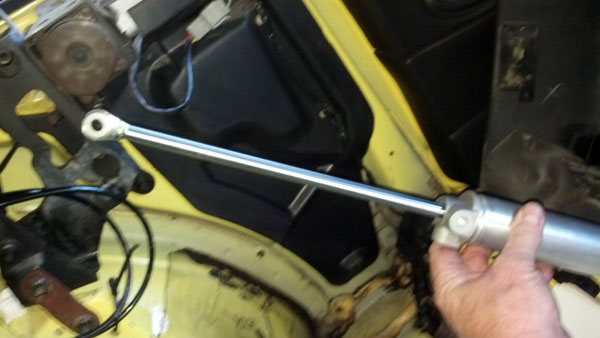
25. Route the cylinder rod between the body and the lifting parts.
26. Install the cylinder on the holding pin.
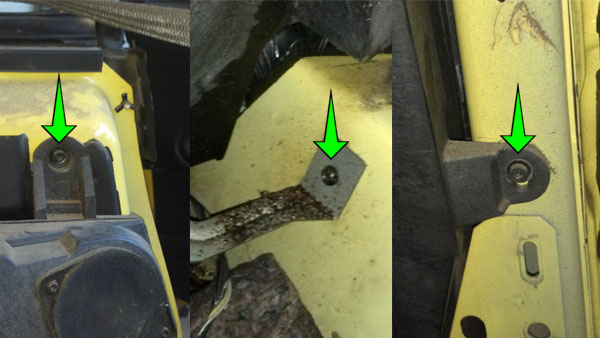
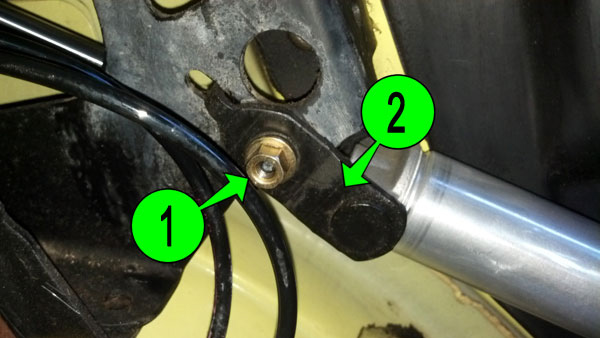
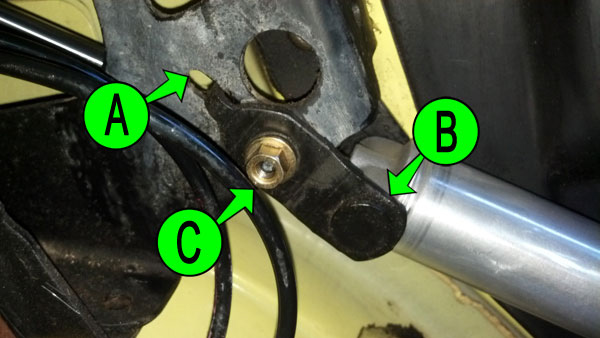
27. Install the pin plate and attaching nut as shown. Ensure the plate tab is inserted into the locating hole (A) and the pin is inserted in cylinder (B). Tighten the attaching nut (C) with a 13mm wrench to the proper torque. The cylinder must move/swing freely. If not, remove the cylinder and investigate the cause.
28. Install cylinder rod attaching pin. Align the cylinder rod and install the attaching pin. Tighten the pin with a T-40 Torx to the proper torque.
29. Install the headliner strap. Align the strap and install the attaching screw. Tighten with a T-20 Torx to the proper torque.
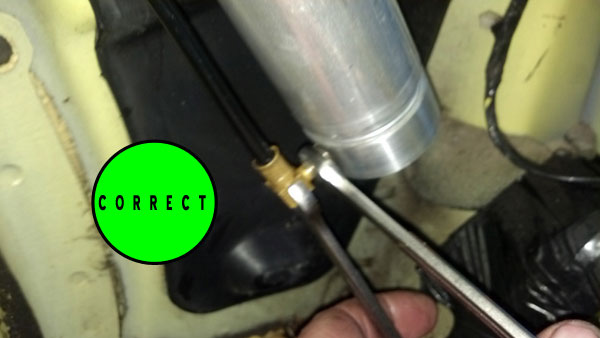
30. Install the hydraulic hoses. Clean and inspect each of the hoses for wear or signs of leakage. If the hoses are damaged or show signs of leaks, replace them with a new top hose kit. Install the lower hydraulic hoses with 10mm and 11mm wrenches. Hand start the fitting at first; do not cross thread. Hold the fitting body with a 10mm wrench while turning the nut clockwise with an 11mm wrench. Ensure that the fitting is positioned parallel with the cylinder. Tighten the fitting securely. Repeat these steps for the upper line.

31. To fill the pump reservoir you need to detach and remove both relays.
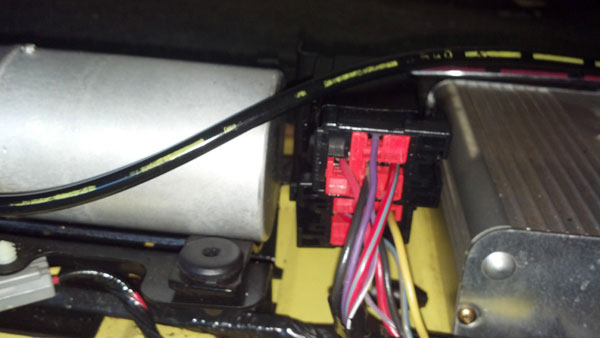
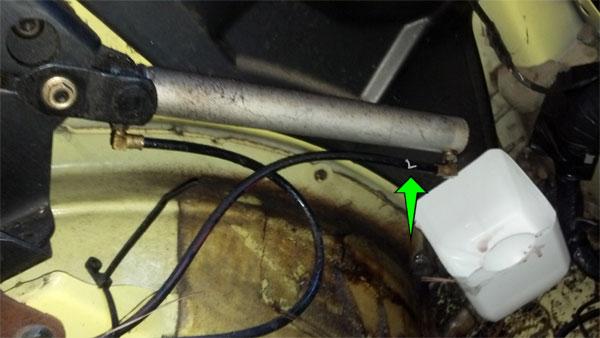
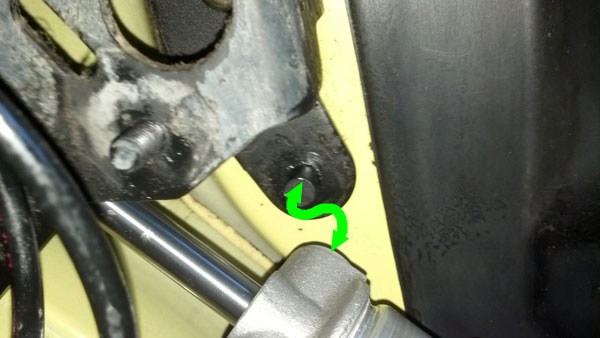
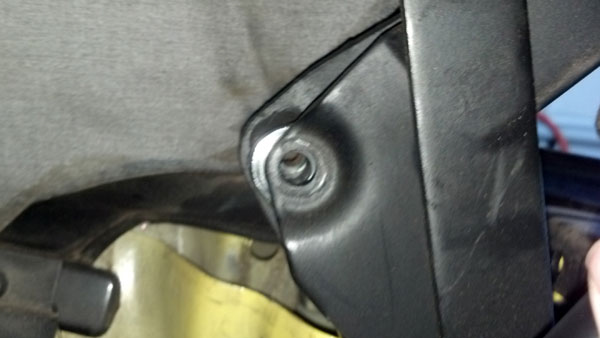
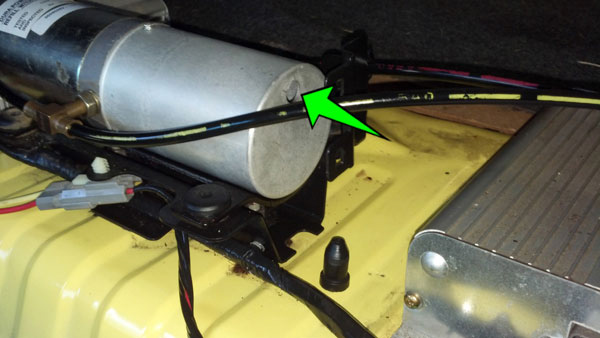
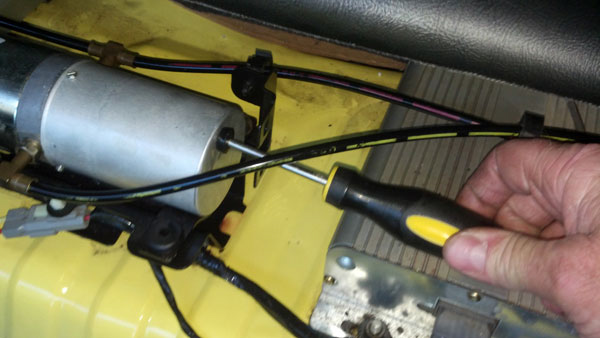
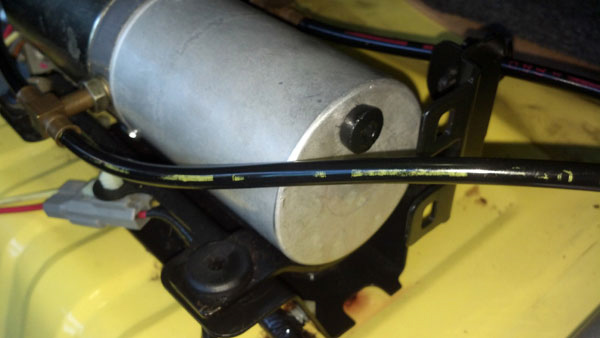
32. Carefully remove the fill plug from the convertible top hydraulic motor.
33. Fill the reservoir with Dexron II ATF until the fluid runs out of the fill hole. Leave the fill plug out. This can be easily done by using a small funnel with a piece of hose attached to the funnel or by using a pump oil can.
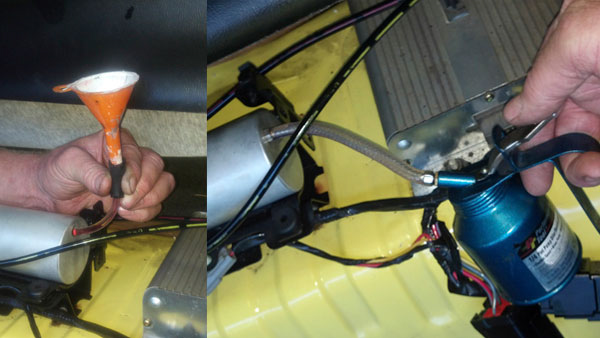
34. Bleed the upper hydraulic line.
35. This step will aid with the removal of air from the hydraulic system. Crack open the upper hydraulic fitting 1/2 to 3/4 of a turn. Place a container under the fitting. Set the parking brake. Turn the ignition switch to the “ON” position. Cycle the system by momentarily activating the top-switch in the “DOWN” position several times, allowing the air to vent until you see the ATF flowing. Turn the ignition switch to the “OFF” position. Tighten the hydraulic fitting securely, in the correct position. Check the fluid level in the pump reservoir. Refill if necessary.
36. Lower the top. This step will require two people: One to activate the switch, while the other assists the top. Person A depresses the top switch in the “DOWN” position. Person B holds the top with both hands and helps lower the top manually while preventing the top from free falling. Allowing the top to be free to fall on its own weight may cause damage to the top and many of the convertible components.
37. Raise and lower the convertible top four or five times. Check the fluid in the pump reservoir in between each cycle. Assist the top manually if needed. Cycling the top up and down multiple times will bleed all of the air from the hydraulic system. The system may be noisy during the first couple of cycles, but it will quiet down. Continue to cycle the top until the top moves up and down completely under its own power. Check lines and fittings for leaks. Tighten or replace parts as necessary. Once the top moves up and down under its own power, leave the top in the down position. Check the fluid level in the pump reservoir and add fluid if necessary.
38. Replace the fill plug. The plug can be a little difficult to press in. A tool can be made by cutting off the end of a Phillips screw driver as shown.
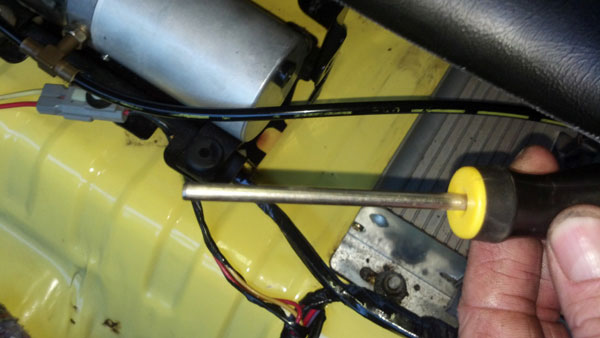
39. Inset the modified screw driver into the hole of the rubber plug. Inset the plug into the fill hole by pushing in on the screw driver with a constant pressure. Do not apply extreme pressure; this may result in the screw driver pushing through the end of the plug and damaging the plug. Clean any ATF with a degreaser and rag.
40. Allow the system rest for about an hour. Allowing the system to rest will let any remaining air to dissipate from the system.
41. If the top operates normally, clean up any spilled ATF and remove all of the tools from the trunk and seat area.
42. Replace the relays.
43. Reassemble the vehicle by reversing steps 2 through 13, then you've completed the installation.
Installation Instructions written by AmericanMuscle Customer Matt Tinaglia 11.05.2014
