 FREE 1 to 3-Day Delivery on Orders $149+ Details
How to Install Flowmaster High-Performance Catted Y-Pipe (99-04 V6) on your Ford Mustang
Installation Time
2 hours
Tools Required
- Car Lift or Ramps
- Penetrative Lubricant
- Breaker Bar 1/2" Drive
- Socket Wrench 1/2" Drive
- Various Extensions
- 15mm Socket
- 7/8" Spark Plug Socket or 7/8" Flare Nut Wrench
- Torque Wrench

Shop Parts in this Guide
Installation Instructions:
1. Elevate your car on a lift or ramps and make sure it is secure before doing any work under it, a lift is highly recommended and will make the install much easier.
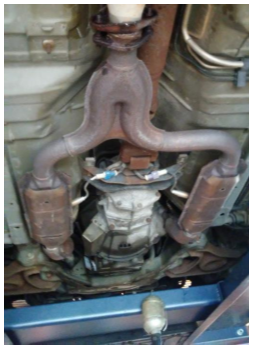
2. With the car up, locate the old y-pipe that is being replaced.
3. Spray the y-pipe bolts at the headers and exhaust with penetrative lubricant.
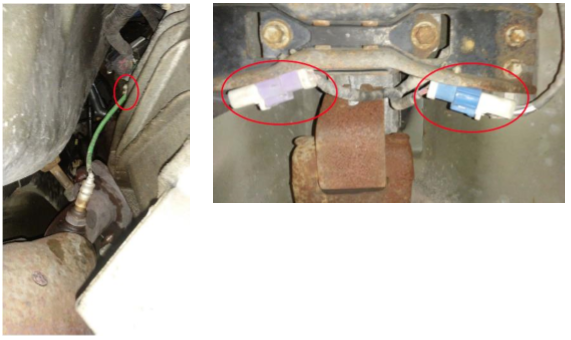
4. Unplug the two Oxygen Sensors located on the Catalytic converters and the two just after the exhaust headers.
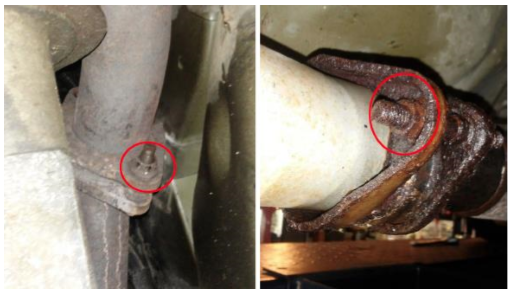
5. Unbolt the two 15mm bolts at the headers and the two 15mm bolts at the catback exhaust and drop down the y-pipe to remove it.
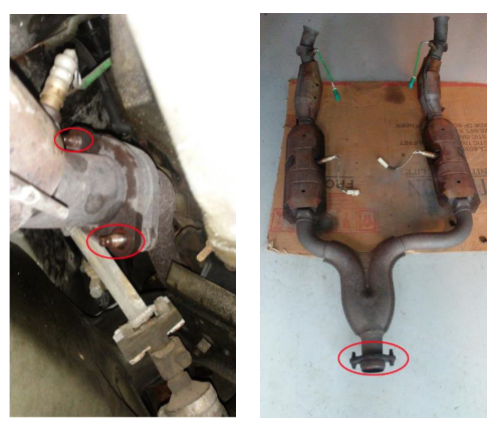
6. Remove the four Oxygen Sensors using a 7/8" oxygen sensor socket or flare nut wrench.
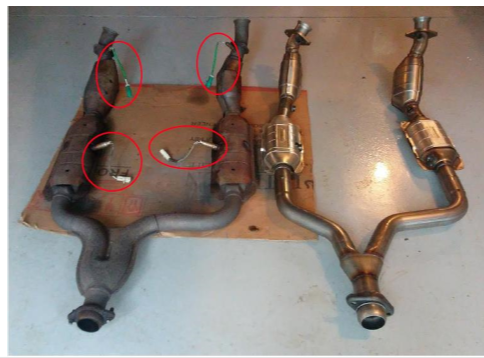
7. Reuse the original oxygen sensors or install fresh ones into the same positions on the new y-pipe.
8. Bolt the two sides with the Catalytic Converters on them to each header, but do not
tighten them down. Then, slide the exhaust clamps onto the y-pipe and slide it onto the two converter pipes.
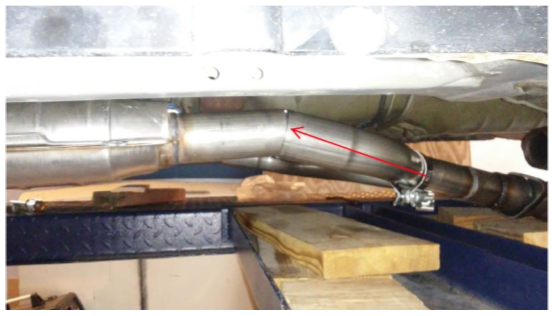
9. Finger tighten down the two 15mm exhaust clamps and the two 15mm bolts attached to the catback exhaust.
10. Now that all the parts are installed, go back and torque down all of the bolts to 25-35 ft lbs. This includes the four header to exhaust bolts, the y-pipe to catback bolts and the two exhaust clamp bolts.
11. Drop the car down but before starting it, clear any diagnostic trouble codes present if necessary.
12. Start your car and with it running, spray a little soapy water on the exhaust joints and look for bubbles indicating an exhaust leak and fix if necessary. This is also a good time to inspect the rest of your exhaust setup to insure it is still in good working order.
13. The final step is to stand back and listen to the great sound from your new exhaust!

Installation Guide Written by AmericanMuscle Customer Duane Irwin 9/22/17