FREE 1 to 3-Day Delivery on Orders $149+ Details
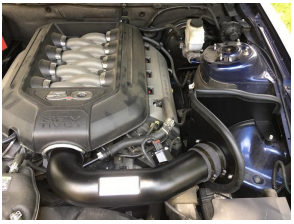
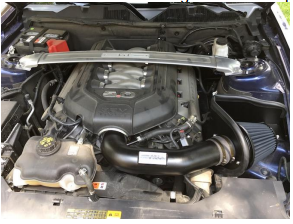
How to Install K&N Black Hawk Cold Air Intake (11-14 GT) on your Ford Mustang
Installation Time
1 hours
Tools Required
- Flathead Screwdriver
- Ratchet
- 8mm Socket
- 10mm Socket
- 13mm Socket
- 15mm Socket
- 3mm Allen Wrench
- 4mm Allen Wrench
- Pliers
- T20 Torx Driver

Shop Parts in this Guide
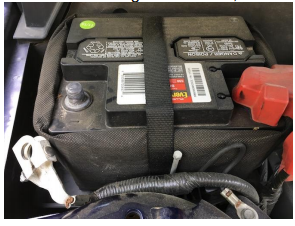
1. With the engine turned off, disconnect the negative battery cable.
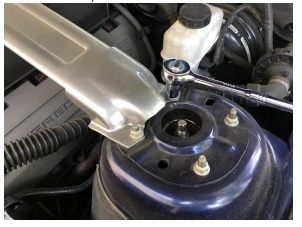
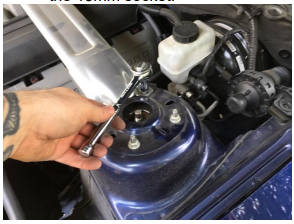
2. For cars that have a strut tower brace installed, it must be removed. Remove the 4 nuts that hold the brace, and then remove the brace itself.
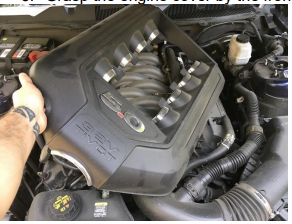
3. Grasp the engine cover by the front and pull up to pop it free, and then remove the engine cover.
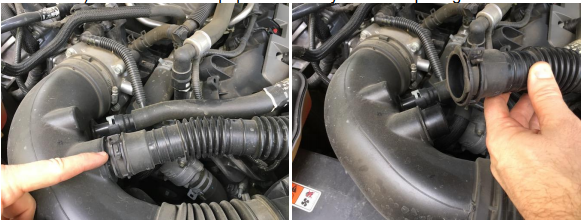
4. Use pliers the grasp and twist off the clamp holding the “sound tube” to the drum, and then disconnect the hose from the drum.
5. Use pliers to release the clamp holding the “sound tube” to the intake tube (when you squeeze the tabs of the clamp all the way together it should click and lock in the open position for easier removal). Disconnect the hose from the intake tube and then remove the “sound tube” from the vehicle. There are two points securing the “sound tube” to the vehicle – one will slide off very easily (nearest to the drum) and the other will pop out with only moderate pulling force.
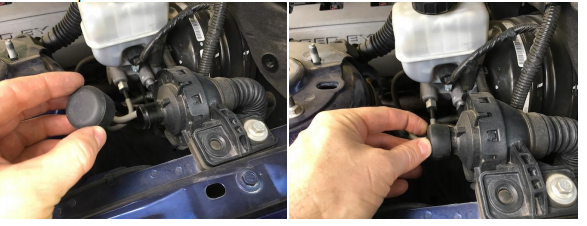
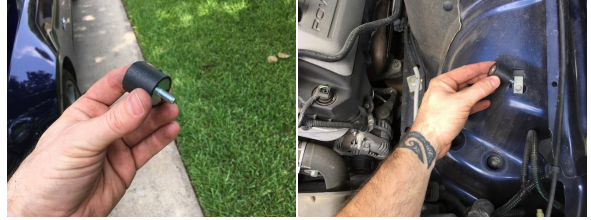
6. Locate the supplied rubber cap, and install it onto the drum. It just pushes on by hand without a clamp.
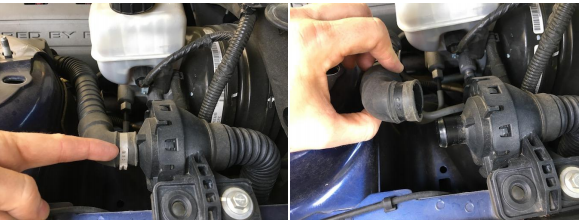
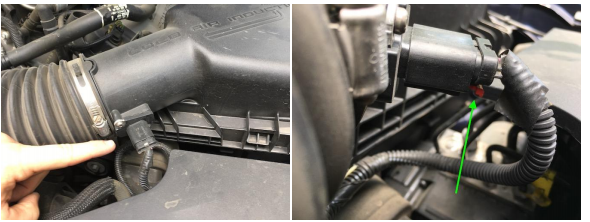
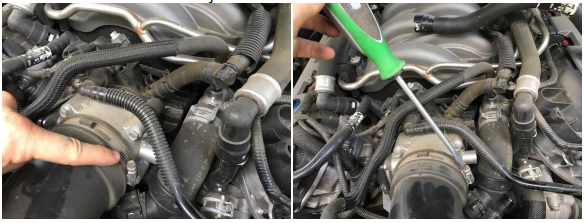
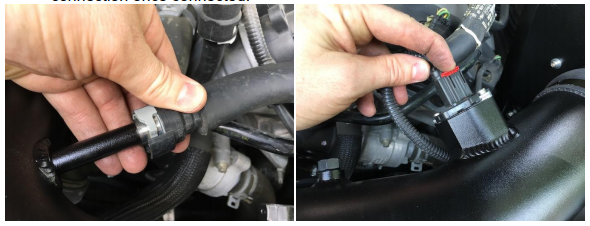
7. Disconnect the mass air sensor connector. There is a red tab on the underside that will pull out by hand to release the connector as shown in the close-up picture.
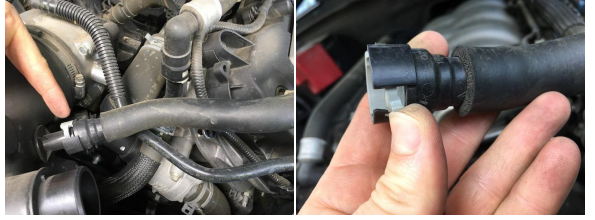
8. Disconnect the crank case vent hose from the intake tube. The is a finger-release lock on the connector (mine was on the under-side of the hose as shown in the second picture) – simply slide the release with your finger and then pull the hose while still holding the release with your finger. NOTE: Some models may have an EVAP vent line as well. If so, this line should be removed at this step as well.
9. Using a flathead screw driver (or socket if you prefer), loosen the clamp that holds the factory intake tube to the throttle body.
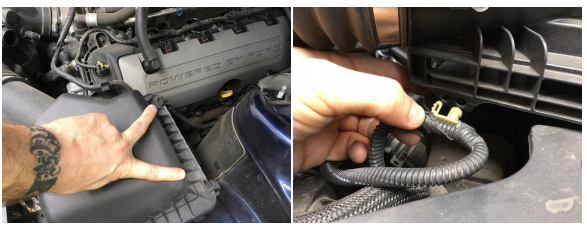
10.Release the 2 retaining clips on the air filter box, and then remove the upper air filter box and the intake tube. NOTE: Be sure to remove the mass air sensor connector bundle from the air box before pulling it out of the vehicle in order to avoid damage to the bundle (see second picture). It is ok to cut the yellow plastic holding it onto the air box as it will not need to reattach to the new intake.
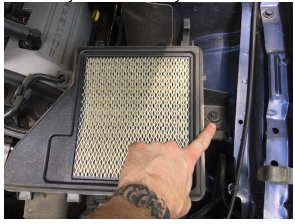
11.Using a 10mm socket, remove the bolt that holds the lower air filter box to the inner fender, and then remove the lower air filter box from the vehicle. At this point, your factory intake is completely removed. NOTE: You may want to keep the factory intake and filer in case of any problems, or for any other reason you need or want to remove your K&N intake.
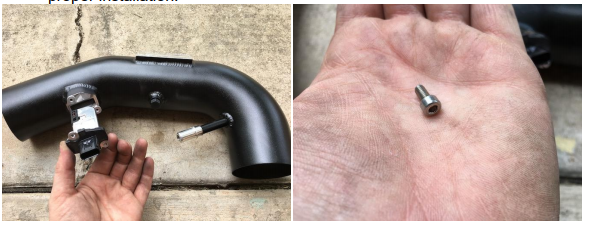
12.Using the supplied M6 hex-head bolt with a lock washer and flat washer (as shown in the picture), bolt the fresh air intake scoop to the heat shield.
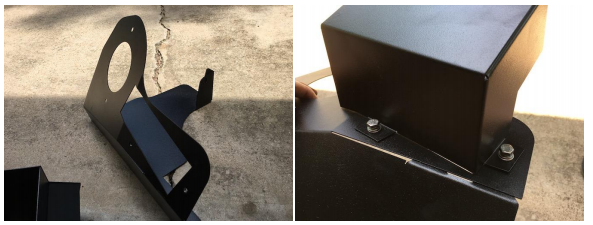
13.Using the supplied M6 allen bolts with a lock washer and a flat washer (as shown in the picture), bolt the filter adapter to the heat shield using a 4mm allen wrench.
14.Install the supplied rubber edge trim around the entire edge of the heat shield. NOTE: The edge trim may come out a little too long or a little too short the first time you try to install it. If it’s a little long you can just trim of the excess. If it’s a little short you can pull it off and try again – in this case, try to stretch the edge trim a little bit as you go to make it fit all the way around.
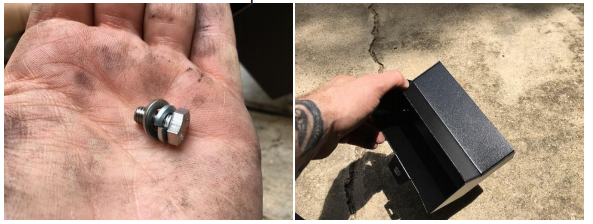
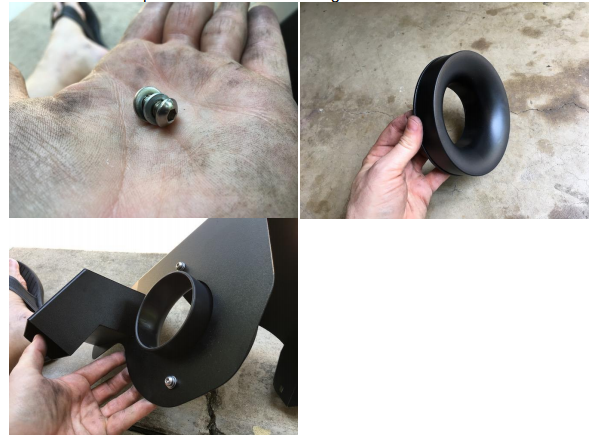
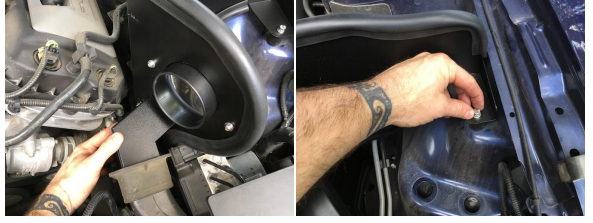
15.Locate the supplied rubber mounted stud (as shown in the picture), and install it into the inner fender air box mounting location, tightening firmly by hand.
16.Install the heat shield into the vehicle so that the fresh air scoop is inserted into the factory duct and the mounting hole is lined up with the rubber mounted stud. Use the M6 hex-head bolt with a lock washer and a flat washer (the same as in step 12) to bolt the heat shield to the rubber mounted stud, and tighten with the 10mm socket.
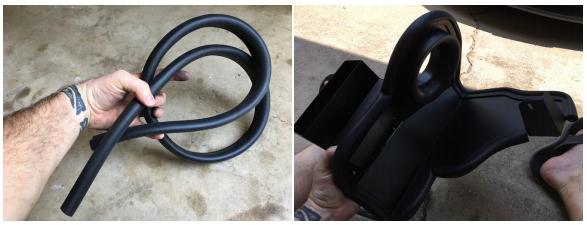
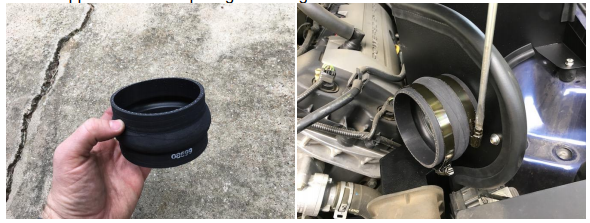
17.Locate the supplied silicone hump hose (08699), and install it onto the air filter adapter using the supplied band clamp. Tighten using a flathead screw driver or a socket.
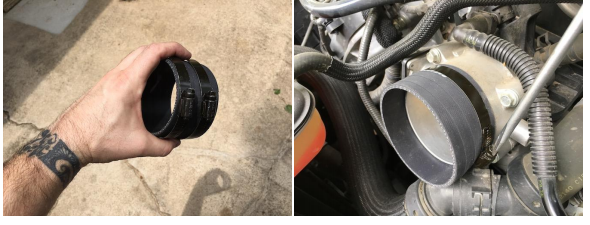
18.Locate the supplied silicone hose (08698), and install it onto the throttle body using the supplied band clamp. Tighten using a flathead screw driver or a socket.
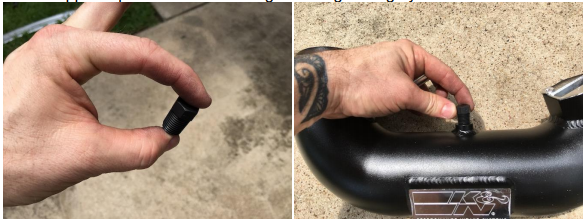
19.Locate the supplied ¼ NPT plug and install into the K&N intake tube. Being plastic, this can easily cross thread so you should install by hand, hand tightening and then turning 2 full turns with a wrench or socket. NOTE: If your car is equipped with the EVAP vent line, you should instead install the supplied quick disconnect fitting – also tightening by hand at first.
20.Use the T20 torx driver to remove the 2 screws holding the mass air sensor into the factory intake tube, and then remove the mass air sensor. NOTE: It is recommended to handle the sensor by the portion on the outside of the intake tube, and try to avoid handling the portion on the inside of the intake tube.
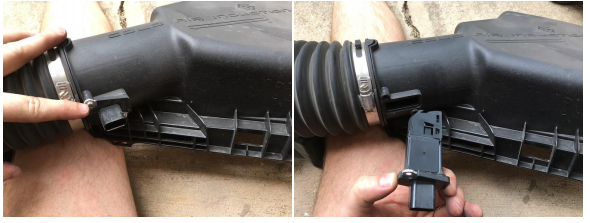
21.Insert the mass air sensor into the K&N intake tube, and use the supplied M4 allen bolts to secure it in place, tightening with a 3mm allen wrench. NOTE: The hole for the mass air sensor is on the opposite side of the K&N intake tube compared to the factory intake tube, so the sensor will install upside down compared to how it was in the factory intake tube. Don’t worry, the bolt holes will ensure proper installation.
22.Be sure that the remaining band clamps are fitted onto both of the silicone hoses, and then install the K&N intake tube into the silicone hoses. Check the alignment of the intake tube for the best fit, and use a flathead screw driver or a socket to tighten the band clamps.
23.Connect the crank case vent line and the EVAP vent line (if equipped), and then connect the mass air sensor electrical connection. Be sure to push in the red tab on the mass air sensor electrical connection once connected.
24.Reinstall the engine cover. Place it lightly on top of the engine first to check alignment, then push firmly at each inside corner of the plenum window so that the 4 tabs pop into place to secure the cover.
25.Reinstall the factory strut tower brace (if equipped), and secure in place with the factory nuts using the 13mm socket.
26.Install the K&N air filter onto the filter adapter – be sure that the supplied band clamp is still on the base of the filter. Tighten the band clamp using a flathead screw driver or a socket.

27.Reconnect the vehicle’s negative battery cable, and double check to make sure that everything else is connected and tightened down properly. Then step back and enjoy
FINAL NOTE: K&N recommends that you check the intake system periodically for alignment, clearance, and proper tightening of all connections in order to maintain optimum performance and to maintain the warranty.
Installation Guide Created by AmericanMuscle Customer Warren N. on 8/21/17