 FREE 1 to 3-Day Delivery on Orders $149+ Details
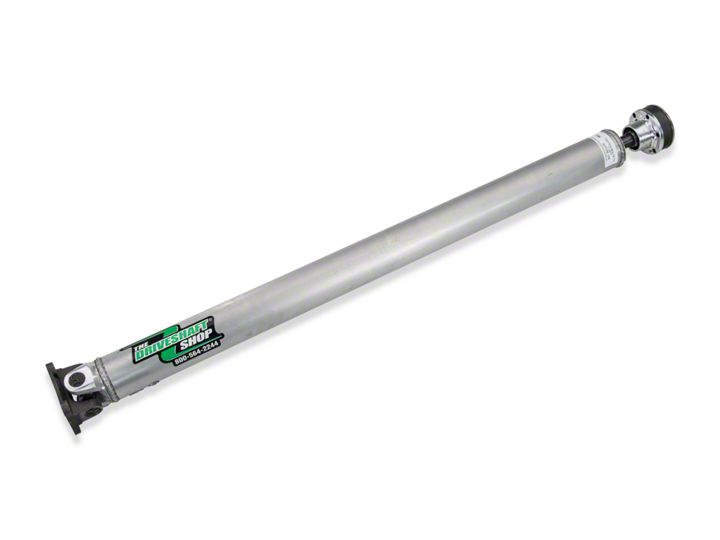
How to Install The Driveshaft Shop 3.5 in. Aluminum One Piece Driveshaft (11-14 V6) on your Ford Mustang
Installation Time
2 hours
Tools Required
- 12mm 12pt Socket 1/2in and 3/8
- 3/8 Ratchet
- Extensions 1/2 and 3/8
- 15mm 6pt Socket
- Loctite
- 1/2" Swivel
- Pry Bar
- Rubber Mallet
- 3/8 and 5/16 Allen Sockets
- Torque Wrench
- Jack and Stands
- Impact Wrench and Ramps (Optional)
Shop Parts in this Guide
TORQUE SPECS DS adapter plate 45ft lbs. Diff driveshaft end 6 bolts 57Ft Lbs. Front driveshaft 4 stock bolts 76ft lbs. Exhaust clamps 4 bolts 30ft lbs
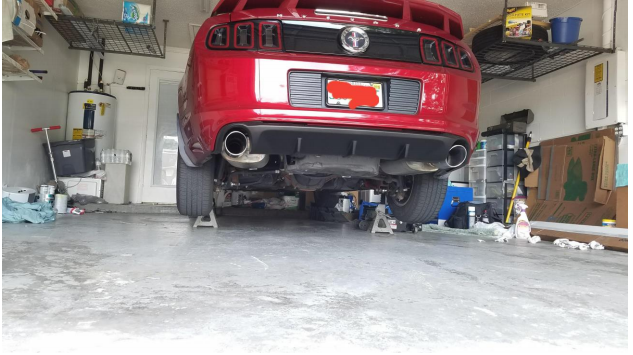
Step 1 Lifting your Mustang
- Either using a jack and jack stands jack up the front and rear of the car or drive the front up on ramps and jack up the rear.
Note – If you were just driving the vehicle, give it a few minutes to cool off being you will be touching the exhaust and be very close to the undercarriage of your vehicle.
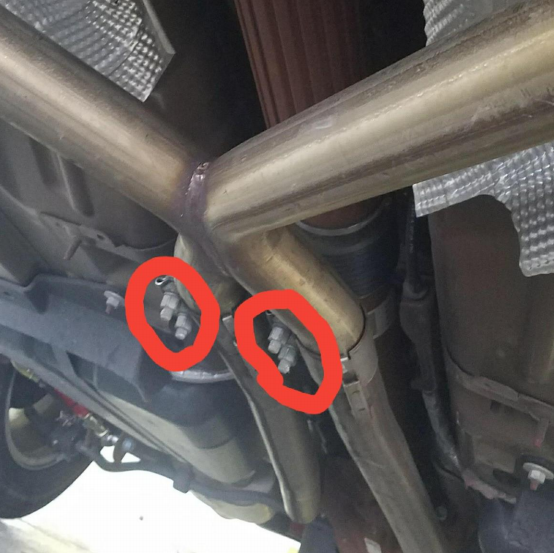
Step 2 Loosen Exhaust Clamps
- Using a 15mm socket, undo the exhaust clamps holding the H-pipe to the midpipes. Move pipes over to the side.
Note – Use caution as these can be very hot if you didn’t let the car cool down first.
Step 3 Removing Transmission Bolts
- In the front of the driveshaft (transmission) there are 4 12mm bolts. You MUST use a 12pt socket to undo these otherwise you will strip them and have a very difficult time getting them out. Keep these 4 bolts as they are used for the new driveshaft.
- Using an impact wrench or socket and ratchet remove the 4 12mm bolts. Putting the car in neutral and spinning the rear tires makes getting to all the bolts very easy, just engage the parking brake when you go to remove a bolt.
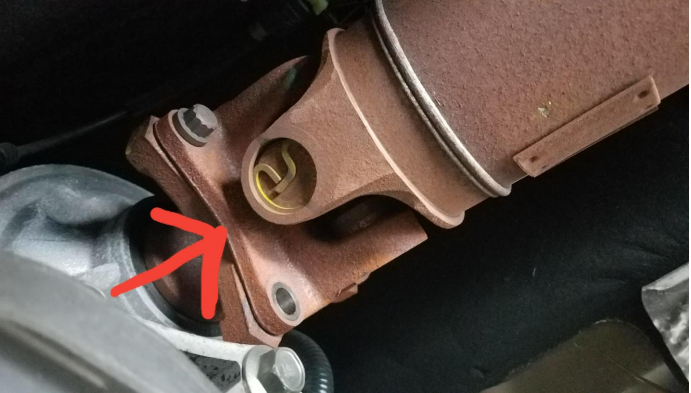
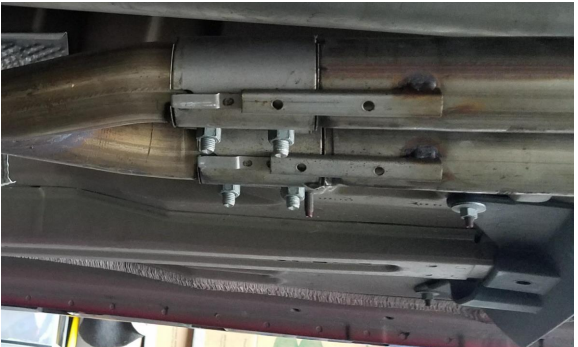
Step 4 Knocking Driveshaft Loose
- Use your pry bar and mallet to break loose the driveshaft from the transmission. Note – It works the best hitting in the spot directed below in the picture, hit all 4 side and it will eventually drop.
- Once the driveshaft comes loose, reinstall one bolt hand tight to hold it up until you get the rear end loose.
Step 5 Removing the rear bolts
- The rear end with the differential requires the same 12m 12pt socket, there are 4 bolts. Repeat steps 3 and 4, you will not need these 4 bolts as the driveshaft comes with new hardware.
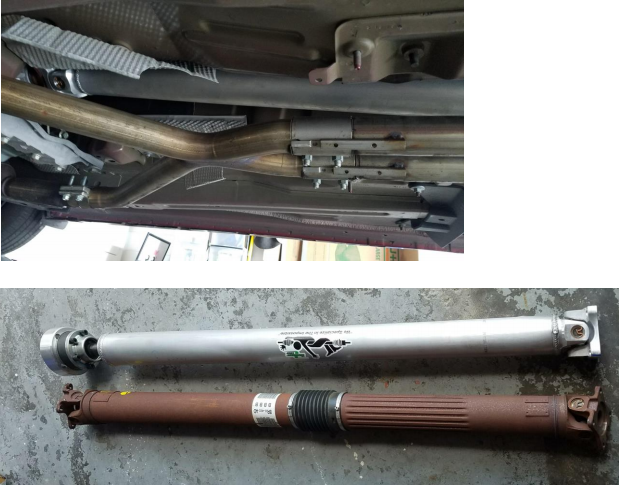
Step 6 Removing the old driveshaft
- Once both ends are loose on the driveshaft slide it down between the midpipes and out the rear of the car.
Note – If you didn’t unbolt the exhaust now is the time to do so it will make getting the driveshaft out way easier and will save you a lot of time and headache.
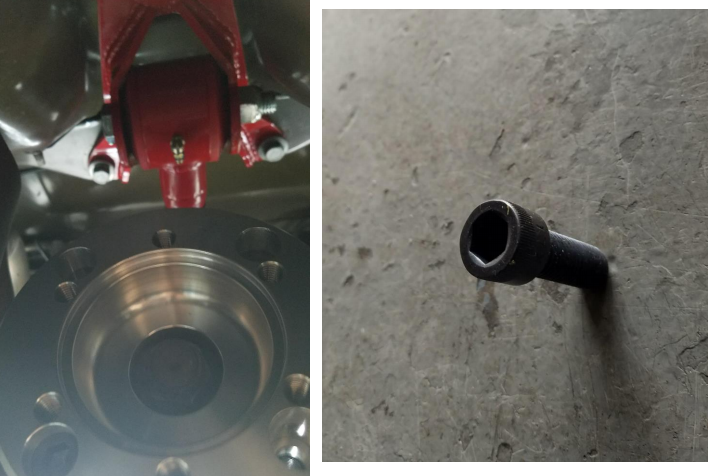
Step 7 Installing the Adapter Plate
- Next you want to install the adapter plate into the rear of the car for the new driveshaft to fit correctly.
- There are 4 bolts that require a 3/8 Allen key or socket (you want to use the socket so you can torque them down correctly).
- Tap the adapter into place with your mallet, add thread locker on the 4 bolts and torque them down to 45Ft Lbs.
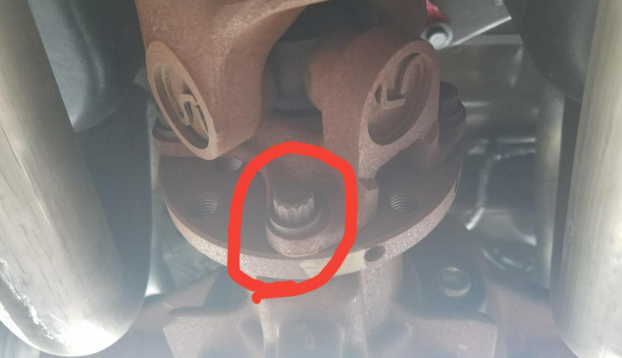
Step 8 Installing New Driveshaft
- Slide your new 1 piece driveshaft from the rear of the car up to the front. The square end goes to the front and mounts to the transmission, the round side mounts to the adapter on the rear differential. If the driveshaft is too long you can tap the CV and it will compress it enough to fit.
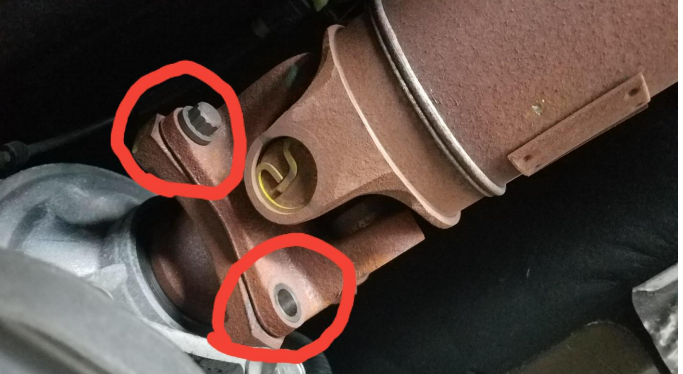
- There will be a mark on the driveshaft that you want to match up with the rear differential (shown below).
- Once lined up put 2 bolts in the front and 2 in the back of the driveshaft to hold it up.(Its easier having a friend help you hold it up while you screw in 2 bolts.)
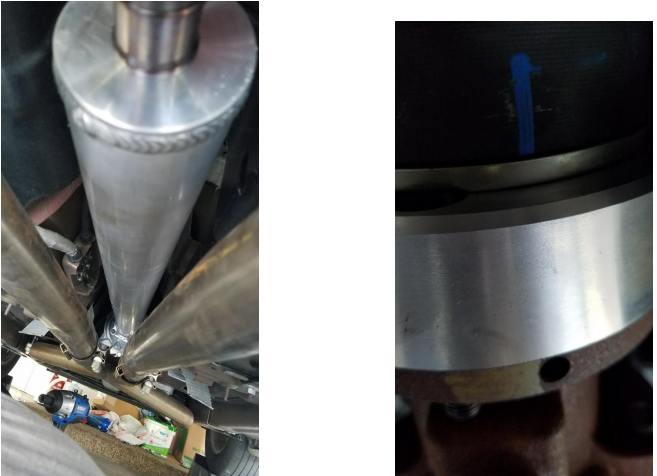
Step 9 Installing rear of Driveshaft
- Once you have the front bolts holding the driveshaft up there are 6 5/16 Allen key bolts that will connect the driveshaft to the adapter. Add thread locker to these 6 bolts and tighten them down to 55ft lbs in a star pattern.
Note – you will have already installed 2 of the bolts to hold the driveshaft in place, once you have the other 4 installed remove the first 2 add thread locker and reinstall.

Step 10 Installing front of Driveshaft
- The front reuses the 4 12mm 12pt bolts taken off the vehicle during the disassembly of the old unit. Add thread locker to these 4 bolts and tighten them down to 76ft lbs.

Step 11 Reconnect the Exhaust
- Reconnect the exhaust clamps and tighten them to 30ft lbs each.
Step 12 Setting car to ride height
- Using 2 Jack stands place one under each side of the rear axle closest to the wheels as possible. Lower the car until it sits firmly on the axle.
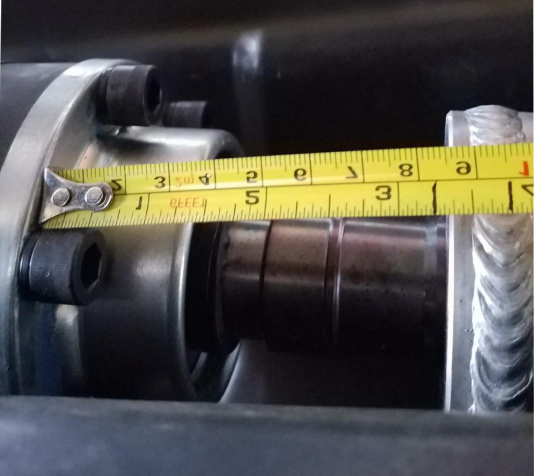
Step 13 Adjusting pinion angle
- Measure the area showed in the picture below. It must measure within 3 1/4 - 3 3/4, if not you must have an adjustable upper control arm to correct this angle.
Finishing up a successful install!
- Congratulations if everything is in check lower your vehicle and take the your mustang for a ride. You will notice how it climbs rpms slightly faster and is more responsive!
Installation Instructions Written by Jeremy Hruska on 4/25/18.

