 FREE 1 to 3-Day Delivery on Orders $149+ Details
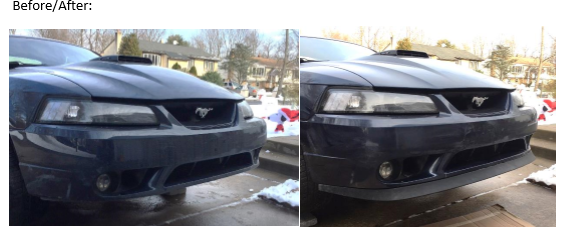
How to Install Ford Mach 1 Chin Spoiler (99-04 All, Excluding 03-04 Cobra) on your Ford Mustang
Installation Time
30 minutes
Tools Required
- Jack
- Jack Stands
- Drill
- 1/4 Inch Drill Bit
- Duct Tape
- Sharpie
- 14 (1/4 x 3/4) Stainless Steel bolts
- 28 1/4 Washers
- 14 1/4 Locking Nuts
- 11mm Socket
- Ratchet
- 11mm Wrench

Shop Parts in this Guide
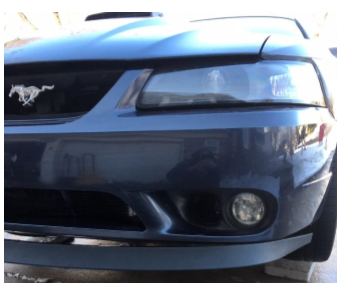
This guide will be useful if installing an OEM Mach 1 Chin Spoiler on a 99-04 V6, GT, or 99/01 Cobra front bumper. Owners of factory Mach 1 front bumpers can skip the entire drilling section of this guide, as the holes are already in place.
[I purchased my hardware listed below from Lowes. I opted for all stainless steel hardware, and the hex heads of the bolts were 11mm. This may be different depending on what hardware you use]
1. Jack the car up so the front end is high enough to work on. Place jack stands under metal sections of the frame. Safely lower the car onto the jack stands.
2. Align your chin spoiler in one of the following ways. Use duct tape to hold the spoiler in place.
- Choice A: Align the edges of the chin spoiler with the edges of the front bumper. This will cause the front of the spoiler to site behind the front of the bumper about a ¼ inch. This look is how the OEM Mach 1s came from the factory
- Choice B: Align the Center of the chin spoiler to be flush with the center of the front bumper. This will make the chin spoiler stick out a little further, and look more aggressive. However, the edges of the chin spoiler will not be flush with the edges of the bumper. (How I will be doing it)
3. Once the spoiler is held up with duct tape. Use a sharpie to mark the holes through the spoiler, onto the bumper cover.
4. You can now remove the chin spoiler from the car. Be careful and gentle when pulling the duct tape off of your paint.
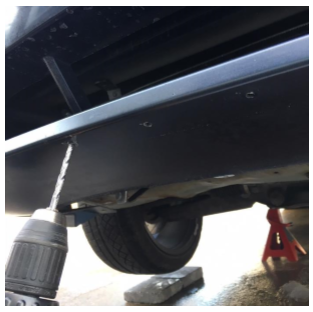
5. Using your ¼ inch drill bit, begin drilling out each of the holes that you previously marked. Be sure to stop drilling once the bit has punched through the plastic. Also be mindful of any fog light wiring or intercooler tubing if they are located in that area.
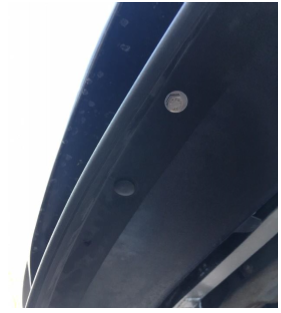
6. Push the three Push pins attached to your bumper into the holes you previously drilled. This will help you hold the spoiler up so that you can attached the other holes using your purchased hardware.
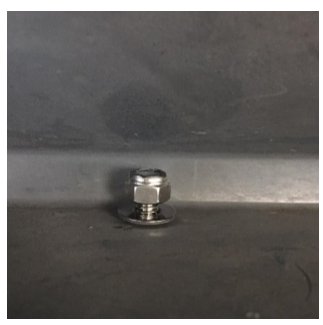
7. Begin attaching your chin spoiler to the bumper. Push the bolt with a washer through the hole. From the inside of the bumper, attach another washer and begin screwing on your locking nuts. Tighten the nut as much as possible with your hand. Do not tighten the bolts down completely just yet.
8. Repeat this process for all of the other holes. Once all of the bolts/washers/nuts are installed. You can now begin tightening everything down. Using your wrench to hold the nut, tighten the bolt using your 11mm socket and ratchet. Tighten everything firmly, but do not overtighten and damage the plastic.
9. Give your chin spoiler a good pull and make sure nothing is loose. Being on the front of the bumper, this spoiler will likely take a beating from curbs and driveways, so make sure it is on nice and tight.
10. Lower your car back down, and enjoy your new aggressive front end!
Installation Instructions Submitted by American Muscle Customer 12/20/17
