Guaranteed Free Delivery by 12/24! available on most items - Details
How to Install BMR Level 2 Rear Control Arm Package - Hammertone (05-10 All) on your Ford Mustang
Installation Time
2 hours
Tools Required
- Break Bar
- Ratchet and/or Impact Drill
- 18 mm Socket
- 21 mm Socket
- 13 mm Socket or 50 IP Torx (FTX50TPE)
- 10 inch Ratchet Extension Bar
- (2) Jack Stands
- Floor Jack x 2
- (2) Wheel Chocks or Blocks

Shop Parts in this Guide
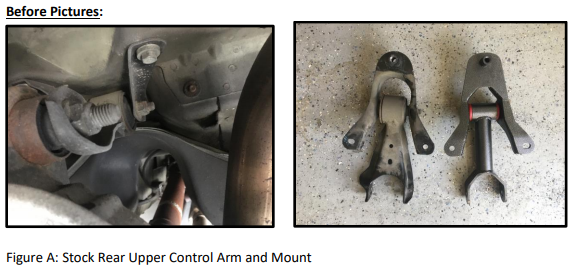
1. Remove the upper control arm mount bolt.
- It is accessed under the rear seat inside the car.
- Remove the lower section of the rear seat by releasing the tow lower clips located at the front of the seat bottom.
- Push back in the middle of each side of the seat, lift and pull out. (Figure B)
- Push back in the middle of each side of the seat, lift and pull out. (Figure B)
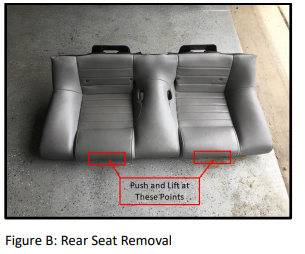
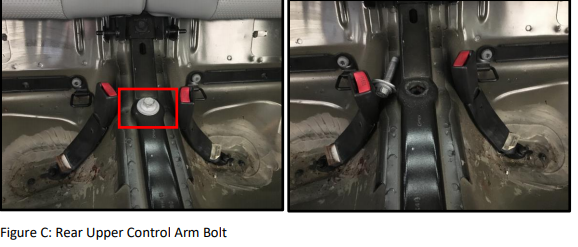
- Utilizing the 18mm socket, breaker bar and ratchet, remove the rear upper control arm bolt. (Figure C)
2. Engage emergency brake and put manual transmission in gear; automatic transmission use Park.
3. Place wheel chock or blocks in front of both front wheels.
4. Carefully raise the rear of the car by placing the jack in accordance with your owner’s manual.
5. Place jack stands on either side of the vehicle under the sub frame.
6. Support the rear end with 2 x jacks. (Figure D)

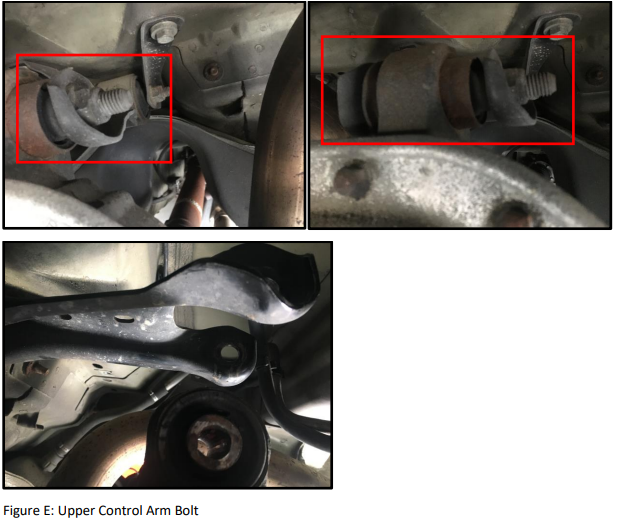
7. Utilizing the 21mm socket, breaker bar and ratchet remove the upper control arm bolt (Figure E)
NOTE – The rear end will shift slightly on the jack once the bolt is removed.
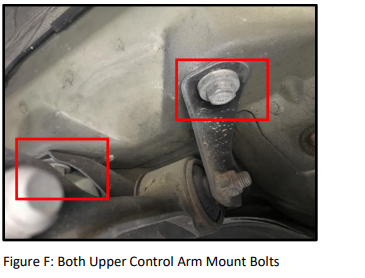
8. Utilizing the 18mm socket, breaker bar, 10-inch extension bar and ratchet remove both upper control arm mount bolts. (Figure F)
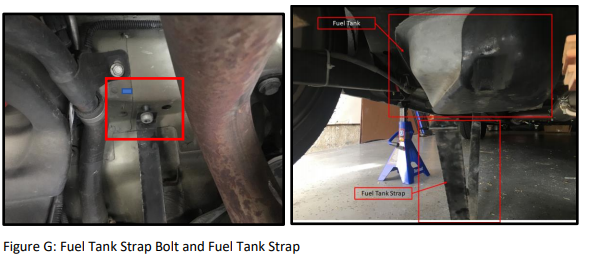
9. Lower the fuel tank
Note – It is not possible to remove the upper control arm mount without lower the fuel tank. a. Utilizing the 13mm socket or 50 IP Torx remove the bolts on the fuel tank straps at the rear of the fuel tank. (Figure G)
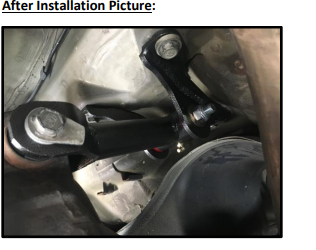
10. Remove the upper control arm and upper control mount
11. Assemble the BMR upper control arm and upper control arm mount.
- Lubricate the polyurethane bushings (where applicable).
- Install the BMR control arm into the BMR upper control arm mount.
- Do not tighten the bolt; this will be accomplished once installed for ease of installation.
12. Utilizing the rear lower factory bolts, install the BMR upper control arm mount and tighten to 110 ft/lbs.
13. Insert the upper front factor bolt and tighten to 129 ft/lbs.
14. Reinstall the rear seat.
15. Reposition the fuel tank and tighten the strap bolts to 33 ft/lbs.
16. Utilizing the jack rotate the rear end until the mounting hole lines up and insert the rear bolt.
17. Lift the rear end to ride height and tighten both control arm cross-bolts to 129 ft/lbs.
Note – Failure to load the suspension before tightening these bolts can result in premature bushing failure due to bushing pre-load.
18. Go back over each nut and bolt to ensure it is correctly tightened.
19. Raise the car off the jack stands and carefully lower it back down.
20. Remove the wheel chocks or blocks.