FREE 1 to 3-Day Delivery on Orders $149+ Details
How to Install BMR Rear Coil-over Conversion Kit - Hammertone (79-04 All, Excluding 99-04 Cobra) on your Ford Mustang
Installation Time
2 hours
Tools Required
- Hydraulic jack and jack stands
- Wrenches and sockets: 18mm, 21mm, 3/4", 7/8"
- Pry-bar and rubber mallet
- Drill with 1/2" drill bit

Shop Parts in this Guide
INSTALLATION:
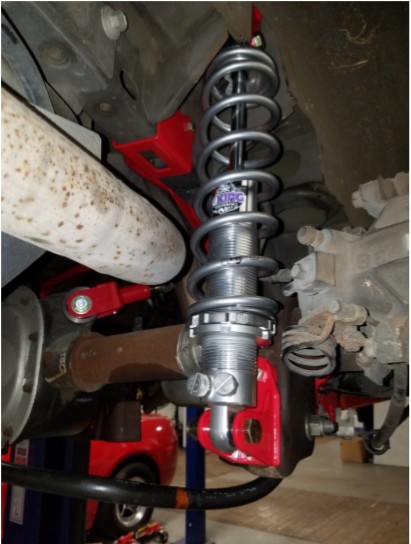
1. Open trunk and remove interior panels to gain access to the upper shock studs.
2. Using a 15mm wrench or socket, remove the upper shock nuts inside the trunk. IMAGE 1
3. Lift vehicle and support with jack stands under the frame rails. Remove wheels/tires.
4. Support the axle with a hydraulic jack then remove the lower shock bolts using a 21mm wrench or socket. Remove the shocks.
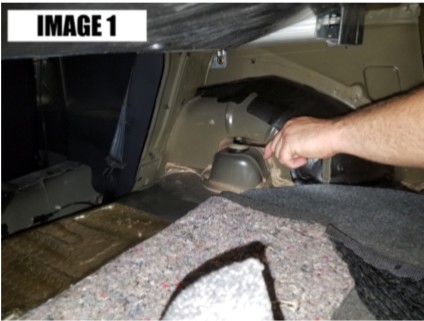
5. If vehicle is equipped with OE quad shocks, remove them using a 15mm and 18mm wrench or socket as shown in IMAGE 2
6. Lower the rear end and remove the factory coil springs.
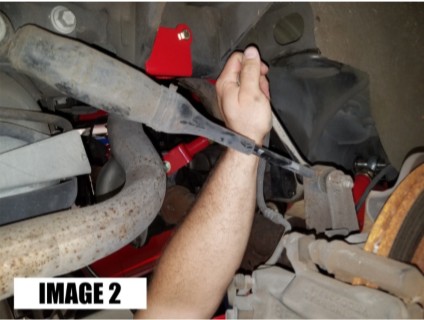
7. Bolt the BMR lower bracket to the factory shock mounting hole as shown in IMAGE 3 using the 1/2" x 1.25" bolt, large washer and lock nut.
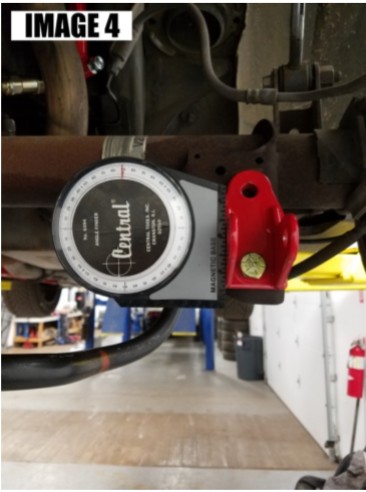
8. Place an angle-finder or level on the bracket to make sure it is vertical, then tighten the bolt using two 3/4" wrenches. IMAGE 4
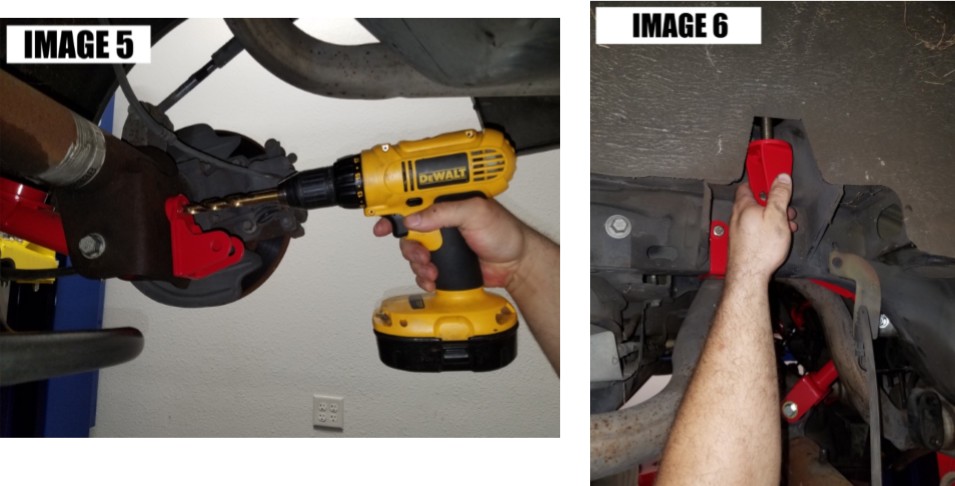
9. Using the upper hole as a drill g
uide, drill a 1/2" hole in the rear end bracket. IMAGE 5. 10. Insert a 1/2" x 1.5" bolt, large washer, and lock nut and tighten using two 3/4" wrenches.
11. Now move to the upper shock mount. This mount will require two people to install, one inside the car and one inside the wheel-well. Insert the upper BMR bracket as shown in IMAGE 6, inserting the stud through the factory shock mounting hole.
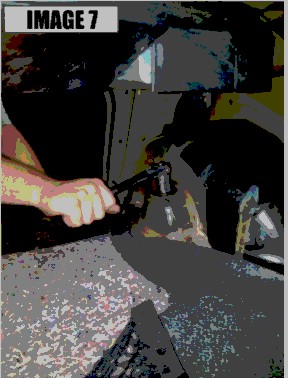
12. Place the 5/8" flat washer and lock nut onto the stud and tighten while the second person holds the bracket from inside the wheel-well using a 3/8" extension or large screwdriver. Tighten the nut using a 7/8" wrench or socket. See IMAGE 7 on the following page.
13. Once the upper and lower mounts are installed, assemble the coilovers of your choice using the manufacturers recommendations.
14. Install the coil-overs using the provided 1/2" x 2.5" bolts, stainless washers, and poly-lock nuts.
15. Adjust to the desired ride height, re-install wheels/tires, and lower the vehicle.
COIL-OVER RECOMMENDATIONS:
For a 1"-3" lowering, we recommend the following Viking coil-over or a coilover with specs similar to these below:
Viking Part #C209-W
• Bearing style ends suggested, bushing style ends not recommended
• Most coil-overs are available in two different mounting widths, 1" and 1.25". BMR brackets are designed to accommodate a 1.25" width. The W in the part number above dictates the wider bearing.
Shock Specs:
Compressed height - 11.57