 FREE 1 to 3-Day Delivery on Orders $149+ Details
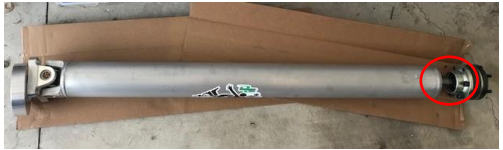
How to Install The Driveshaft Shop 4 in. Aluminum One Piece Driveshaft (15-17 GT w/ Automatic Transmission) on your Ford Mustang
Installation Time
2 hours
Tools Required
- Lift or Jack/Stands
- 12mm,13mm,15mm Wrench/Sockets
- Torque Wrench
- Socket Wrench
- 7mm,8mm,10mm Ball Head Socket
- Various Extensions
- Blue Loctite

Shop Parts in this Guide
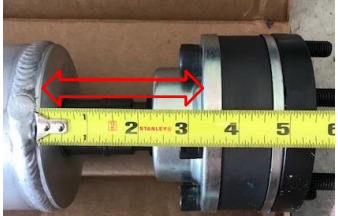
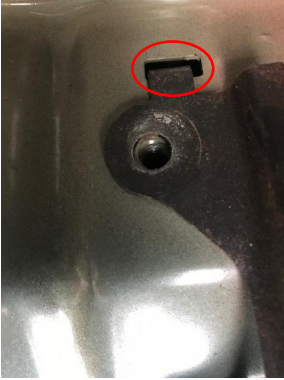
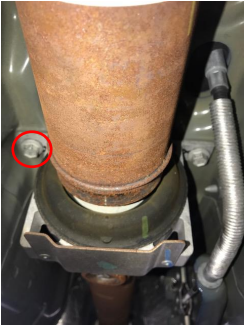
1. IMPORTANT- Before starting the installation process measure the distance between the two points shown in picture. If this distance is not between 3-1/4 inch and 3-3/4 inch, do not install and contact driveshaft shop -IMPORTANT
2. Safely place the vehicle on lift or jackstands.
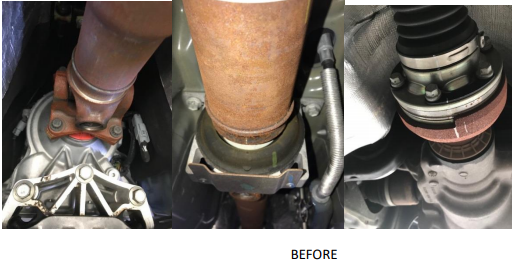
3. The exhaust will be removed first.
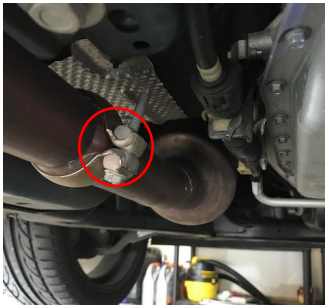
4. Loosen the 15mm nuts on the exhaust sleeves. (4 nuts total)

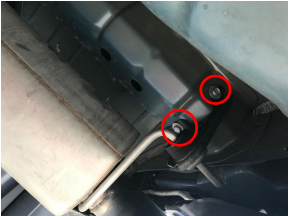
5. Remove the 13mm bolts on exhaust hangers by IRS. (2 bolts total)
6. Remove 13mm bolts on muffler exhaust hangers. (4 bolts total)
7. Exhaust hanger brackets have hooks attaching to vehicle. After bolts are removed the bracket must be lifted slightly to be unhooked.
8. Cat back exhaust can now be slid off and removed.
9. Removal of the driver side cat to midpipe connecting pipe will make the install easier. Loosen the 15mm nut and remove the pipe if desired.
10. Before removing, it is recommended to mark the mating points of driveshaft to differential pinion flange as well as driveshaft to transmission flange. If stock driveshaft is reinstalled in the future these marks will be used to attain original alignment for balancing purposes. If the driveshaft is over articulated (harsh angles) at the center bearing, damage can be sustained to stock driveshaft. Support the driveshaft where it is being disconnected so it does not accidentally fall and cause damage or injury.
11. Note that when loosening and tightening driveshaft bolts it may be necessary to engage parking brake to prevent driveshaft from spinning.
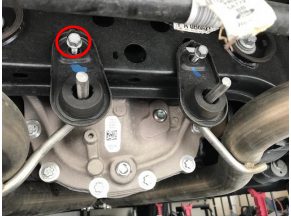
12. Remove 10mm driveshaft to differential pinion flange bolts located at rear of driveshaft. (6 bolts total)
13. Remove 12mm driveshaft to transmission flange bolts located at front of driveshaft. (4 bolts in total)
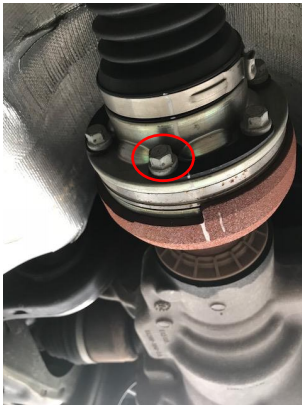
14. The last bolts holding up the driveshaft will now be removed. Make sure the driveshaft is supported or it will fall. Remove 13mm bolts on the driveshaft center bearing. (2 in total).
15. The driveshaft can now be removed.
16. To prepare new driveshaft, remove the 10mm allen bolts from the front of driveshaft. This is the side with 4 bolts. The driveshaft comes with these running through the front spacer that will mate to transmission flange. (4 bolts in total). Set spacer and bolts aside
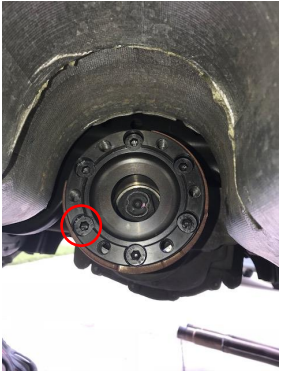
17. Remove the 8mm allen bolts from the rear of driveshaft holding the rear adaptor. This adaptor will mate between differential pinion flange and driveshaft. (6 bolts in total). There will be 6, 7mm allen bolts inside the adaptor. Set adapter and all bolts aside.
18. Position rear adapter in differential pinion flange with recessed bolt holes facing towards the front of car as to be visible when adapter is in place.
19. Apply blue Loctite to the 6, 7mm allen rear adapter bolts (shorter of the 2 sets of rear bolts) and install in the recessed bolt holes. Tighten to 45 ft-lbs in a star pattern.
IMPORTANT-Be careful as the bolts’ outer edges round very easily and may strip if tightened at an angle- IMPORTANT.
20. Position driveshaft into place to verify correct fitment. Have assistant hold driveshaft in place or support with jack or jack stand if alone. If used, place towel or other padding between jack stands and driveshaft to prevent driveshaft from damage.
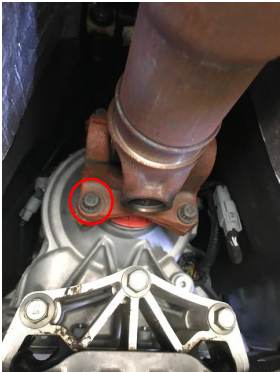
21. Apply blue Loctite to the 6, 8mm allen rear bolts (longer of the 2 sets of rear bolts) and install fastening driveshaft to the rear adapter that was installed in differential pinion flange during step 18. Tighten to 57 ft-lbs in star pattern.

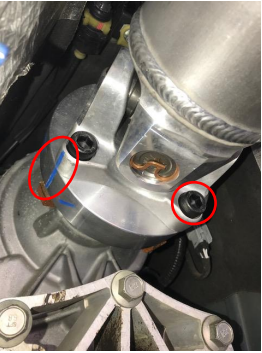
22. Move to front of driveshaft.
23. Insure that the mark made from driveshaft shop on the driveshaft lines up with the mark made on the spacer. The spacer has a lip protruding around the inner ring on one side. The side with the lip will face towards the driveshaft.
24. Apply blue Loctite to the 4, 10mm allen bolts and install with spacer sandwiched between driveshaft and transmission flange. Tighten to 70 ft-lbs in star pattern. Notice mentioned mark alignment in picture.
25. Check all bolts for correct torque specs.
26. This would be an optimal point to install a driveshaft loop if desired. Americanmuscle.com offers multiple driveshaft loop options.
27. Reinstall cat to midpipe connecting pipe and tighten nut.
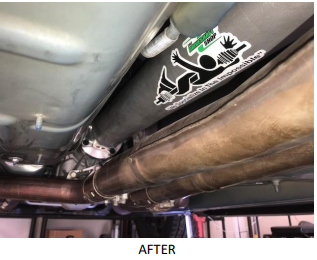
28. Slide exhaust back onto vehicle.
29. Install and tighten hanger bolts and exhaust sleeve nuts.
30. Safely lower vehicle back to ground from lift or jackstands.
31. Test drive and make sure no vibrations are present.
Installation Instructions Written By AmericanMuscle Customer 5/29/2018.
