 FREE 1 to 3-Day Delivery on Orders $149+ Details
How to Install a Shelby GT500 Rear Valance & Exhaust Kit on your 2013-2014 Mustang
Installation Time
3 hours
Tools Required
- Goggles Wrench 11mm and 13mm deepwell socket 13mm socket Socket extension (I used 12in)
- Old rugs/towels to protect bumper/mufflers from concrete
- Dremel (with wheel for cutting plastic) or body saw
- Needle Nose Pliers
- Drill

Shop Parts in this Guide
Installation
Removal of Rear Bumper
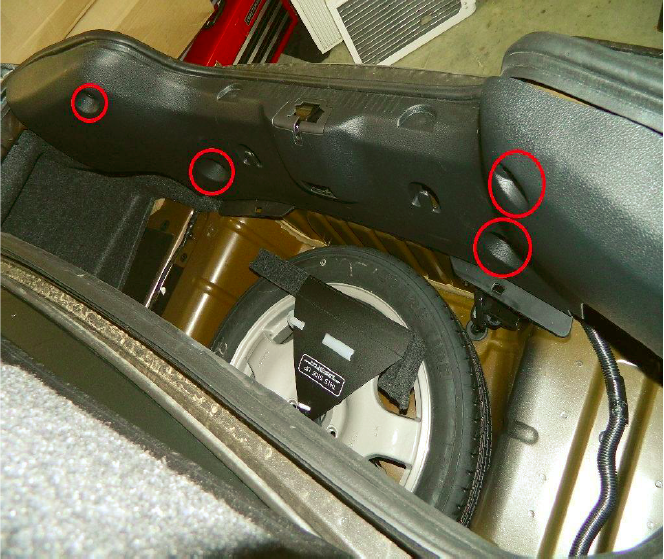
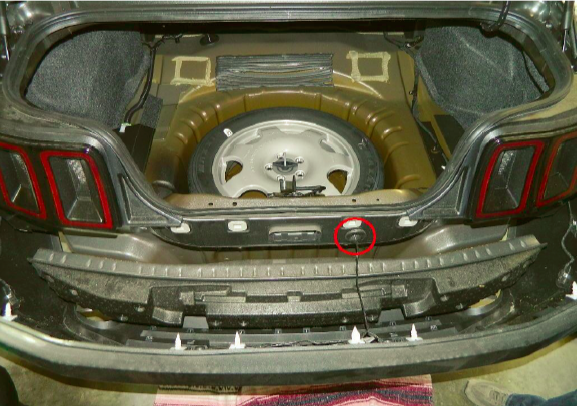
1. Begin by securely lifting the rear of the car. In trunk, unscrew (2) plastic screws and (2) Christmas tree fasteners from back plastic panel. Lift up on plastic panel to remove from car, disconnect wiring harness from inside trunk light. Also disconnect inside wiring harness for rear lights.
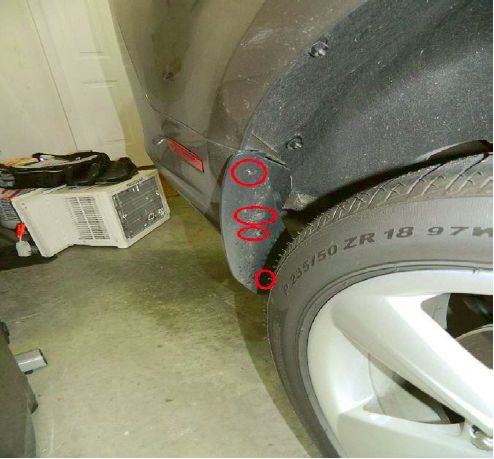
2. Unscrew (3) screws from rear splash guard and then unclip rear splash guard and remove. (Both sides). This is made much easier by removing the rear wheels, I used a ¼ hex head on a wrench with a phillips head bit on the end to get them out. Not ideal, but it worked.
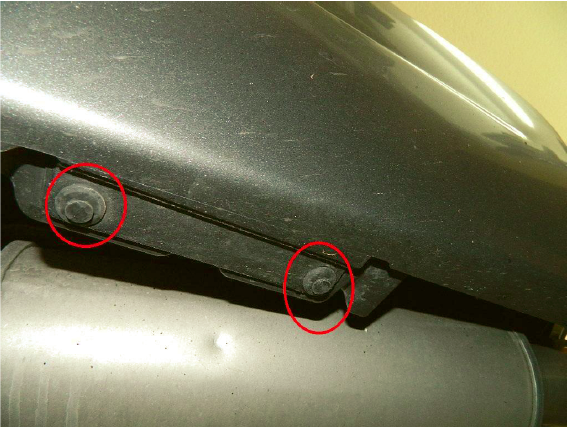
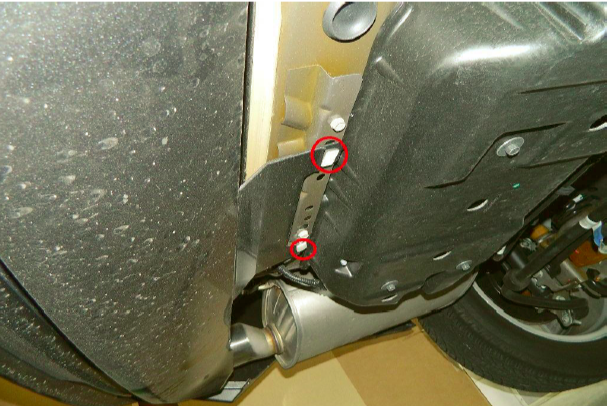
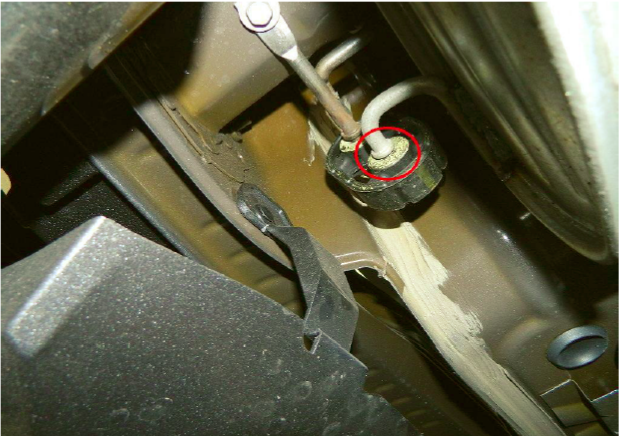
3. Remove (2) pins from under side of bumper that run alongside the mufflers.
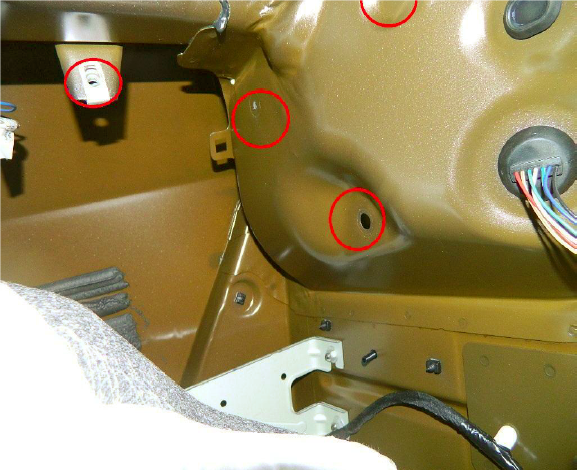
4. Although not necessary, it made it much easier to remove the rear tail lights as well, as the rubber seals along the bumper go up under the lights. (I did not do this until reinstalling the bumper, I should have done it from the start). Remove (1) bolt (13mm) on each side along the cloth of the trunk to get access to all (3) nut/washer sets (11mm) per light. Deepwell sockets are used for the taillights.
With carpet bolt removed.
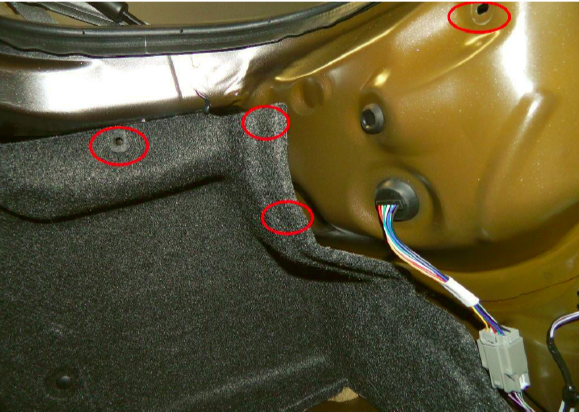
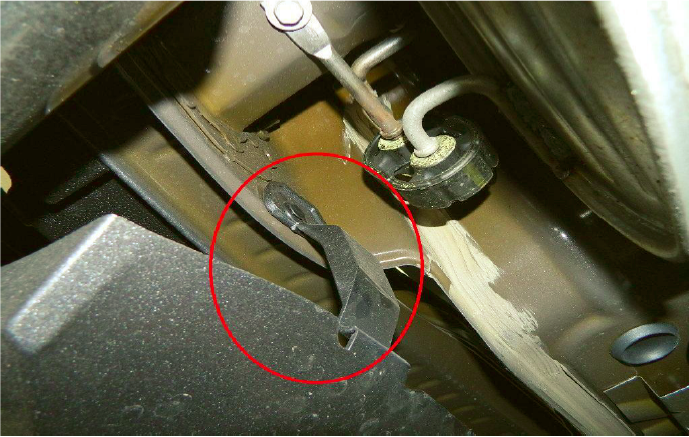
5. Underneath the car, remove (2) push pins and (2) white plastic locks. You will reuse the (2) push pins, but not the white locks. I found the white locks difficult to remove, but since that part of the bumper is getting cut off later, I just broke them to get them out. The new valance comes with its own white plastic locks, so this worked for me.
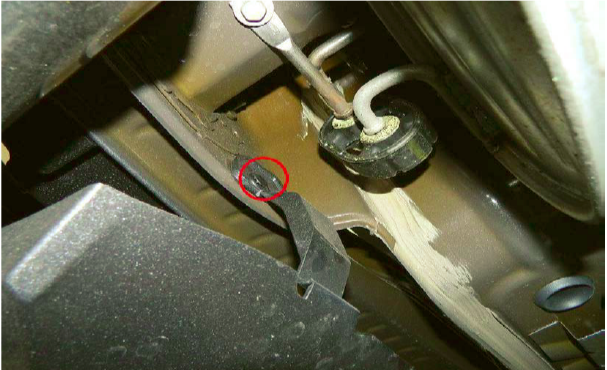
White Plastic Locks
6. Begin removing bumper. Starting with wheel wells, separate the bumper from the car from front to back evenly. Once at back of car, push the wiring harness for the rear lights (including the grommet) through the trunk, leaving it connected to the bumper. Free the bumper from the car and set it down on an old rug or towel to protect it.
Uninstall Stock Mufflers
1. Under car where muffler meets pipe, loosen bolt with 13mm socket. There is a metal flange used at the factory for installation that will not need to be removed, and the Shelby Quad Exhaust comes with its own clamp/bolt pre-installed on the muffler.

2. Remove rubber holder from muffler. This takes some effort. I used my body to help support the muffler while doing this.
3. Once free, push up on mid pipe and separate ball joint of muffler from pipe. This also takes some effort. (Picture shows bolt still tightened, yours will be loose at this point.)

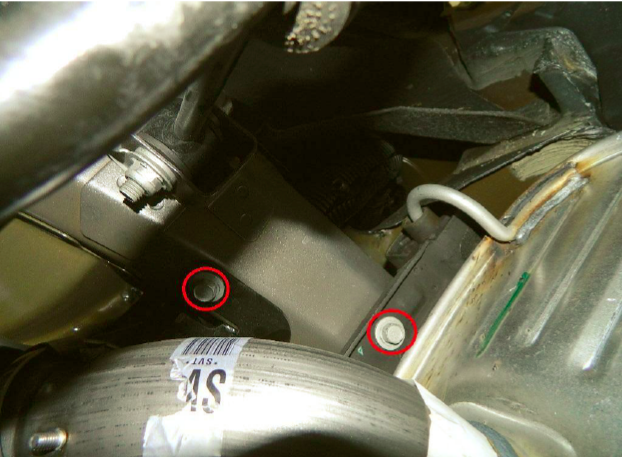
4. Then slide muffler further back along its last set of mounts to make space for removing bolts that secure front muffler bracket. On passenger side there are (2) 13mm bolts, there are (3) on the driver side. Once these are removed, the muffler will fall. Take care to support muffler the whole time.
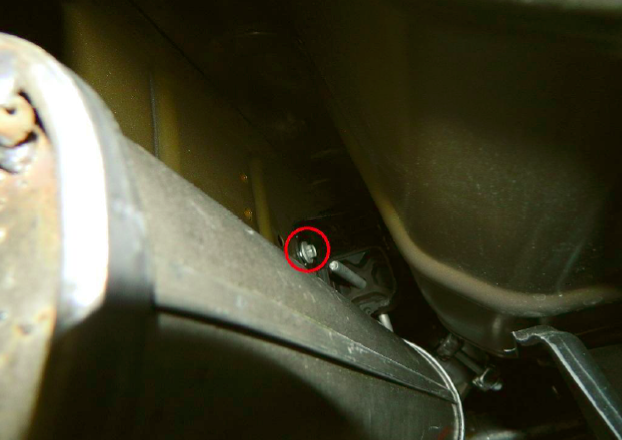
5. Driver side third bolt is difficult to get to, I used the wrench with a regular 13mm socket and pushed the muffler away from the frame to get my hands in. Picture taken from rear of car looking down muffler.
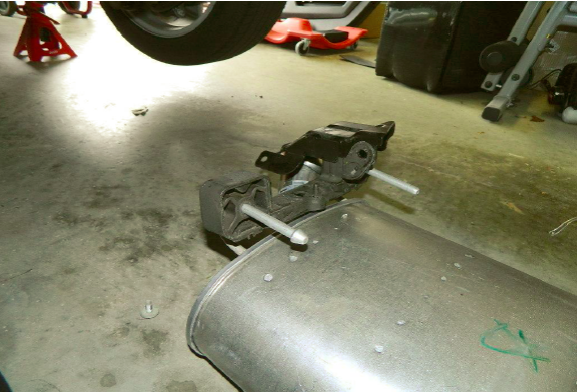
6. Remove mounting bracket from each muffler and transfer to the new mufflers.
7. Repeat process in reverse to install new mufflers.
Rear Valance Install
1. From inside the bumper, remove red reflectors (2) and black trim. Use pliers to compress the clips. You will reinstall the reflectors, but not the black trim piece. (picture taken after the main Dremel cut was made.)
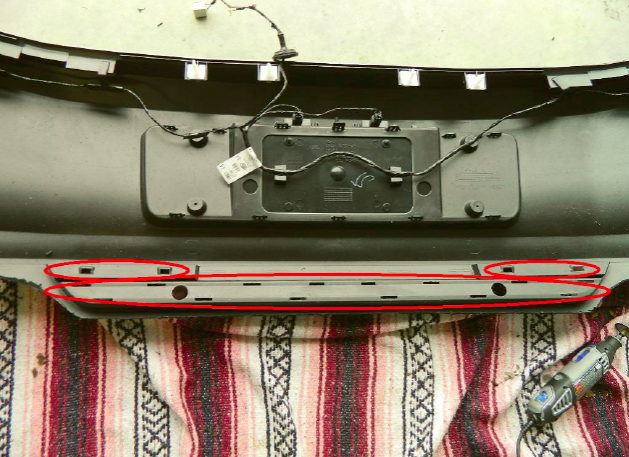
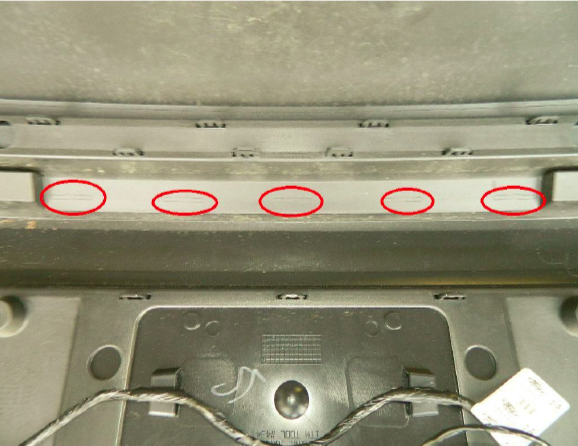
2. Along the inside, Ford drew a line for where to cut the bumper, as well as (9) slits for the new valance to clip into. Because of the angle of the Dremel, I drilled holes along the line every few inches and did a decent portion of the Dremel cutting from the outside of the bumper. Not ideal, but it worked. A body saw would prevent the need for this.
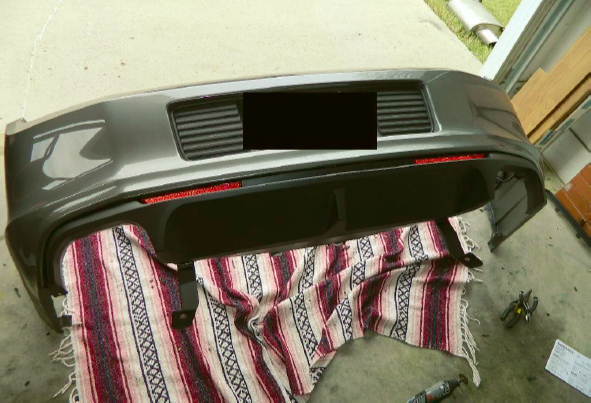
3. New valance snaps into place. Make sure to check that it is fitting correctly and make additional cuts/adjustments as needed. Snap in red reflectors.
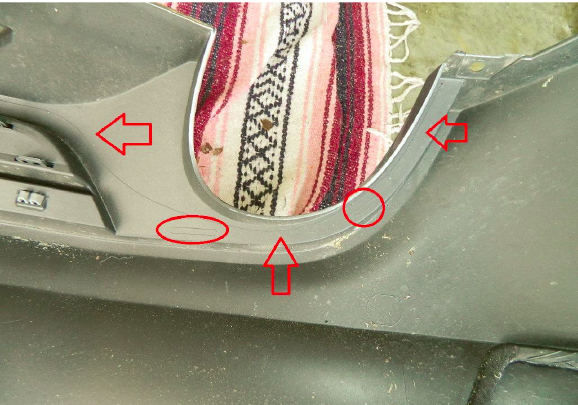
4. With taillights removed (helps a lot) bumper snaps on, from middle to outside. Reinstall rear electrical harness and grommet while snapping bumper back on. Make sure that plastic arms that were uninstalled on old valance are set up to fit between bumper and muffler. If you don’t, they will have to be bent to fit, likely resulting in them breaking. (See pic).
5. Once bumper is snapped on, reinstall push pins on plastic arms and included white plastic locks. Reinstall push pins under side of bumper next to mufflers, and then the rear splash guard and its screws. Reinstall taillights, and then the inner trunk plastic panel.
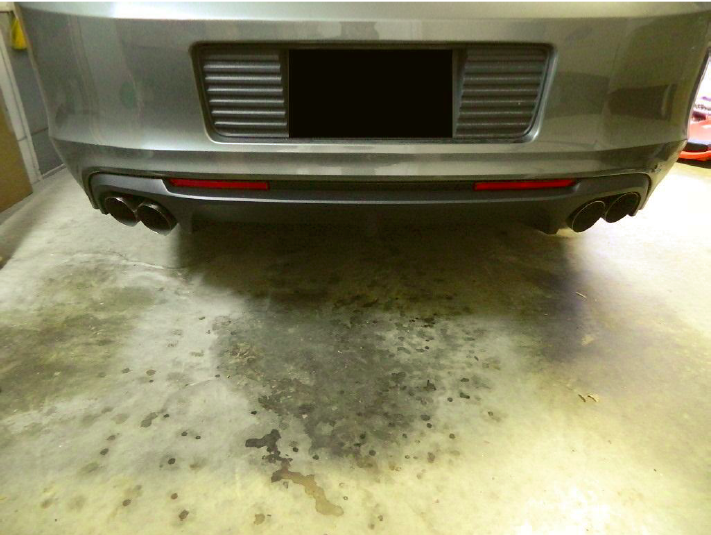
The mufflers can be adjusted up and down a little after install, after this picture I pushed the right side down to be in line with the left. Win!
Installation Instructions written by AmericanMuscle customer Erik Wangenheim 2.1.13

