FREE 1 to 3-Day Delivery on Orders $149+ Details
How to Install a Mishimoto Direct Fit Baffled Oil Separator System - Black Silicon Hose
Installation Time
1.5 hours
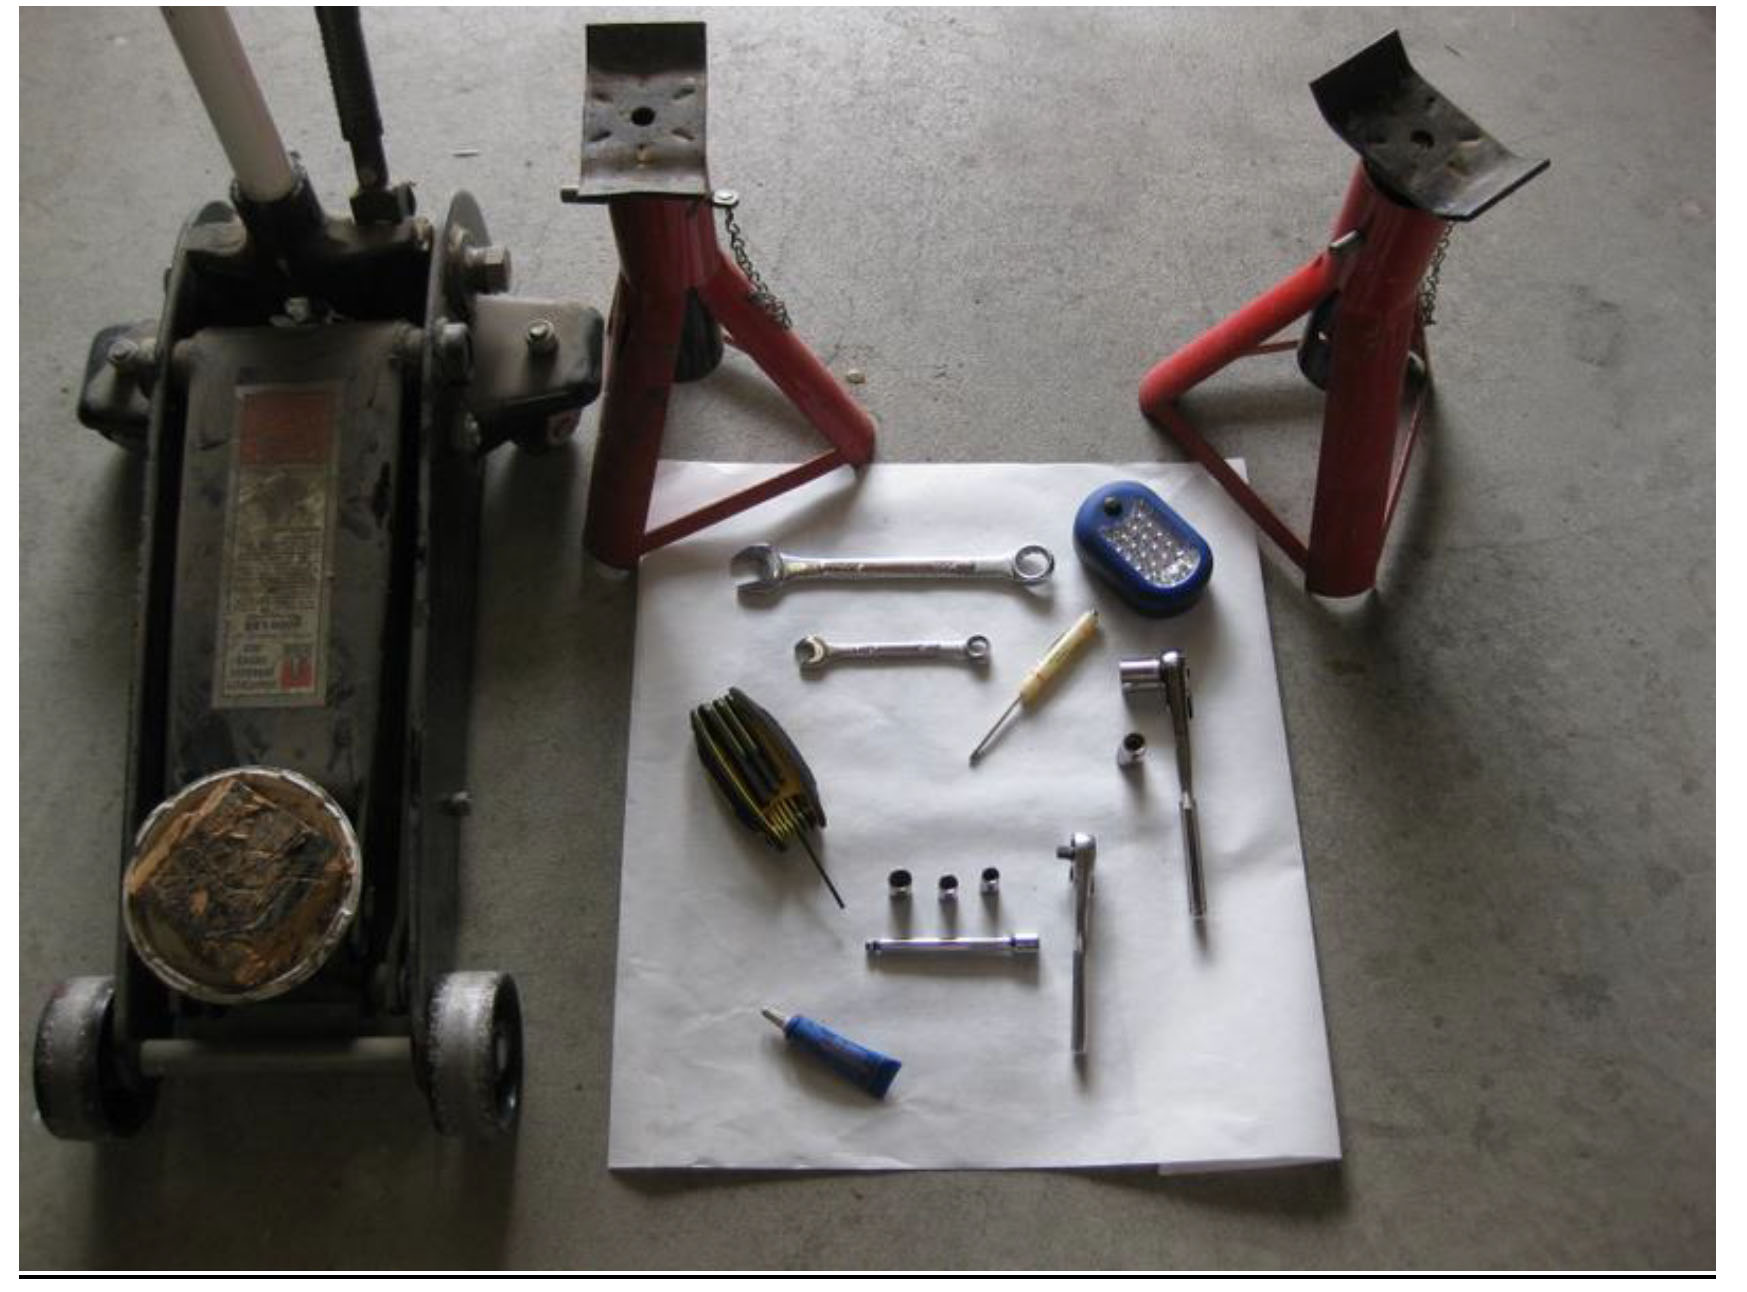
Tools Required
- Hydraulic floor jack and jack stands, or lift
- Flashlight
- 2.5 mm Allen wrench
- 10mm box end wrench
- 17mm box end wrench
- 10mm deep socket or socket and extension
- ¼” drive ratchet
- Standard screwdriver (for hose clamps)

Shop Parts in this Guide
1. Preparation
1. Chock the vehicle if using jack and jack stands
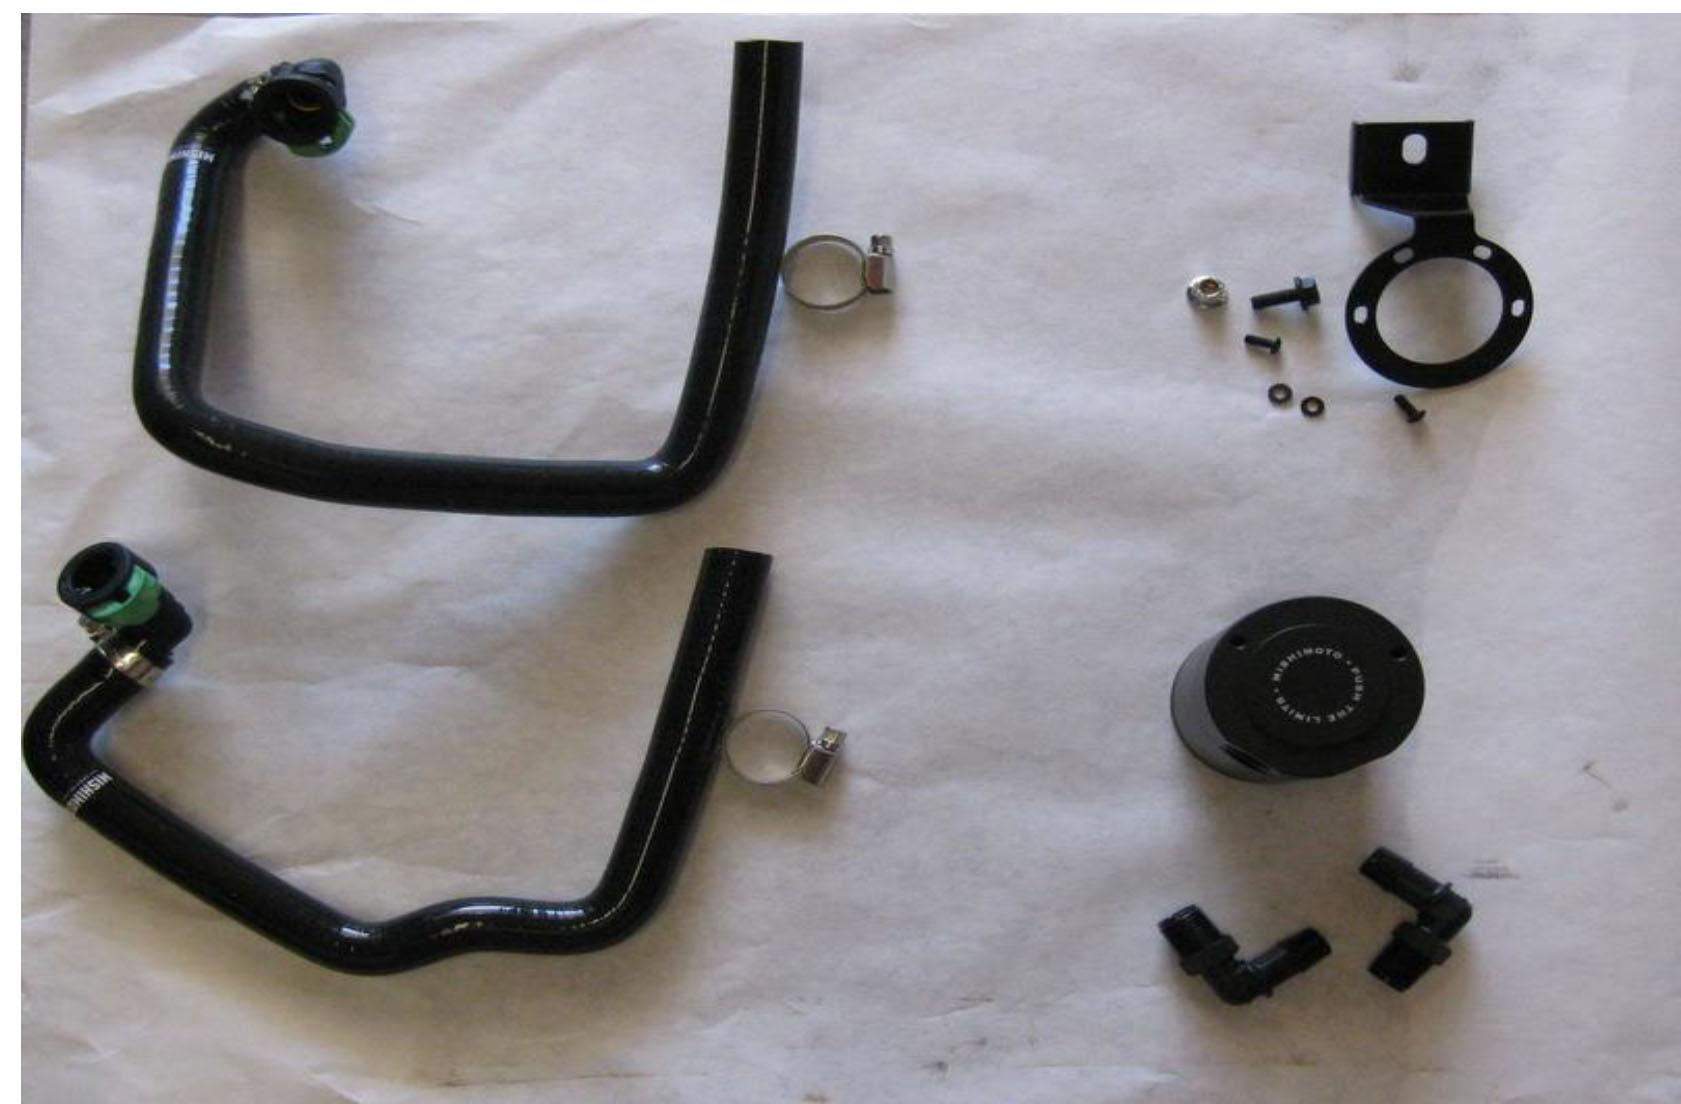
2. Check to make sure all of the parts are accounted for
a. Two silicone hoses with quick connects on one end
b. Two screw drive clamps
c. Two 90 degree male thread x barb elbows
d. Catch can e. Catch can mount
i. 2 – 2.5mm Allen head screws
ii. 2 – plastic washers
iii. 10mm bolt and nylon lock nut
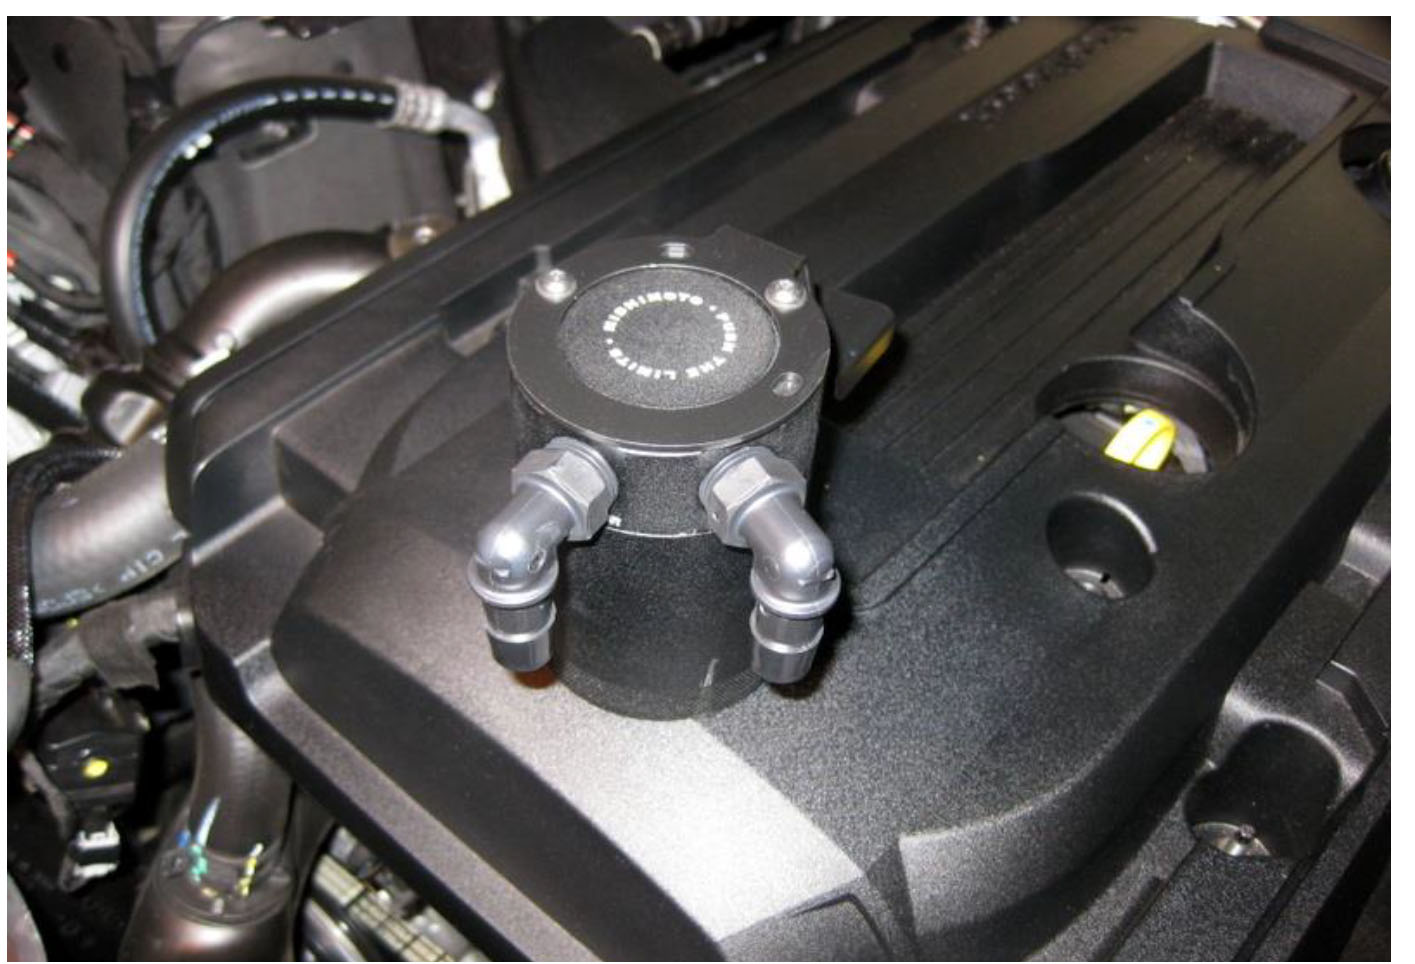
2. Preparing the Catch Can
1. Using the 2 – 2.5mm Allen head screws and washers, screw the top to the can, as shown, hand tight
2. Screw the elbows into the can, finishing pointing downward
a. You can use the 17mm wrench, however I used my hands to tighten them
Optional: I chose to remove both the plastic engine cover, and then the belt idler in order to better access the connections and to provide a little more room to work. While technically these are optional, as the Mishimoto video appears to complete the job otherwise, I suspect that the small amount of time needed to open the area up will save a lot of frustration in the end.
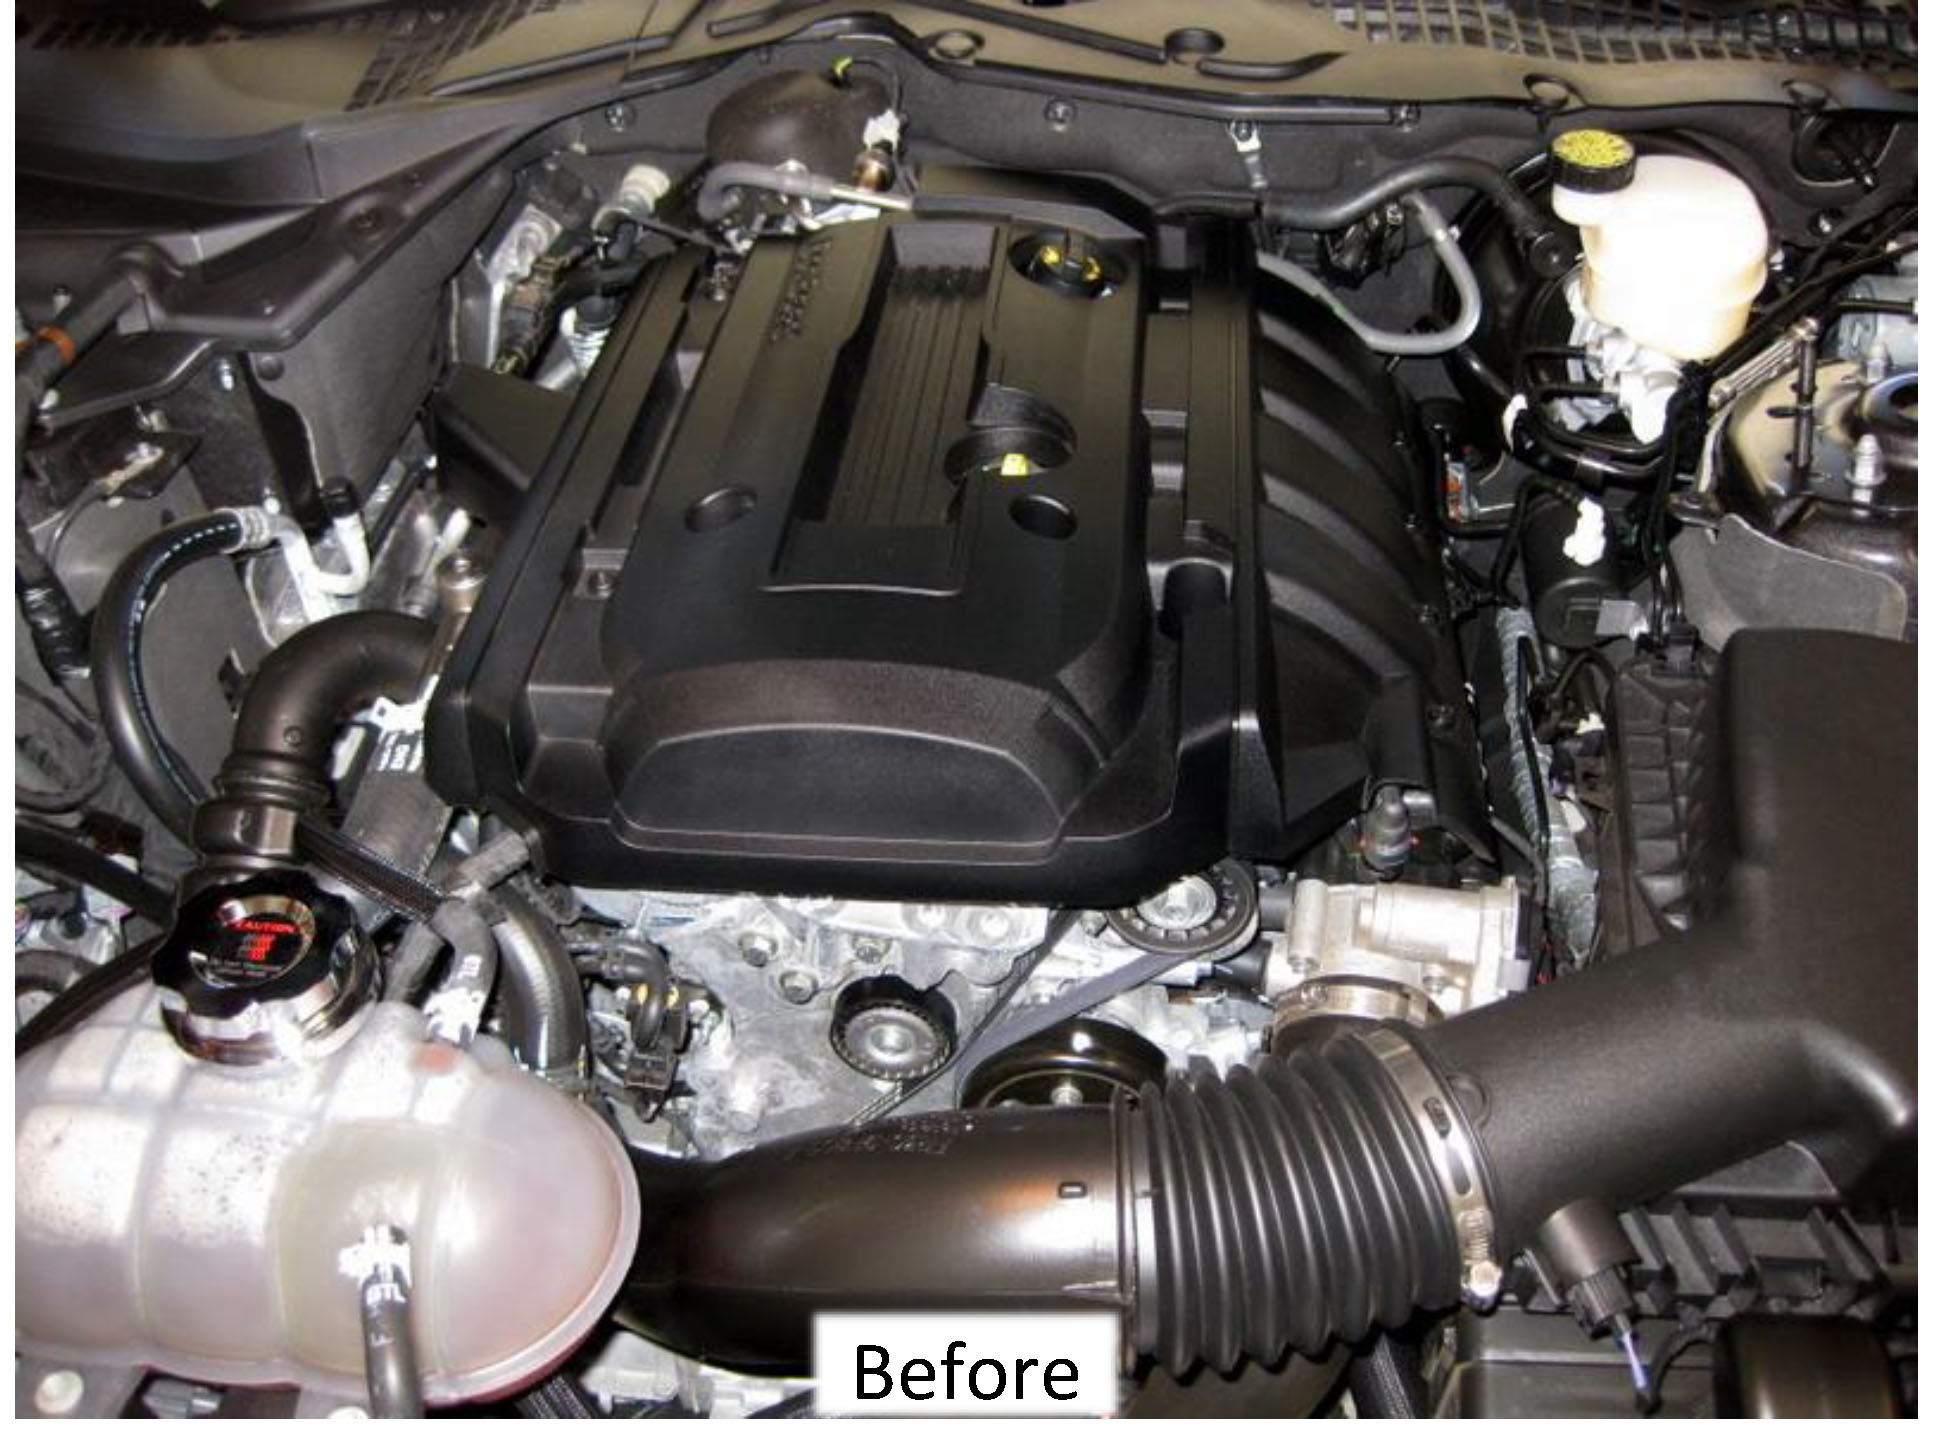
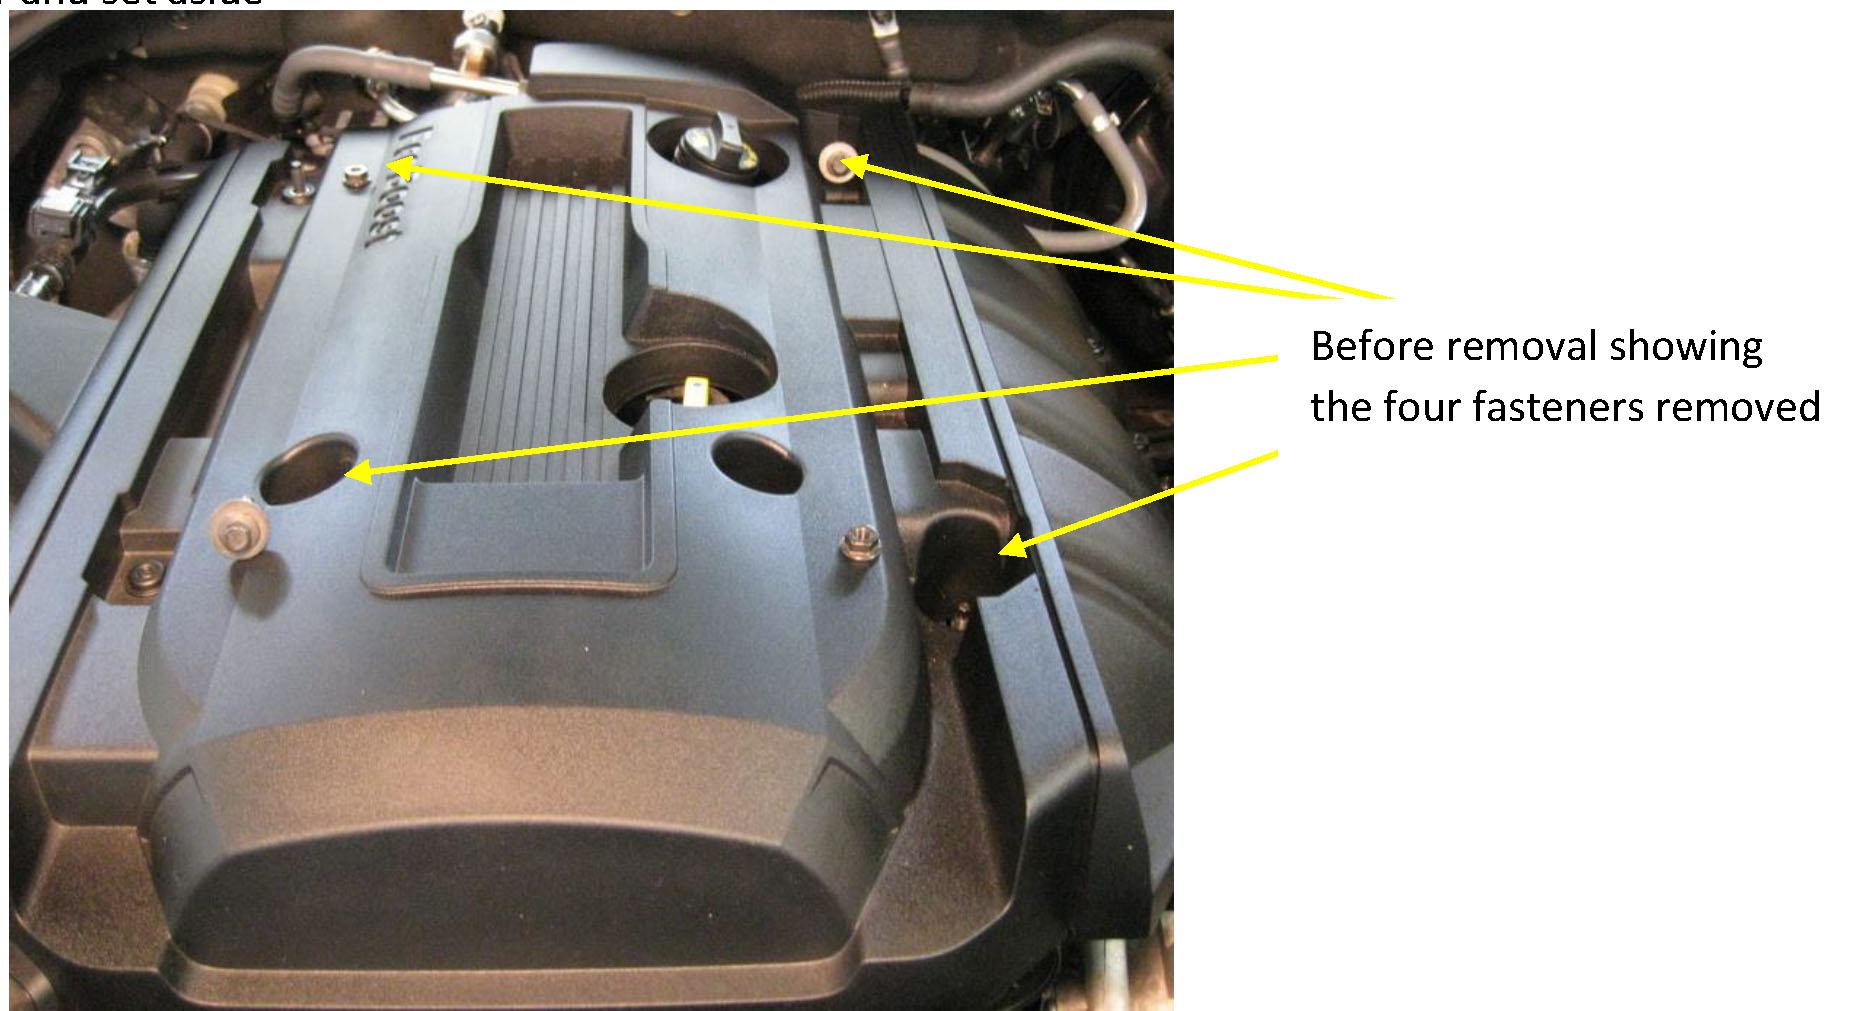
3. Removing the Engine Cover (optional, but recommended):
1. Remove the 2 x 10mm nuts from the studs
2. Remove the 2 x 8mm bolts from the opposite corners
3. Remove cover and set aside
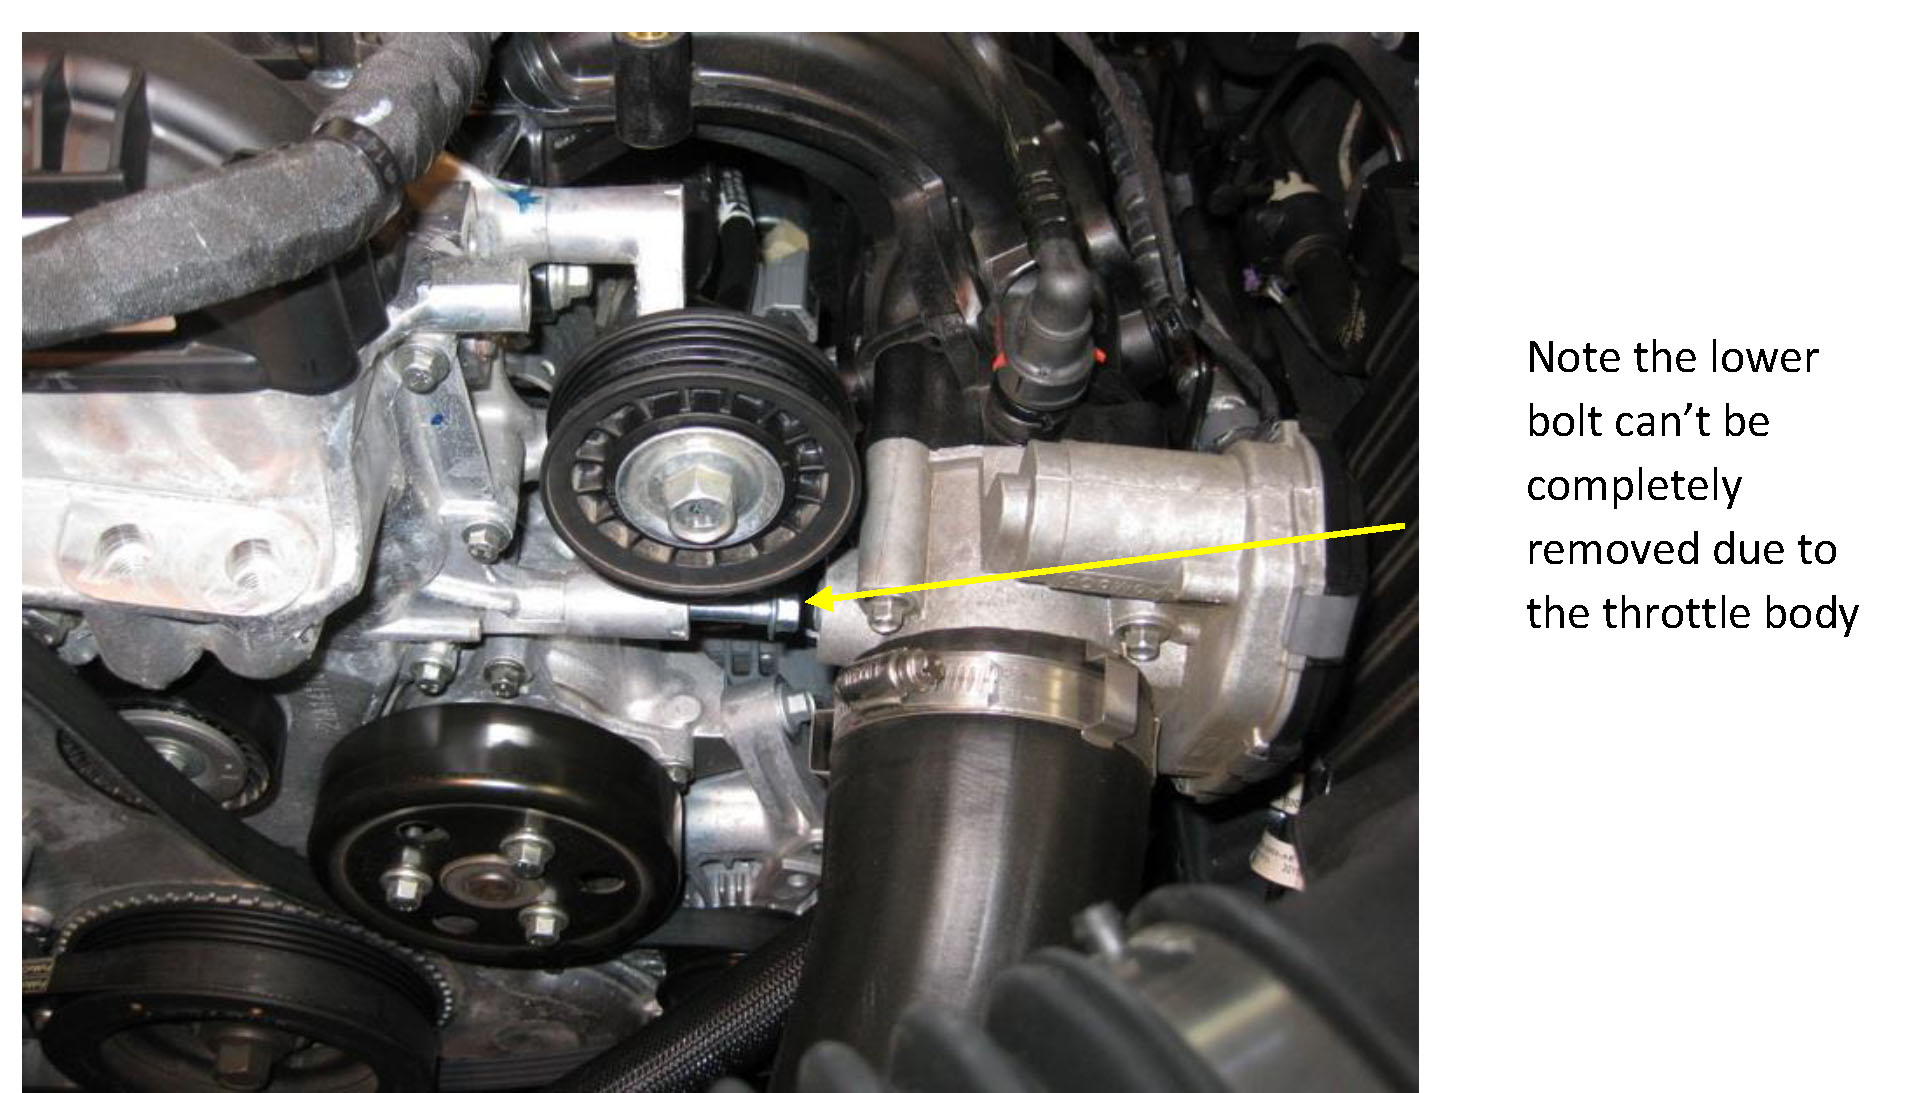
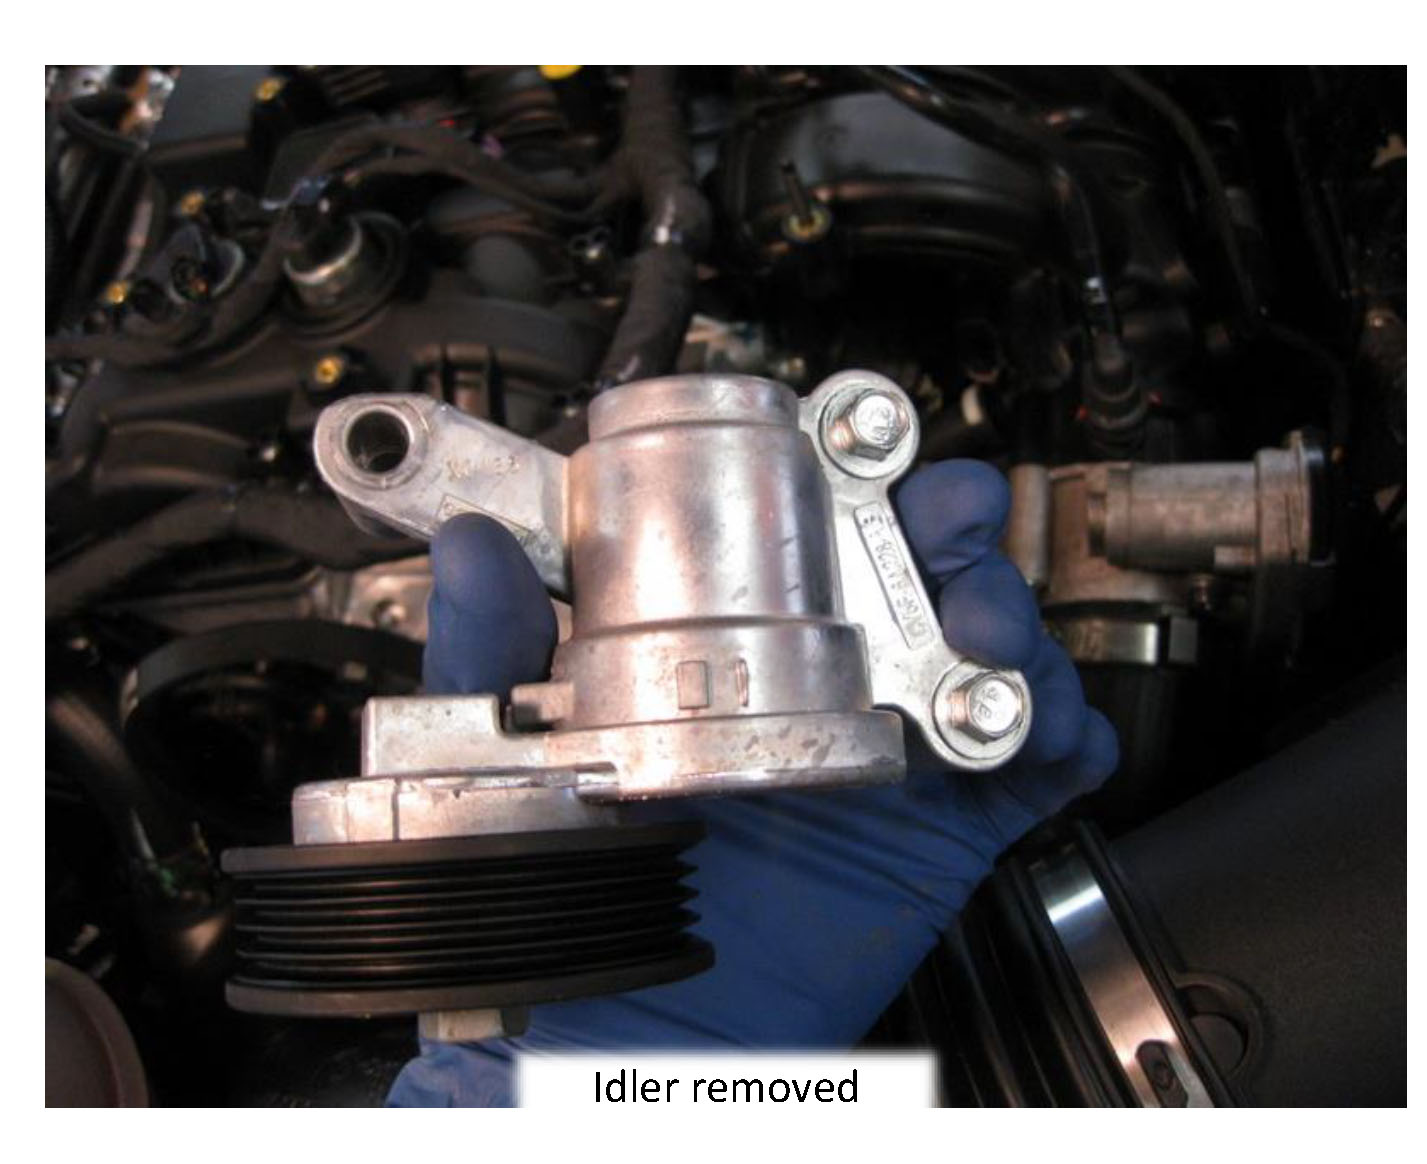
4. Removing the idler (optional, but recommended):
1. Using the 15mm socket and 3/8 ratchet, move the idler pulley up and midline to remove the belt
2. Secure the belt out of the way, noting how it was routed
3. Remove the 3 x 10mm idler bolts. The top bolt is easy; the other two will require a box end wrench
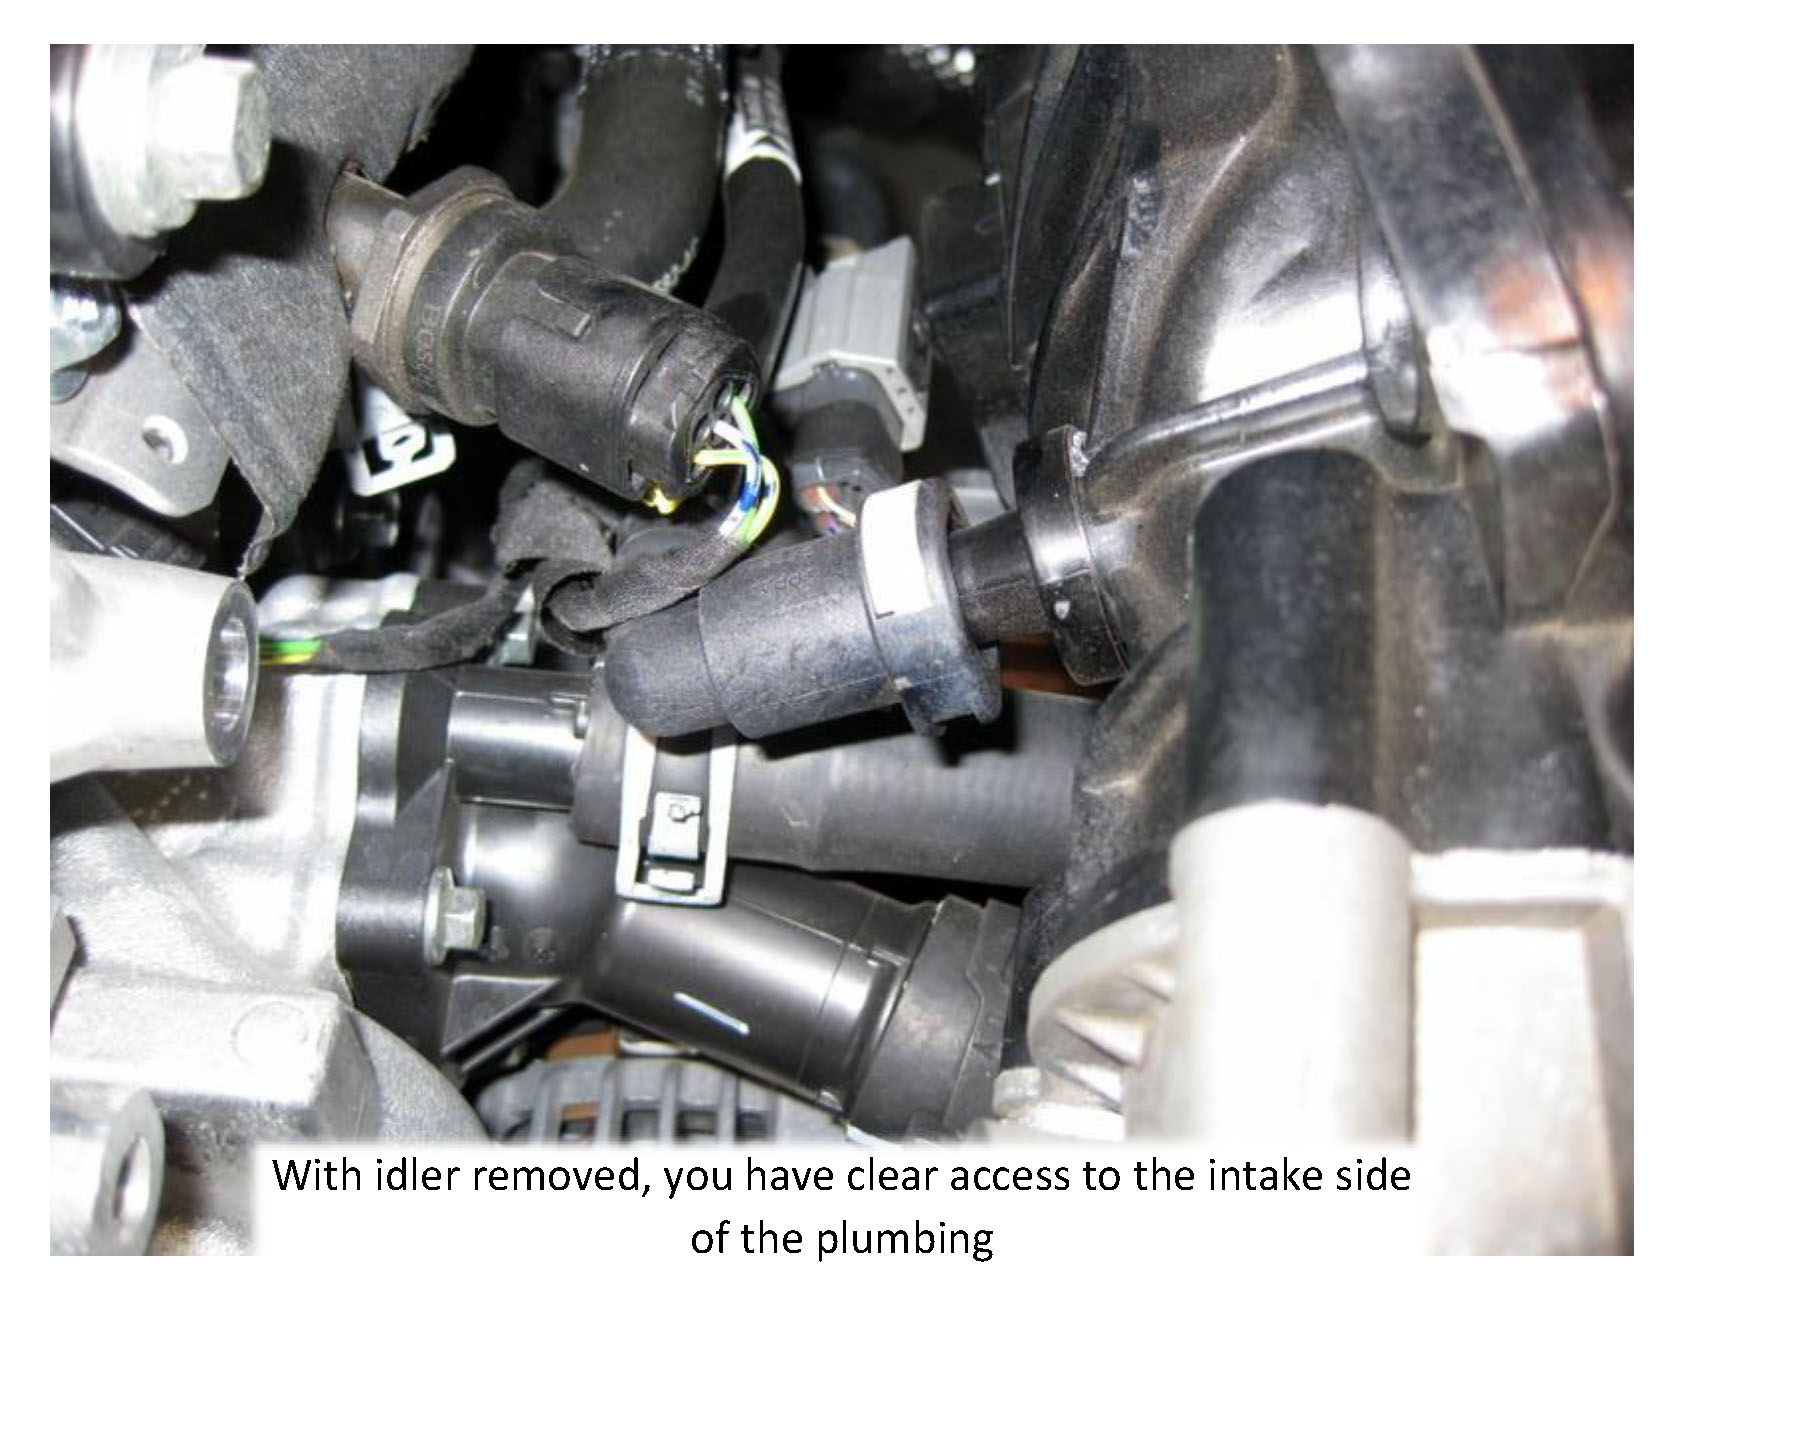
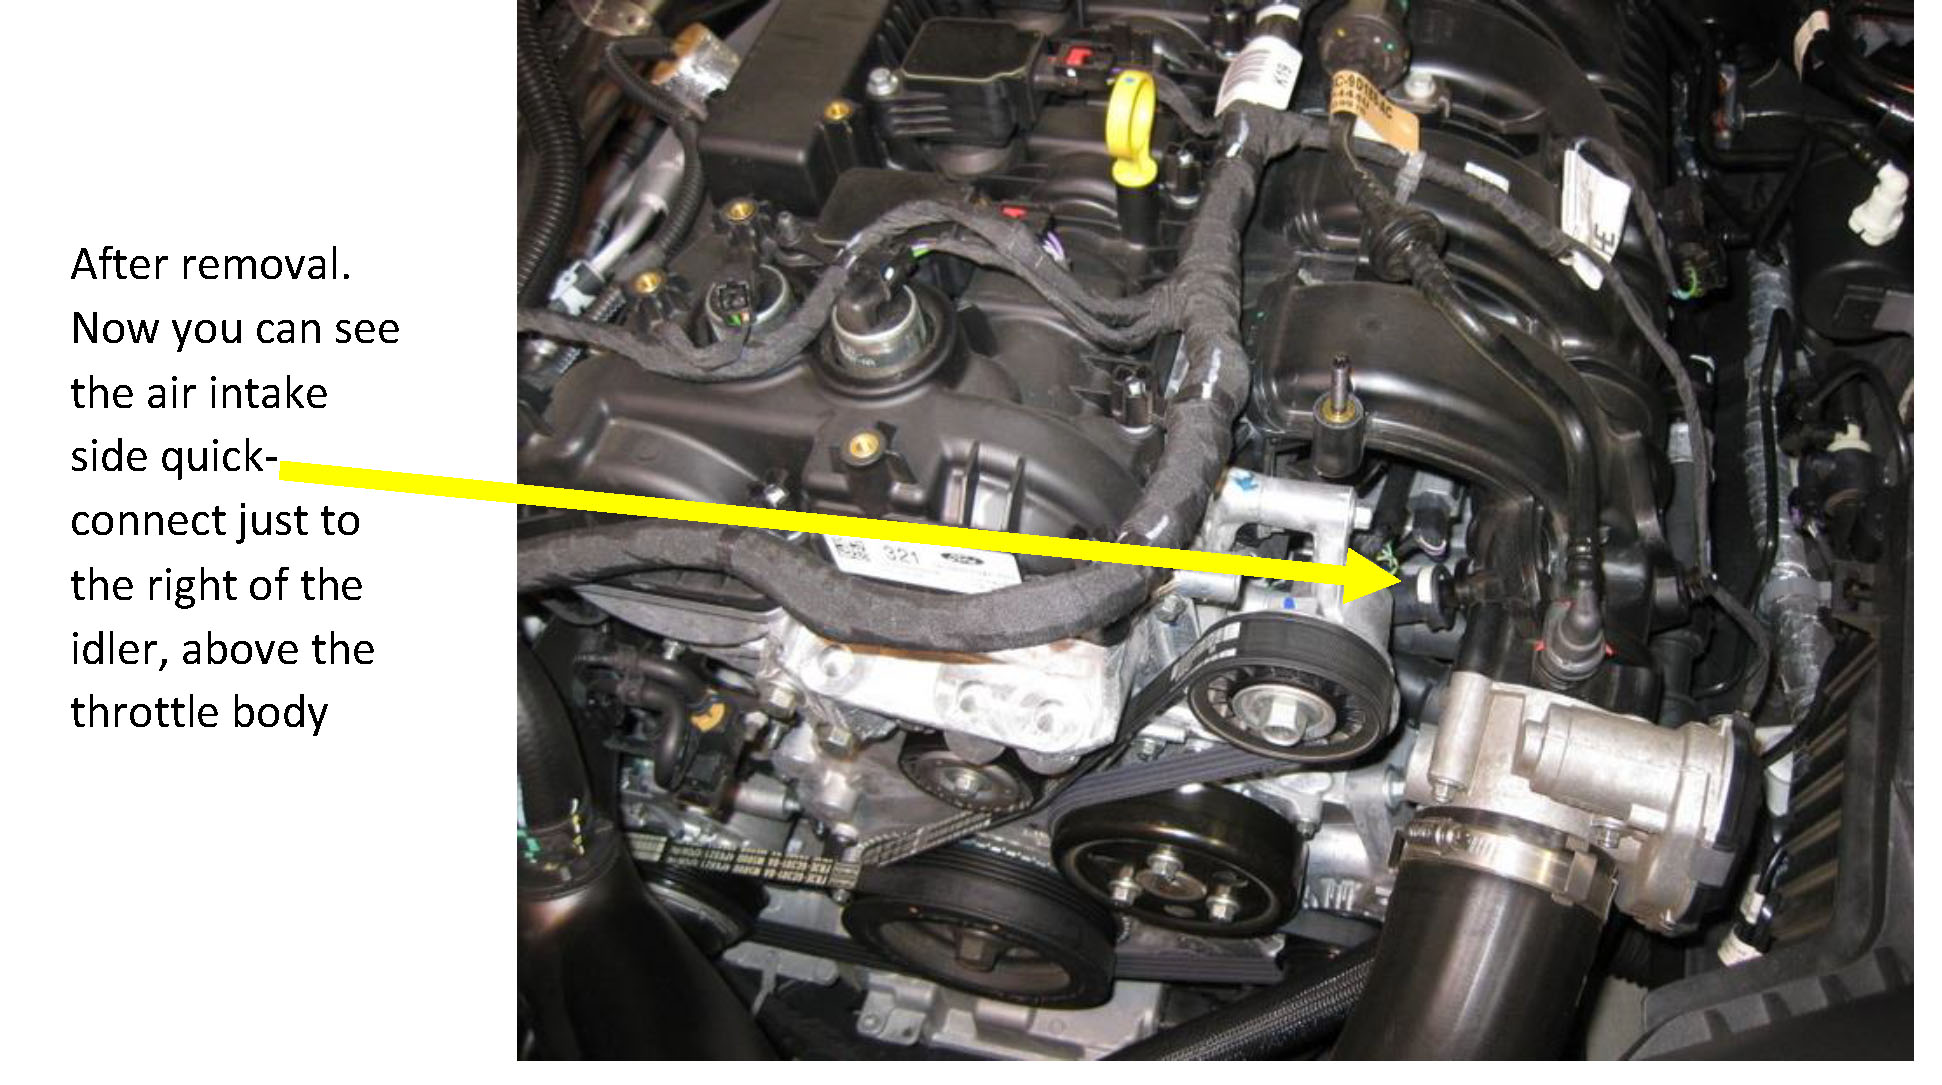
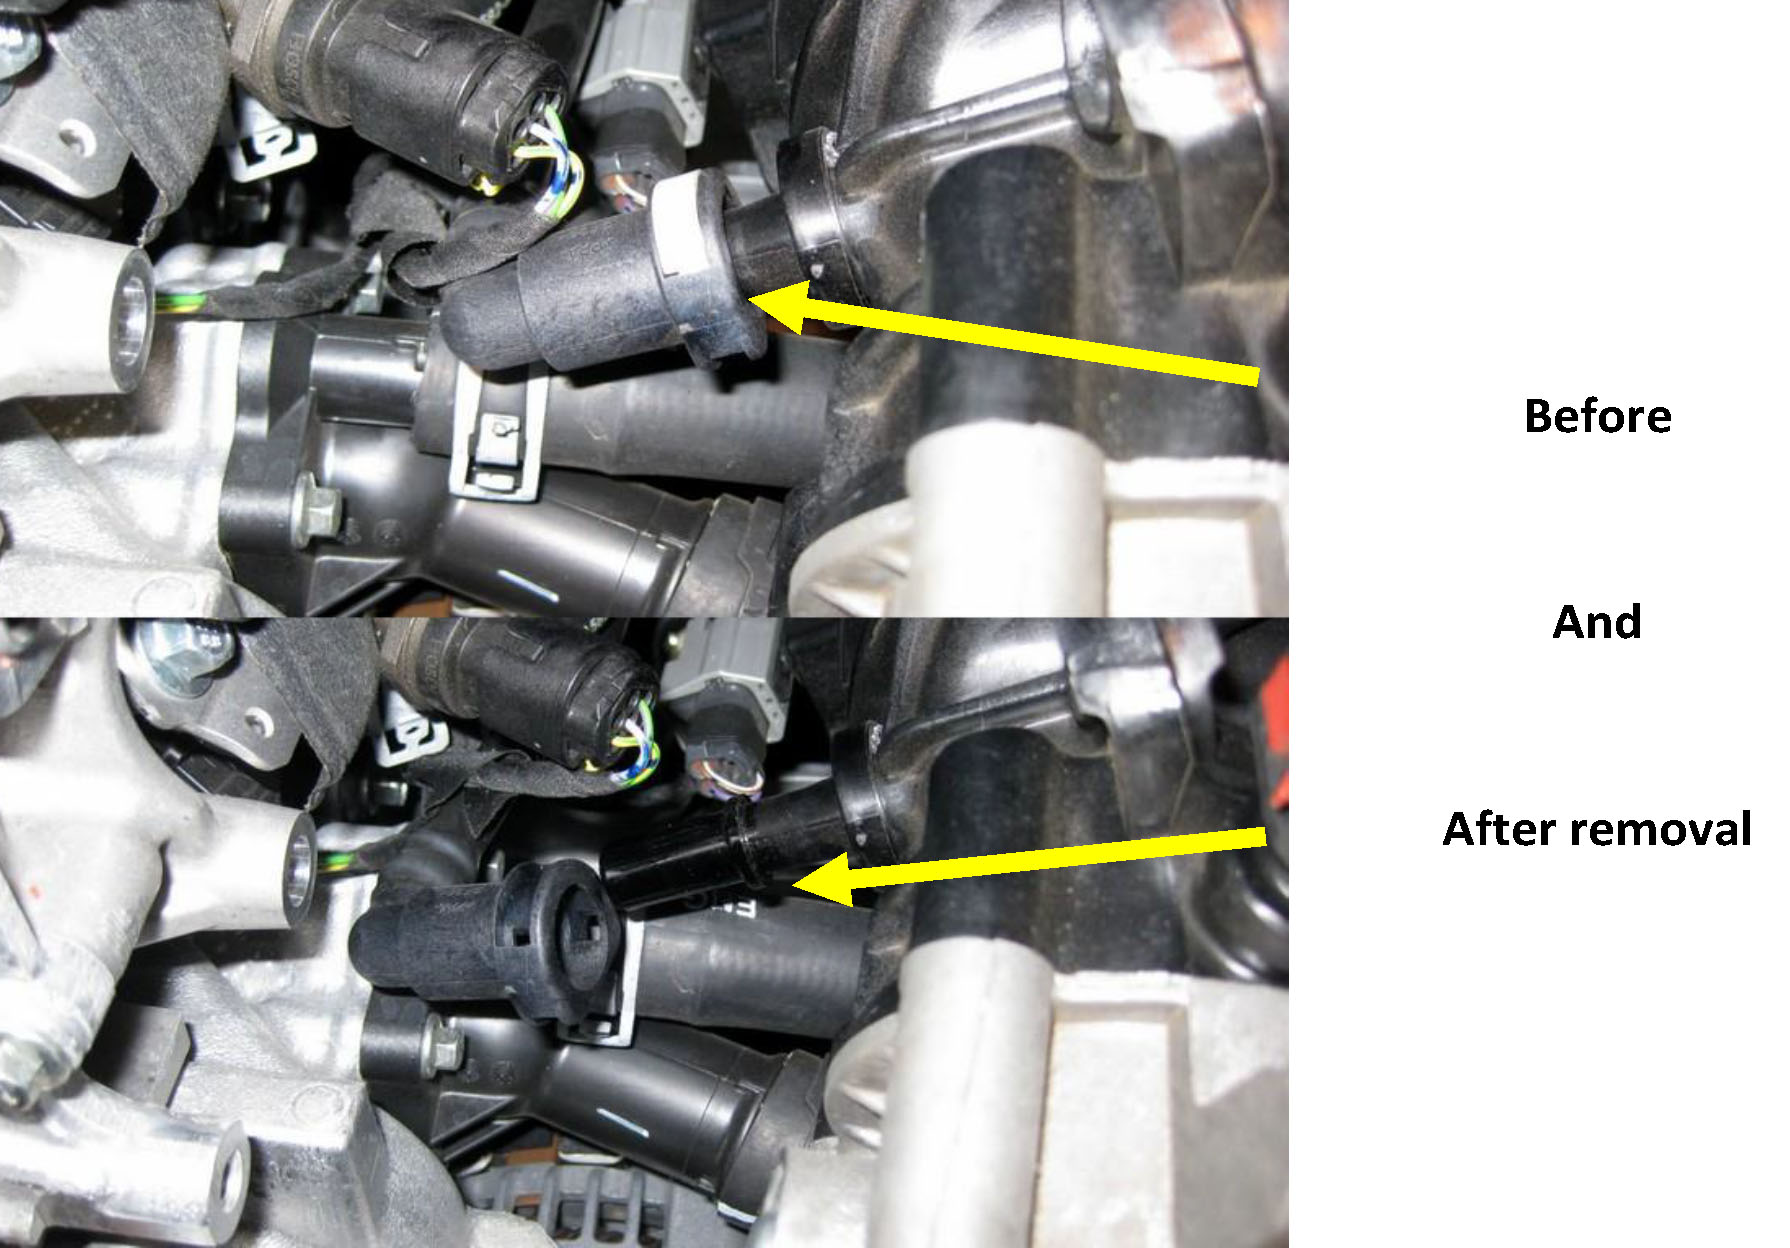
5. OEM Quick-connect removal:
1. To remove the OEM quick-connect, note the way that they snap around the male end.
2. It is necessary to push out and up from both open ends of the clip, while pulling the opposite end of the clip away from the fitting
3. For easiest removal of the fitting, remove the (white) clip completely
4. Pull the quick-connect off of the male fitting
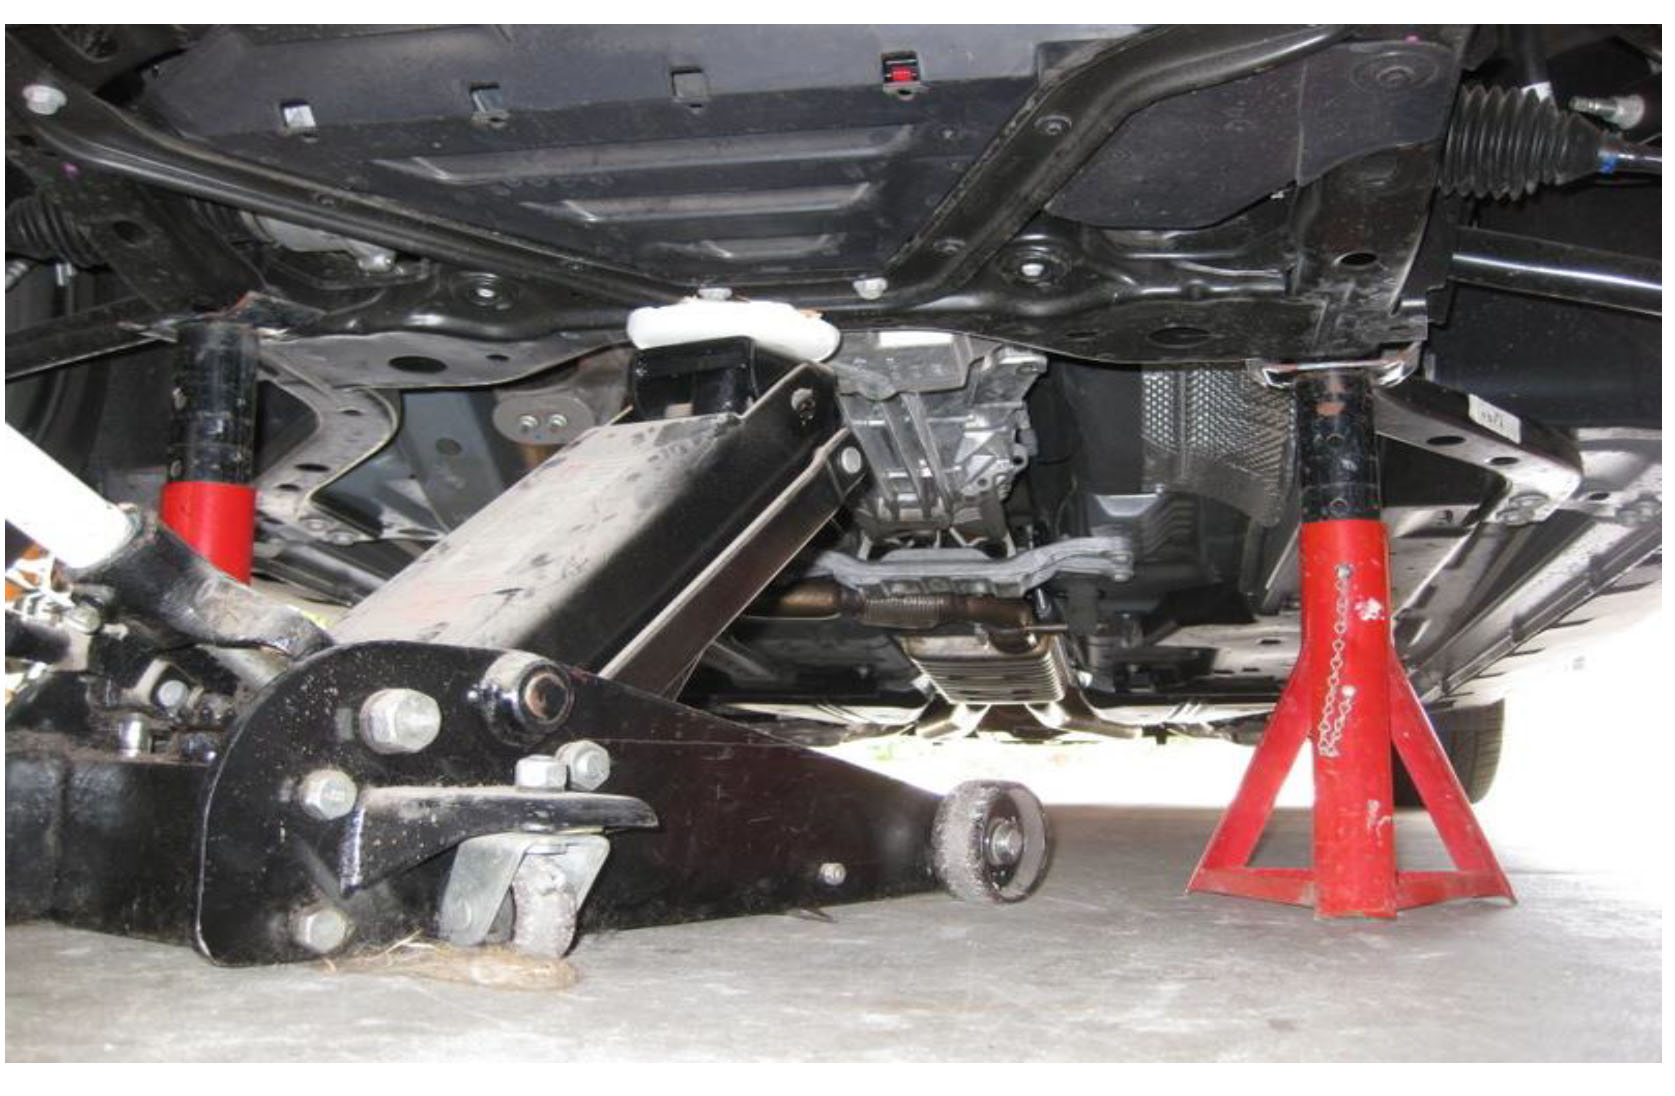
6. Removing the lower, block side connection
1. If you don’t have a lift, like most of us DIY’ers, then get the car as high as possible 2. Put the jack stands under the frame rails to keep them out of the way
3. You’ll most likely be rolling in from behind the front left wheel
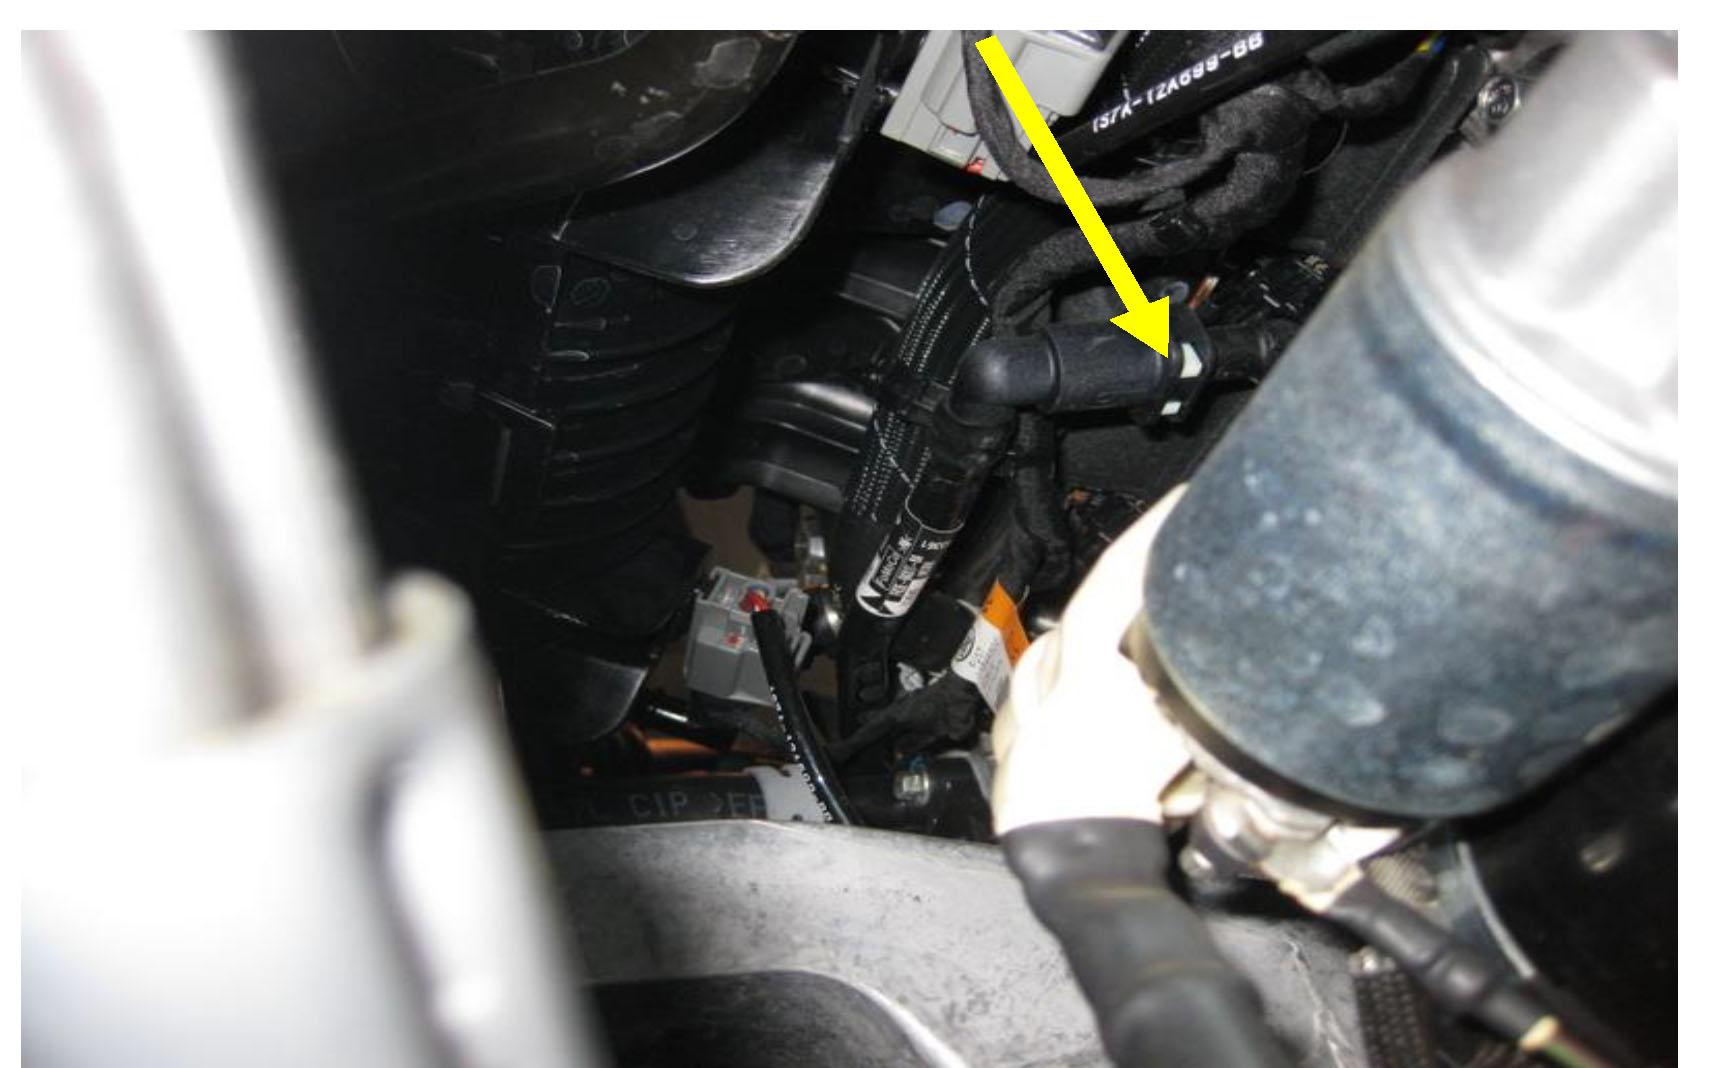
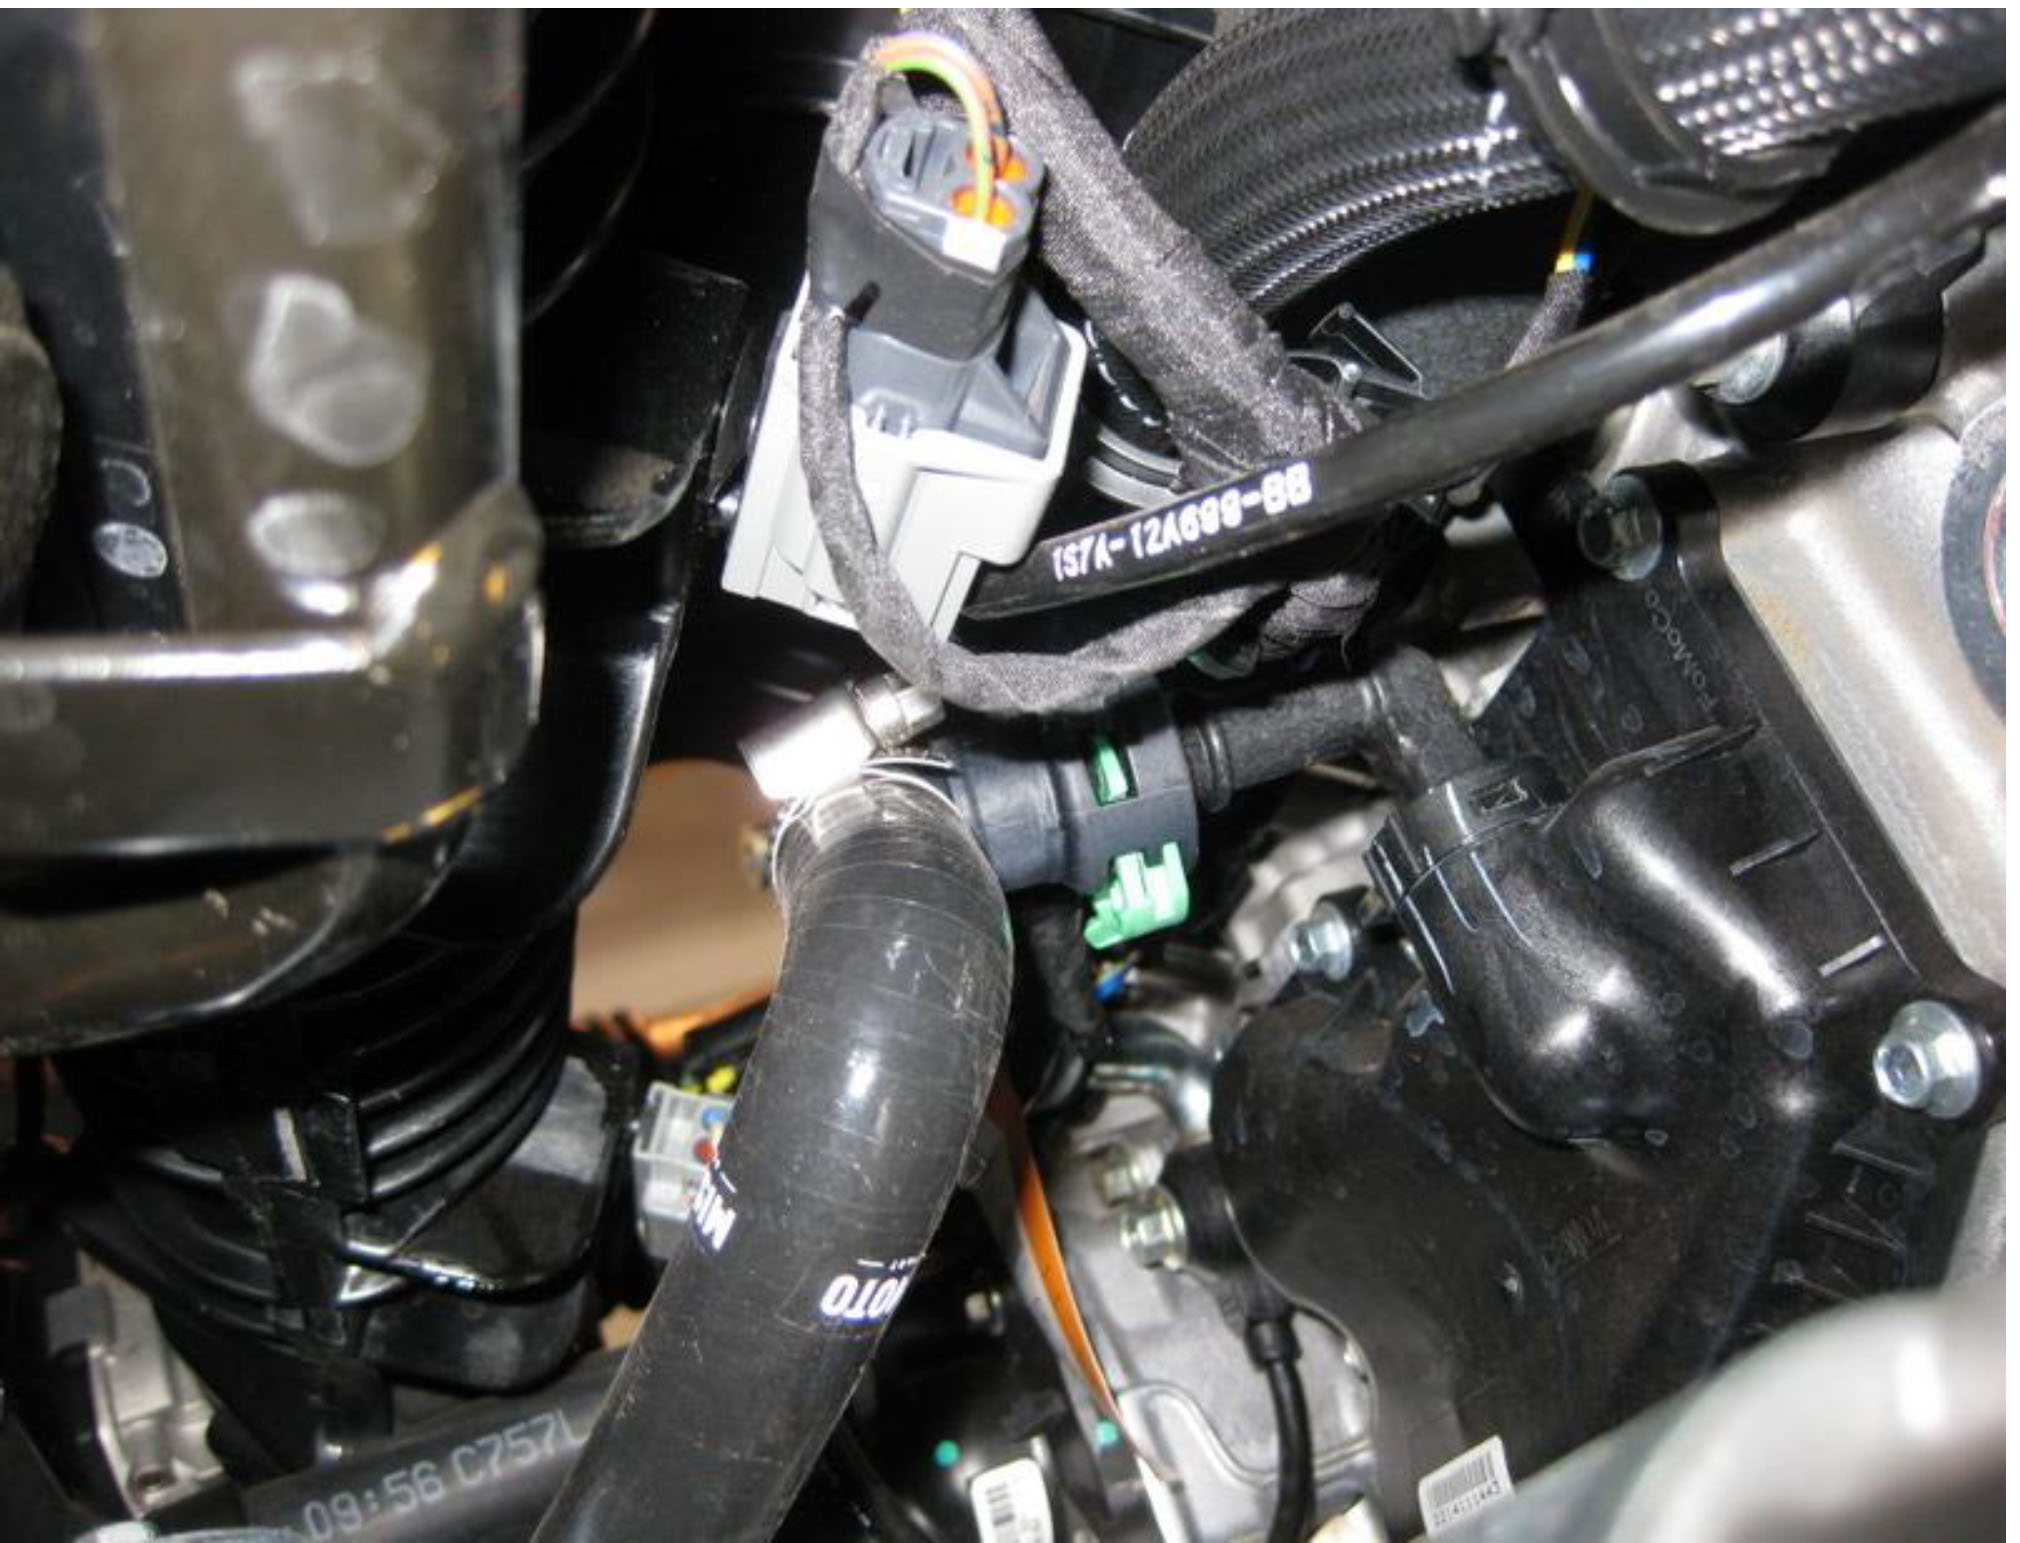
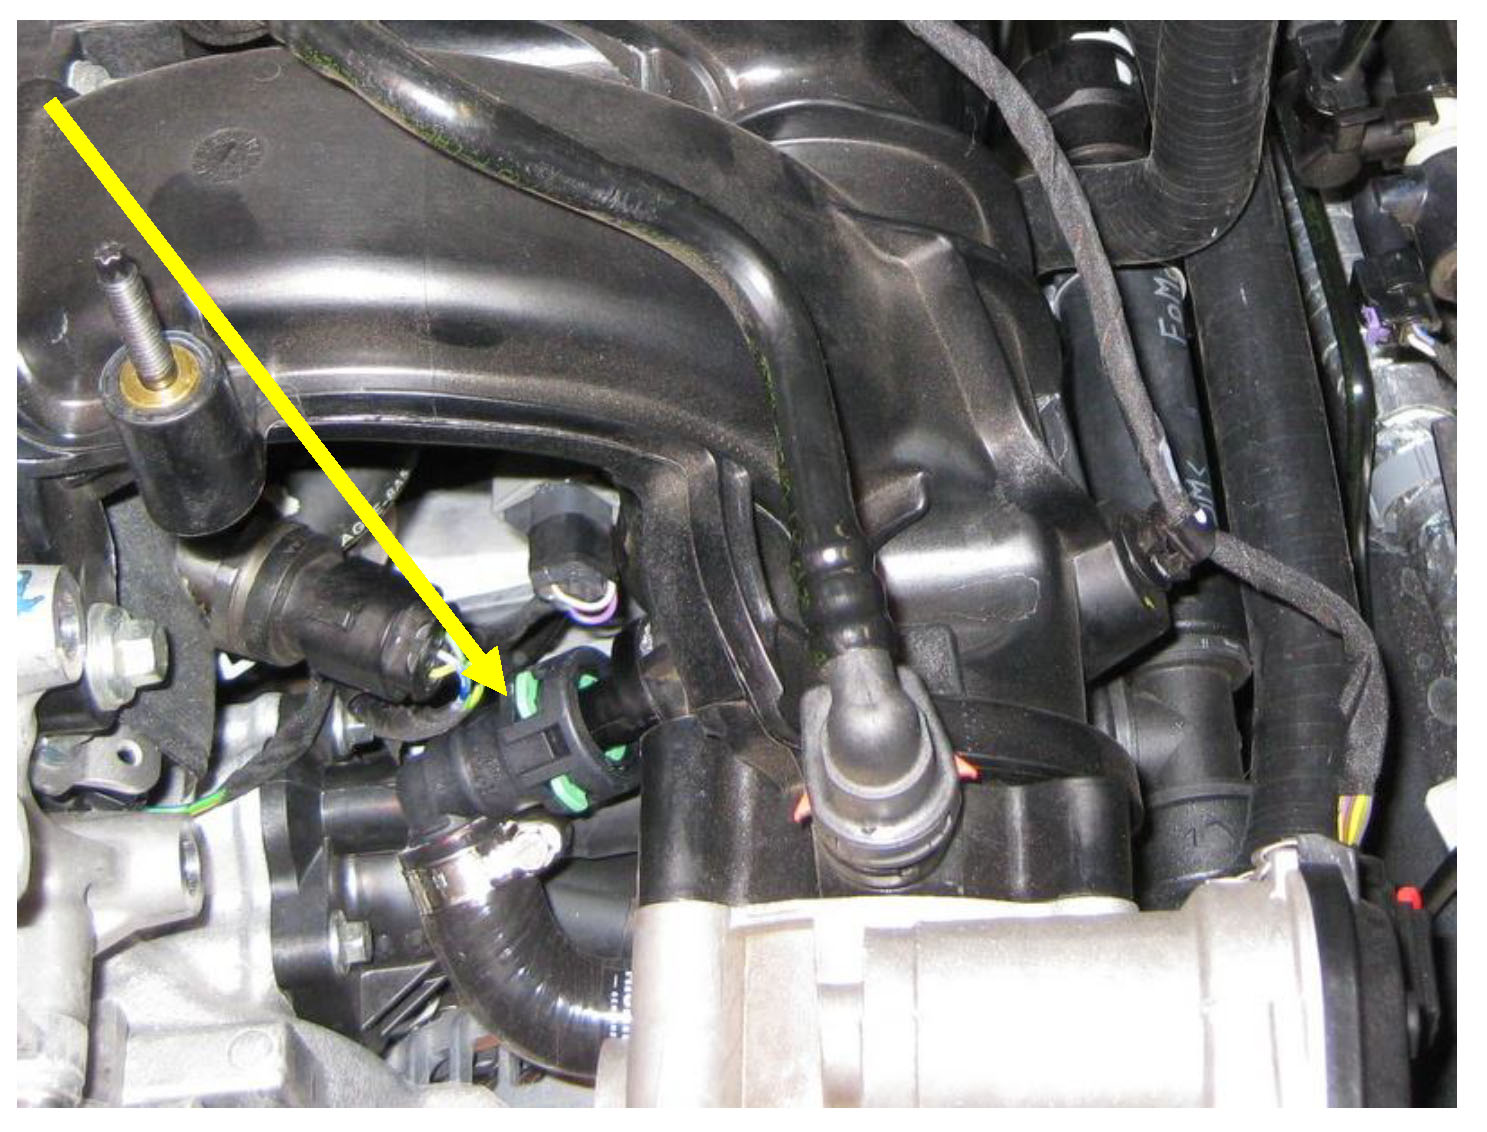
7. Finding and removing the block side connection
1. It’s located just above and forward of the starter, as seen here above the solenoid
2. A magnetic flashlight will help you keep this visible
3. Use a small screw driver to patiently push the bottom of the clip away from the connector
4. Remove the clip completely, as in the earlier connection, and remove the fitting
5. Remove the hose completely from here, or from above
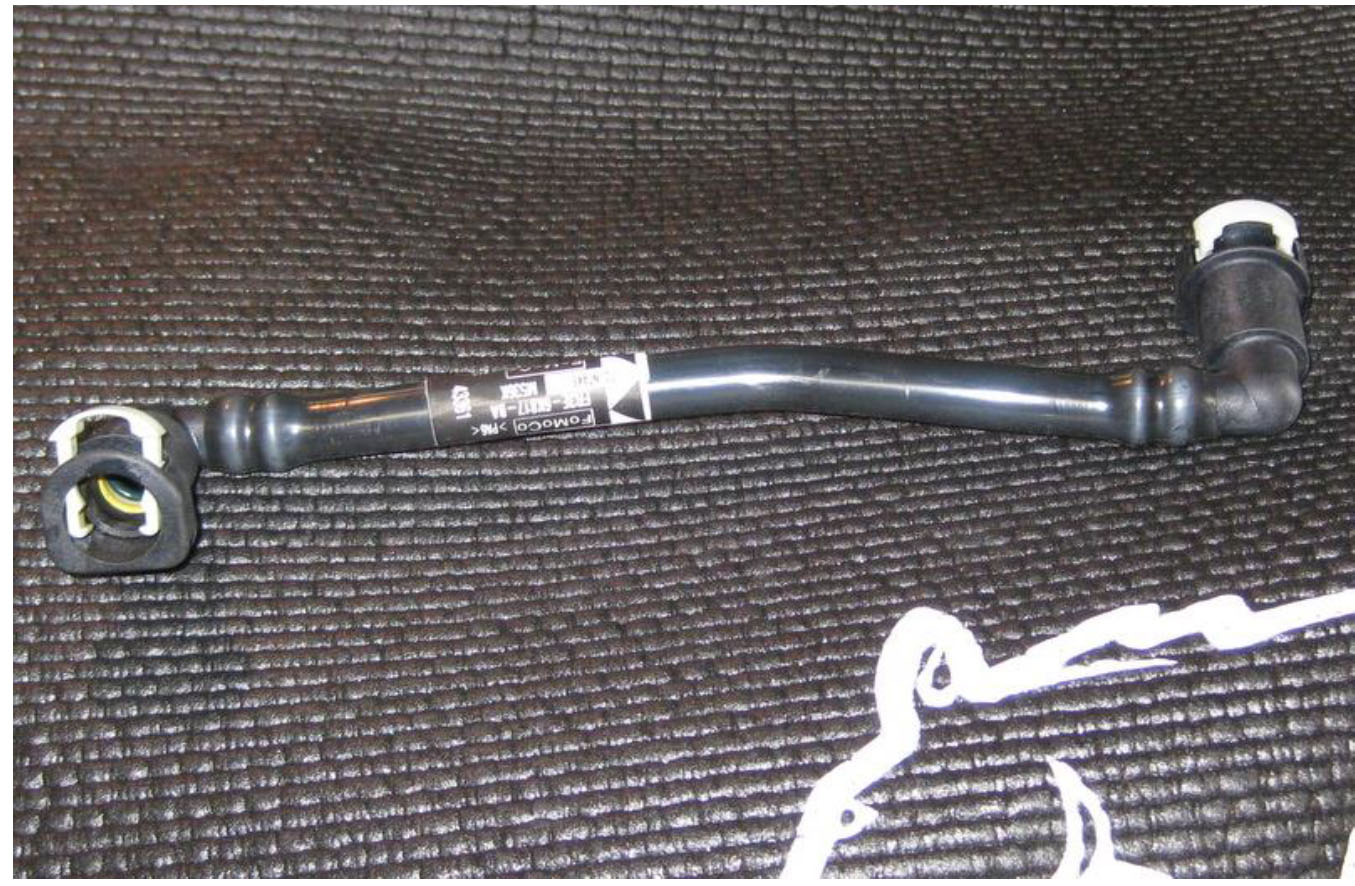
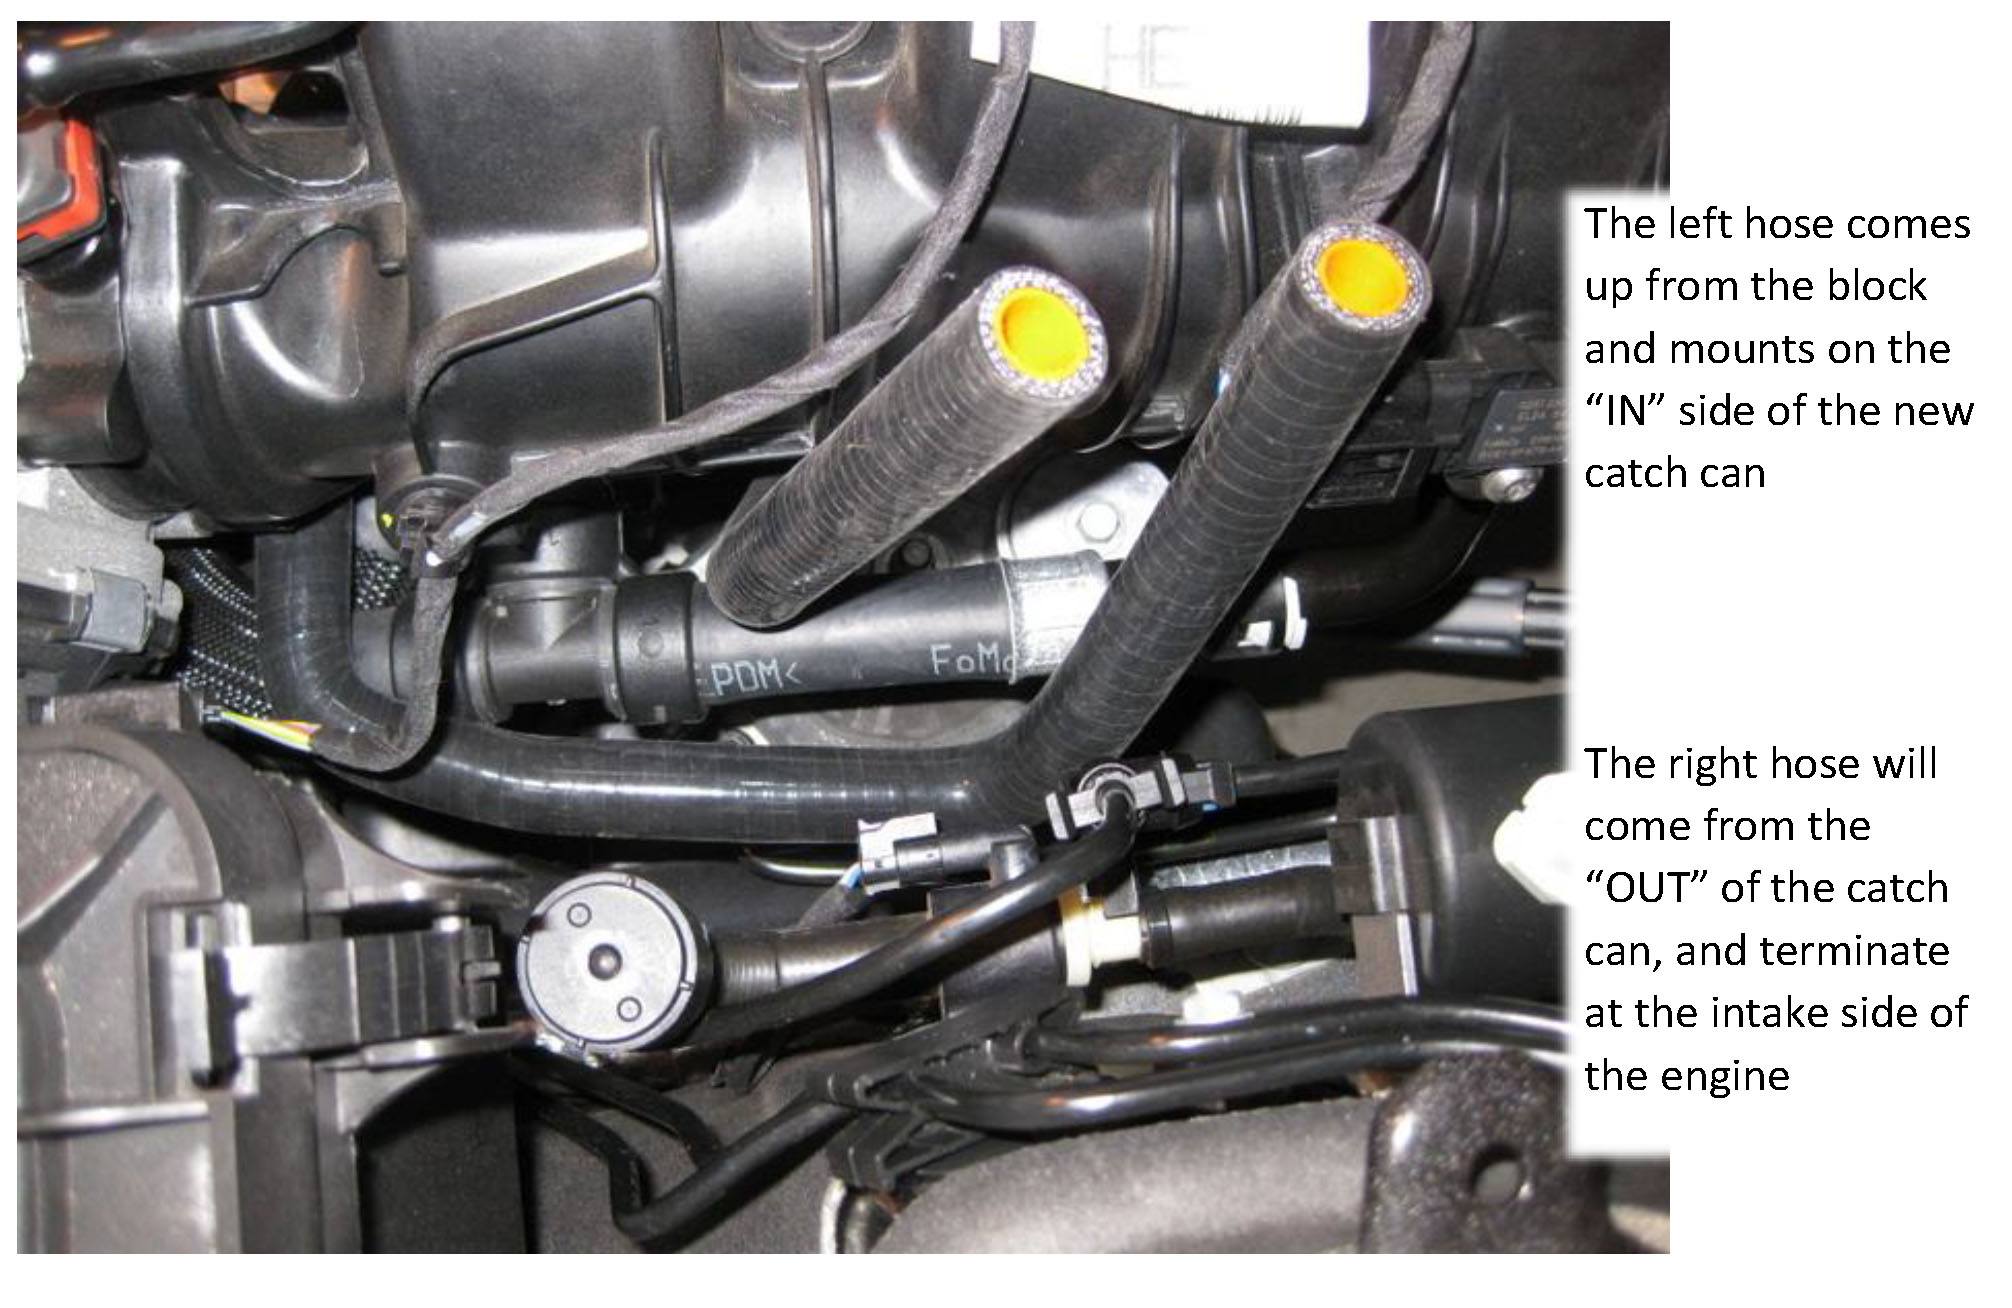
8. Connecting the new hose to the block side
1. Use the shorter hose, in the parts picture above it is the lower hose
2. Make sure the quick-connect is open and the clamp around it is tight
a. These connectors work differently, if you find you have to push too hard to move the clip down, it is likely not seated correctly.
b. Once the connector is onto the nipple far enough, the clip will easily snap into place
c. It may be a good idea to work the clip once or twice before you try to install it; note that without putting it on a male end you will need to pull the lower part of the clip away from the seat, simulating the flange on the nipple pushing the clip into position
3. The nipple on the block swivels. In my install it had swiveled to point forward, making it harder to see
4. For this hose, route it between the engine mount and the block, with the open end finishing pointing up and parallel to the strut tower
5. Push the connector all the way onto the nipple and engage the clip
6. After you’ve ensured the hose is routed correctly, lower the vehicle and remove the jack
9. Connecting the air intake side
1. Ensure the quick-connect fitting is open and the clamp is secure
2. Using the long hose, route it between the throttle body and the coolant line with the open end parallel to the strut tower like the lower hose
a. This hose will terminate aft of the hose coming from the block
3. Push the connector onto the male fitting and secure the clip
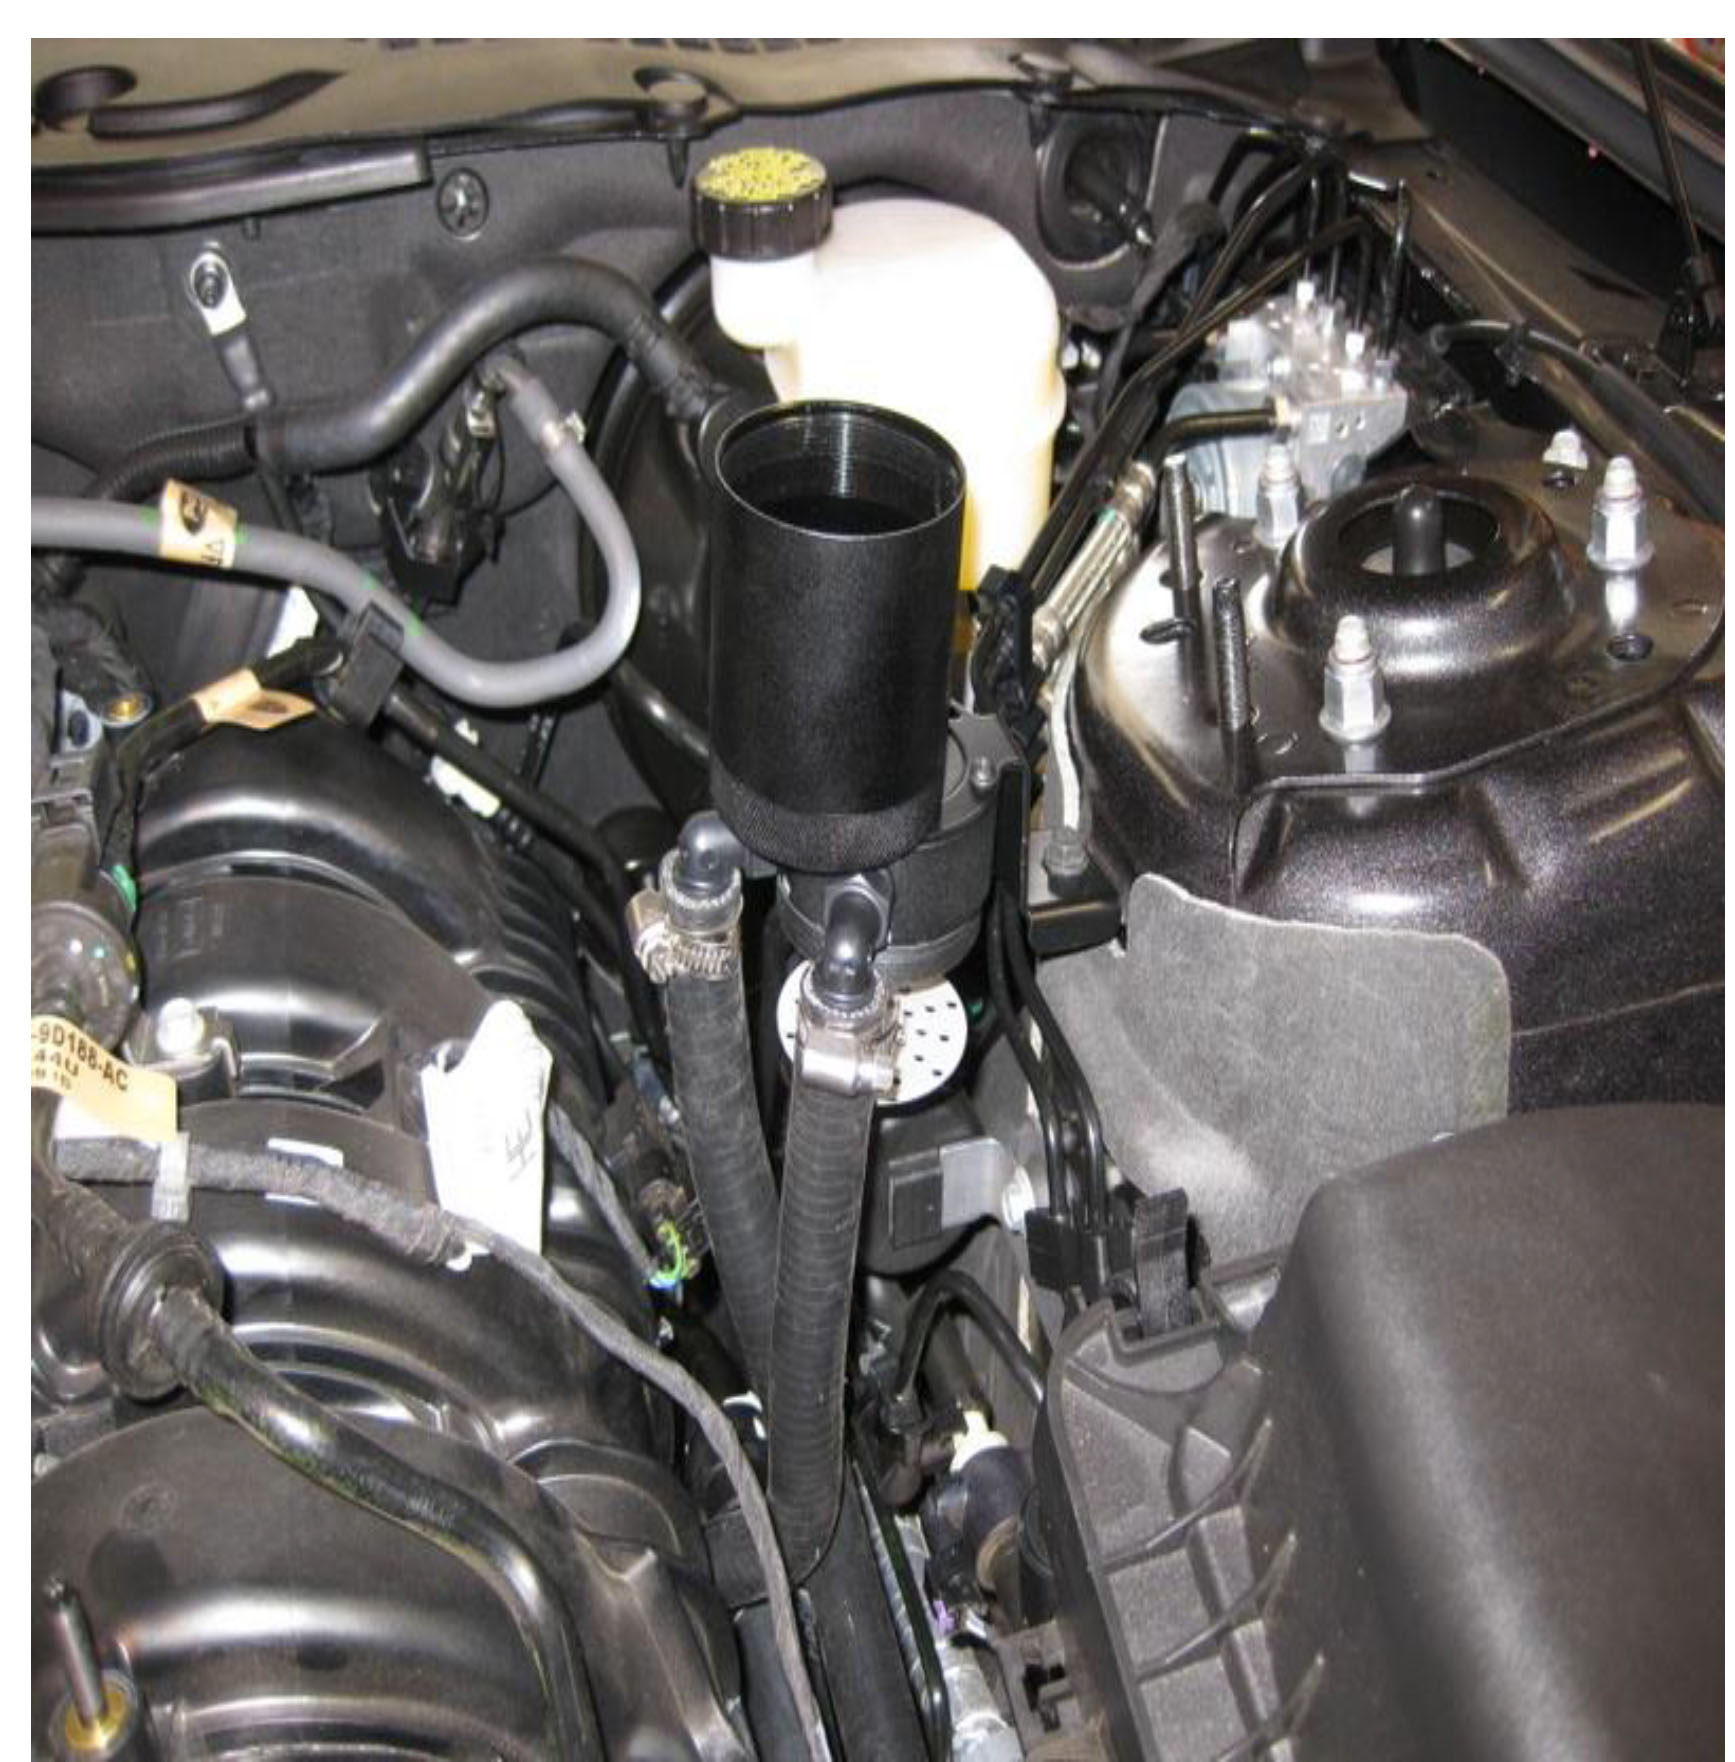
10. Mounting and connecting the Catch Can
1. Using the supplied 10mm bolt and nylon lock nut, mount the can to the open hole on the engine side of the strut tower
a. I chose to have the bolt head up, as the black matches the engine compartment better, in the install video they chose the nut up
b. Use your 10mm socket and 10mm wrench to complete this
c. The nylon lock nut does not require any specific torque, so just snug it up
2. Next, install the two new hoses
a. Remember to put the hose clamps on before slipping them onto the barbed nipples i. Ensure they point the direction you want, and will end where they are accessible
b. I prefer to use the 7mm socket and ¼” ratchet to tighten the clamps, as often a standard screwdriver will slip out and damage the slot

11. Put the idler back together
1. As the bolts are screwed into the aluminum engine and there is no way to get a torque wrench in there, I put a dash of thread locker on the threads of each bolt
2. Hold the idler in place, and finger tighten all three bolts
3. Using a small 10mm wrench, hand tighten all three, taking care not to overtighten
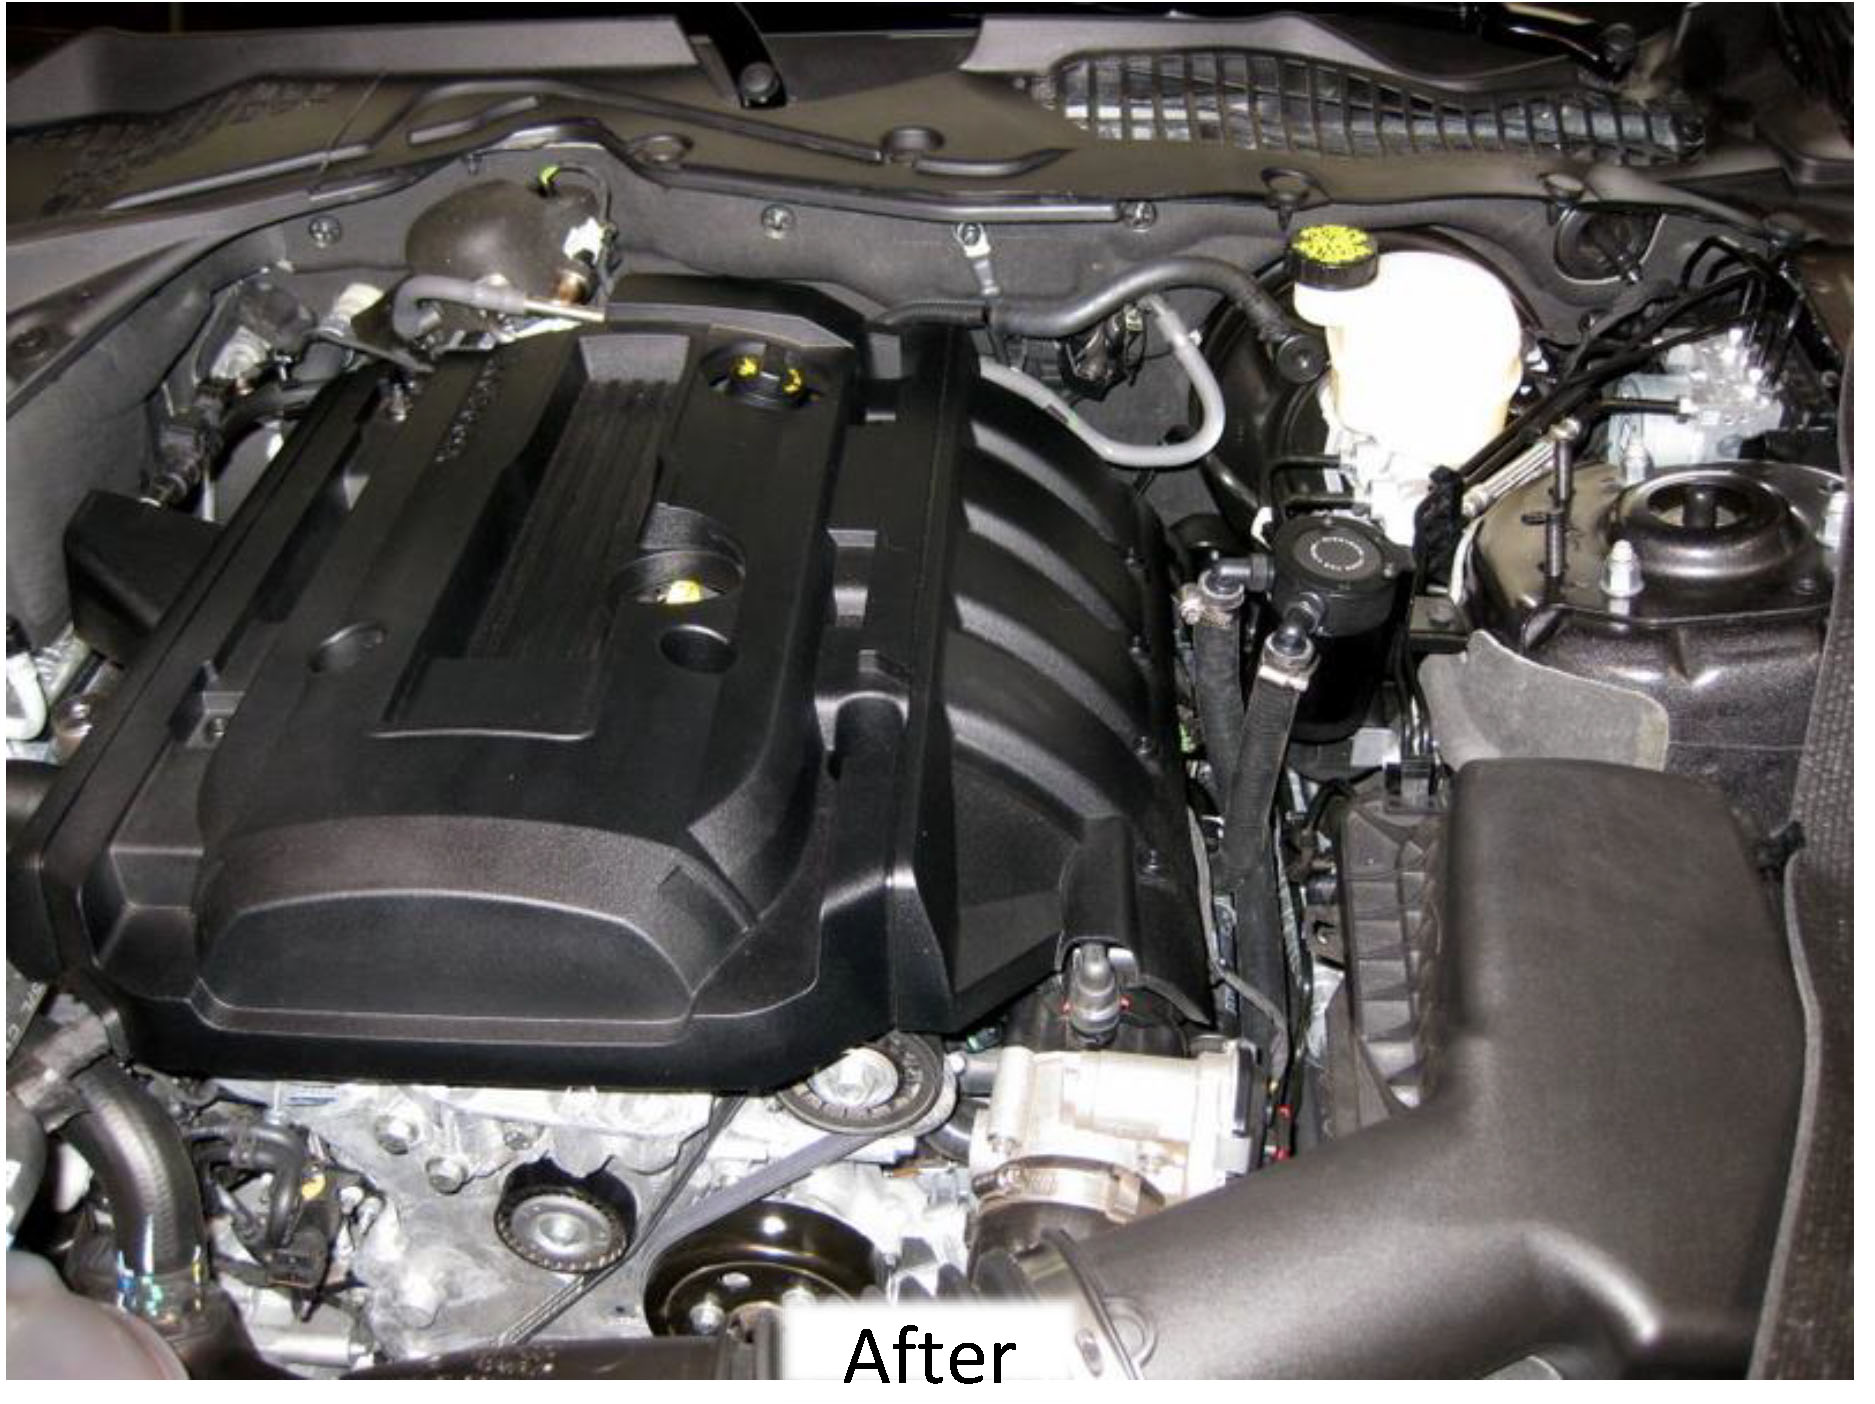
12. Replace the engine cover
1. Put the engine cover back in place
2. Install the 2 x 10mm nuts on the studs, hand tight
3. Install the 2 x 8mm screws into the cover, hand tight
13. Remove the “Can”
1. Before you call it complete, make sure you can get the can off of the assembly
2. Using your hand, with some force you should be able to unthread the can from the mount, as shown below
3. Replace the can taking care with the threads