 FREE 1 to 3-Day Delivery on Orders $149+ Details
How to Install ST Suspension Sport Shock & Strut Kit on 05-14 Mustang GT V6
Installation Time
4 hours
Tools Required
- Ratchets
- 8mm socket/wrench
- 10mm socket
- 13mm socket
- 15mm deep socket
- 18mm deep socket
- 19mm deep socket
- 22mm wrench
- Strut Spring Compression Tool
- Torque Wrench
- Floor Jack
- Jack Stands
- Wheel chocks
- A friend or neighbor willing to help

Shop Parts in this Guide
FRONT STRUT INSTALLATION
1. Loosen the lug nuts on both front tires.
2. Place wheel chocks behind rear tires.
3. Raise the front of the vehicle with floor jack and use jack stands to properly support the vehicle.
4. Remove the front wheel to expose the strut. a. Only work on one strut at a time to use the other side as a reference if needed.
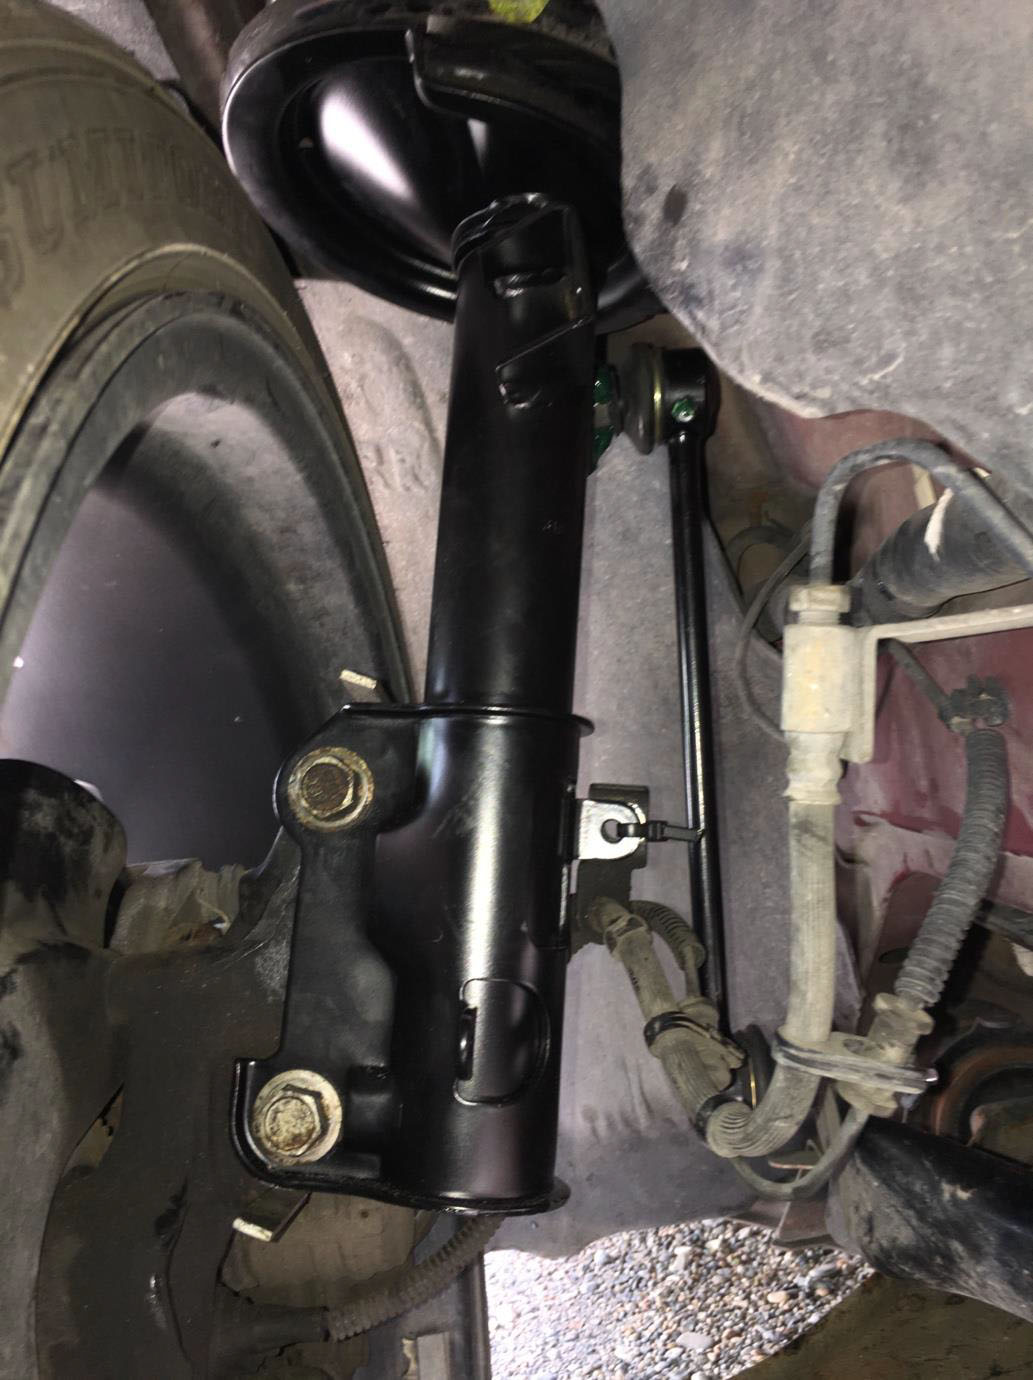
5. Loosen the sway bar end link with a 18mm deep socket, then use an 8mm socket or wrench to hold the bolt in place while turning the 18mm nut.
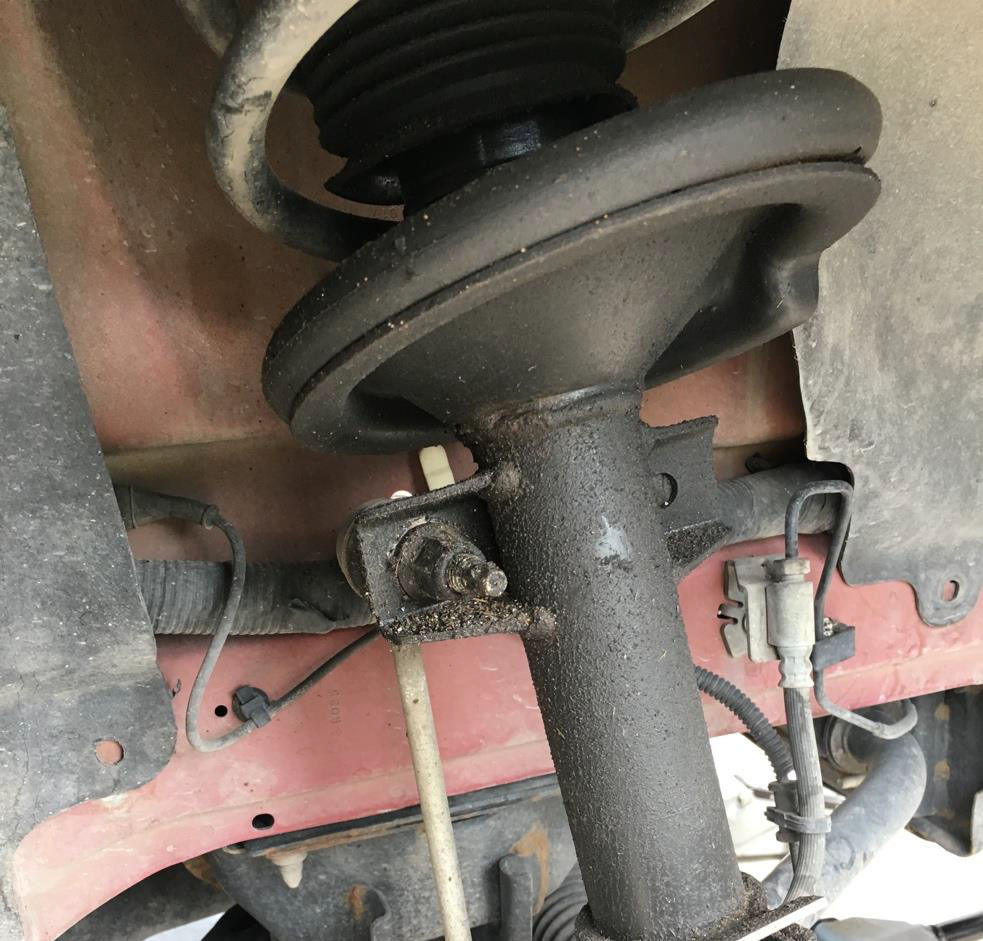
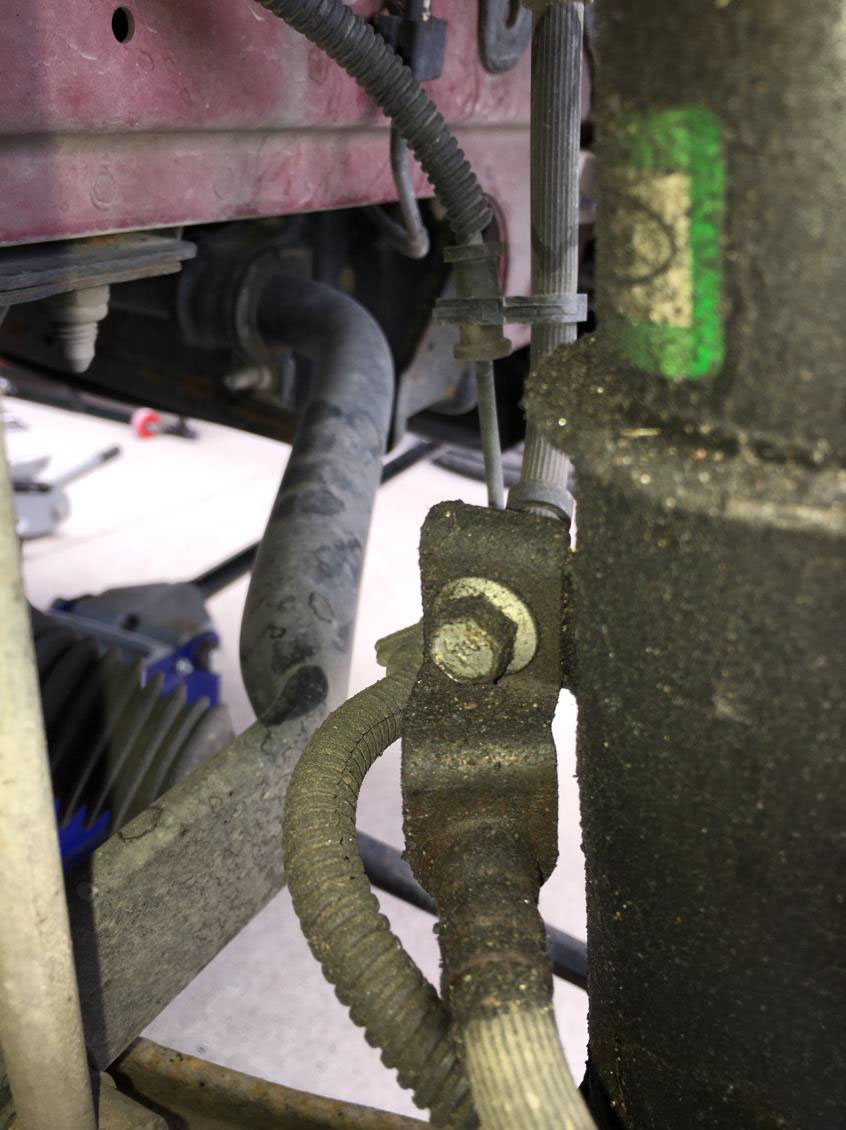
6. Using a 10mm socket or wrench, remove the brake line support bracket. Also remove the plastic fastener below the brake line support that is holding the ABS sensor cable.
7. Place a jack stand under the lower control arm for support. Not doing so can cause damage to the brake line or ABS sensor cable. 8. Raise the hood and remove the four nuts that are holding the top of the strut in using a 13mm socket or wrench. Don’t remove them completely to avoid having the strut fall out.

9. Ensure that the strut is fully extended. It is possible the spring may be under some tension still.
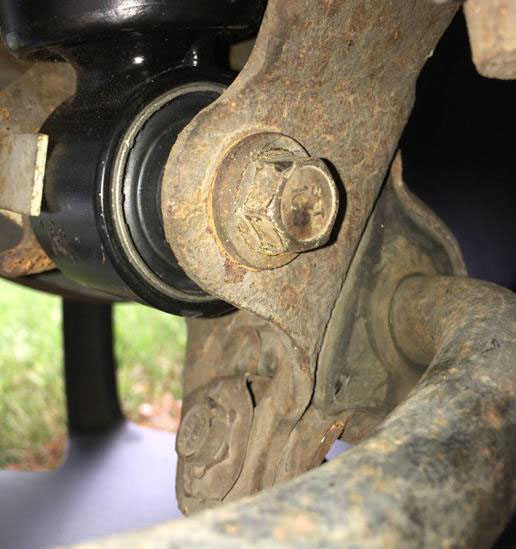
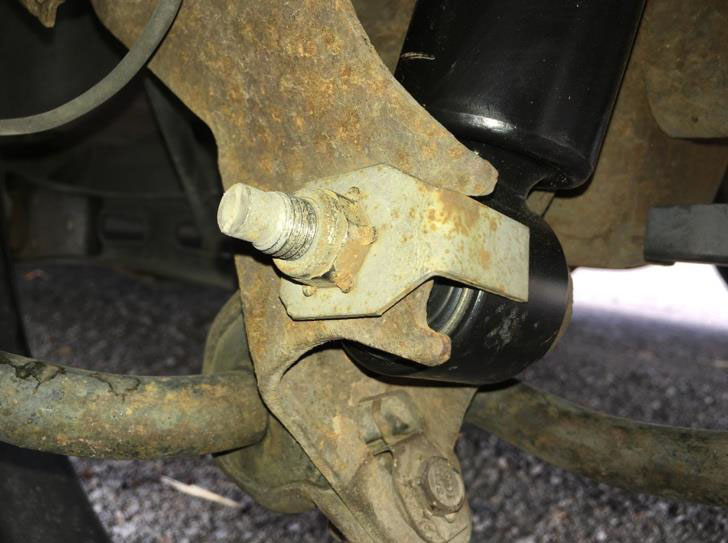
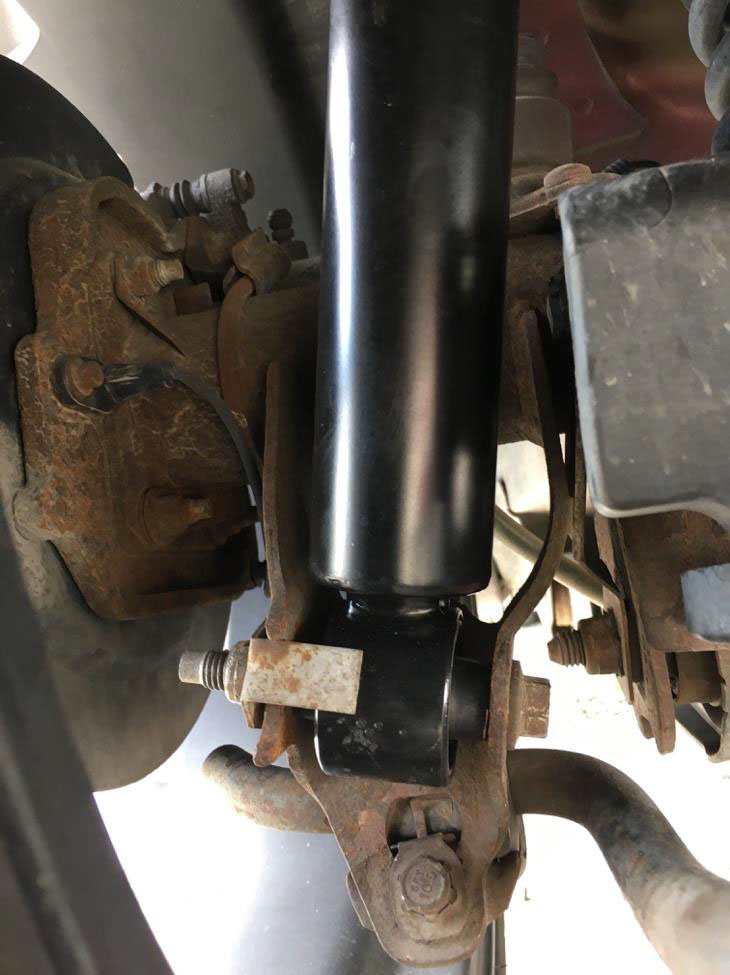
10. Use an 18mm socket or wrench to remove the bolts attaching the strut to the steering knuckle. An impact wrench is recommended as these bolts are more exposed to the elements of the road and may be hard to break loose.
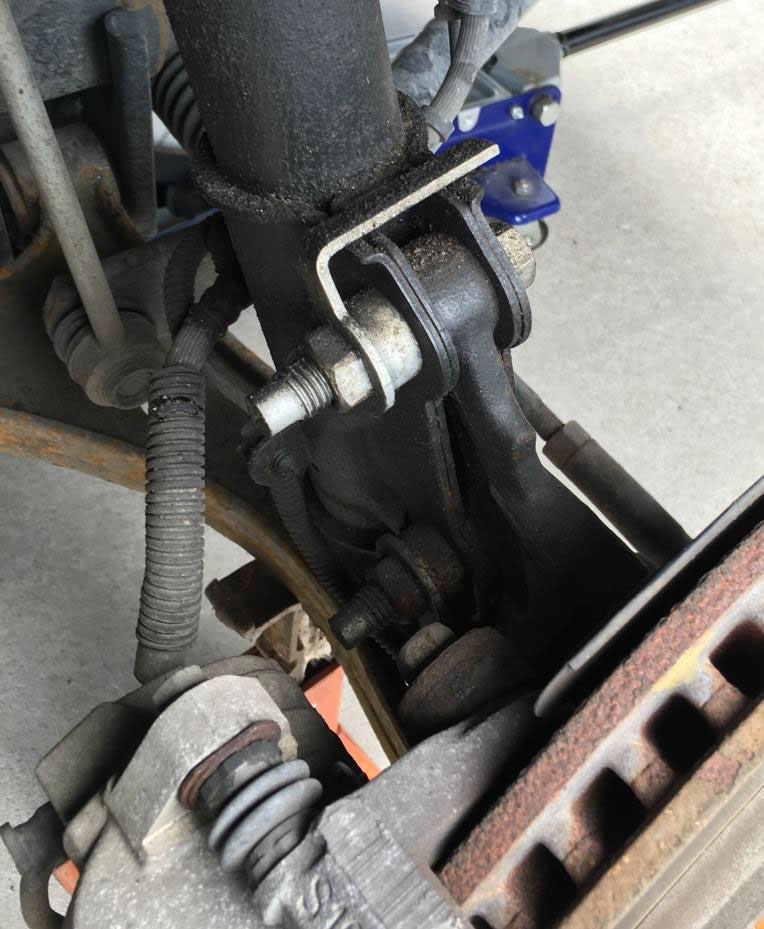
11. After the two bolts holding the strut to the steering knuckle are removed, with the help of a friend, completely remove the nuts under the hood and lower the strut down and out from under the vehicle.
12. Using a spring compressor, compress the spring. Use a 22mm wrench and a 10mm socket or wrench to remove the nut from the top of the strut mount. If ball bearings fall out of the strut mount, it is bad and will need to be replaced.
13. With the strut mount and spring removed, transfer the rubber bump stop and dust cover from the old strut to the new strut.
14. Place the spring into the strut, aligning the bottom end of the spring with the indent at the shoulder of the strut. You may need to compress the spring a little more to get the bolt of the strut to protrude through strut mount as these struts are a little shorter than the stock struts.
15. Tighten the nut on the strut mount with a 22mm wrench and a 10mm socket or wrench. DO NOT USE AN IMPACT WRENCH. Torque the nut to 46 Ft-lbs for Mustang years 2005- 2010, and 76 Ft-lbs for Mustang years 2011-2014. Remove the spring compressor.
16. Lift the strut assembly into place, making sure the notch and arrow on the strut mount faces away from the vehicle. Finger tighten the four mount nuts to hold the assembly in place.
17. Guide the steering knuckle into position on the strut and insert the two bolts and nuts. Torque these to 148 Ft-lbs for Mustang years 2005-2007, and 166 Ft-lbs for Mustang years 2008-2014. Reattach the sway bar end link with an 18mm socket or wrench and an 8mm socket or wrench and torque to 85 Ft-lbs. Reattach the ABS sensor cable and the brake line with a 10mm socket or wrench.
18. Tighten the four top nuts with a 13mm socket or wrench and torque to 26 Ft-lbs.
19. Repeat for the other side.
REAR SHOCK ABSORBER INSTALLATION
20. Loosen the lug nuts on both rear wheels.
21. Place wheel chocks in front of the front tires and raise the vehicle with a floor jack. Place jack stands under the vehicle to properly support the vehicle.
22. Remove the rear wheel to expose the shock absorber.
23. In the trunk, pull the side lining back to expose the top shock mount.
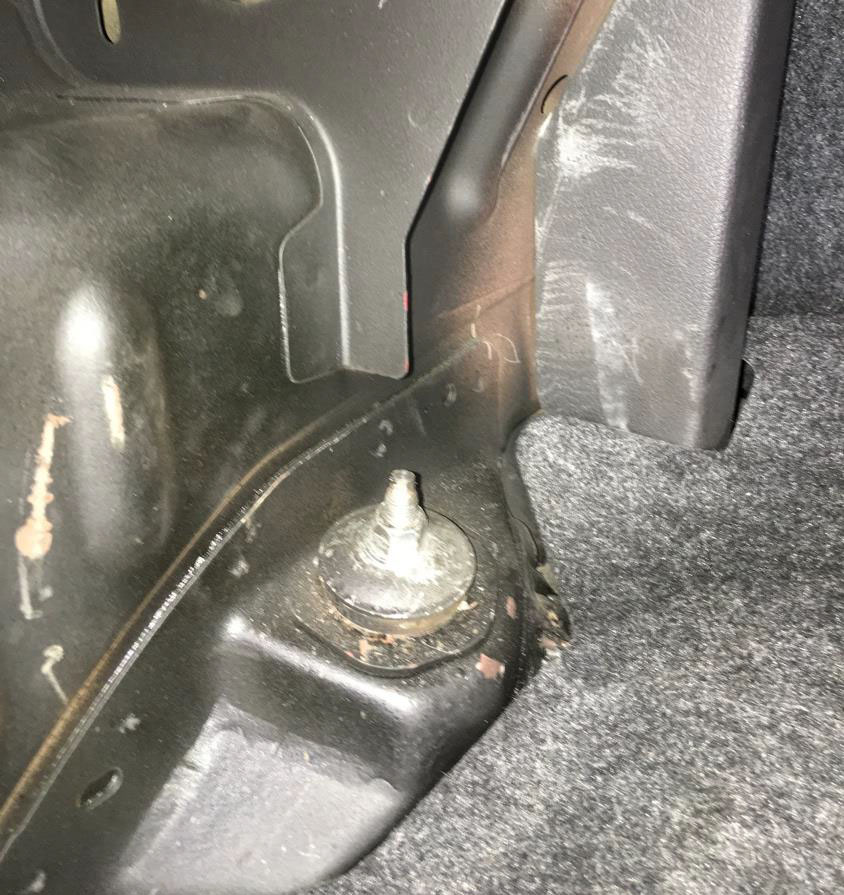
24. Use a 15mm deep socket or wrench to remove the top nut. You may need to
use a wrench and a pair of pliers to keep the bolt from turning while loosening the nut. 25. Use a 15mm socket or wrench to loosen the lower bolt and remove the bolt from the shock absorber. The metal flange on the nut will help hold the nut while you loosen the bolt.
26. After removing the old shock absorber, guide the top of the new shock absorber through to the trunk. Then slide the lower bolt through and torque to 85 Ft-lbs with a 15mm socket or wrench.
27. In the trunk, use the original top shock nut and tighten with a 15mm socket or wrench. Torque to 30 Ft-lbs.
28. Repeat for the other side.
nstallation Guide Created and Submitted by AmericanMuscle Customer, Kyle Johnson, on 7/15/16

