 FREE 1 to 3-Day Delivery on Orders $149+ Details
How to Install BMR Steel Anti-Wheel Hop Package - Hammertone (05-14 All) on your Ford Mustang
Installation Time
3 hours
Tools Required
- 1/2" Drive Ratchet
- 18mm, 19mm, and 22mm Sockets
- 22mm Box End Wrench
- Torque Wrench
- Lug Nut Socket
- Jack and Jack Stands
- Pry Bar(s)
- Rubber Mallet
- Ratchet Strap (Optional)
- Silicone Based Polyurethane Lube (Grease)
- Zip Ties

Shop Parts in this Guide
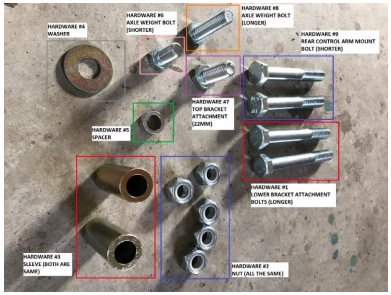
Hardware Required
Installation
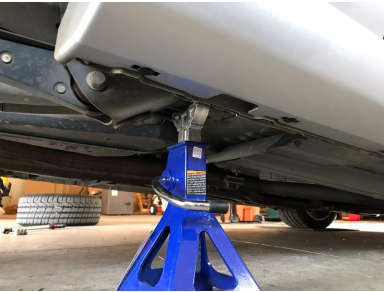
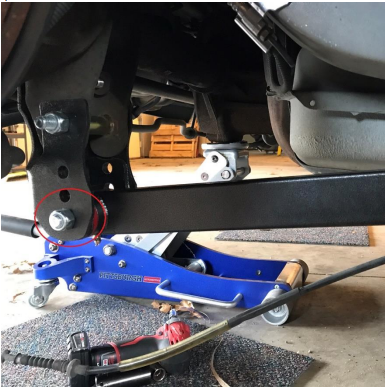
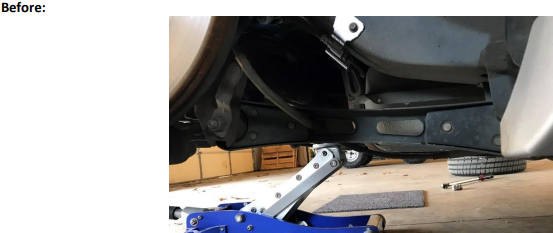
1. Using Jack and jack stands (or automotive lift) lift the rear of the car by the axle. Place jack stands under the body of the car in a structural area.
2. Remove rear wheels for my room.
3. Start with passenger’s side of the vehicle.
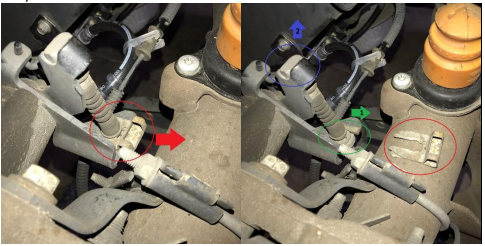
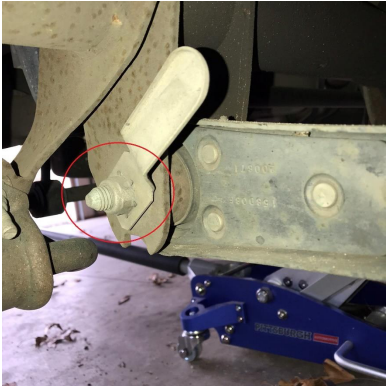
4. With emergency brake disengaged, remove brake cable by removing tab and lifting the end out of the bracket and move out of way.
5. Remove the factory front 18mm control arm bolt (the nut may stay in place or fall out of its bracket) and remove the control arm from the front mount.
6. Remove the factory rear 18mm control arm bolt and remove the control arm from the rear mount.
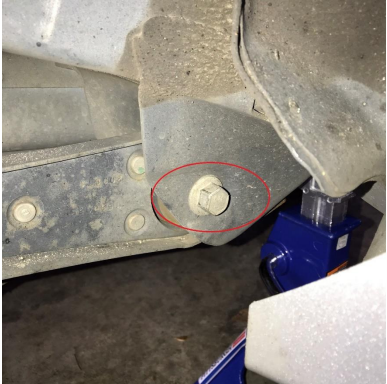
7. If equipped on vehicle, remove the axle weight with a 15mm socket and wrench. If not move to next step.
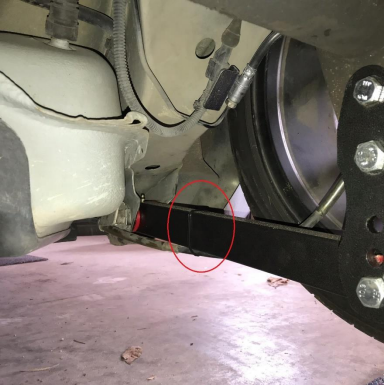
8. Install the passenger’s side relocation bracket by reinstalling axle weight (if equipped). If it was not equipped use hardware #6 (19mm) to attach relocation bracket to axle. Do not tighten.
9. Install hardware #1, #2, and #3 for the lower bracket attachment point to the axle. Place bolt through sleeve and thread nut on bolt but do not tighten.
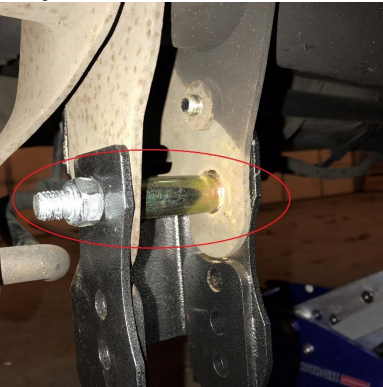
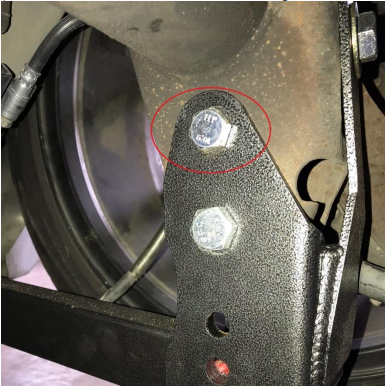
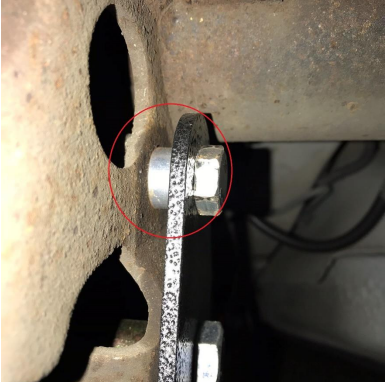
10. Install #7, #4, and #2 in the top backside mount. Place bolt through washer and thread nut on bolt. Place 22mm wrench through bracket on nut. Torque 22mm bolt to 129 lbs/ft.

11. Torque 22mm lower bracket nut and bolt (step 8) to 129 lbs/ft.
12. Torque axle weight bolt (step 7) to 45 lbs/ft.
13. Grease fittings in new control arms with silicone based polyurethane lube. Rub some grease on outside of polyurethane bushing as well.
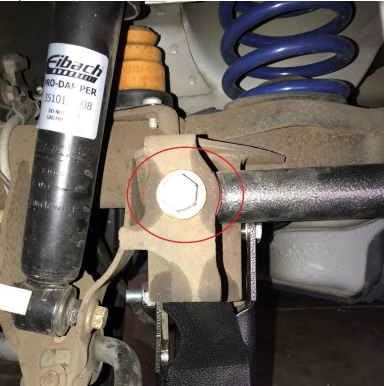
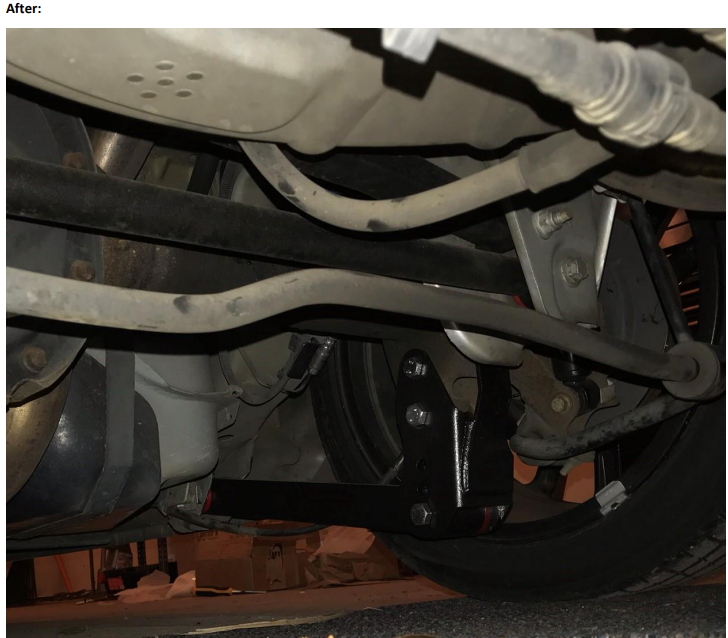
14. Install control arm (orientation shown below) in front mount using factory hardware. Thread bolt but do not tighten.
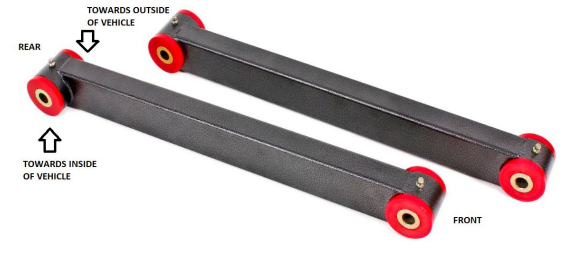
15. Install control arm into desired hole in relocation bracket with hardware #9 and #2. This may require a pry bar, ratchet strap, rubber mallet, or other creative ways to accomplish. Removing weight on axle by lowering car onto jack stands may help.
16. Torque the 22mm rear control arm bolt and front factory 18mm bolt to 130 lbs/ft.
17. Reinstall emergency brake and zip tie cable to control arm.
18. Move to driver’s side of vehicle.
19. Repeat steps 3 through 6 on the driver’s side.
20. Remove the factory 18mm panhard bar bolt and nut.
21. Install the driver’s side relocation bracket by reinstalling axle weight (if equipped). If it was not equipped use, hardware #8 (19mm) and #5 to attach relocation bracket to axle. The spacer installs in-between the axle and new bracket. Do not tighten.
22. Install hardware #1, #2, and #3 for the lower bracket attachment point to the axle. Place bolt through sleeve and thread nut on bolt but do not tighten (see step 9).
23. Reinstall factory panhard hardware in the top backside mount. Torque bolt to 129 lbs/ft.
24. Torque 22mm lower bracket nut and bolt (step 22) to 129 lbs/ft.
25. Torque axle weight bolt (step 21) to 45 lbs/ft.
26. Repeat steps 12 through 16 on the driver’s side.
27. Reinstall wheels, torque to factory specifications and lower vehicle.
Installation Instructions Written by AmericanMuscle Customer K. Coplin on 3/25/18.