 FREE 1 to 3-Day Delivery on Orders $149+ Details
How to Install PA Performance Alternator - 170 Amp (03-04 Cobra) on your Ford Mustang
Installation Time
2 hours
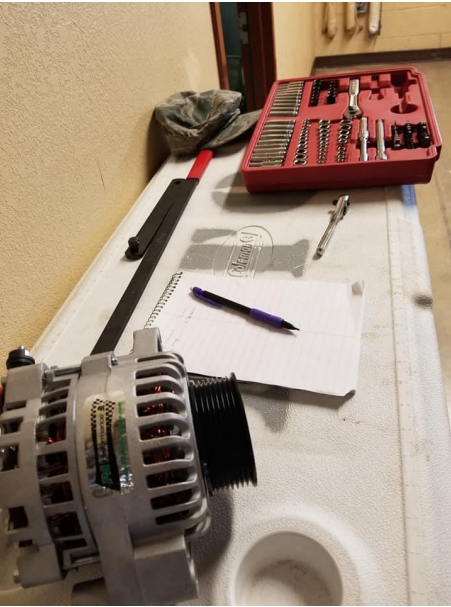
Tools Required
- 1/2 in drive Tensioner bar
- Deep/Shallow Socket Set w/ Metric & Std.

Shop Parts in this Guide
PA Alternator Install on the 2003-2004 Cobra
Note:
Because of the alternator
being so close to the header,
allow the car to completely
cool before starting. This is
also a generic install, in that
this guide will work for the
install of any 6g alternator in
the 03-04 Cobra. If changing
pulley sizes you will possibly
need a new belt.
Preparation for Alternator Removal
1.) Disconnect the Battery cables, remove the battery, and tuck the cables out of
the way.
1.1) Using a long extension and a 5/16in or 8mm socket, remove the battery
hold down.
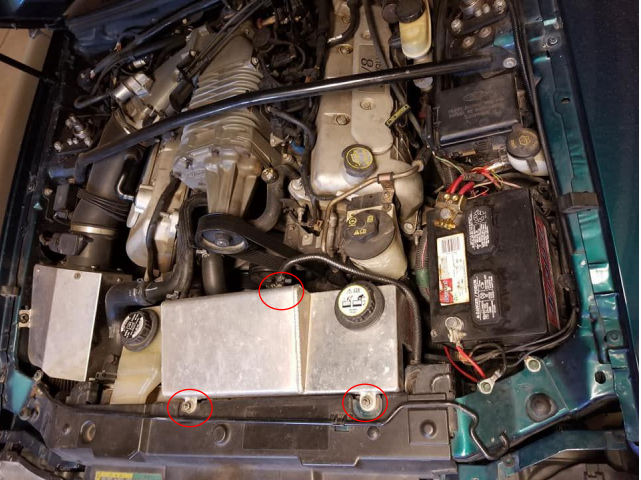
2.) Remove the 3-7/16in coolant expansion tank nuts. (Red Circles)
Removing the Battery Tray
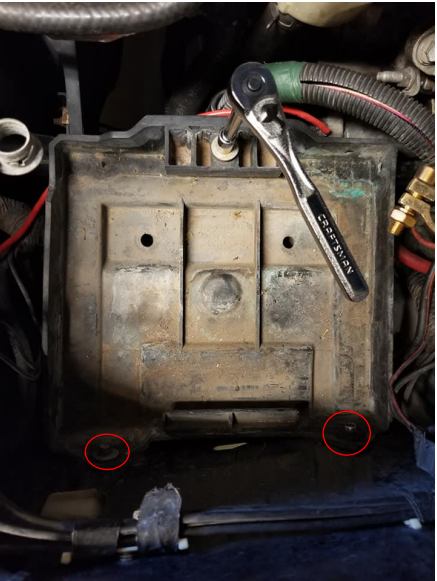
3.) Remove the 2-5/16in bolts that go into the fender actually bolt into the Horn
bracket. When loosening these, take note that the horn bracket inside the fender
may fall. Note -The Ratchet is on the Battery hold down and would normally be
removed first w/ the battery.
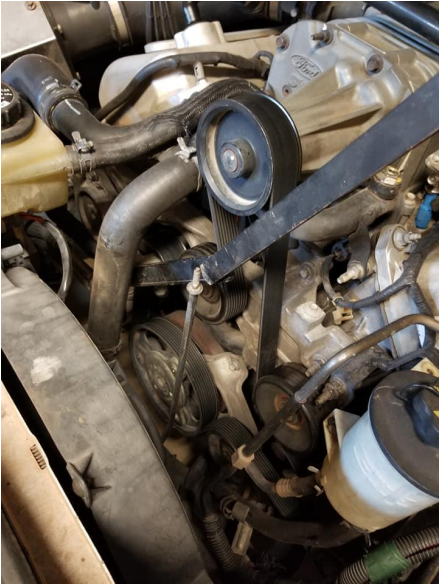
Serpentine belt, overflow tank, and accessory movement/removal
4.) Using your 1⁄2 drive breaker bar, or tensioner tool remove the outer serpentine
belt if you haven’t already. Note: You can disconnect the coolant overflow tank,
or you can rotate it towards the front of the car. Placing it out of the way for the
majority of the alternator removal and install.

Serpentine belt, overflow tank, and accessory movement/removal
5.) Remove the 3- 10mm Screws holding the Power Steering reservoir to its
bracket (Red Circles).
6.) Remove the nut holding the hard metal line next to it as well. Note: We need
to make room to pull the alternator out, so these will be loose to accommodate
its evacuation.
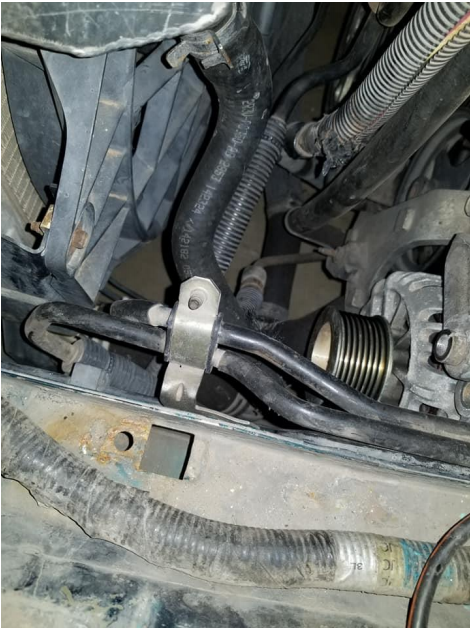
Serpentine belt, Overflow Tank, and Accessory Movement/Removal Cont.
7.) Remove the screw holding the bracket with the 2 hard lines in place. Note:
Allowing all of these hard mounted lines room to move out of the way for the
alternator.

Serpentine Belt, Overflow Tank, and Accessory Movement/Removal Cont.
8.) Remove the 2-13mm nuts holding the starter power wire. Doing this should
allow you to move it out of the way. One is located here, and the other is located
further down the harness towards the oil pan.
Alternator Removal
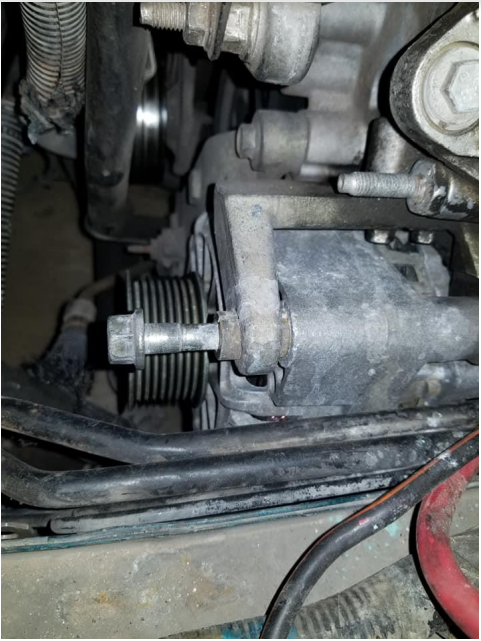
9.) Remove the top 15mm bolt pictured here. 180deg from this one is the 2nd
smaller bolt you need to remove. You can get to it with a 2-4in extension and a
shallow socket.
Note: My bottom bolt was broken at the time of this install, and was replaced
with a 13mm M8/1.25mmx40mm bolt.
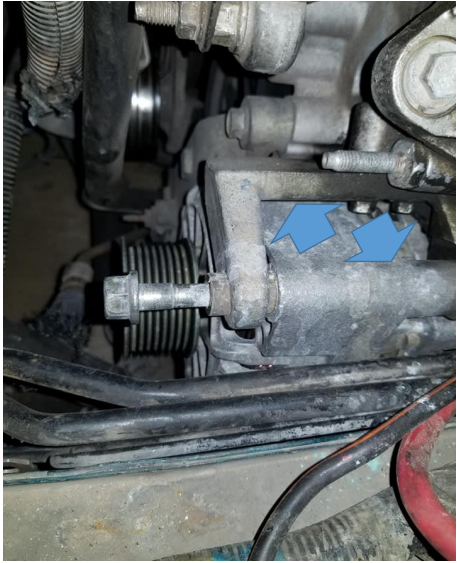
Alternator Removal
10.) When both bolts have been removed, place your ratchet or something to pry
the alternator from the bracket downwards (blue arrows). Just enough force to
move the collar the longer bolt inserts into. Your alternator should be free and
able to wiggle out.

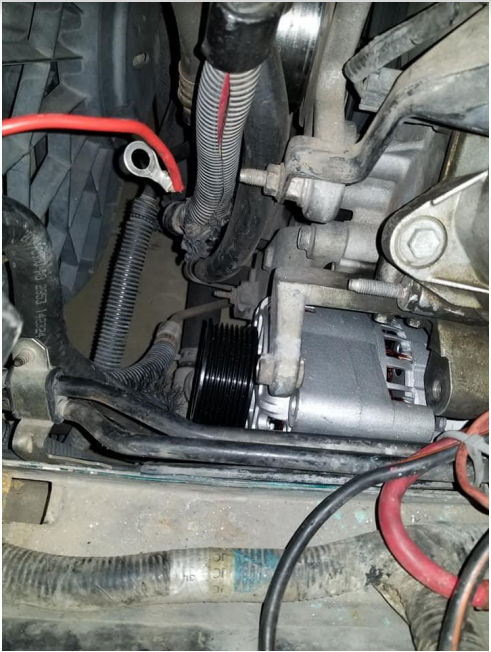
Alternator Removal Cont.
11.) Push/Pull/Rotate the alternator towards the front of the car. Keep the pulley
towards the front. You need to get it clear of the bracket so you can pull it up and
out of the car.
Note: You can move the power steering reservoir out of the way as well as the
starter wire harness. My overflow tank was still connected, I just rotated it out
of the way.
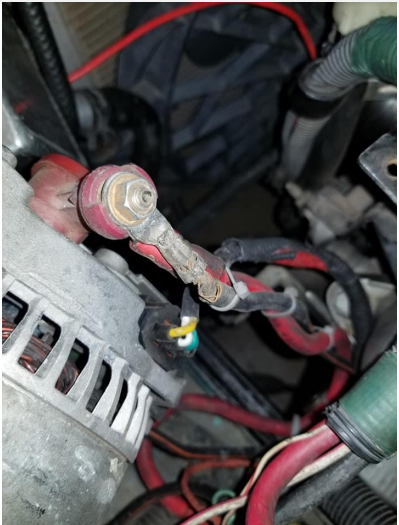
Preventative Maintenance and Overall Alternator Harness Checkup
12.) Remove the 10mm nut holding the power wire onto the alternator post.
12a.)Remove the alternator harness. Check the harness for frayed
wires/cuts/etc. If any of these wires are compromised you will get wonky
readings, battery light, or charging failure.
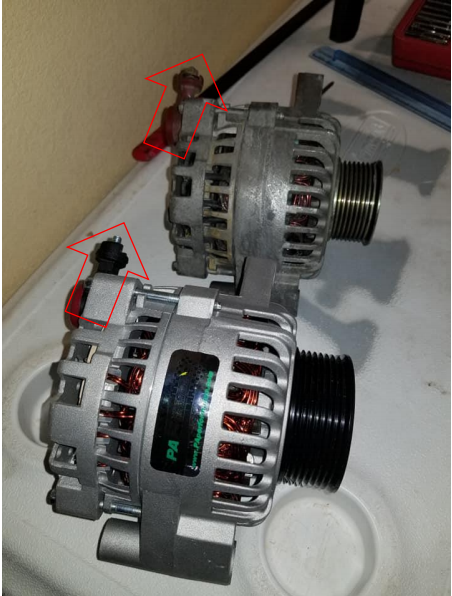
Compare New and Old Alternators
13.) Compare your new and old alternators. Ensure the Posts are facing the right
direction. Note: the stock pulley is smaller than the 170amp PA alternator. A
longer serpentine belt was required on my install.
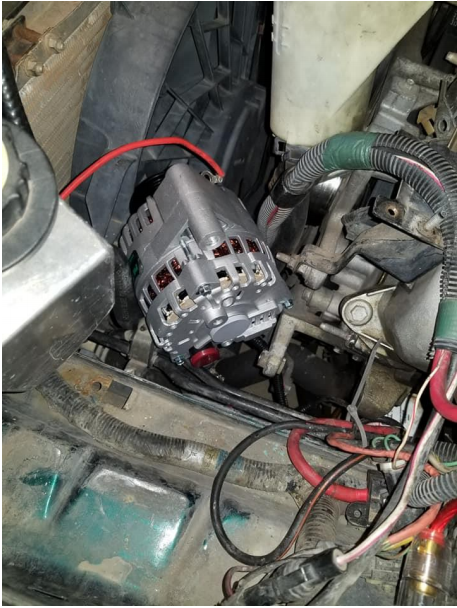
Installing the New Alternator
14.) Connect the harness to the alternator along with the power wires, and snake
it back into the alternator bracket. Ensure the harness is safe, and not pinched
when you place it back into the bracket. Ensure it is also not touching the header.
Finishing Touches
15.) Install the rest of the nuts and bolts you removed once your alternator is
squared away. Double check everything that you removed and make sure it’s
bolted back, zip-tied out of the way, or screwed back in.
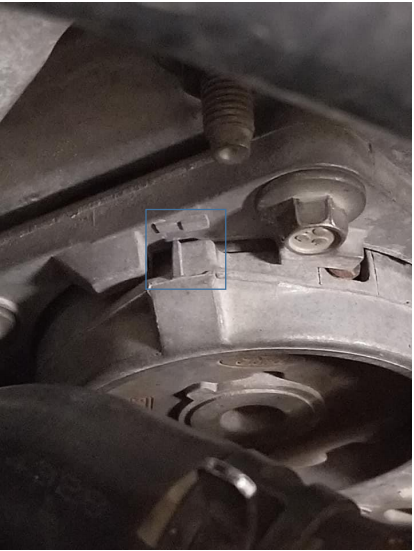
16.) Reinstall your serpentine belt, your tensioner indicator should be in between
the boxes.
Start your car and check the voltage at the battery. You should have over 14v
with a functioning alternator. If the car is running and its 12v-13.5, the regulator
isn’t working and there may be a malfunction in the alternator
harness/alternator.
Installation Instruction Written by AmericanMuscle Customer.

