 FREE 1 to 3-Day Delivery on Orders $149+ Details
2005-2009 Covercraft Mustang Pocket Pod Installation Guide
Installation Time
15 minutes
Tools Required
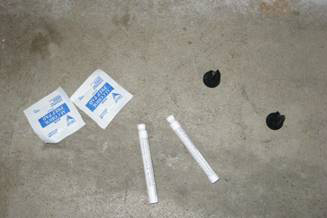
- Pushpin fasteners x 2 (included)
- Adhesion promoter ampule x 2 (included)
- Alcohol prep pad x 2 (included)
- Latex gloves (recommended)
Installation
Install Steps:
- Locate all the pieces that came in the assembled package. Included should be:
- 1 – Custom Pocket Pods,
- 2 - Pushpin fasteners,
- 2 - Adhesion promoter ampule,
- 2 - Alcohol prep pad

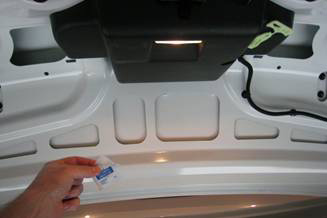
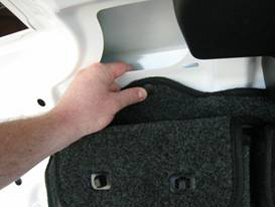
2. Open trunk and clean the surface under the trunk lid. If you have used oil, wax, or silicone based protectants on the surfaces of your vehicle, the enclosed alcohol wipes will not remove all the protectants and cause adhesive failure. These protectants can be removed by using a mixture of 5 parts warm water, 1 part household ammonia, and 1 part liquid dish detergent. Wipe on with a clean towel, turn the towel frequently to ensure you do not reapply the protectant after it has been removed. Wipe surface dry with a clean towel.
3. Clean the surface under the trunk lid with the enclosed alcohol pads.
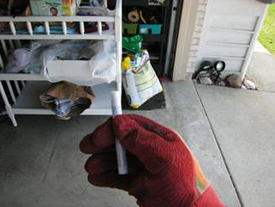
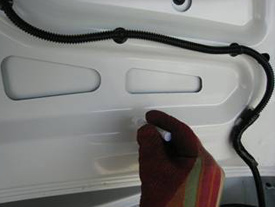
4. Wearing latex gloves, crush the adhesive primer ampule by pressing on the dot located on the ampule. Apply the adhesive primer to the area on the underside of the trunk lid that will be covered by the “Custom Pocket Pods” securing tape. You will be able to smell and see the adhesive on the trunk lid. Make sure that you apply a nice coating on the areas that will be in contact with the securing tape.
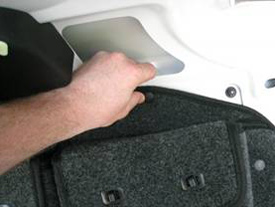
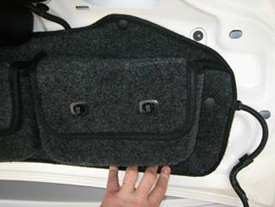
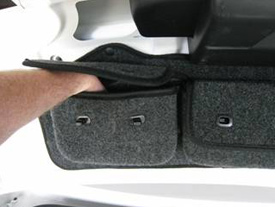
5. Lay the “Custom Pocket Pods” flat with the back side facing up so the securing tape is visible. Peel back the very top tape as well as tape from the right side.

6. Place the “Custom Pocket Pods” in position and carefully press the push pin fasteners into hole off the trunk lid.
7. Softly pull back on the side of the “Custom Pocket Pods” and remove the adhesive backing for the securing tape. Start on the right side, the side that you already removed one backing from, and work your way across to the other side. All 9 backings should have been removed (3 left, 2 lower middle, 1 upper middle, 3 right). Press the “Custom Pocket Pods” into place, connecting the securing tape to the trunk lid.
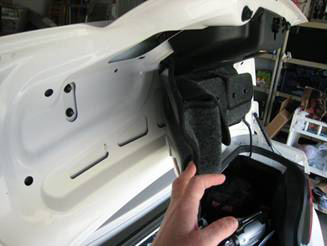
8. To insure proper adhesion, firmly run your hand along the outside of the pouch and firmly press on the surfaces inside each of the storage pouches. Doing so will ensure proper adhesion to for you “Custom Pocket Pods”
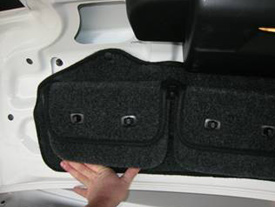
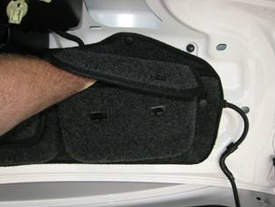
Installation complete.

Before
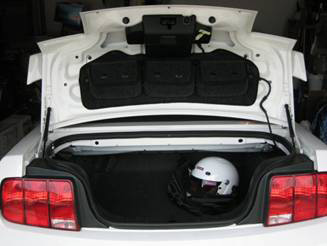
After
Installation instructions provided by AmericanMuscle customer Lance Lovato
Related Guides
-
Installation
-
Installation
-
Installation
