 FREE 1 to 3-Day Delivery on Orders $149+ Details
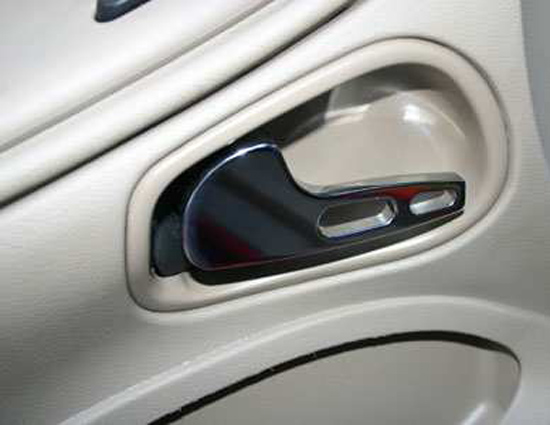
SHR Mustang Billet Interior Door Handle Installation Guide (1994-2004)
Installation Time
45 minutes
Tools Required
- Side cutters
- Pick / hook tool
- Standard / Needle nose Pliers
- 3/8 wrench / socket to tighten nylock nut
- Safety glasses
- Flat and Phillips Screwdriver (small and large)
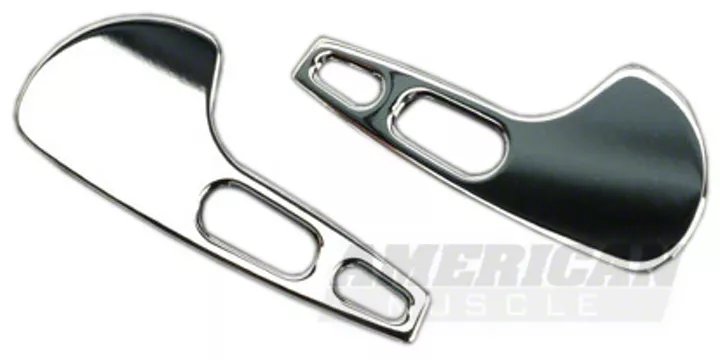
Shop Parts in this Guide
Installation
1. Roll down both windows.
2. Remove negative terminal from battery.
3. Using the hook tool or an appropriate prying tool, remove the switch control assembly and disconnect.
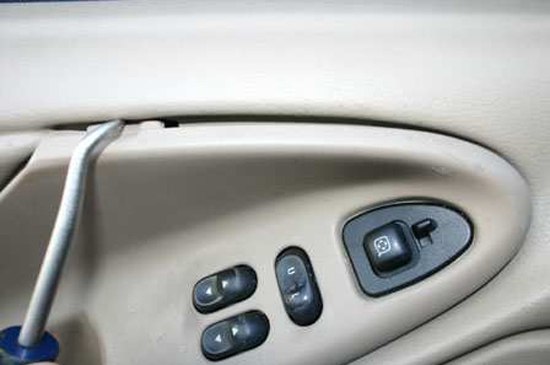
4. With the switch plate out of the way, you will have access to the top of the handle assembly.
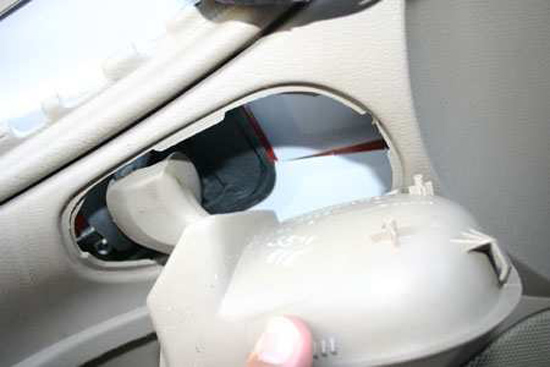
5. Using the hook tool or a flat screwdriver, pop the plastic cup from around the door handle – putting the handle in the open position will aid in removing it completely.
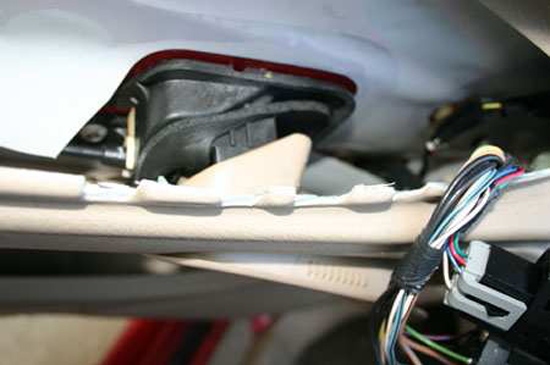
6. Using the side cutters or an appropriate saw or dremel type tool, cut the bottom of the roll pin used to hold the handle to the brace. Metal pieces may be ejected here at high velocity, so be careful and use appropriate safety precautions.
7. Remove the roll pin from the top of the handle, and discard original pin. The door handle can now be removed from the handle receiving assembly. Be aware of the return spring which will be re-used with the new handle, as well as the orientation of the spring.
8. Remove the door release cable from the door handle.
9. Install new handle, reinstalling the original return spring, and installing the opening cable. Be aware that there is a small recess cut into the door handle to accept one of the return spring “legs” which will help it to stay oriented properly. Failure to install spring correctly could cause door handle to flop around, or in extreme cases could cause door to open while vehicle is in motion – extreme care must be taken to avoid this!
10. Install new supplied stainless steel screw in place of original roll pin, and secure at bottom with nylock nut. Nut should be tight enough to engage locking section, and to hold screw, but not so tight as to “clamp” down on the handle causing binding of the handle to receiver assembly.
11. Test for proper operation of door handle prior to reassembly of door switch plates and cup cover. Enjoy!
Installation instructions provided by SilverHorse Racing (SHR)

