 FREE 1 to 3-Day Delivery on Orders $149+ Details
How To Install a MAC Dual Exhaust Conversion Kit for your 1999-2004 V6 Mustang
Installation Time
3 hours
Tools Required
- Pypes Exhaust hanger kit
- 18mm deep socket
- Sawzall
- 13mm socket
- 18mm socket
- ⅜ Ratchet
- ½ Ratchet
- Allen wrench set
- Floor Jack
- (2) Jack Stands
- 4 bricks or wheel chocks
Please Note: Fitment to a 99-04 v6 mustang.
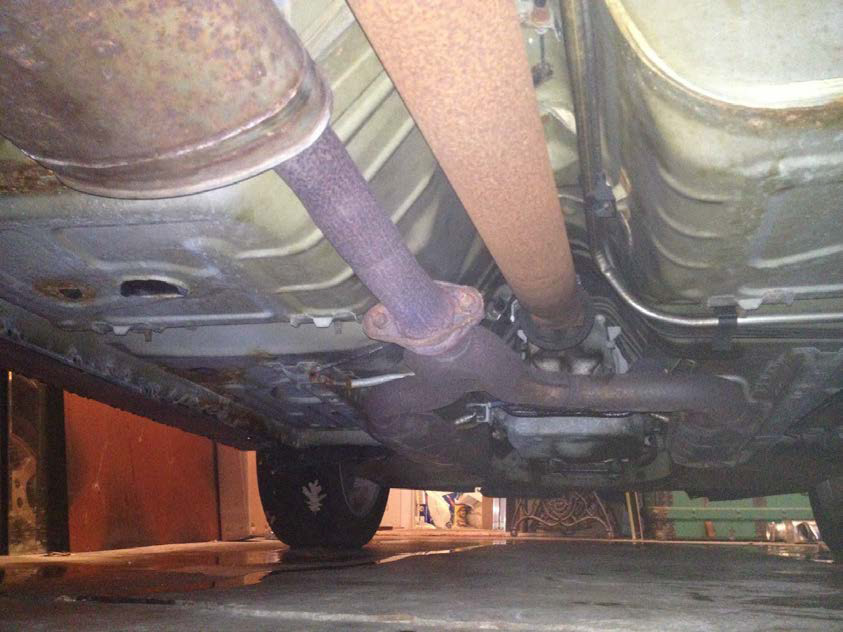
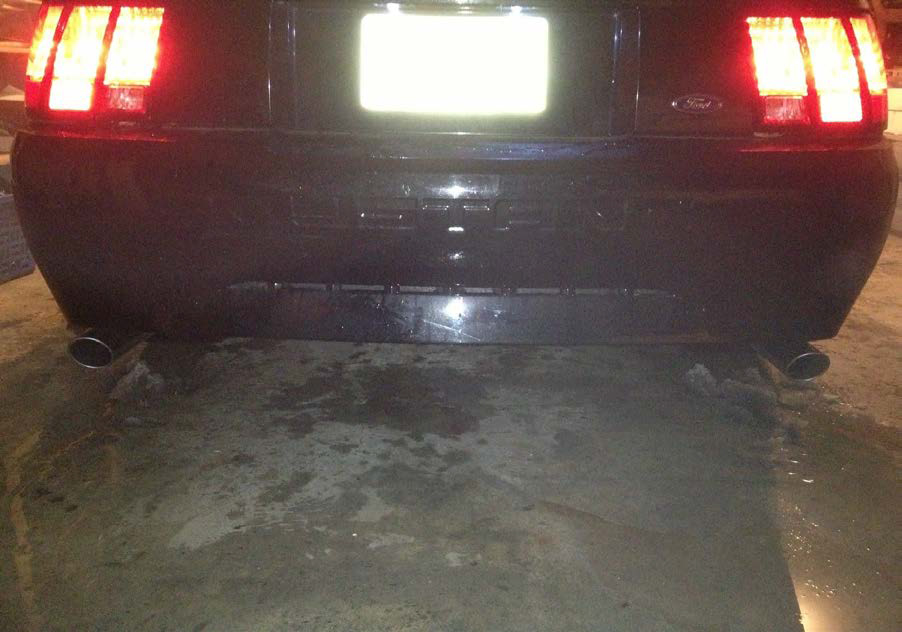
Before:
After:

Removal Procedure:
1. Engage emergency brake and put transmission in gear; automatics use Park.
2. Place bricks or wheel chocks in front of and behind each of the front wheels.
3. See owners manual to find the lift points of the car. Lift the car and then place a jack stand underneath it, continue to the other side and repeat.
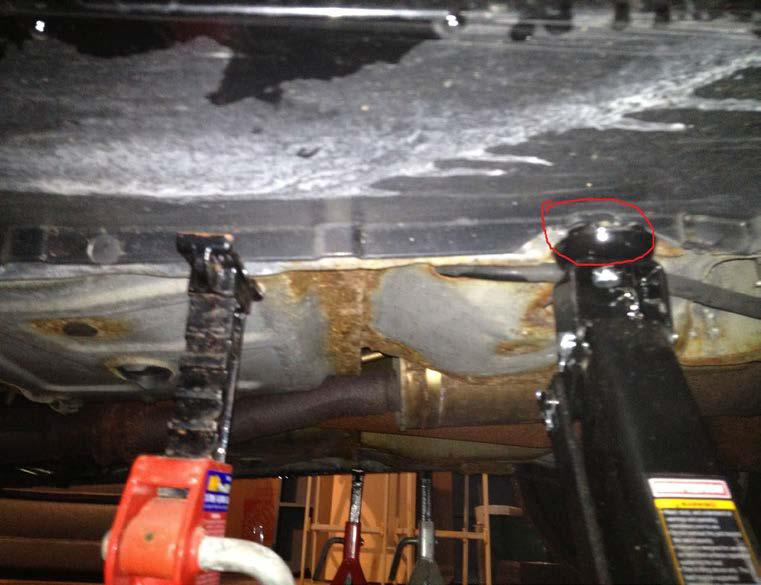
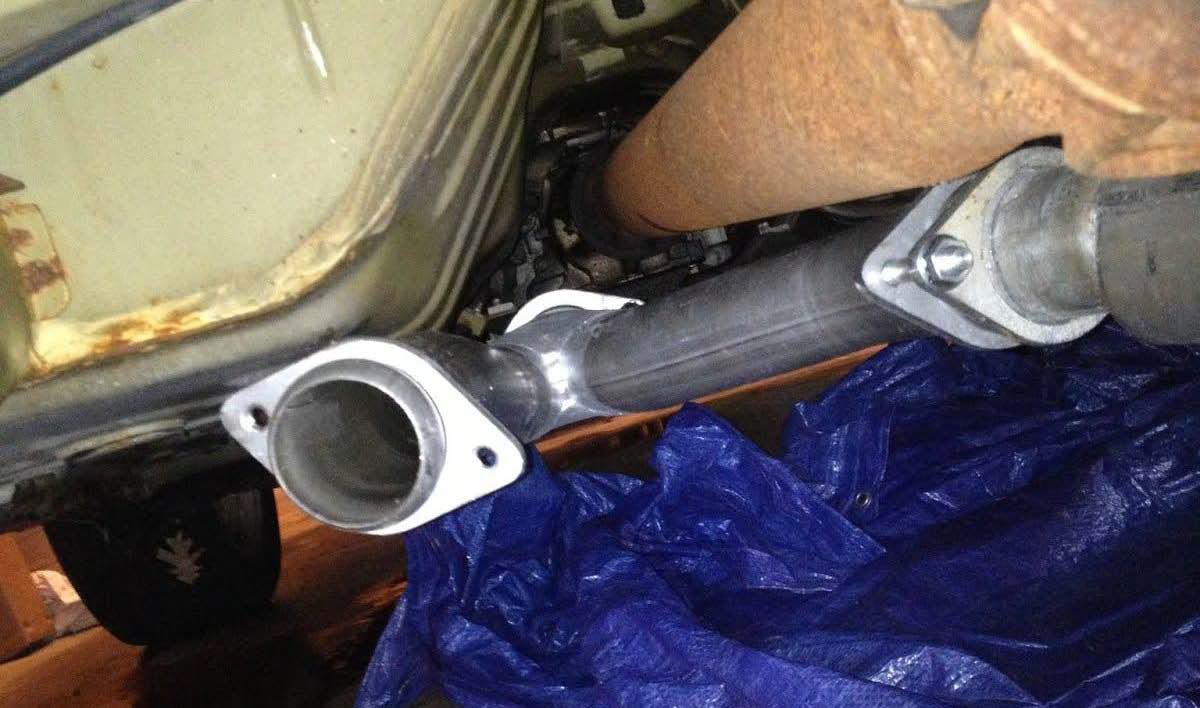
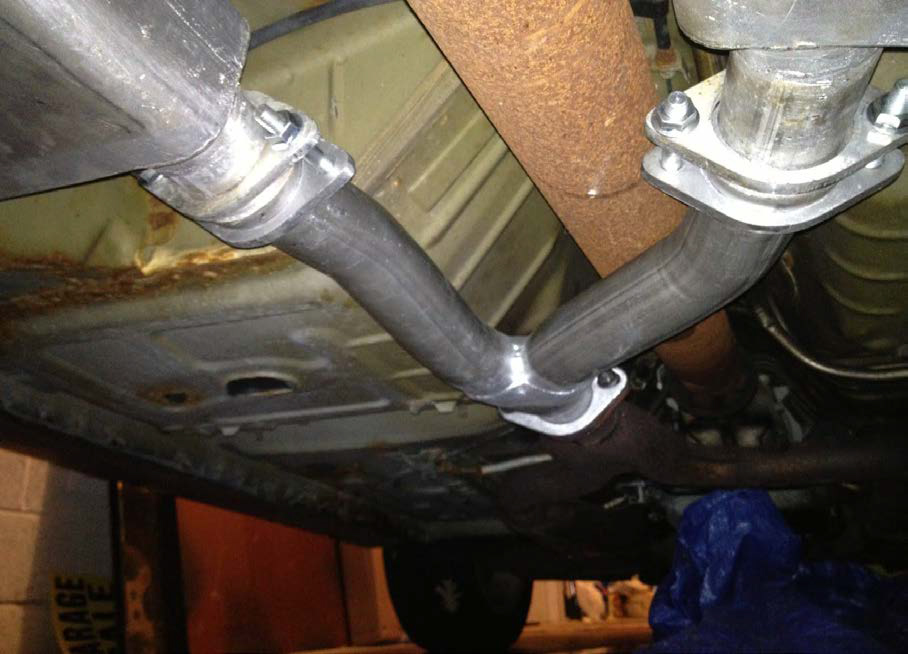
4. Once the car is lifted and safe, look under the car and spot the bolts that are near the Y-pipe
and spray them with WD-40 and let it sit for about a minute. This loosens up any rust that may have built up around the nut.

5. Loosen & remove the nut (18mm) and leave the bolt attached because you will use it later on with the installation of the new exhaust system.
6. You will notice that the old exhaust system is all one piece and will have to cut it into sections to remove it from under the car. Cut along the dotted lines
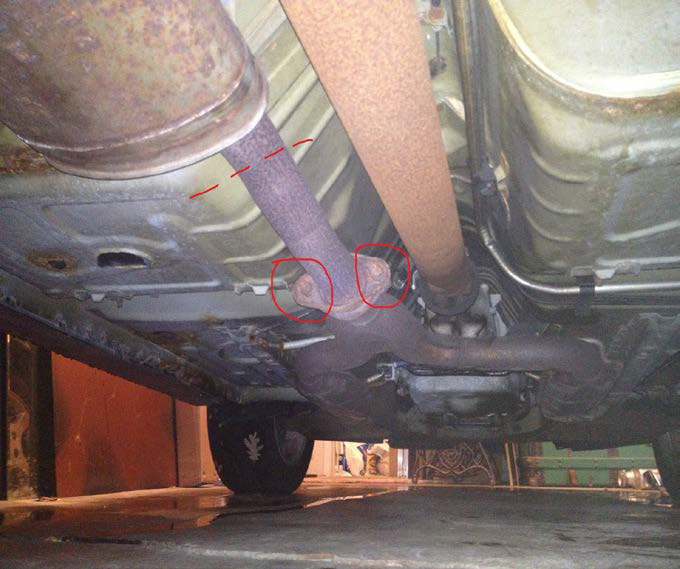
7. Remove the Y-pipe from the car.
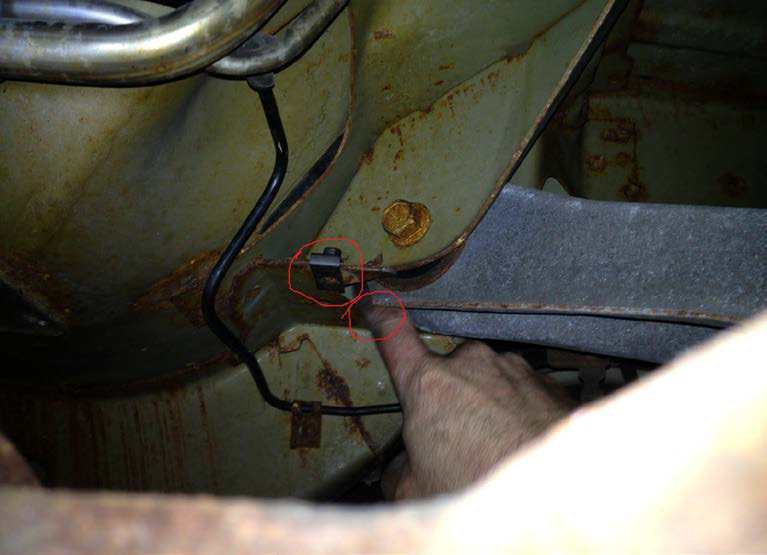
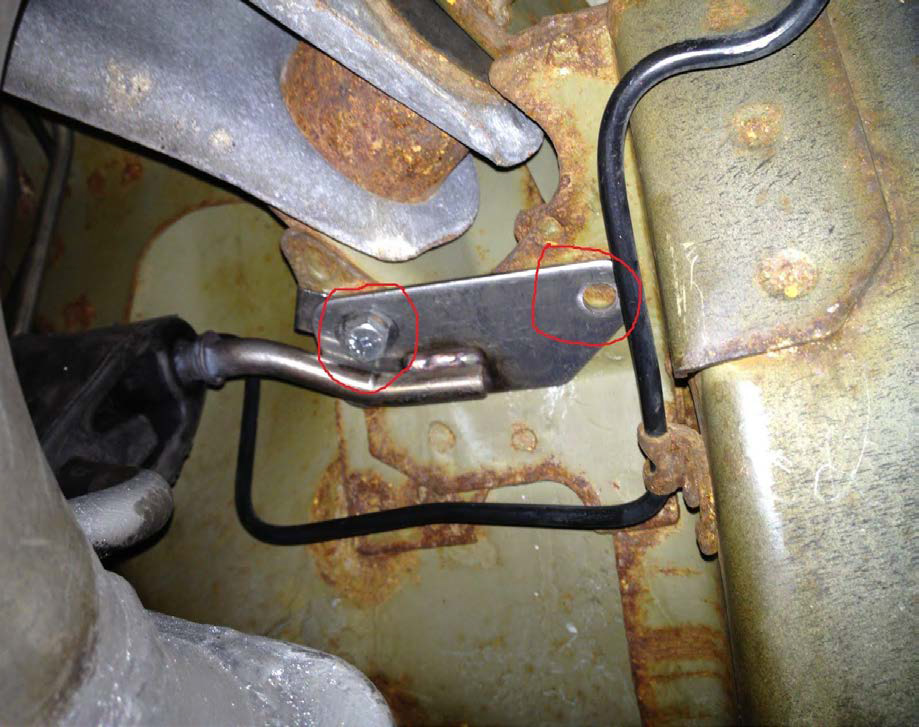
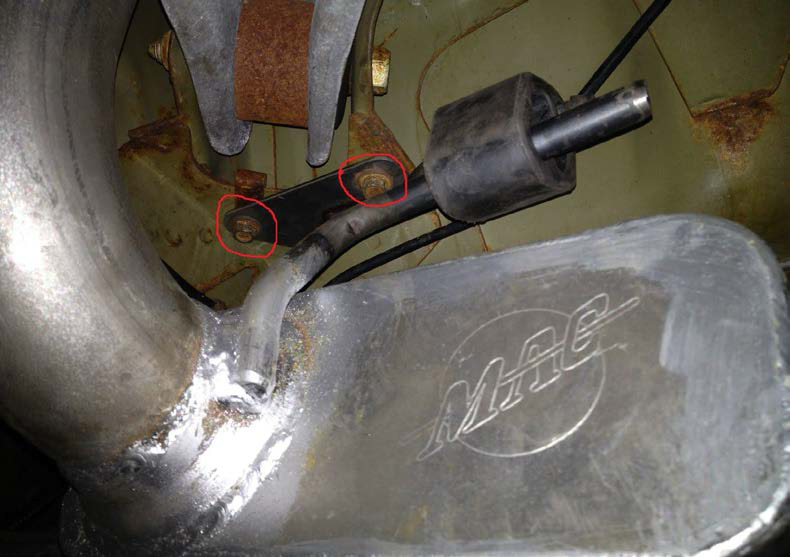
8. Look for the muffler hanger. Proceed to cut along the dotted lines. Notice the knobs at the end of the pins, these do not allow you to remove the pins from the rubber hangers.
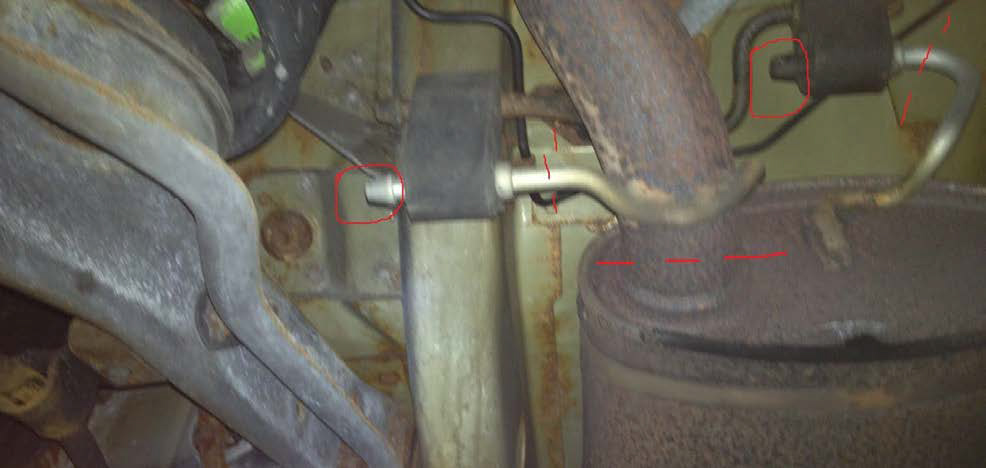
9. Once you cut the muffler loose remove the hangers from the underneath of the car by unbolting them.
10. The rest of the piping should come out from under the car now.
Installation Procedure:
1. Unbox the new Exhaust system and the Pypes Exhaust hanger kit that was purchased along with the system.

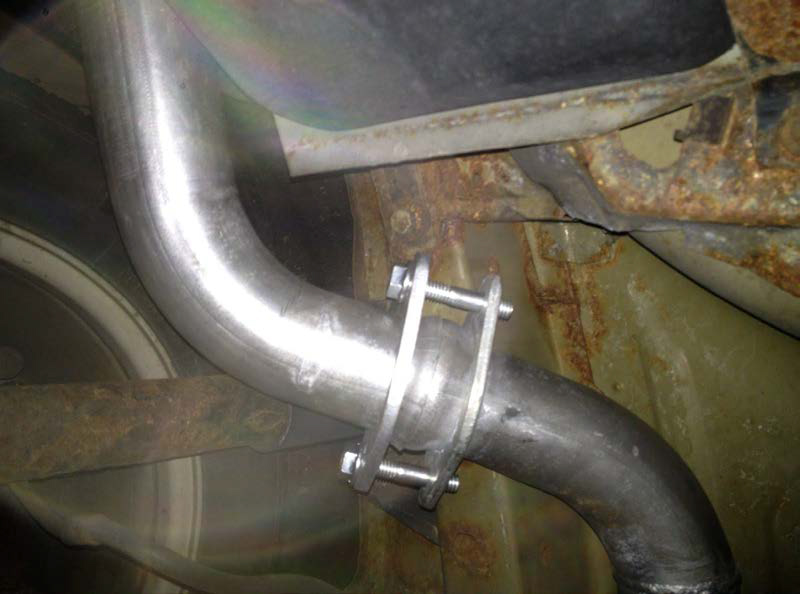
2. Install the new Y-pipe loosely.
3. Install the muffler hangers from the Pypes kit onto the mufflers and then start to fit the mufflers underneath the car (start with the passenger side first).
4. Lift the muffler up and over the rear axle into place.
5. Loosely attach the muffler to the Y-pipe.
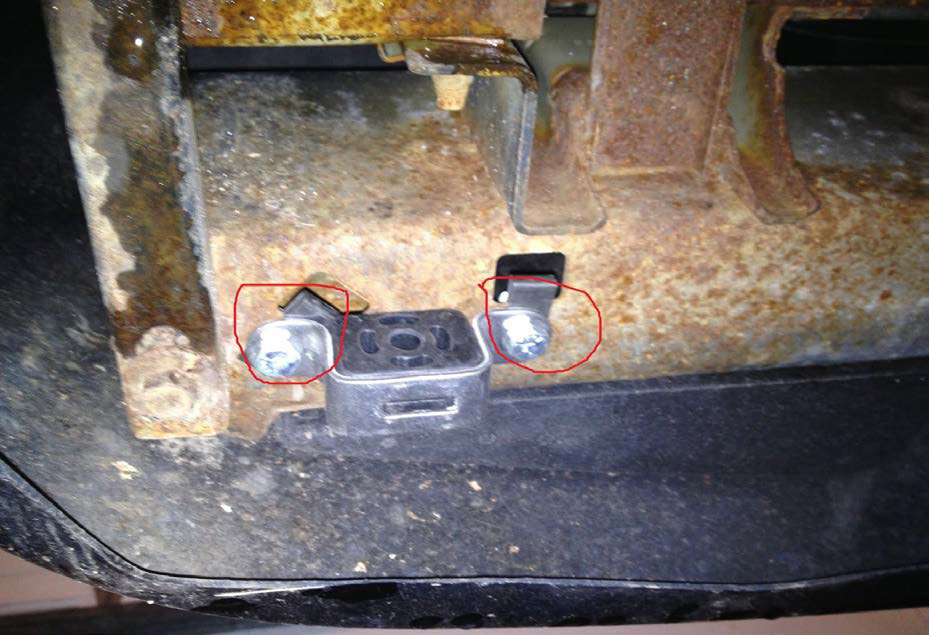
6. Attach the muffler hangers to the designated spots.
7. Tighten the hangers to the bottom of the car (13mm). (It is easier to attach the hangers onto the muffler before installing the muffler, rather than trying to install the hangers and then attach the muffler).
8. Loosely attach the tail pipe (10mm) to the other end of the muffler so that it lies just outside of the gas tank on the passenger side.
9. Place the driver side muffler assembly up and over the rear axle and loosely attach it to the Y-pipe.
10. (Remember it is easier to attach the hangers to the muffler first rather than to the car first). Attach the hangers to the car.
11. Attach the tail pipe to the other end of the muffler and adjust it so it is on the driver’s side of the gas tank.
12. Attach both of the exhaust tip hangers to the pins that connect to the exhaust tips before attaching the hangers to the car.
13. Attach the hanger & pins to the car on both sides and then place the Exhaust tip over the tail pipe on both sides and slide the pins into the correct spot on the exhaust tip.

14. Align both exhaust tips where you would like them and then tighten down the clamps and Allen screws until the exhaust tips are both secure.
15. Start from the rear and work your way to the front tightening all of the bolts and securing the new exhaust system into place.
16. Lower the car. Then start it and check for leaks. if any leaks occur, tighten where the leak is coming from.
Installation Instructions written by AmericanMuscle customer Zach Weinfurter 12/19/12
