 FREE 1 to 3-Day Delivery on Orders $149+ Details
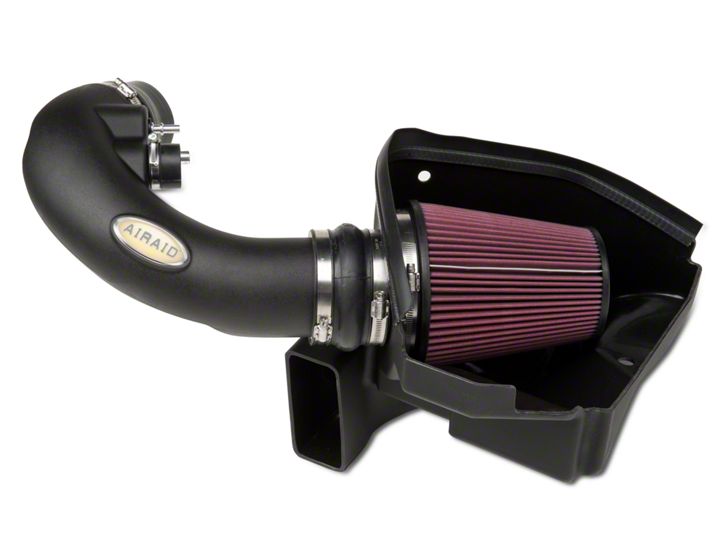
How to Install a Airaid Cold Air Intake on your 2011-2014 Mustang GT
Installation Time
45 minutes
Tools Required
- Wrench
- 8mm Socket
- 7mm Socket
- 10mm Socket
- 6" Extender
- 4mm Allen Wrench
Shop Parts in this Guide
Tools Required:
Wrench
8mm socket
7mm socket
10mm socket
6” extender
4mm allen wrench
Time: About 45 minutes
Stock Intake Removal
1. Disconnect negative battery cable.
2. Remove engine cover.
3. Loosen hose clamps (8mm) on throttle body and intake tube. Loosen clamps on sound tube and crankcase line and then disconnect them.
4. Also disconnect MAF sensor by pulling red tab back first and then pulling the MAF connector free.
5. Remove MAF sensor from stock intake tube using supplied Torx bit.
6. Disconnect MAF wiring from intake tube (it is connected with christmas tree fastener).
7. If using sound tube, remove connection from airbox (top left corner of airbox).
8. Unscrew bolt securing intake air box to frame with (10mm). I used an extender here to make it easy. You will reuse this bolt.
9. Remove both the stock intake and the stock airbox from the engine bay.

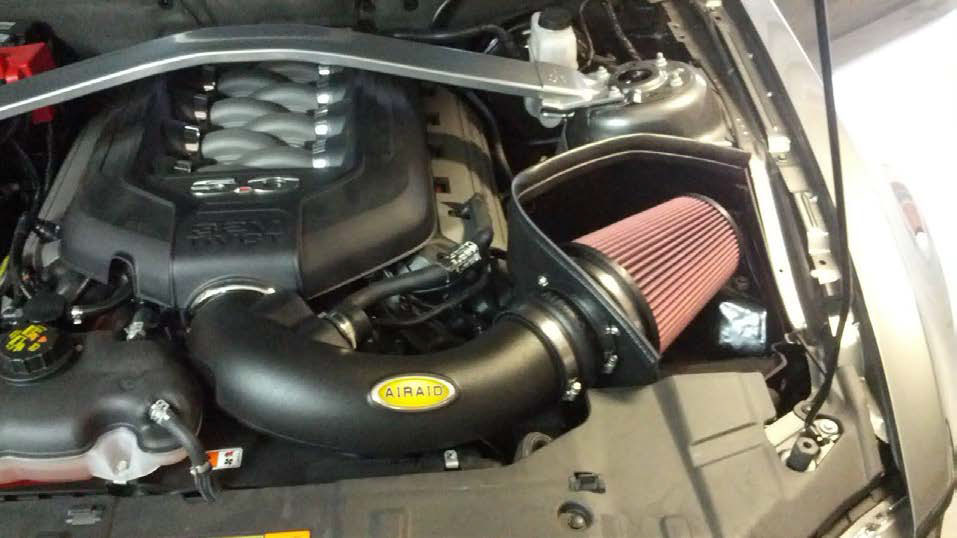
Airaid Assembly
1. On Airaid intake tube, install blind grommet if MT (this was a bit of a pain, used a torx bit to help push it in by working around the edges) or ⅜” grommet and fitting if AT.
2. Install ⅝” grommet and then the metal fitting into the grommet.
3. At this point if you are doing a sound tube delete, install the Urethane cap and 60mm hose clamp onto the sound tube hole on the Airaid intake (picture does not have this done).
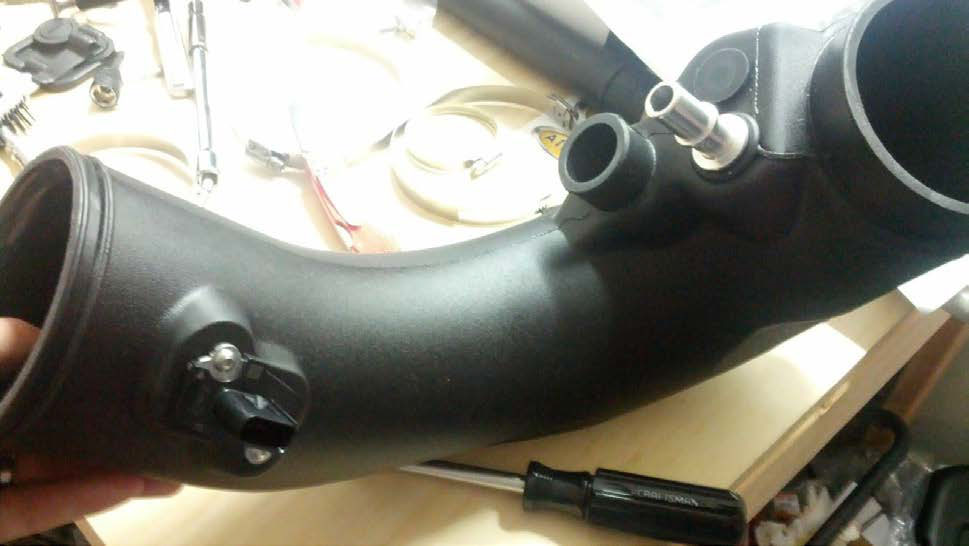
4. Install MAF on Airaid intake. If using the MVT for non tuned installations, insert it into the intake and line up the holes for the MAF. Then install the MAF using (2) provided button screws with (4mm) allen wrench.
5. Install the filter adapter using the (3) button screws and washers into the Airaid airbox.
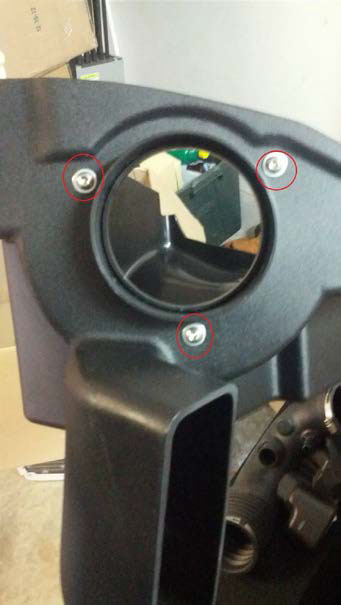
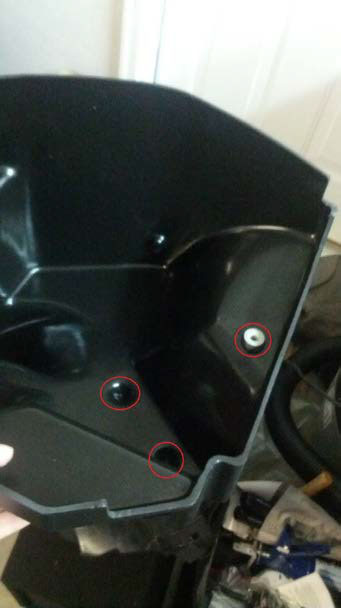
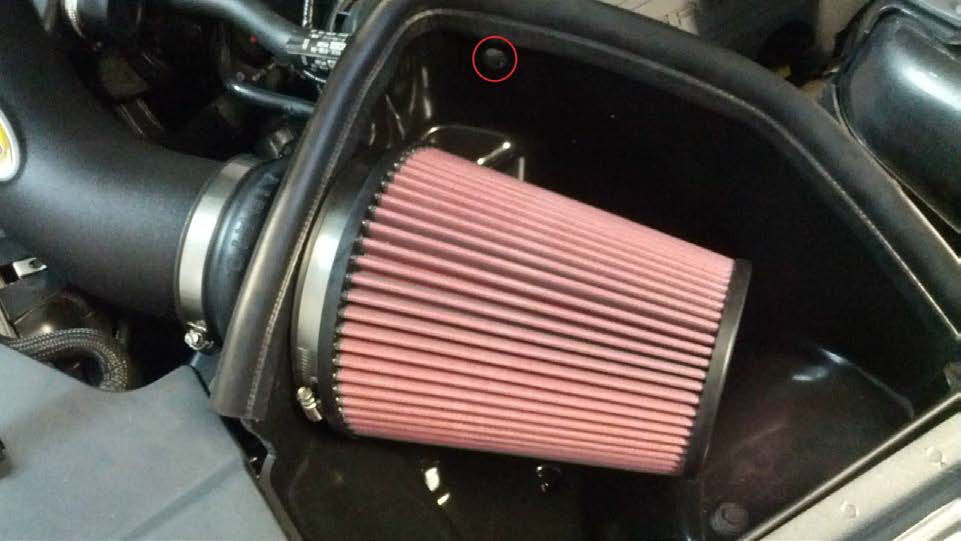
6. On stock airbox, remove (2) rubber stoppers from bottom of airbox (underneath red circles in picture) and remove steel sleeve and grommet from where 10mm bolt was removed at beginning.
7. Install on Airaid airbox.
8. Install ‘hump hose’ onto filter adapter with hose clamp (8mm). Also loosely install hose clamp on ‘hump hose’ from the other side.
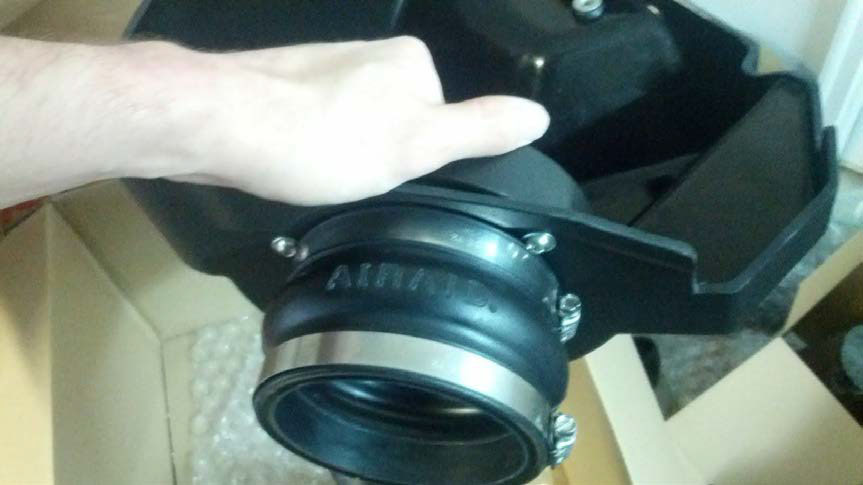
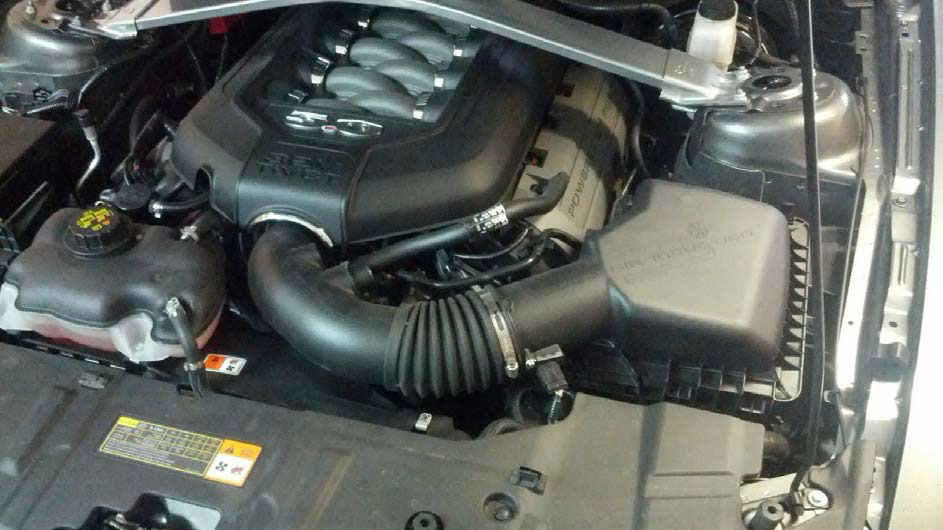
9. Install ‘silicone reducer’ onto Airaid intake tube. Insert intake tube into ‘hump hose.’ At this point, I found it much easier to install the unit in the car all together instead of airbox then intake.
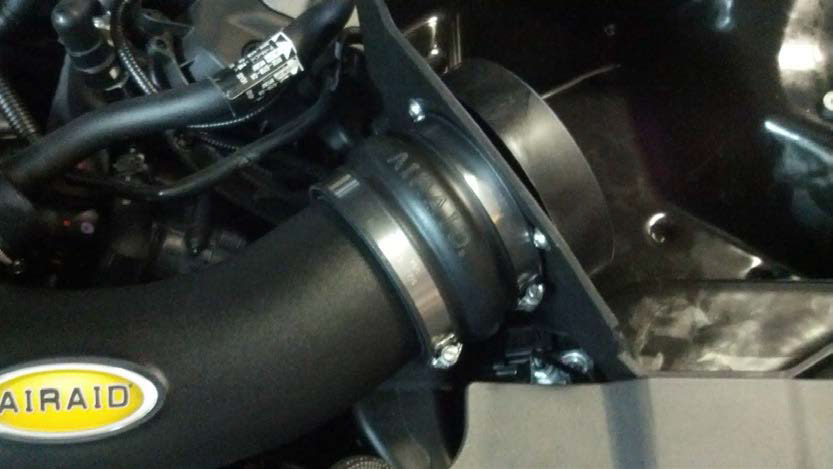
10. With the the intake tube and airbox connected (but not with the hose clamps tightened down), I was able to maneuver the ‘silicone reducer’ over the throttle body (don’t forget the have the hose clamp for the throttle body on it before you connect them) and the airbox into the car with little effort.
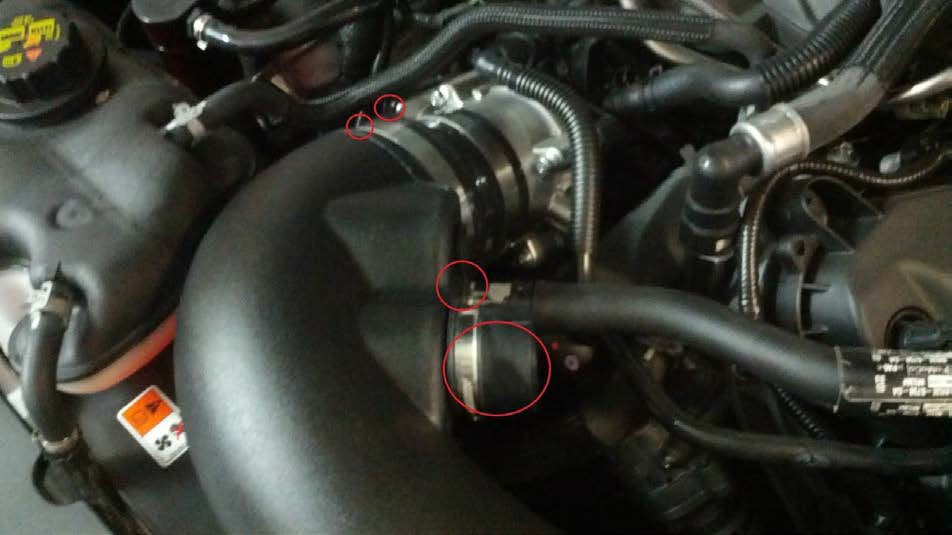
11. Reconnect the crankcase line on the new fitting and reconnect sound tube if used (in the picture the sound tube delete is now installed).
12. Finish tightening all hose clamps (throttle body/intake and both on hump hose).
13. Install 10mm bolt into airbox to secure it to car.
14. Install filter on filter adapter, tighten hose clamp.
15. If using sound tube, reconnect sound tube to airbox (red circle in picture).
16. Install weather strip along edge of box. I worked from bottom to top.
17. Reconnect MAF sensor. It will now be underneath the intake tube.

18. Reconnect negative battery terminal.
19. Check all fittings, connections, hose clamps, etc.
20. Reinstall engine cover.
21. Enjoy!
Installation Guide written by AmericanMuscle Customer Erik Wangenheim on 1/30/12

