 FREE 1 to 3-Day Delivery on Orders $149+ Details
How to Install Airaid Race Cold Air Intake on a 2010 Mustang GT
Installation Time
30 minutes
Tools Required
- Flat Screw driver
- Needle nosed pliers
- Socket wrench with 3/8”
- Socket wrench with ¼” drive OR ¼” drive screwdriver
- Deep 10mm socket
- Deep 11mm socket
- 8mm socket (deep or shallow)
- #20 Torx bit (Included with product)
- ¼” drive bit holder
- Utility knife
- 3/32” hex key
- 5/32” hex key
- Included Parts:
- 1 - Filter
- 1 - Filter Adapter
- 1 - Intake Tube
- 1 - Cool Air Box
- 1 - Urethane Hump Hose
- 1 - Urethane Oval Coupler
- 1 - Urethane 1 ¾” Coupler
- 1 - 3/8” hose
- 1 - Weather strip
- 3 - 1/4-20 x ½” Button Head Cap Screw
- 4 - ¼” Flat washer
- 2 - 8-32 x 3/8” Button Head Cap Screw
- 1 - 1/4-20 x 7/8 Hex Bolt
- 1 - M6 x 1.0 x 12 Hex Bolt
- 7 - Hose Clamps (2 small, 4 medium, 1 large)
- 1 - Grommet
- 1 - Firewall Plug (Optional)
- 1 - Urethane Cap (Optional)
- 1 - Aluminum fitting
- 1 - Resonator Tube Bracket
- 1 - #20 Torx bit
PPE (Personal Protective Equipment)
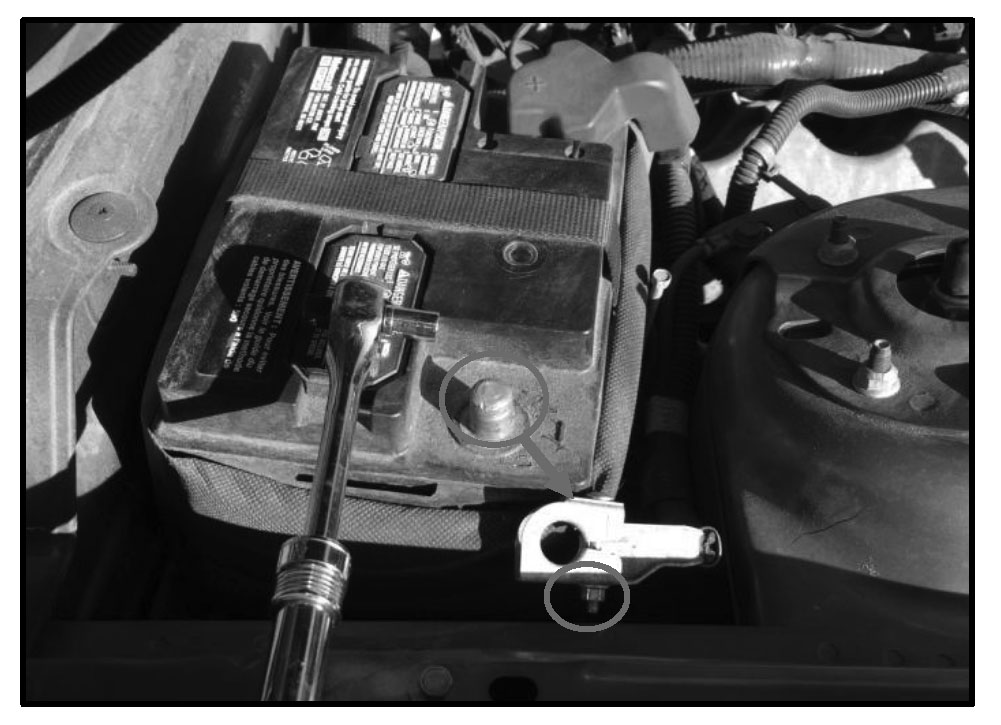
Cut resistant gloves Note: Disconnect the negative battery terminal prior to beginning any work to eliminate any potential charge that may cause serious injury. Ensure ignition is in off position and loosen nut with 8mm socket.
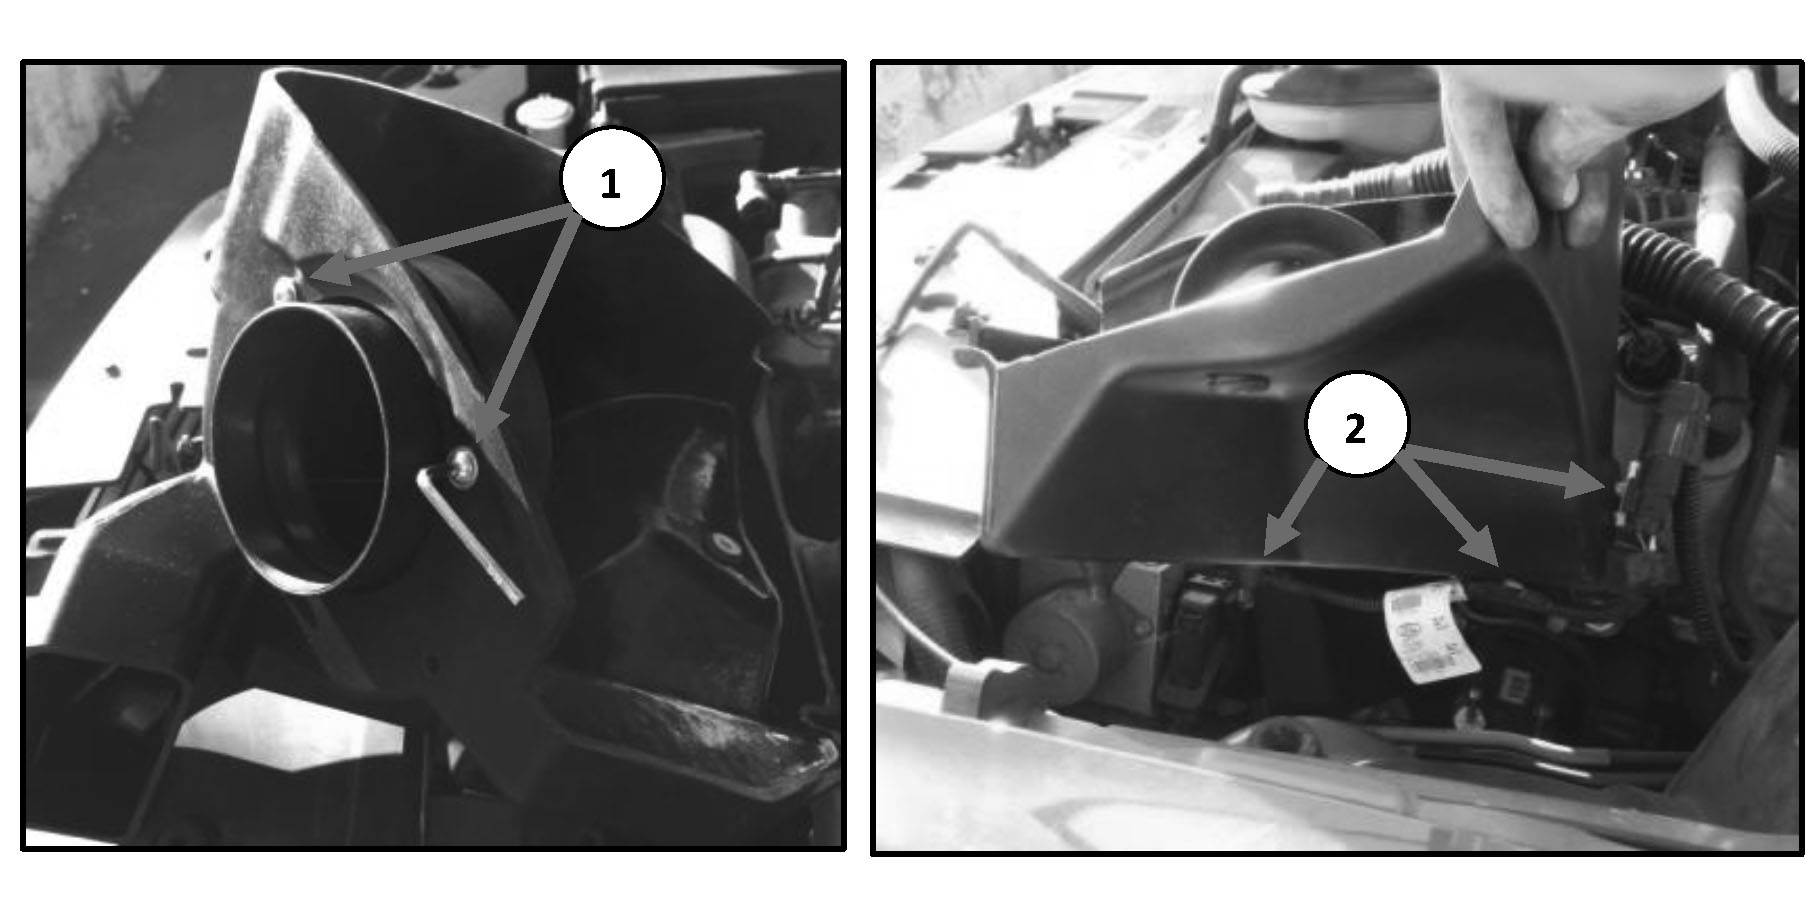
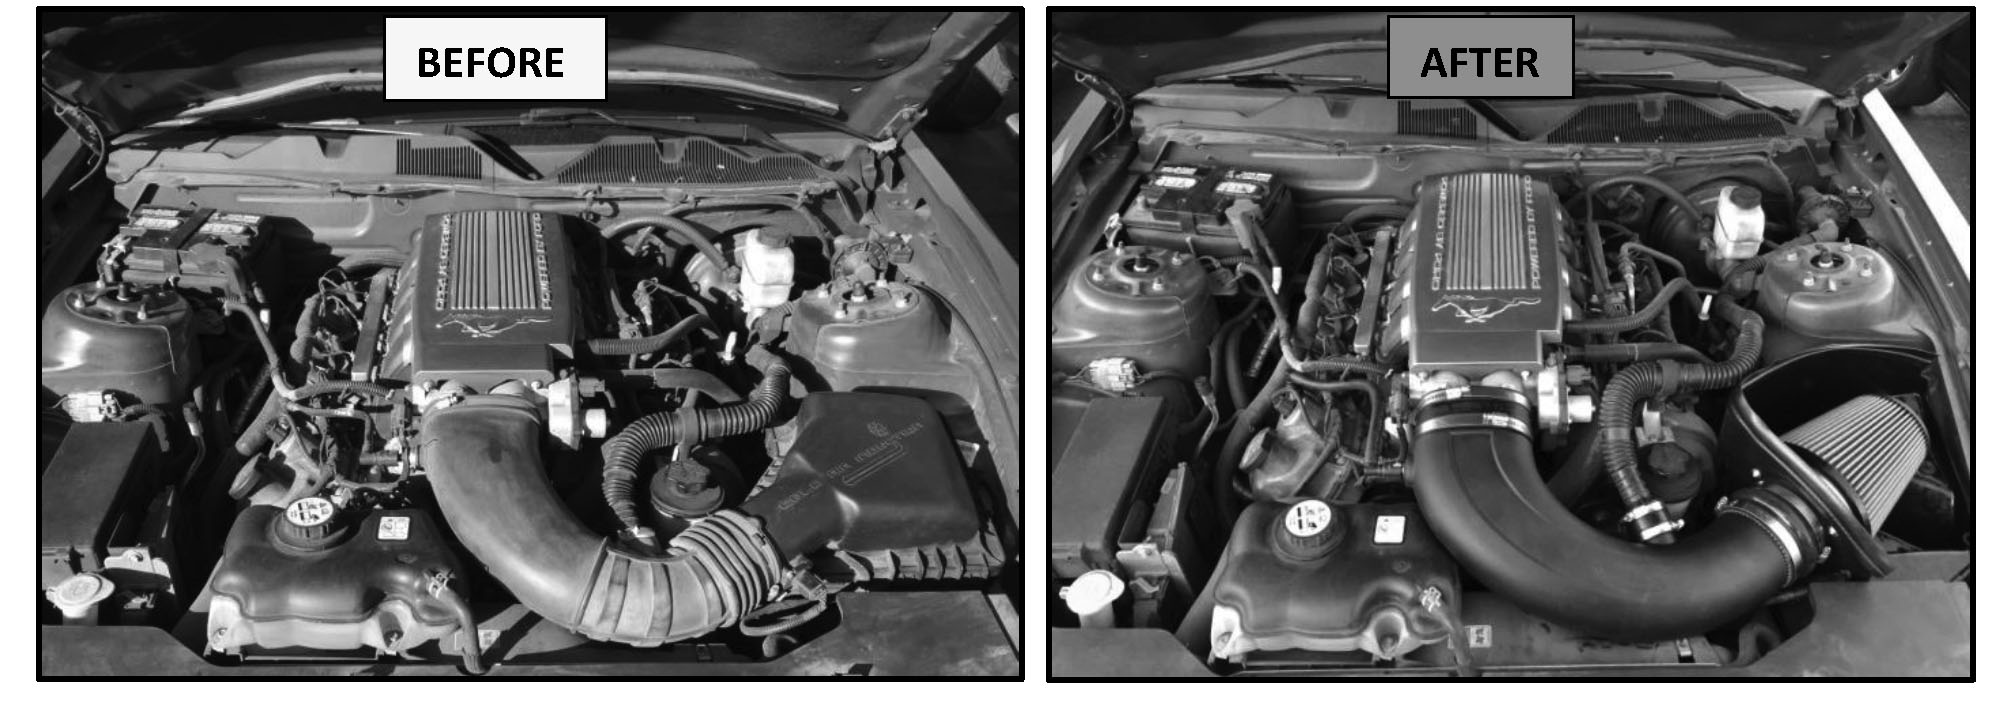
Stock Intake Removal:
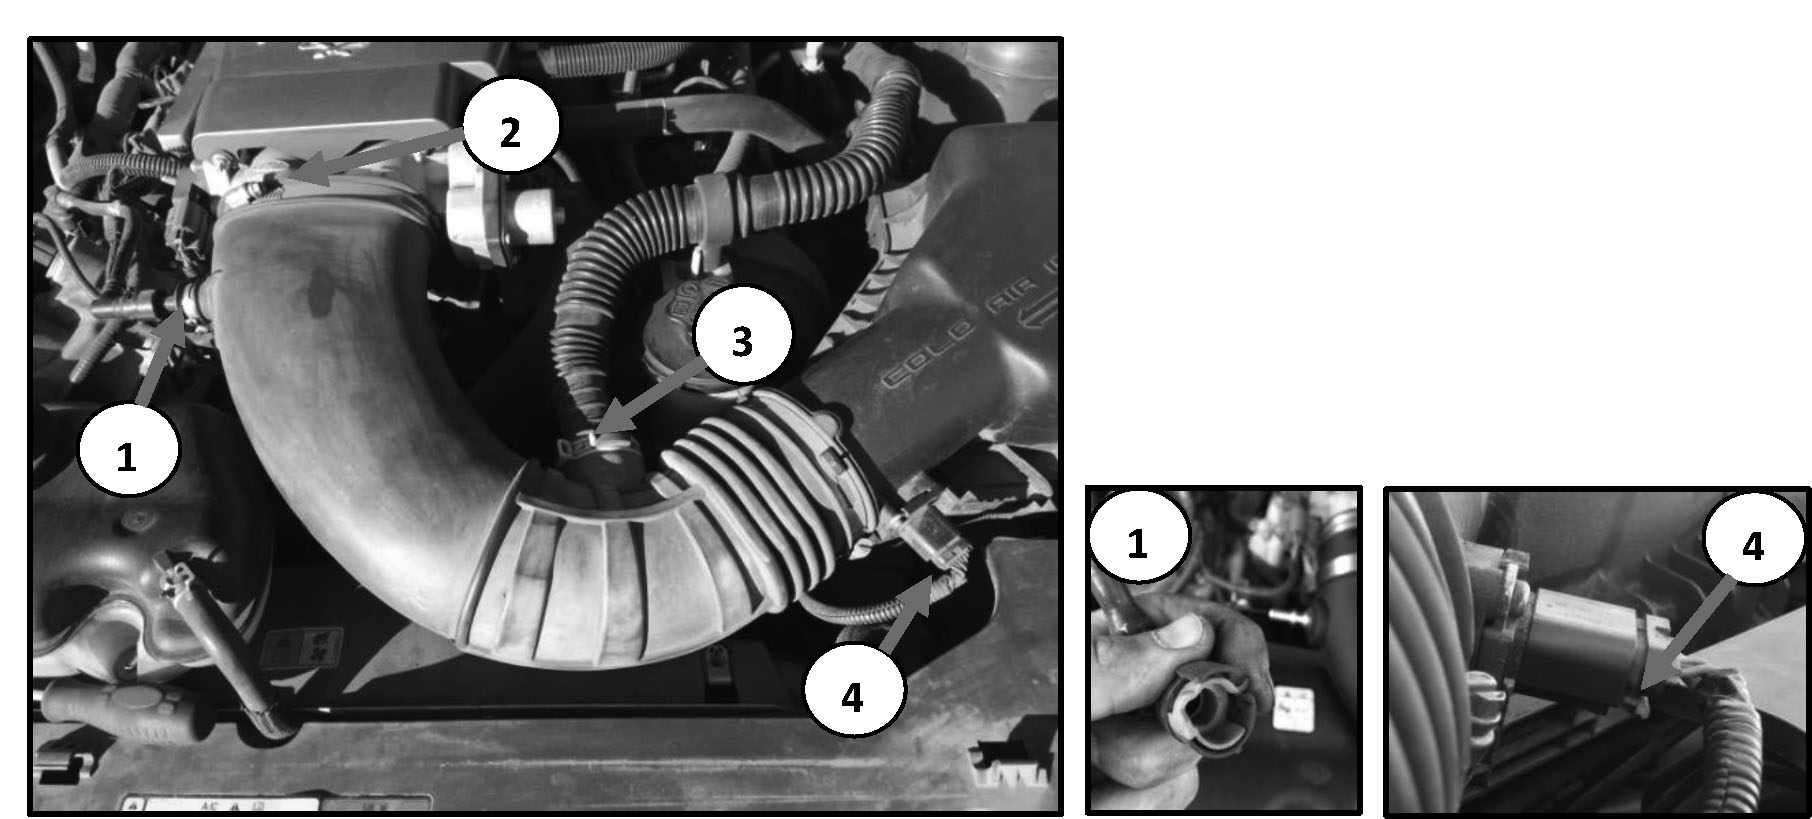
1. Remove breather hose from the engine (push green tabs at both ends).
2. Loosen hose clamp on throttle body/intake tube.
3. Disconnect resonator from intake tube using pliers to compress clamp.
4. Disconnect wiring from Mass Air Flow sensor by pulling out red tab on harness.
5. Remove Air box bolt and save for later (10mm socket).
6. Use flat screwdriver to pry out all 5 wiring anchors from air box.
7. Rotate the air box and intake tube forward and remove assembly from engine.
8. Remove the steel sleeve and grommet and save for later.
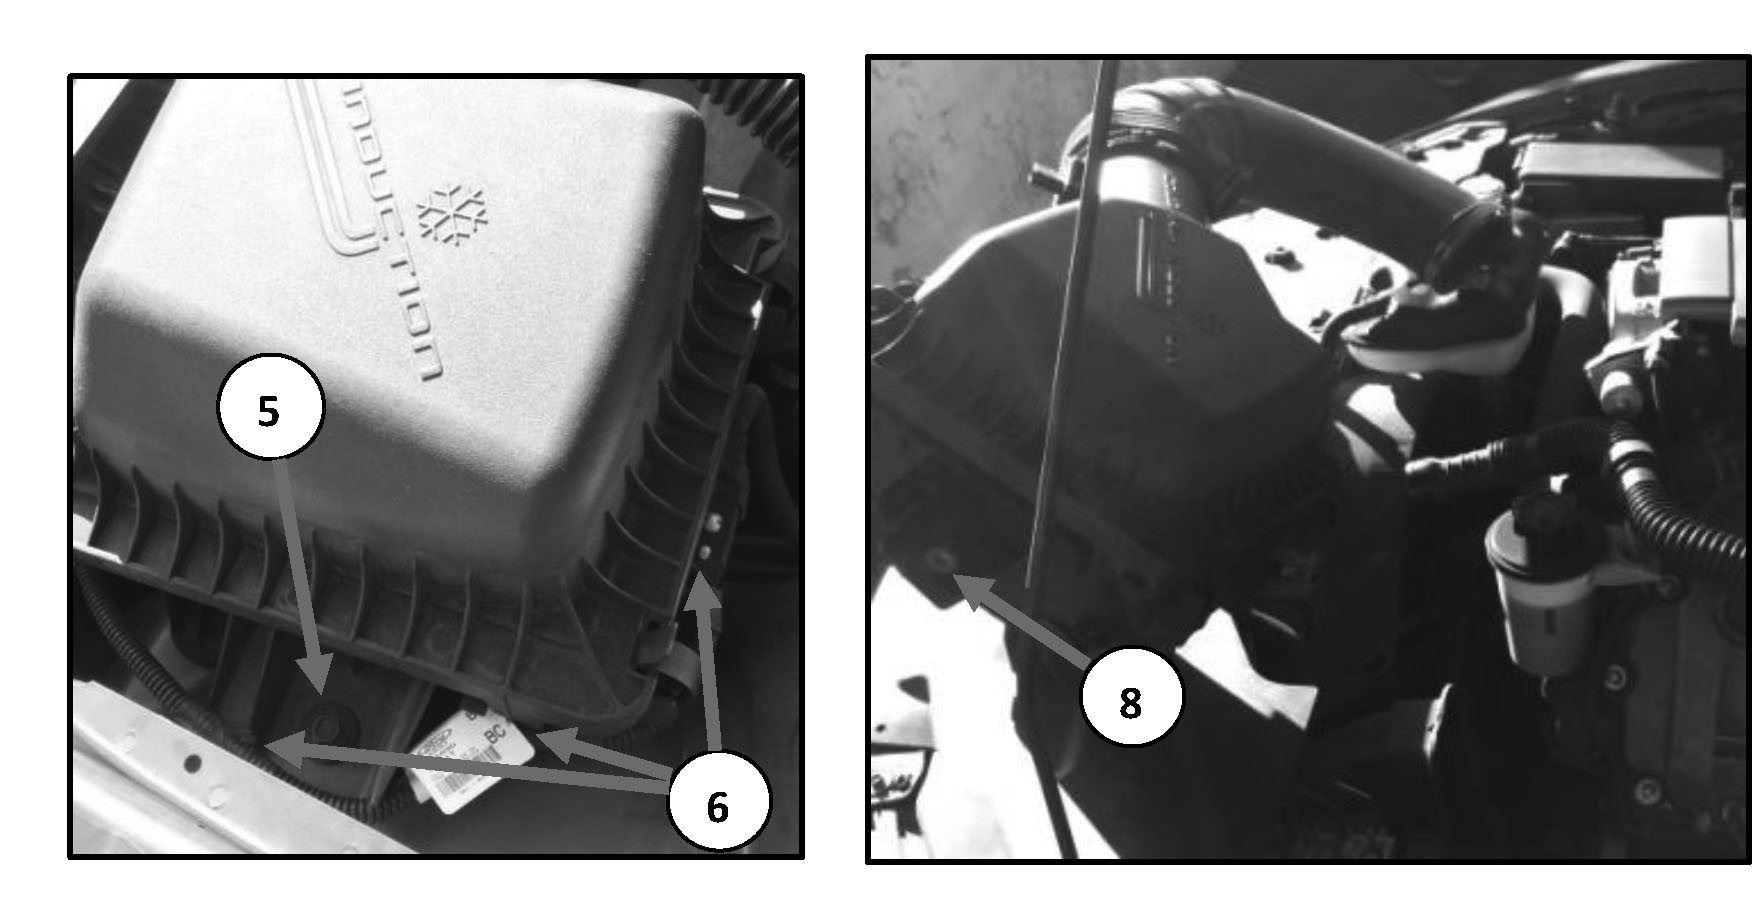
9. Remove the 2 factory grommets and replace back into the two corresponding fender holes. 10. Use the #20 Torx bit to remove the Mass Air Flow sensor.
Airaid Cold Air Intake Install:
1. Install the filter adapter (3 ¼-20 cap screws with washers) into the New Air box (Hex key).
2. Anchor the wiring tabs into the air box. Start with 2 holes in the back and work underneath the box towards the front.
3. Reinstall the grommet and sleeve into the new air box bolt hole.
4. Install air box into the vehicle, making sure the inlet scoop aligns with the stock scoop and locating pins seat into the grommets.
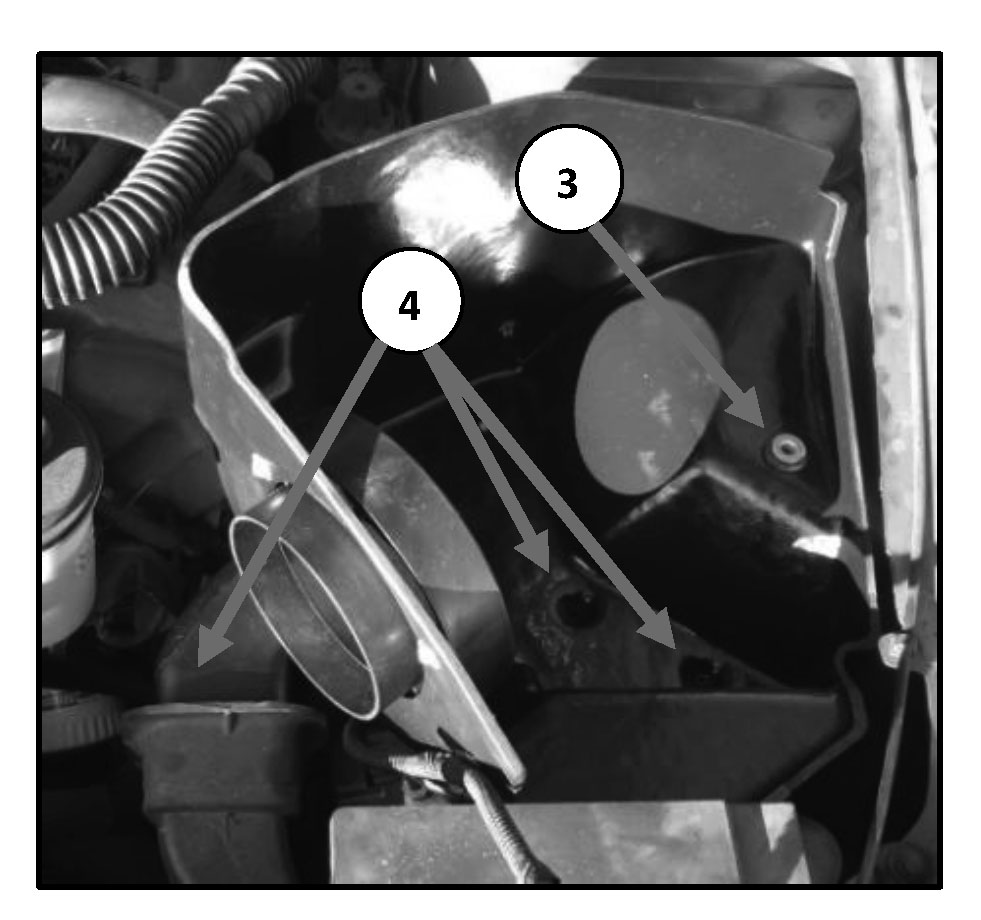
5. Reinstall the air box mounting bolt. Ensure wiring harness is not pinched under box.
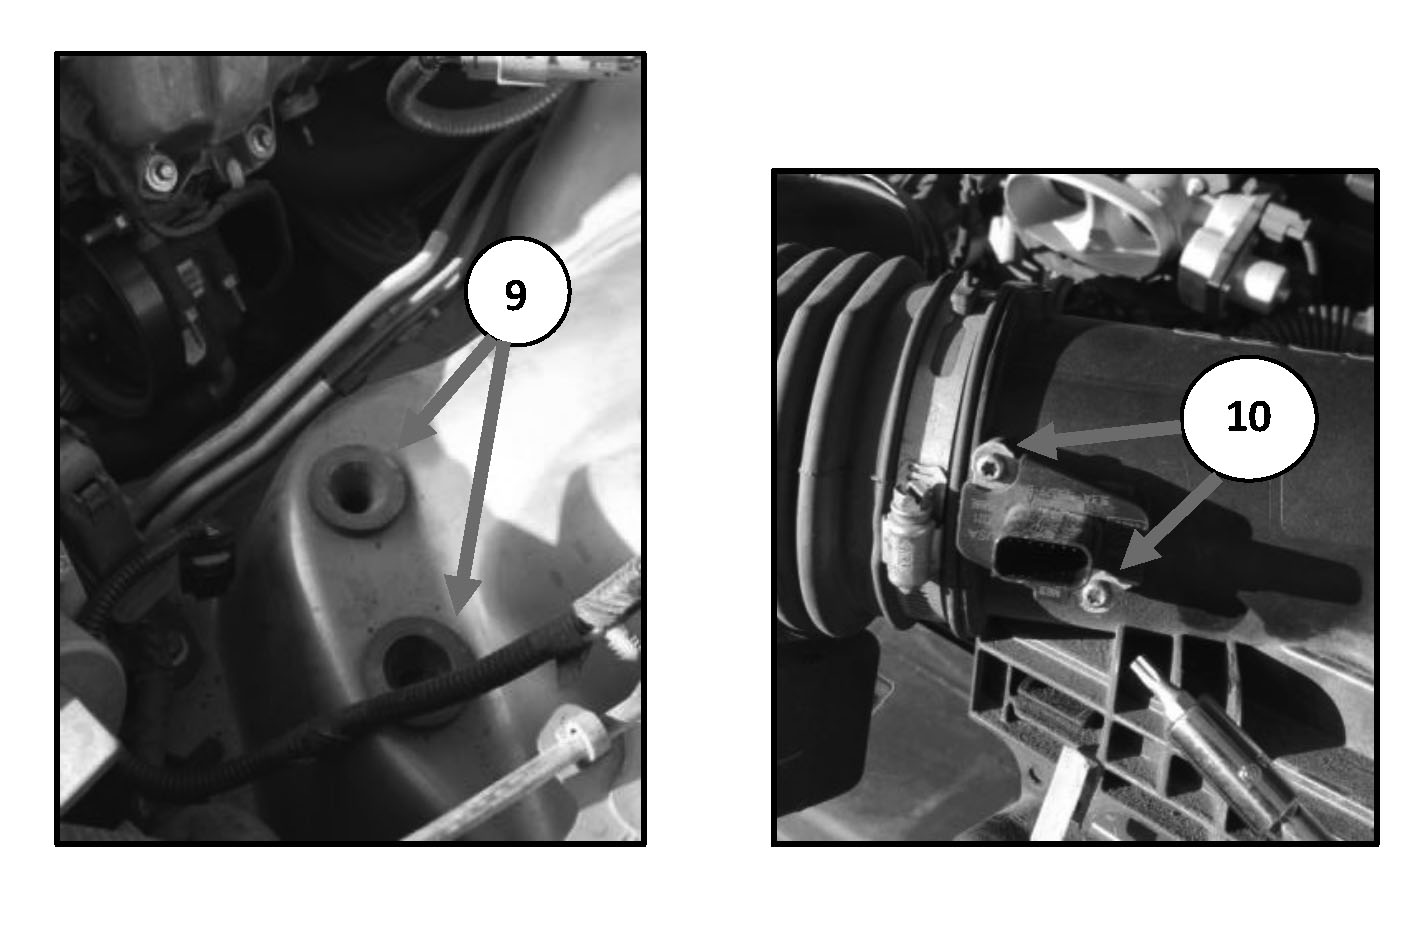
6. Install hump hose onto filter adapter using 2 medium sized hose clamps. Leave clamps loose for now. 1 2 3 4 7. Install Mass Air Flow sensor into the provided intake tube using the 2 provided 8-32 x 3/8” screws (hex key).
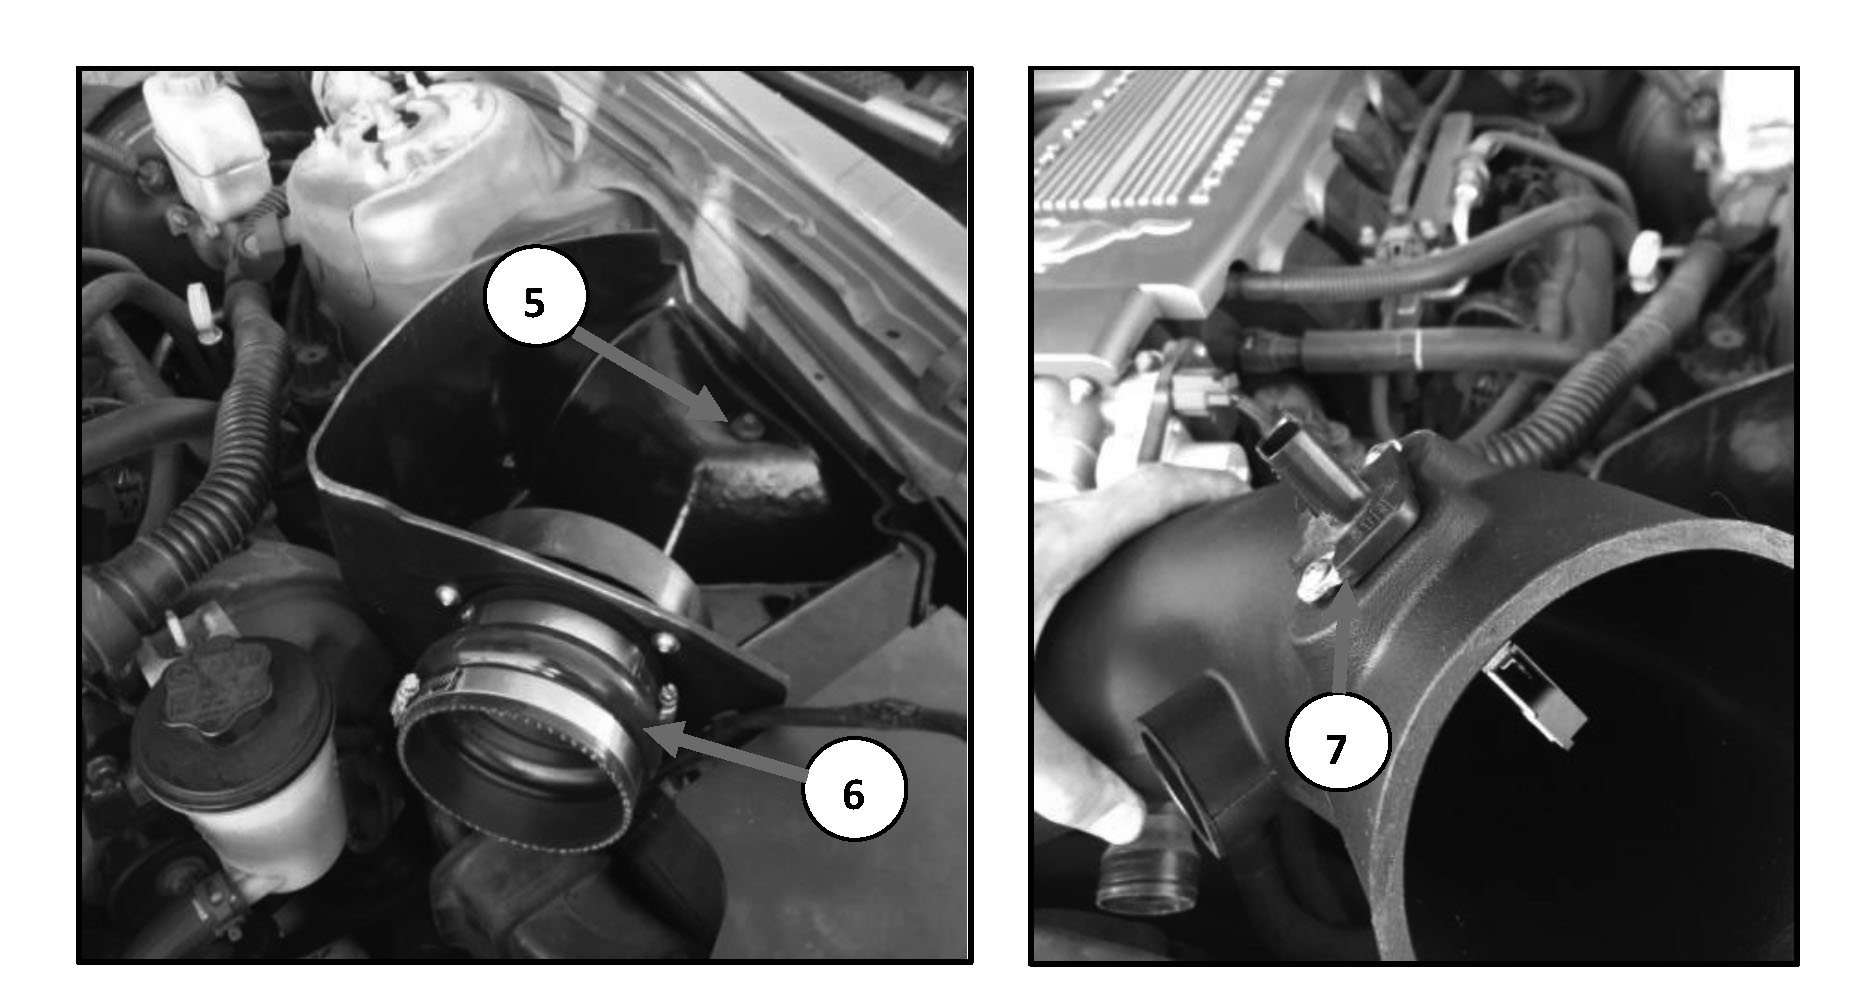
8. Lift intake resonator from stud and remove bolt (deep 10mm socket).
9. Using the provided bracket, thread the 1/4 -20 hex bolt through the short side of the bracket.
10. Insert M6 x 12mm hex bolt with flat washer onto the long side of bracket and install bracket into the power steering reservoir as shown.
11. Install the oval coupling onto the end of the intake tube using 2 medium sized hose clamps.
12. Install the 1 ¾” coupling onto the intake tube using the 2 smallest hose clamps.
13. Install grommet and aluminum fitting into the intake tube.

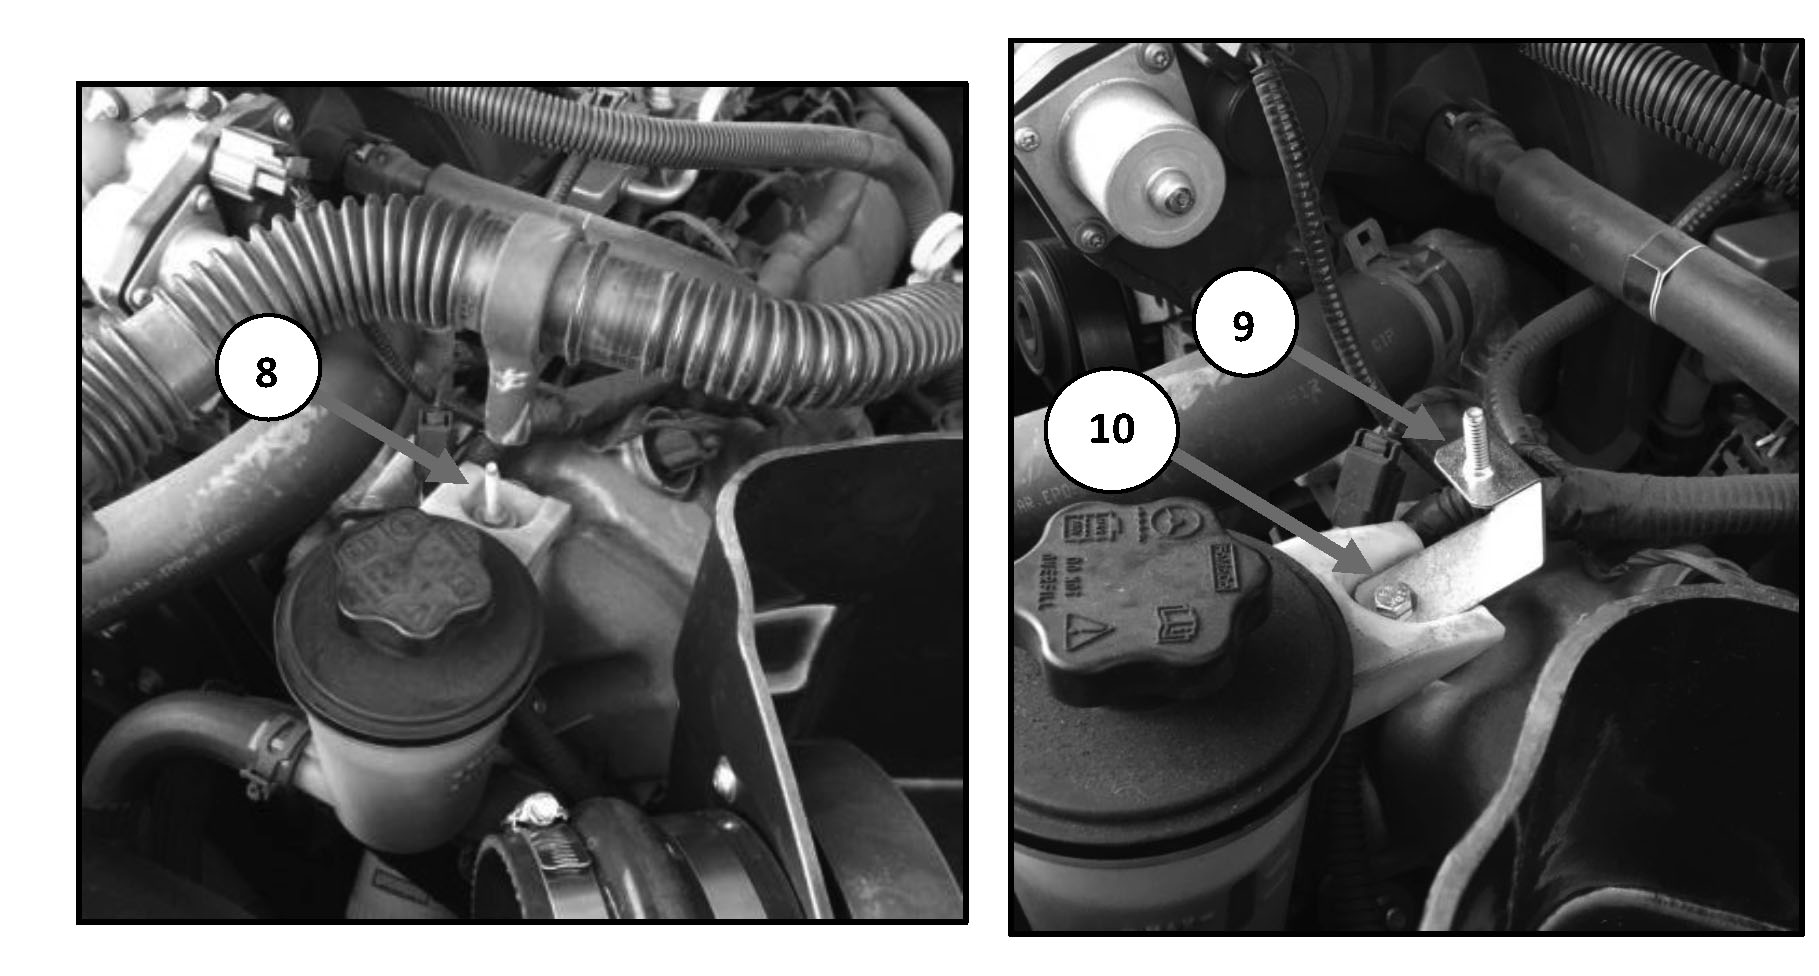
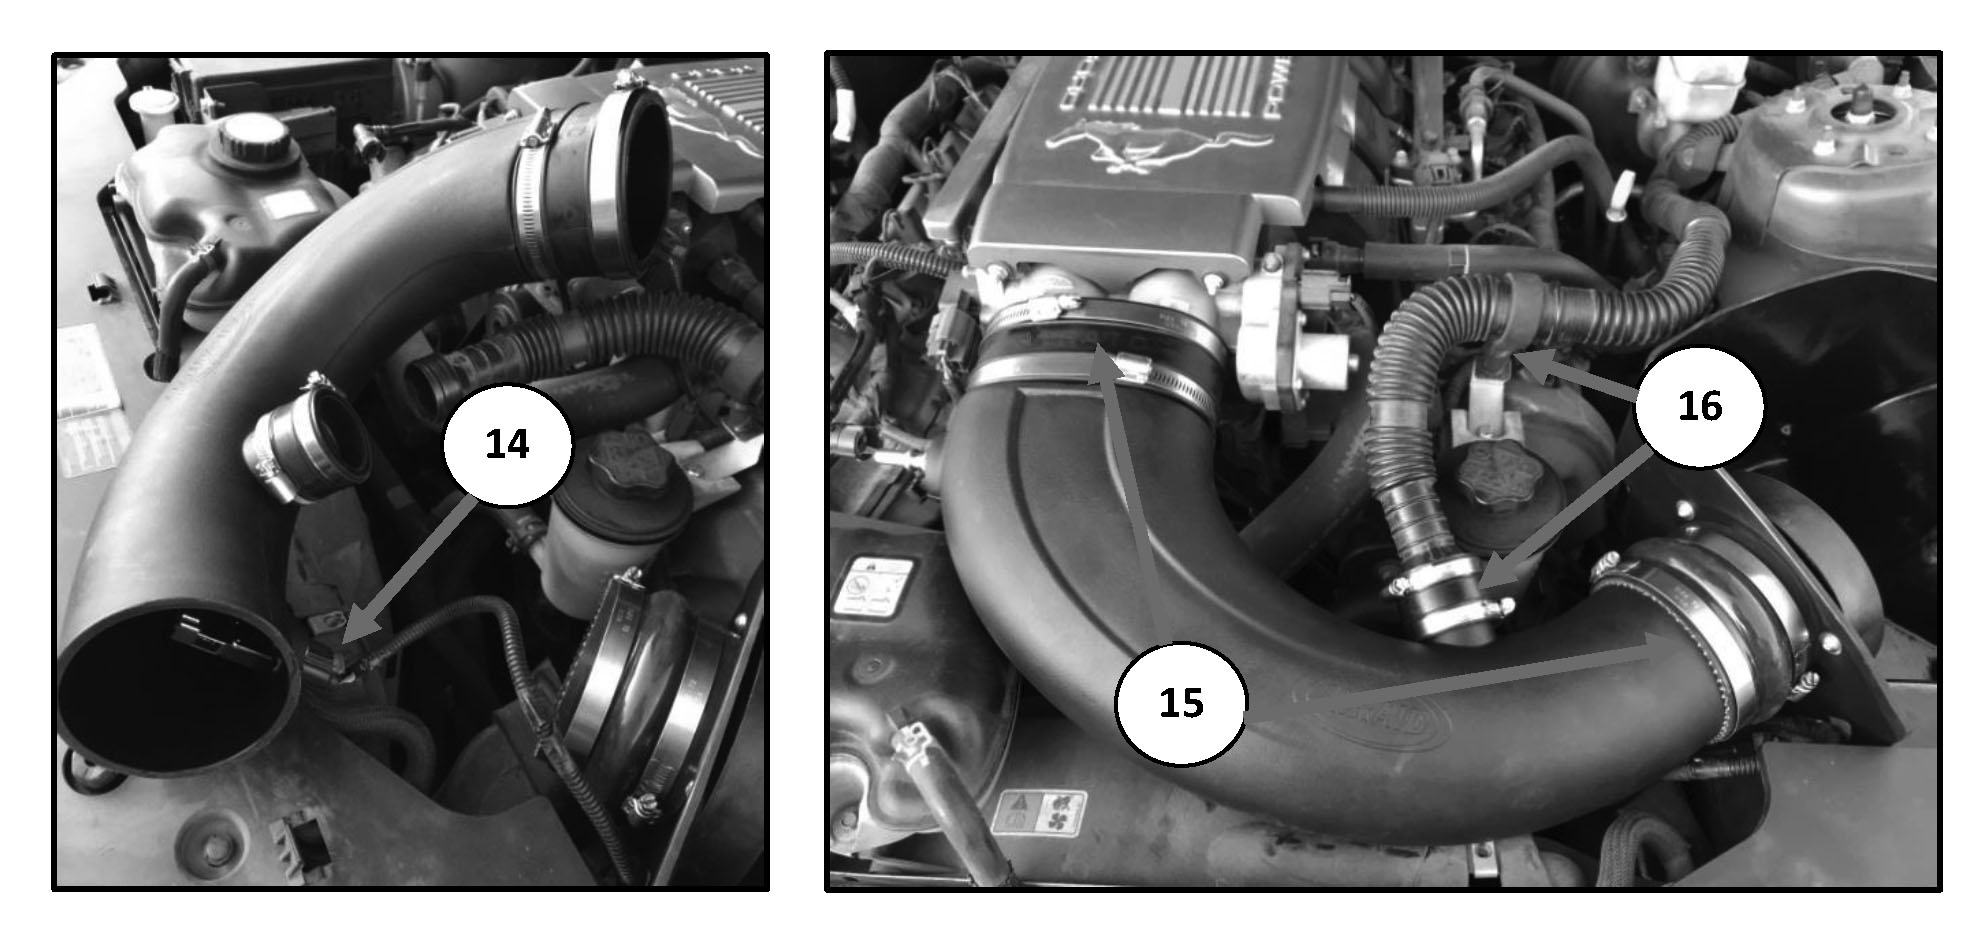
14. Connect the Mass Air Flow Sensor wiring harness. Push red tab in to secure.
15. Install the air intake tube into the hump hose and throttle body, and then tighten all 4 hose clamps.
16. Reinstall the resonator tube onto the bracket, insert into 1 ¾” coupling and tighten the hose clamp.
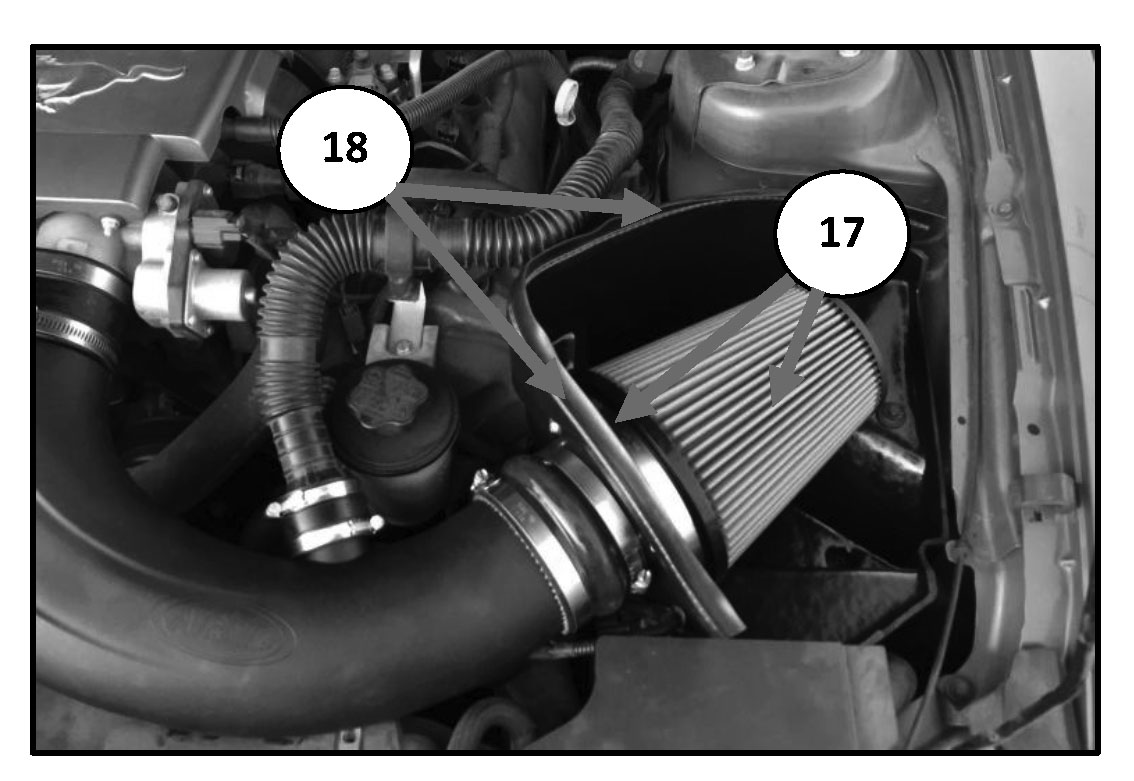
17. Install the filter onto the filter adapter and tighten large hose clamp to secure. 18. Install weather strip around the top edge of the air box.
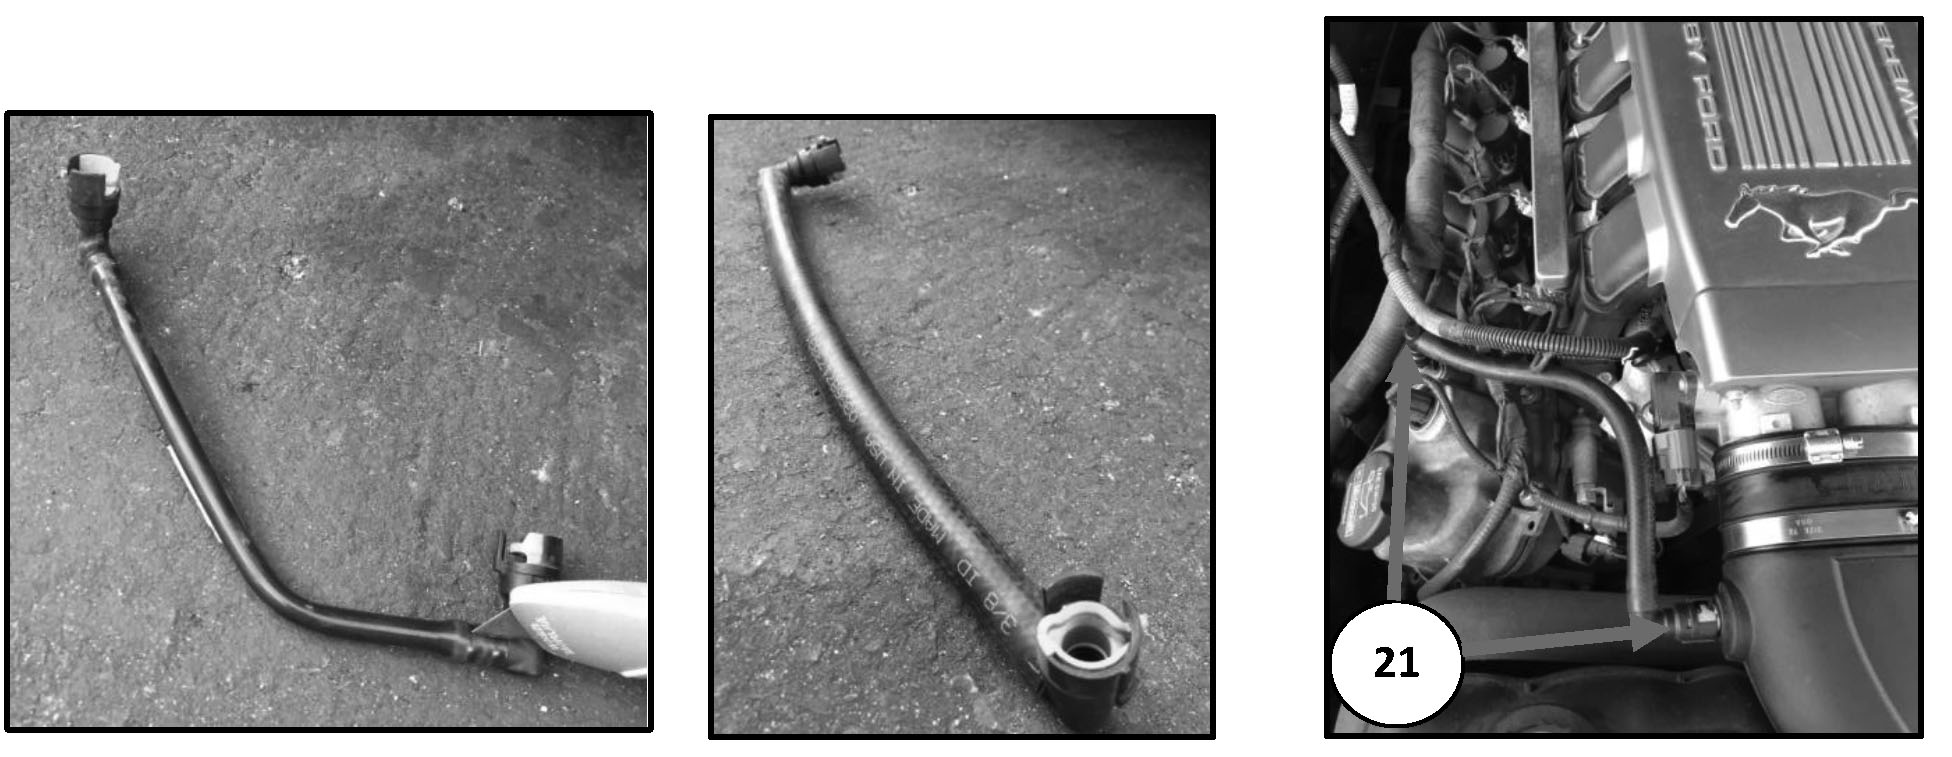
19. Using utility knife, carefully slice both ends of the breather hose just enough to remove the connectors.
20. Reattach the factory connectors into each end of the provided 3/8” hose.
21. Attach the connectors to the aluminum fitting and the valve cover.
22. Double check all clamps and screws are tightened. 23. Reconnect negative battery terminal.
Installation Instructions Created and Submitted by AmericanMuscle Customer Mark Joseph on 7/20/2016.