 FREE 1 to 3-Day Delivery on Orders $149+ Details
How to install an Arm Rest Cover on your 2005-2009 Mustang
Installation Time
2 hours
Tools Required
- Phillips Screwdriver
- Spray-on adhesive
- Scissors

Shop Parts in this Guide
Installation
Thank you for your purchase of our Mustang Arm Rest Cover. The Scott Drake grained-vinyl arm rest cover is designed to permanently attach to the original arm rest pad. Removing the cover after installation will cause damage to the arm rest pad. Non-permanent installation methods are not recommended. The replacement arm rest pad, 5R3Z-6306024-AAC is available from your Ford dealer.
PREPARATION:
We recommend using high grade upholstery type spray-on adhesive such as 3M Super 77 multipurpose adhesive or similar.
As with all instructions, please read fi rst and then start in the installation process. If you are not familiar with this type of project, check with a professional upholstery shop. Note: If the cover comes out of the package with a wrinkle or fold mark, leave it in the sun to relax the material. Warm vinyl is easier to install.
INSTALLATION:
STEP 1: Remove the armrest pad from your vehicle
Remove the arm rest pad from the center console by removing the 4 screws that hold the pad to the hinge, leaving the hinge attached to the console. Remove the inside lid of the pad by removing the 6 retaining screws, and set the lid aside. Note where each screw mounts into the underside of the pad.
STEP 2: Clean the surface of the arm rest pad
Clean the grained material of the pad with alcohol or a prepping agent to remove any grease or oils that may have gotten on the surface. Even new pads should be cleaned to remove any release agents that may be present. Note that the ABS material of the inside of the pad may not allow the adhesive to stick. Cleaning the ABS material with acetone will help remove some of the release agent or the natural slickness of this material. Light sanding of the ABS material may also help create “tooth” for the adhesive to stick to. Prep around the edges of this area.
STEP 3: Determine where the cover will be positioned
Pre-position the cover on the top surface of the pad. Line up and center the stitched seams along the top curves of the pad. While holding the cover to the pad, fl ip the pad over and observe where the extra material will be attached and what areas will be trimmed. Note: DO NOT trim off any material at this time.
STEP 4: Apply Adhesive
Adding spray adhesive is next. You are going to work in sections doing the top-side fi rst and back-side last. Most spray-on adhesive products state to spray both surfaces to be joined together and wait until both are “tacky”. The term tacky means different things to different people. For the purpose of this installation, tacky means “almost dry” to the touch. When testing tackiness, your fi nger should stick to but not pull off any adhesive. This should allow for some repositioning if required but still provide excellent adhesion. With this in mind, spray the adhesive, following the manufacturer’s directions, on the top surface of the pad and the back side of the vinyl cover. DO NOT spray adhesive on the side edges or the underside of the pad yet. Let both surfaces get “tacky”.
STEP 5: Apply cover to the top of the pad
When both surfaces are ready, line up the cover with the pad and press the cover fi rmly onto the top surface of the pad. This may require an assistant to keep everything in line and in the desired position. Push any air bubbles out from under the cover. Gently pull on the free edges of the material and press on the cover to remove any wrinkles while you work. Check and recheck your alignment. When you are satisfi ed that the cover is on straight and all bubbles or wrinkles are removed, fl ip the pad over.
STEP 6: Prep the bottom
Start on one side of the pad. Pull the free end of the cover over the edge and observe where it should be trimmed and glued. Trim the cover leaving enough material to go about 1 to 1 ½ inches in from the textured pad surface. Note: You will trim away all excess material when the entire installation is done. Also trim the cover where it would cover the screw holes. The screws may grab on to the material and pull it causing undesired results. After one side is ready, work on the other side in the same way. DO NOT add adhesive at this time. After both sides are prepared, work on the front edge and back edge in the same way. Note where the cover will cover any screw holes, and cut away the material. Note where the corners of the material will be folded and where the material will need to be removed to avoid gathering.
After all edges have been prepped, spray the adhesive on the back of the vinyl cover and to the back edges and inside area of the pad. Again, allow the adhesive to get tacky.
STEP 7: Apply cover to the bottom of the pad
When the adhesive is ready, start working on the sides. Pull the material over the edges and work out any wrinkles. Work from the middle of the side and work out towards the corners. Check the top surface periodically as you go. Get both side edges attached and move on to the back edge. Pull the material at the middle of the back edge and work towards each corner. Pull the material around the corners while pressing out any wrinkles that may be visible when viewing from the top. Cut away any excess material. Do not cut too close to the edges, always leave enough material to grab on to. Keep checking the top surface to make sure the cover is not gathering or wrinkling. Finally, move to the front edge. Again, start from the middle of the front edge and work towards each corner, pulling and working out and wrinkles. Do not leave excess material at the corners. When you are fi nished, check the top surface again.
STEP 8: Finishing up
Finish the installation by securing the inside lid back onto the pad. Any areas with excess material that prevents the inside lid from mounting must be trimmed. Caution: You may be tempted to trim the material very close to the inside edges under the lid. Make sure the adhesive has fully dried before attempting this to avoid the material shrinking beyond the edge of the lid. Reattach the covered pad to the hinge, and start showing off your stylish, new arm rest pad!
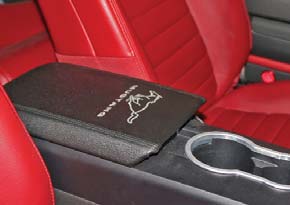
Mustang Running Horse Arm Rest Cover
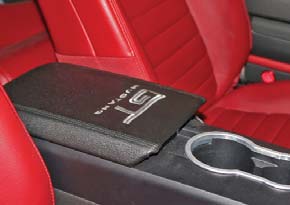
Mustang GT Arm Rest Cover

