 FREE 1 to 3-Day Delivery on Orders $149+ Details
How to Install an Auburn HP Series Limit Slip Differential - 28 Spline 7.5in on Your 7.5in Rear Diff
Installation Time
4 hours
Tools Required
- Ratchet Wrench
- Torque Wrench
- 1/2", 5/16", 3/4", 12mm and 15mm Sockets
- Lug nut Wrench
- Dial Indicator
- Digital Measuring Caliper
- Floor Jack
- (4) Jack Stands
- Brake/ Engine Cleaner or a Parts Washer
- Table Vice
- Hydraulic press
- Breaker Bar
- Impact Driver
Installation
Parts Needed:
- New Differential
- Your choice of 1.5 Liters of Gear Oil 75w90
- 3.5oz of Friction Modifier
- Shims & Gasket maker/sealer
Optional Parts:
- Motive Installation and Bearing Kit
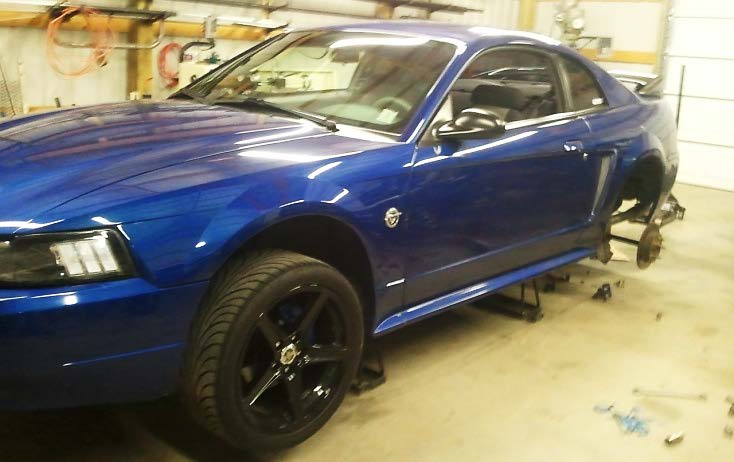
NOTE: Before beginning, you should consider what you will need to do this job properly. This installation was done on a 2004 Mustang so if you are doing this on a newer model, it could vary just a bit. I do recommend having an extra hand when doing this.
Removal Instructions:
1. Jack up the car. Support the car under the sub-frame; then move to the rear and jack up the differential. Put the other stands up under the sub-frame in front of the rear tires instead of the axles to give you more room to work.
2. Remove the filler cap located at the back of the differential housing on the driver side slightly lower than the driveshaft. Use the end of a 1/2” wrench with no attachments. This can be put to the side until refilling is complete.
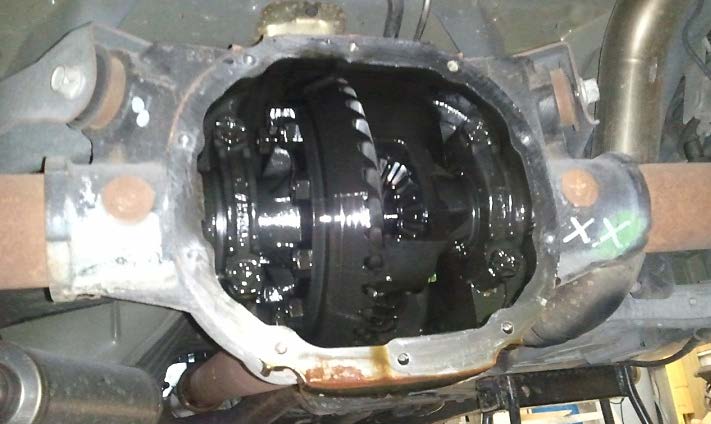
3. Remove the (10) bolts holding the differential cover on with your 1/2” socket and let the old gear oil drain out. Note: Start from the bottom and work your way to the top; this will help to avoid a messy situation.
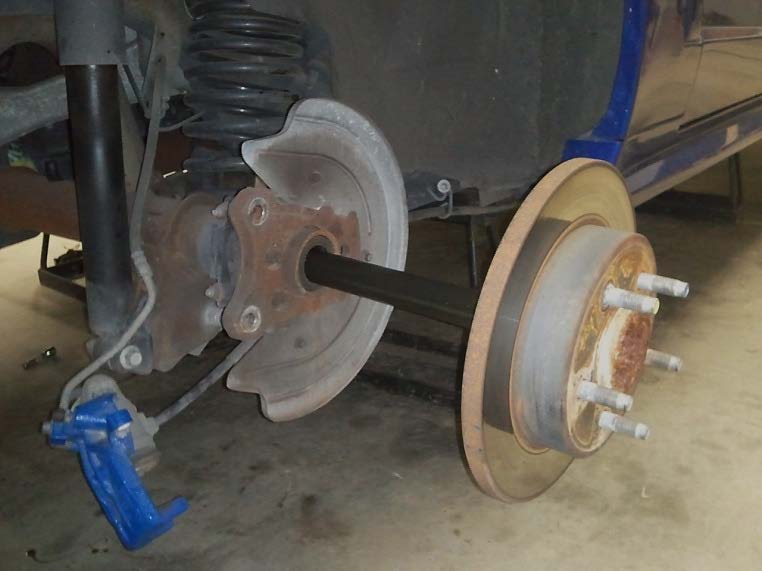
4. While you are letting the oil drain, start removing the wheels and rear brakes. Remove the (2) bolts on the caliper using the 12mm socket and remove the caliper bracket using the 15mm socket.
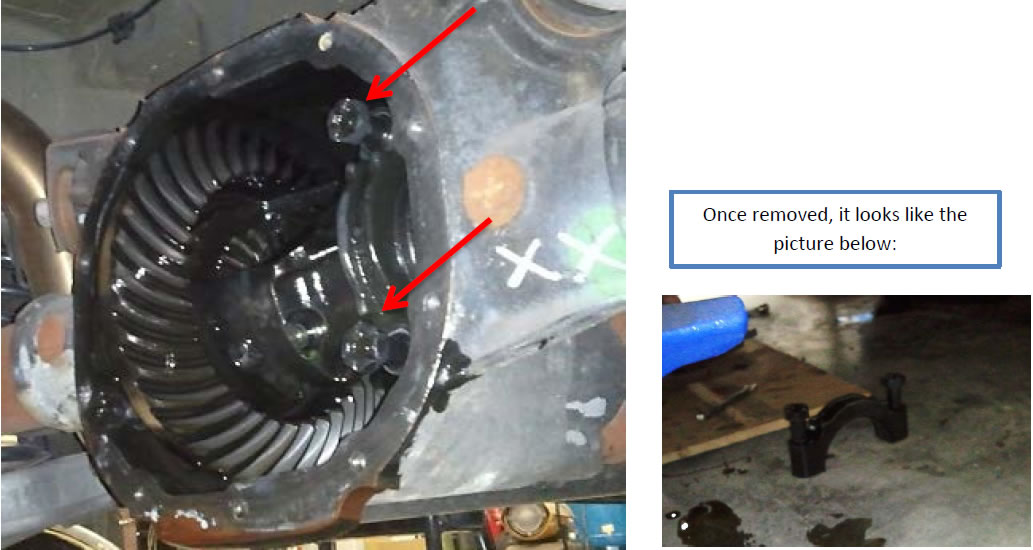
5. Now that you have given the oil time to drain, it’s time to remove the bolt on the stock differential that’s retaining the large pin you see in the middle of the differential using a 5/16” socket. You might have to rotate the driveline slightly to be able to get the bolt out.
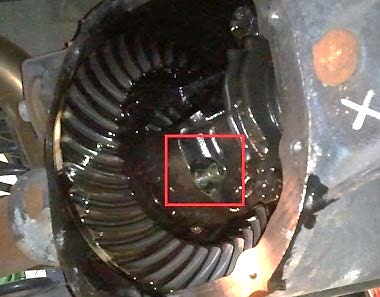
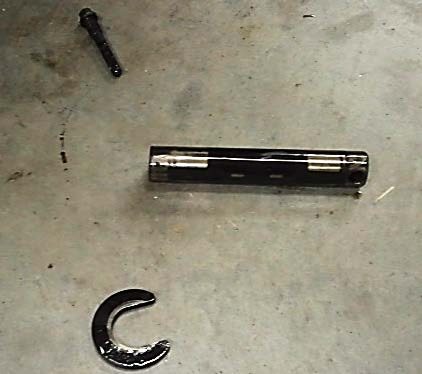
6. Remove the large pin in the middle of the differential.
7. On each side of the car, push on your axles to move them in a little further. This allows easy removal of the c-clips holding your axles in.
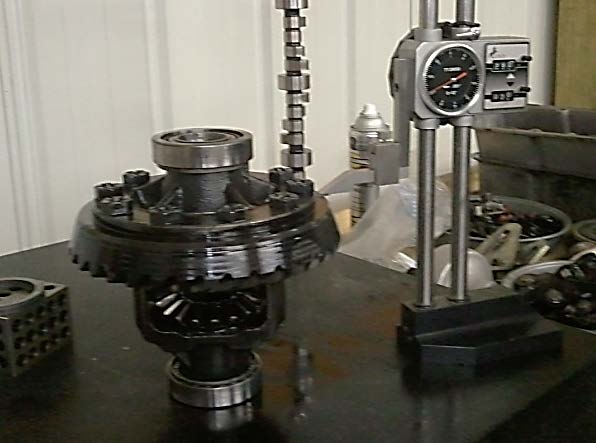
8. Remove the c-clips. Clean the clips and save them for when you reinstall your new differential later. The parts removed are shown below for an example.
9. Next, pull your axles out far enough to remove the differential or you can pull them all the way out.
10. Measure the backlash on your gears using a dial indicator – put the end against the gear as it sits against the pinion. Then rotate it away from the pinion gear toward the end of the dial to get your measurement. Our V6 measured 11 to 12 thousandths, but this could vary for yours.
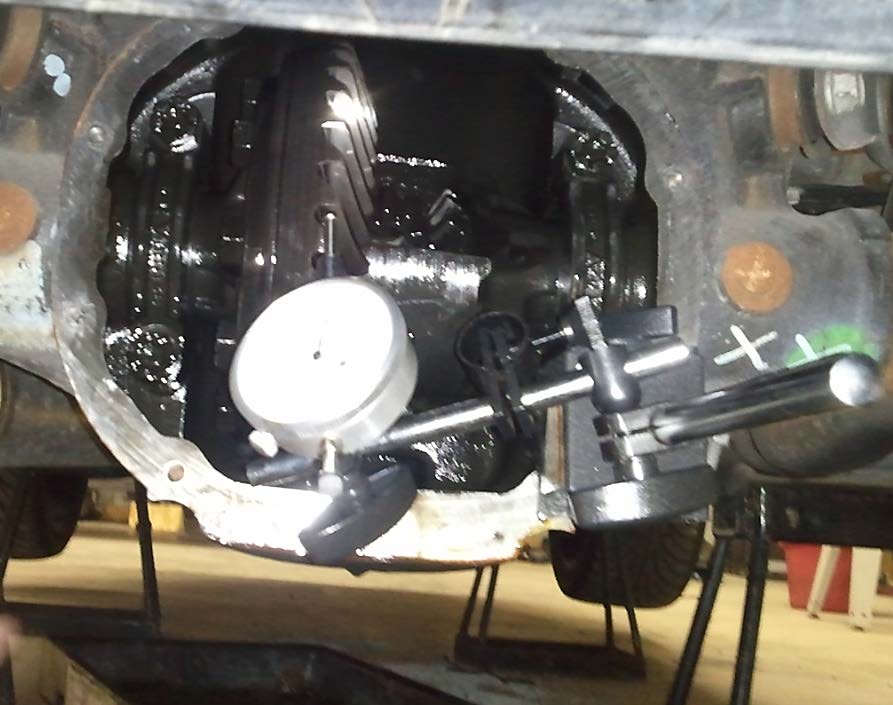
11. Next, you need to remove the (2) bearing caps on each side of your differential by taking off the (4) bolts using a 3/4” socket. Make sure to mark them so that you can put them back on the exact way they came off; otherwise they will not seat properly when you are reassembling the diff later.
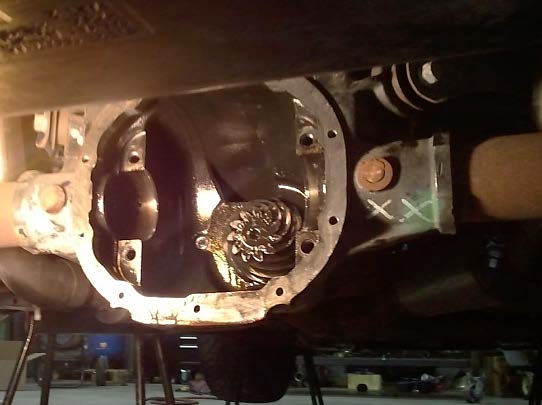
12. Remove the stock differential. It might take a bit of prying from side to side, but it should not take much effort to get it out. Be careful not to let it drop or you could damage your ring gear. Keep the old shims from the factory as you might be able to use at least one of them when installing the new differential.
13. Now take time to clean all of your parts up for reinstallation, including the ring gear, c-clips and the inside of the differential housing. Making sure to get as much of the old oil out as you can.
14. Leave the ring gear and bearing races on for now because you will want to take some measurements to ensure your new differential fits properly.
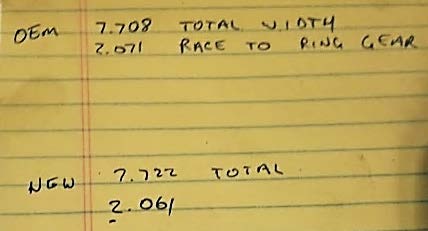
15. Before installing the new differential, we took some measurements from the bearing races on the driver side to the bearing races on the passenger side and then from the driver side to the ring gear.
16. We measured 2.071 inches from driver side ring to race and then 7.708 in total width with the bearing races still on and took note of it (Picture shows our measurements for both OEM and the new diff; yours could vary.) After we took our measurements, we took off the ring gear.
17. Remove the ring gear and set it aside.
New Differential Setup:
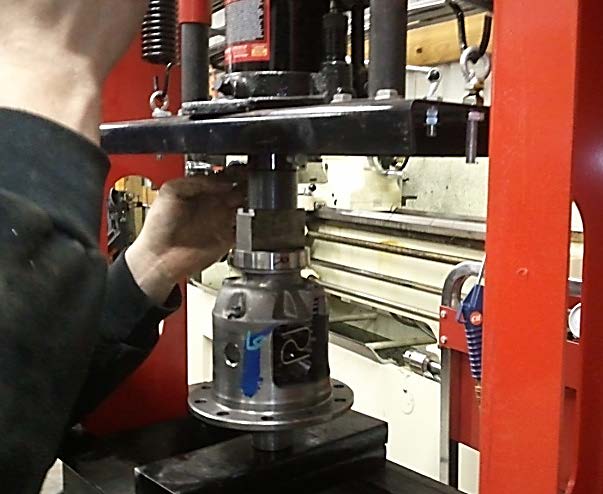
1. We opted to use new bearings on the new differential instead of reusing the old ones. We used a press to fit our new bearings, coating them with a small amount of engine grease so they would slide on no problem. Then we put a block of wood between the bearing and the press to ensure we did not damage the bearing.
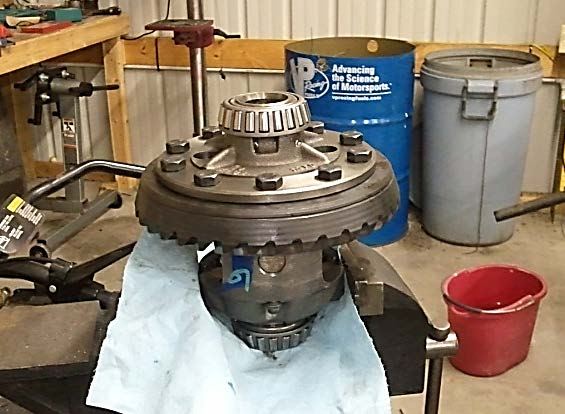
2. Bolt the ring gear to the new rear differential. The bearing kit we used came with new bolts as well so we went ahead and used a 3/4” socket for the new bolts and ring gear. We added blue Loctite and torqued the bolts down to 85 ft/lbs.
3. We then took our new measurements with everything installed on the differential. From driver side ring to race we measured 2.061 and the total width 7.722 inches. With these measurements, we were able to reuse the driver side shim, but we had to use other shims from our bearing kit because we had 10 thousandths of an inch less space on the passenger side. All of these measurements might vary depending on your car and year model.
Installation Instructions:
1. Now that you have some rough measurements, you will now need to test fit your new differential. To do this, we installed the differential and put the caps on to see where we were at. This is probably the most time consuming part of the install because you want to make sure that everything fits properly. We had to do this about (3) times before we had the amount of backlash on the gears that we wanted without there being any space for the new differential to shift side to side. Our final measurement for our backlash was 10 thousandths of an inch.
2. Once you find the proper alignment, put Loctite on the bearing cover bolts and tighten everything up.
3. Push your axles back in and secure them with the old C-clips the same way you took the old ones out.
4. Next, install the old differential cover. Make sure to use plenty of gasket sealer if you do not have a new gasket so that it doesn’t leak. If using sealer, take some time to let it cure and dry for about an hour.
5. Next, fill the differential with 1.5L of 75w90 gear oil of your choice. We used Lucas Oil just out preference and had to add 3.5oz of friction modifier to prevent any noise and any excessive wear on the new parts.
6. Finally, reinstall your wheels and take your Mustang for a test drive. Listen and pay attention to anything that seems odd. Take some corners and do some tests to make sure both wheels are gripping the way they are supposed to. Enjoy your new 7.5” Limited Slip Differential!
Installation Instructions written by AmericanMuscle customer Zachary Meyer 4.2.12
