 FREE 1 to 3-Day Delivery on Orders $149+ Details
How to Install a Autometer Dual Gauge Instrument Bezel on your 1994-2000 Mustang
Installation Time
30 minutes
Tools Required
- T20 and T10 torx screwdriver
- Small flathead screwdriver
- 10mm socket and ratchet

Shop Parts in this Guide
Installation
Removal of original instrument bezel
1. The first thing you need to do is remove the headlight knob. For this you need to pull out the headlight knob to make room to get behind it.
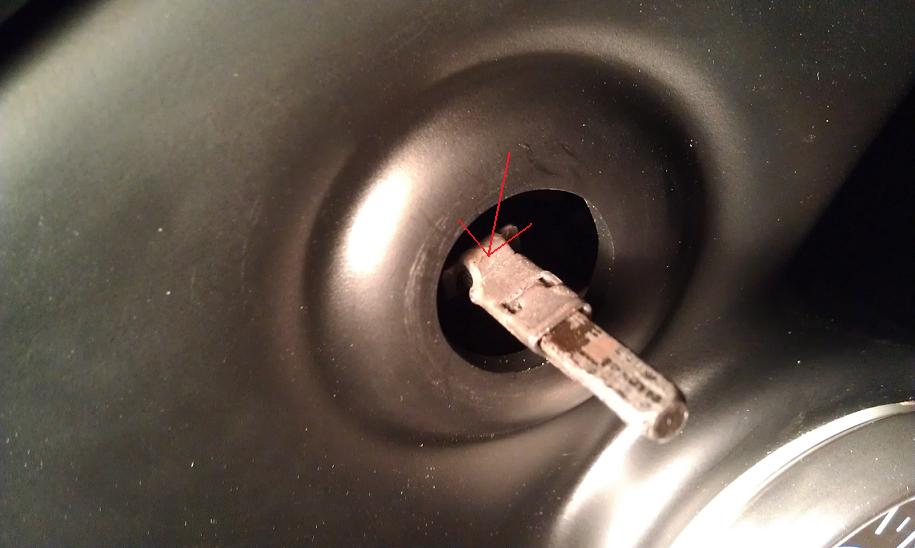
2. Take the small flathead screwdriver and slide it into the opening in the headlight knob. You need to press down to release the clip inside. This is very tricky but once you press down you can remove the knob at the same time. Here is a picture of the release clip and where to press.
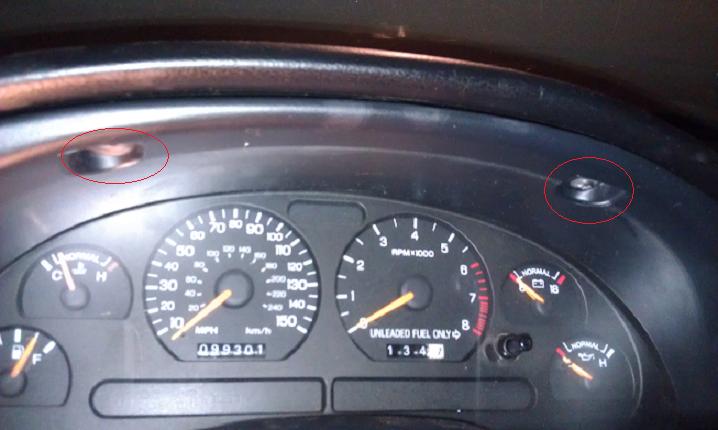
3. Take the t20 torx and remove the (2) holding screws up at the topside of the bezel.
4. The only things holding the bezel on now are spring clips. Grab ahold of the bezel on the inside bottom and pull straight out towards you. You will need to use some force to release the spring clips. It should pop right out.
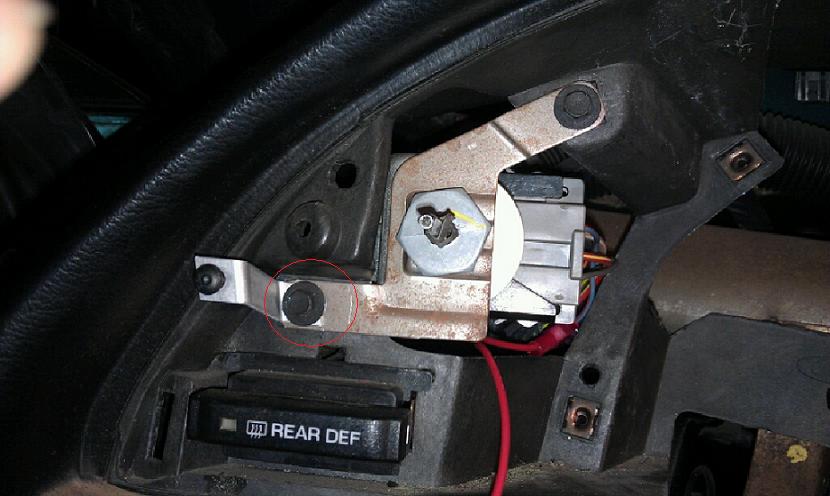
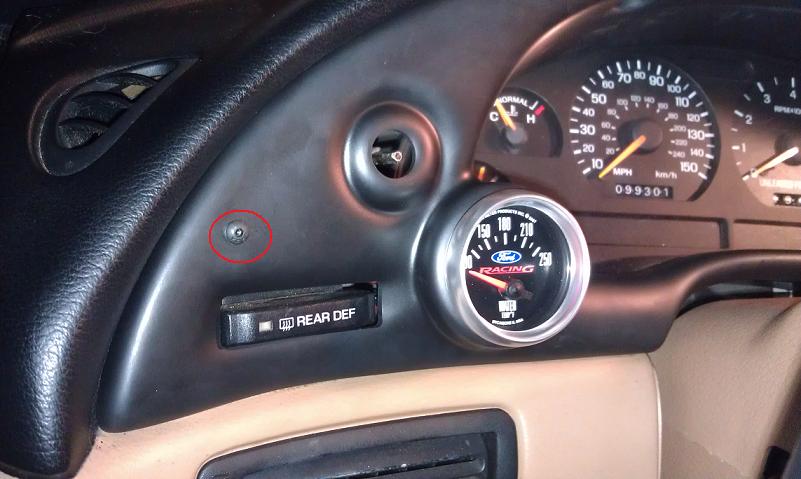
5. Take the two mounting brackets supplied with the new bezel. They will help to hold the new bezel in place. The small one goes on the left side. There are two bolts holding the headlight switch in place. Remove the lower left one with the socket and ratchet. Place the small bracket where that bolt came from and bolt it in with the original bolt. You need to mount the bracket to look like the one in this next picture. The red circle indicates the bolt.
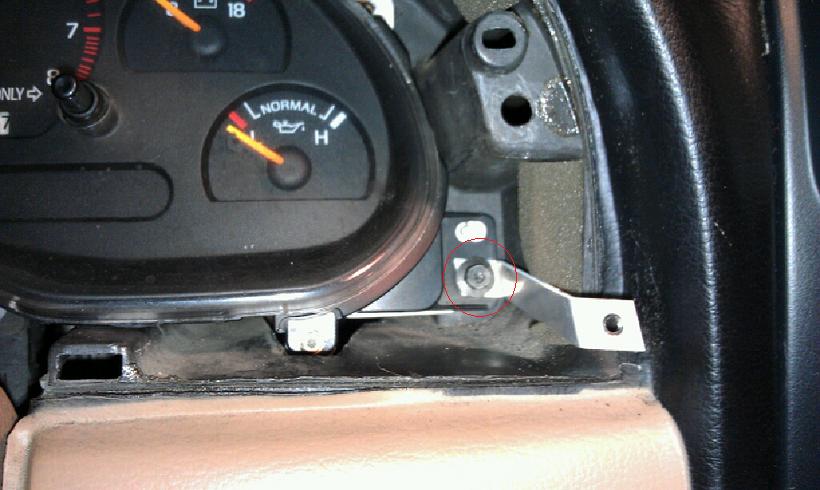
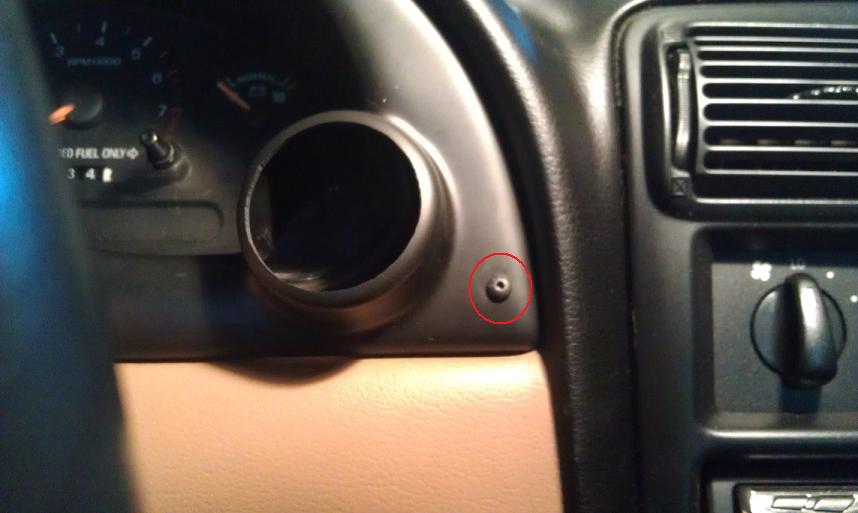
6. The long bracket goes on the lower right side of the instrument cluster. This one mounts in the place of the lower right screw that holds the instrument panel in place. Take your t20 torx and remove that screw then use it to mount the long bracket. It should look like this when installed.
7. Slide your new gauges into the holes of the new bezel.
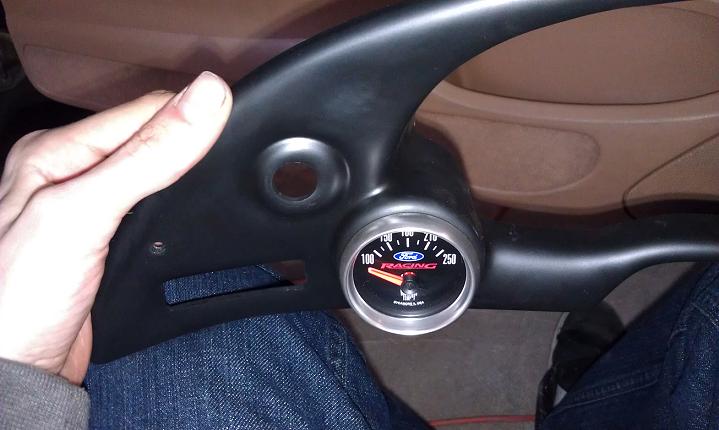
8. Now hook up your wires to your new gauges (described in different installation guides).
9. Place the new bezel right in the exact spot the old one came out. Now the new bezel is not held in with clips like the old one so it should slide right in.
10. Take the (2) t20 torx screws you removed from the top of the old bezel and screw them into the same spots to hold the new bezel.

11. Now take the (2) mini screws supplied with the new autometer bezel screw them into the brackets we installed with your t10 torx screwdrivers. If the holes in the bezel and brackets don’t line up, you can bend the brackets until the do. Screw in the left and right ones to look like this.
12. Now slide your headlight knob back onto its original location and make sure the clip connects.
13. You are now done installing your new auto meter gauge bezel. Enjoy.
Installation Instructions written by AmericanMuscle customer Thomas Bernier 5.24.12

