 FREE 1 to 3-Day Delivery on Orders $149+ Details
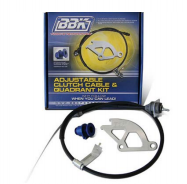
How to Install BBK Adjustable Clutch Cable and Quadrant Kit on your Mustang

Shop Parts in this Guide
Follow these instructions carefully to ensure correct fitment and operation.
STEP 1
Raise the front of the vehicle and place on jack stands. Remove the clutch cable inspection cover on the side of the bell housing.
STEP 2
Using a large screwdriver or pry bar, pry the clutch fork forward and slip the cable end through the large hole in the fork. This disengages the cable from the clutch.
STEP 3
Remove c-clip from the collar of the cable (located where the cable slips through the bell housing).
STEP 4
Working from the engine compartment, remove the bolt holding the cable bracket to the frame rail (next to the power steering pump) and also remove the bolt which holds the cable head to the firewall. Next, remove the cable from the car and discard (You may have to unhook the cable from the quadrant assembly under the dashboard).
STEP 5
Working from under the dash board on the driver’s side, remove the cotter clips from both shafts. Using a screw driver, pry the large quadrant piece off of the shaft and discard along with the spring attached to it.
STEP 6
Remove the spring from the pawl gear, then push the clutch pedal to the floor and slide the pawl gear off the shaft. Many ’87 and later cars will run into a support bracket before it slips completely off the shaft. If the pawl gear slides off completely, discard it and go to step 8.
STEP 7
To remove the pawl gear, first pull the carpet back until you can put the clutch pedal all the way to the floor. Position pawl gear on its shaft by rotating it, slip a large screwdriver or pry bar under the pawl gear and across the quadrant shaft and push downward (toward the floor of the vehicle). A large amount of pressure may be needed to pry the gear and sometimes actually breaking it, which is okay because whatever is left of the gear will easily slide off the shaft.
STEP 8
Bring the clutch pedal back down to normal position and install the BBK Aluminum Quadrant so both shafts slip through the 2 holes in the quadrant. Using a screwdriver or pry bar, pry the quadrant over the 2 shafts evenly and far enough to allow the installation of the 2 cotter clips.
STEP 9
• Installation of the cable is the reverse of the removal.
FOR KITS 15055 &16095
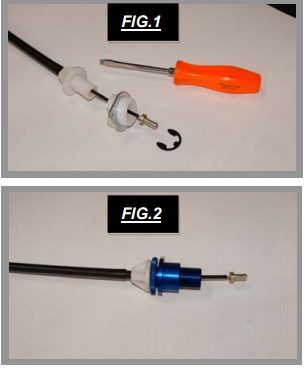
• Remove the E-Clip from the end of the new BBK Clutch Cable. FIG.1
• Remove the plastic ring that has the steel mounting ring attached.
• Feed the end of the cable down to the bell housing and slide it through the hole in the bell housing, position the threaded end of the cable through the clutch fork.
• Feed the clutch pedal end of the cable and housing into and through the BBK firewall adjuster. FIG.2
• From under the dash, position the cable end onto the clutch quadrant.
STEP 10
Once the cable is installed, slide the adjustable end through the small hole in the clutch fork and then install the rounded end adjuster. Adjust the clutch until the pedal is grabbing approximately 2-1/2” off the floor. Once the pedal is in position install the jam nut and tighten it and the adjuster together.
STEP 11
Re-install the cable inspection cover. (Sometimes the cover will have to be clearance as not to come into contact with the adjustable end of the cable).
