 FREE 1 to 3-Day Delivery on Orders $149+ Details
1986-1993 Mustang 5.0 BBK Cold Air Intake Installation Guide
Installation Time
60 minutes
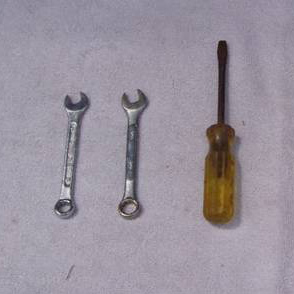
Tools Required
- 7/16 wrench
- 10mm wrench
- Flat tip screwdriver
- Lubricant (Grease, motor oil or even water will work)
- Paper towel or rag
- If throttle body and/or mass air meter are larger than 70mm, larger rubber couplings may have to be purchased at your local auto parts store.

Shop Parts in this Guide
Installation
[Figure 1]
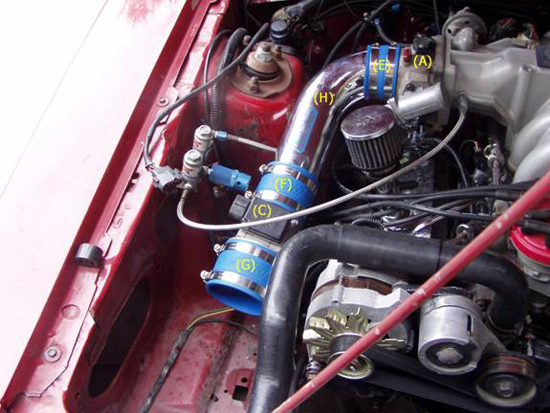
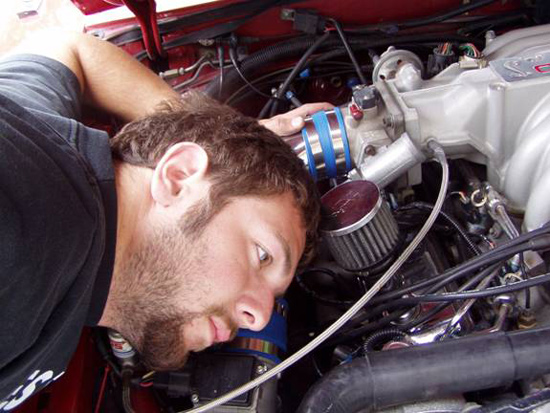
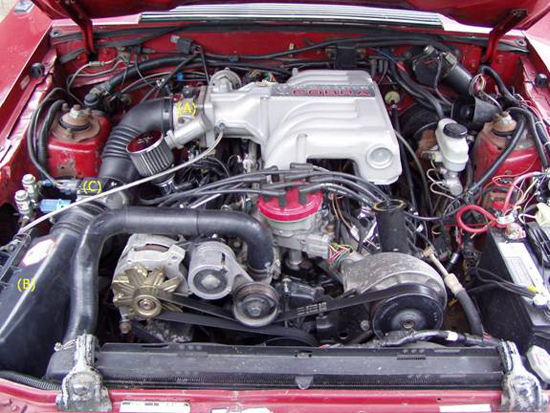
1. The first step is to remove the old intake from the throttle body (A) down to the air box (B). All hose clamps should be loosened so that they move freely before anything is pulled out. Unplug the mass air meter (C) then unbolt the mounting bracket holding it in place. The mounting bracket can be completely removed from the mass air meter, as the mounting bracket will not be needed with the BBK intake. Using a 7/16 wrench, remove the two bolts holding the air box in place. The air box should come out freely (If rubber mounts(D)did not come out with the air box, they must yet be removed from the engine bay). Remove any tubing that may yet remain.

[Figure 2
[Figure3]
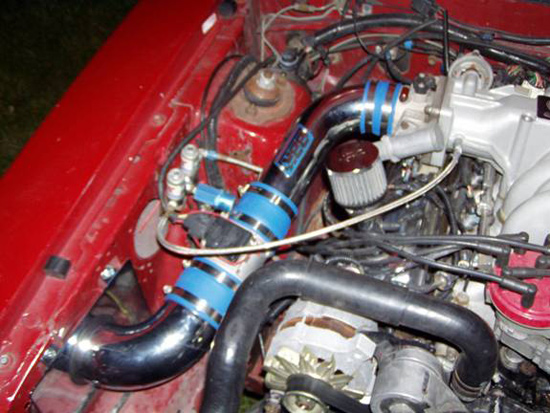
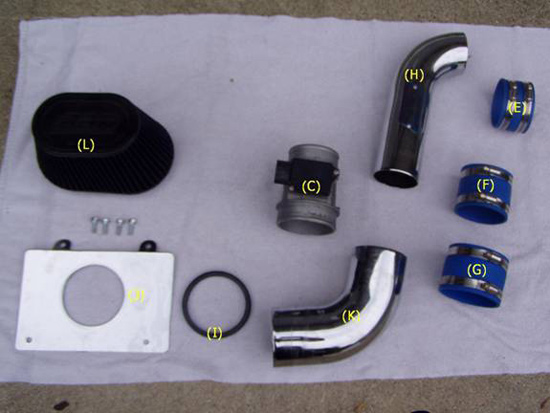
2. Take note that the three BBK rubber couplings are all different, Figure 4 shows the three different couplings labeled (E), (F) and (G). Put 2 clamps on each coupling and tighten to the point where it will not fall off, but is loose enough that it will still fit onto a tube.The Clamps on the rubber couplings should not be fully tightened until the entire intake is in place, this will prevent any unnecessary stress points in the rubber couplings.
a. Fit coupling (E) onto the throttle body.
b. Fit the short end of tube (H) into coupling (E).
c. Fit coupling (F) onto the long end of tube (H).
d. Fit the mass air meter (C) into coupling (F) in the same direction it was originally oriented (the smaller opening goes towards the throttle body (A) and the larger opening should be exposed as this point)
e. Fit coupling (G) onto the exposed end of the mass air meter
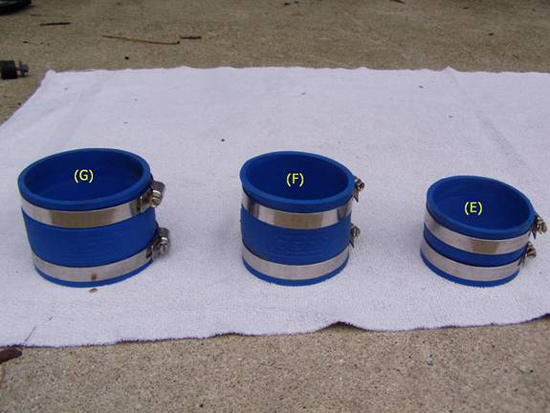
[Figure 4]
[Figure 5]
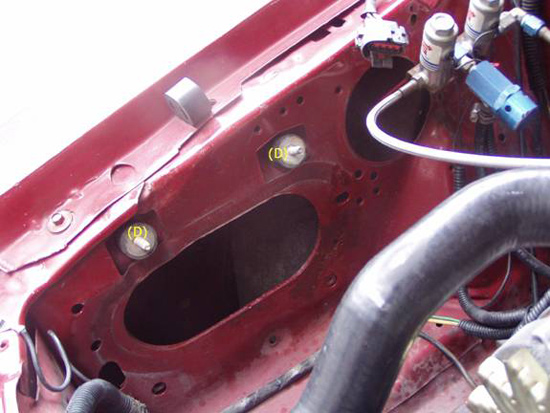
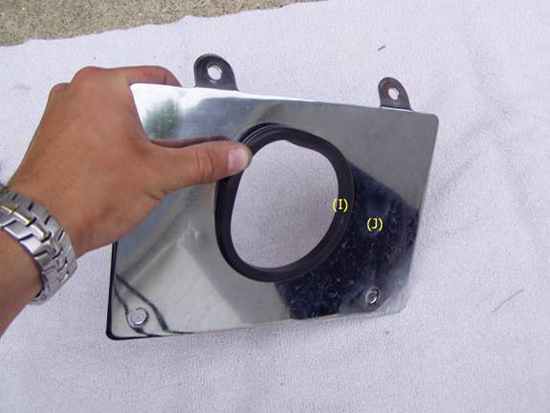
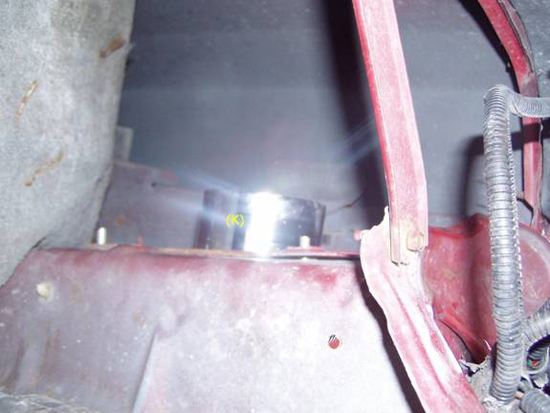
3. Insert the Rubber grommet (I) into the side plate (J) Using the hardware supplied in the BBK Cold Air Intake kit and a 10mm wrench; bolt the side plate firmly to the engine bay wall as shown in Figure 7. Lubricate the entire inside ring of the rubber grommet (I)just enough to allow the end of tube (K) to slide through. Water is the best choice as a lubricant because it will evaporate, leaving everything firmly in place. Grease or oil may be used if water does not lubricate the grommet well enough. It does not matter which way tube (K) is facing because it is perfectly symmetrical. Fit the other end of tube (K) into rubber connector (G).
[Figure 6]

[Figure 7]
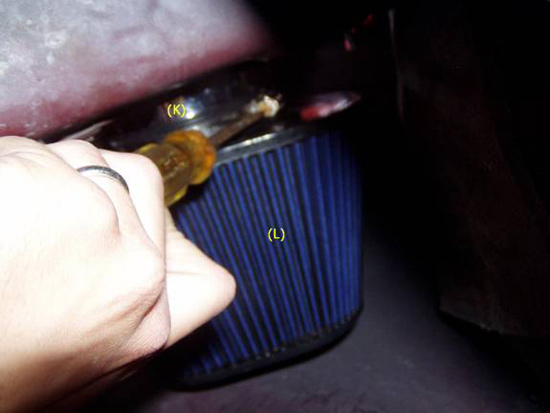
4. Use a paper towel or rag to wipe off any excess lubricant from the end of tube (K) that is located inside the front passenger fender. Access can be gained to this area from beneath the car. A jack is not required but may make the process easier-when using a jack always support the vehicle on jack stands, DO NOT rely on the support of the jack alone.Fit the BBK air filter (L) onto the end of tube (K) that is located inside the fender. Hold it secure as the clamp on the filter is fully tightened with a flat tip screwdriver. It may help to have a friend hold tube (K) firmly in the engine bay as you hold the BBK air filter firmly in place with one hand and screw the clamp with the other. Once the BBK air filter is in place and fully tightened, give it a few firm tugs to make sure it is in place good and not at risk of coming off.
[Figure 8]
[Figure 9]
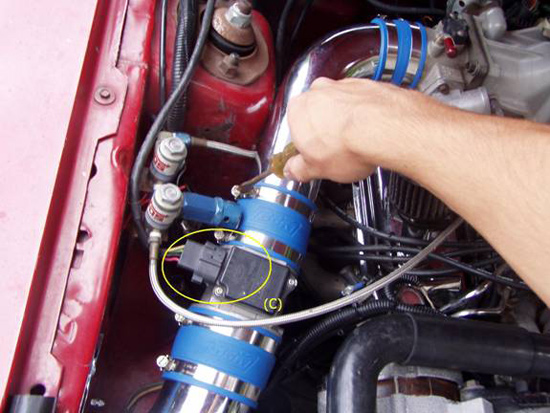
5. Arrange all of the tubing and components so that everything is fit together well. Be sure to have the plug side of the mass air meter (C) facing upward. Plug the mass air meter plug back into the mass air meter. Once everything is in place, firmly tighten all of the clamps on the rubber couplings with a flat tip screwdriver. Be sure that the intake assemble does not move freely or jiggle anywhere (the BBK air filter should be checked a second time after everything else is tightened to be sure it has not moved and that it is firmly in place).
[Figure 10]
6. Start the engine. With the engine running, place your ear right next to each rubber coupling individually to listen for any air leaks. If you suspect a leak, tighten the clamps on the coupling.
[Figure 11]
7. Remember to make sure you there are no tools left in the engine bay, and then take it for a test drive!
[Figure 12]
Part Identification Images Below
[Figure 13]
|
|
[Figure 14]
Installation instructions provided by AmericanMuscle customer Jose Martinez
