 FREE 1 to 3-Day Delivery on Orders $149+ Details
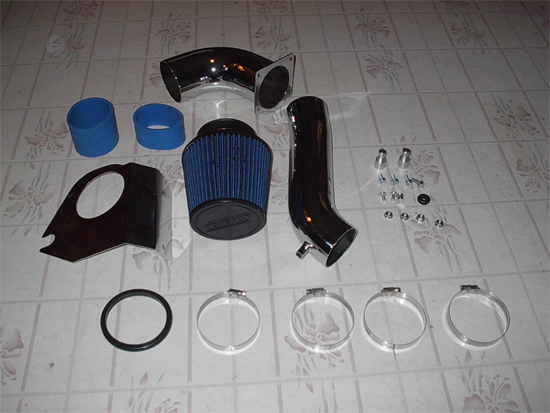
BBK Cold Air Intake ('99-'03 3.8 V6) - Installation Instructions
Installation Time
60 minutes
Tools Required
- Flathead Screwdriver
- Phillips Screwdriver
- 10mm Socket
- 08mm Socket
- 10mm Wrench
- Ratchet

Shop Parts in this Guide
Installation
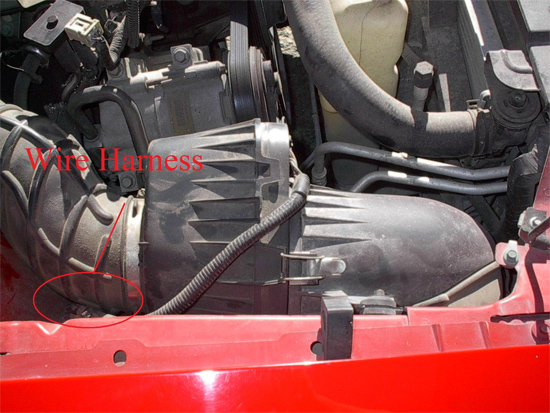
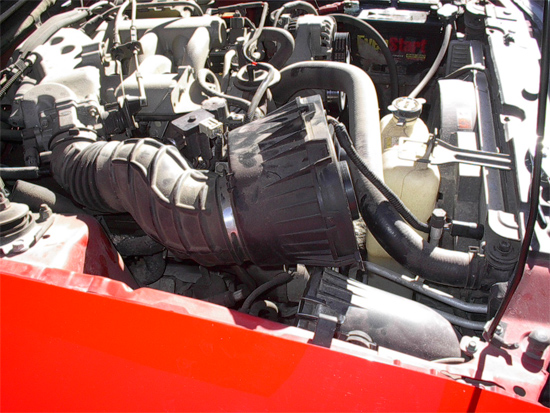
1. Disconnect all wire harnesses from the stock air intake assembly. Some models of the V6 may have two wire harnesses, but for my 2001 V6 I only had one. To remove the harnesses just depress the small clamps inside the harness to detach. Using your flathead screwdriver may help with this.
2. Undo both clips on the air filter housing. The first one is visible right on top, but the second is just around to the right of the clip shown.

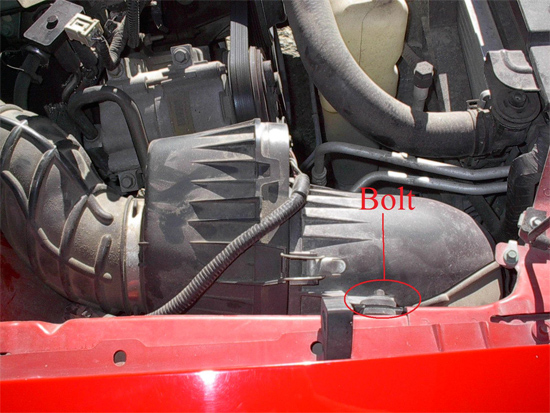
3. Remove the only bolt holding the stock air intake in place. This bolt can be removed with your 8mm ratchet. Save the bolt, for it will be used later in the installation.
4. Separate the intake. This will require some maneuvering of the two pieces.
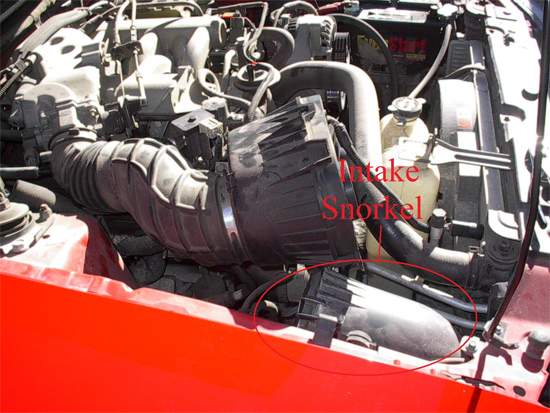
5. Remove the intake snorkel from the fender. It will pull out diagonally from the engine compartment.
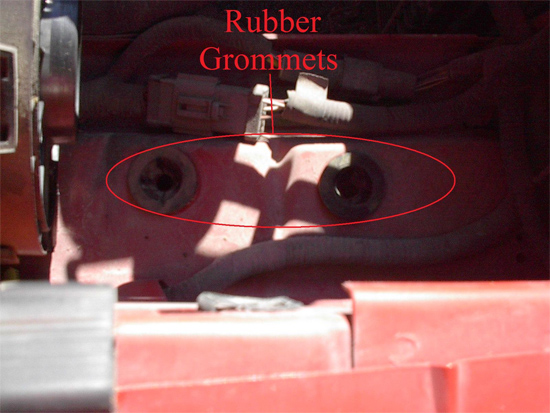
6. These grommets may have come out when you pulled the snorkel out. Just take them off of the snorkel and replace them back to this position.
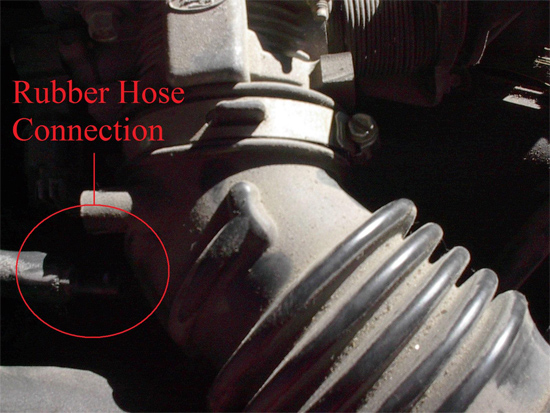
7. Remove the rubber hose from the stock air intake. Once you have done that remove the plastic fitting from the hose. The fitting is a little tricky to remove, but widening the hose with your flathead screwdriver will help. Be careful not to puncture the hose. The end of the hose on mine was very grainy and easy to puncture.
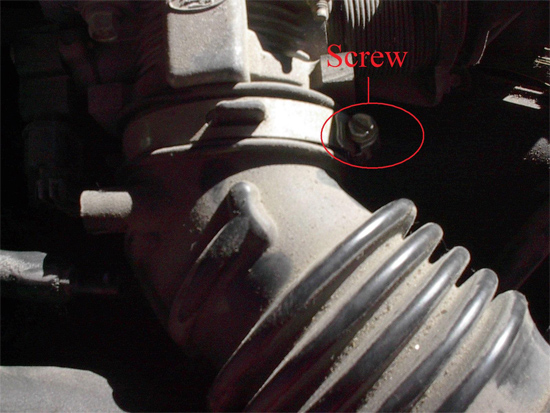
8. Loosen the screw on the pipe clamp. Once you have done this remove the rest of the air intake assembly from the engine compartment.
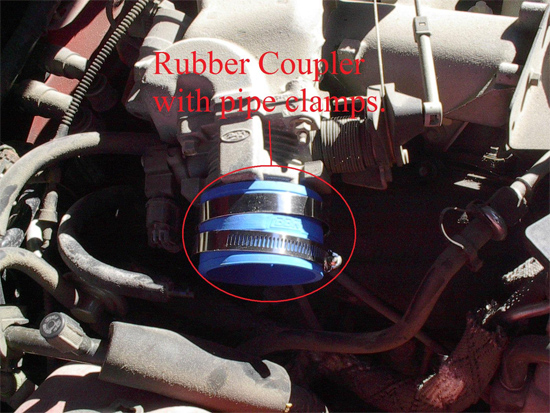
9. Attach the smaller rubber coupler to the throttle body, and put two of the pipe clamps provided on the couple. Be sure the clamps are on with the screw facing up so that you can get to it. You might want to tighten the pipe clamps just enough so they don’t fall off.
10. Some models have an air temperature sensor as well, but mine did not have one. If you have one remove it from the stock air intake by easily pulling it out, and put it into the hole on the main pipe of the BBK Cold Air Intake.
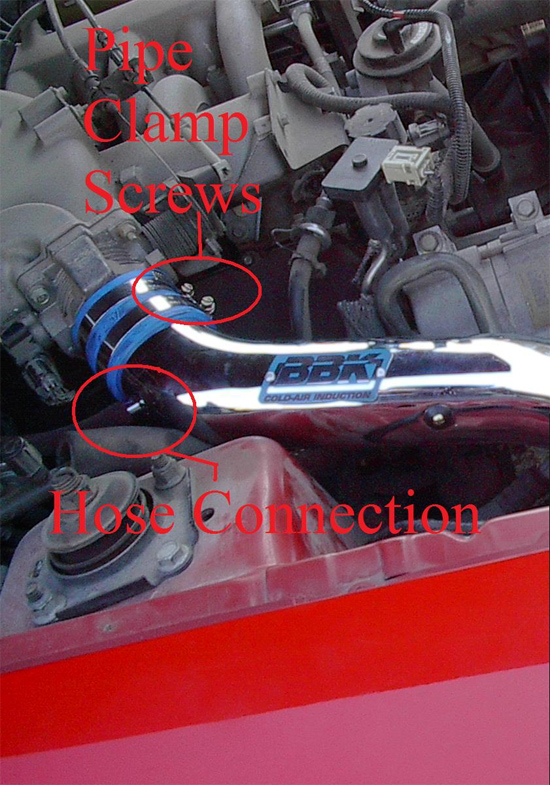
11. Install the upper pipe. I found that this went in very easy. Tighten the screws on the pipe clamp just a bit so that it will hold the pipe into place, but do not tighten them to where you cannot turn the pipe. Also, put the hose (the same hose you removed the fitting from) on the nipple of the main pipe.
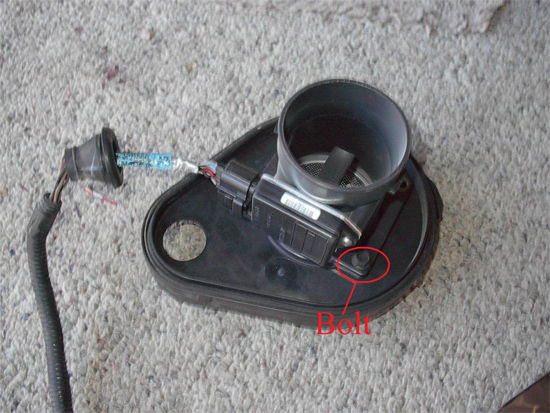
12. Now we need the airflow sensor. This sensor is inside the hosing shown below. Just remove the four clamps and this piece will separate. Again, using your screwdriver is very helpful. Once you have the housing separated, use your screwdriver to push the rubber holder through the hole, and pull the wires through to the other side.

13. Remove the four bolts around the air flow sensor using your 10mm socket and ratchet. The sensor is fragile, so be careful not to drop it. Also do not touch or clean the inside of the sensor.
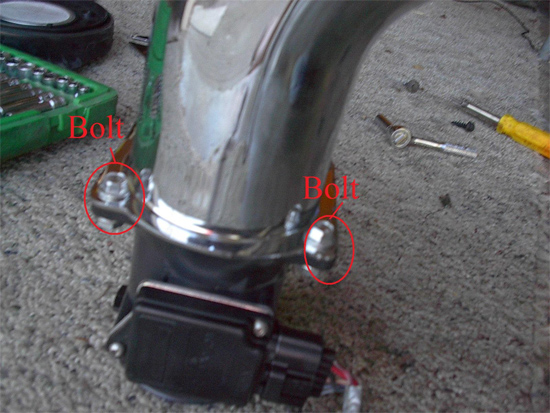
14. Fit the elbow pipe on to the airflow sensor with the 4 10mm bolts and nuts provided. Use your 10mm socket, ratchet, and wrench to tighten the bolts and nuts. Be careful not to over tighten the bolts, for some sensors and plastic and break easily.
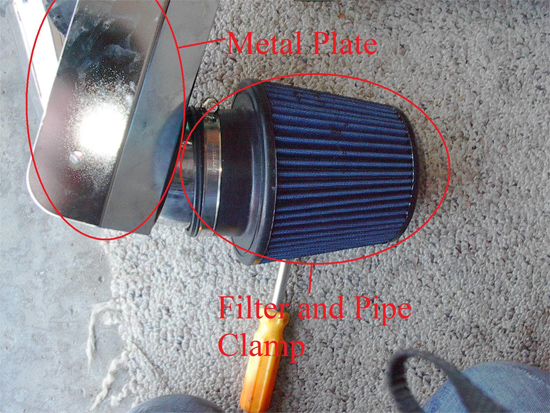
15. Fit the rubber ring in to the hole on the metal plate. Once you have done that fit the elbow pipe through the hole so that the plate is folded away from the end of the pipe. After the plate is on the pipe put another rubber clamp around the filer and fit it on to the elbow pipe. Tighten the clamp.
16. Place the 2 mounting points in to the rubber grommets. This picture does not show them installed, but it does show where they go.

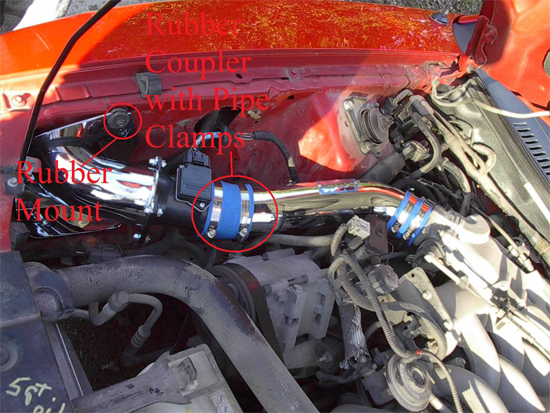
17. Slide the assembly into the hole to the inside of your fender filter first.* Remove the rubber mount from the stock intake and use it to secure the assembly with the bolt that was originally there. Next, connect the assembly to the main pipe using the 2nd rubber coupler and the last two pipe clamps. Lastly, mount the bottom of the assembly to the mounts using the two Phillips screw provided. If the filter does not fit through the hole, just bring the filter to position from underneath your fender and attach it.
18. Finally, reattach all of your wires to the intake, and check all of your bolts/screws.
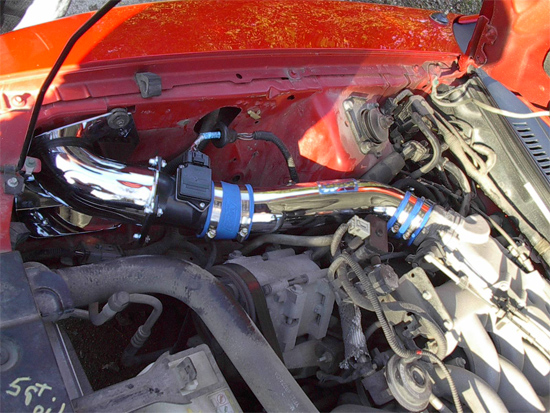
19. You’re done!! Congratulations on your self-assembly of your BBK Cold Air Intake. I’m sure you’re going to be pleased with the sound and performance boost you’ll experience!
Installation instructions provided by AmericanMuscle customer Chris Meyer 11.16.09
Related Guides
-
Installation
-
Installation
-
Installation
