 FREE 1 to 3-Day Delivery on Orders $149+ Details
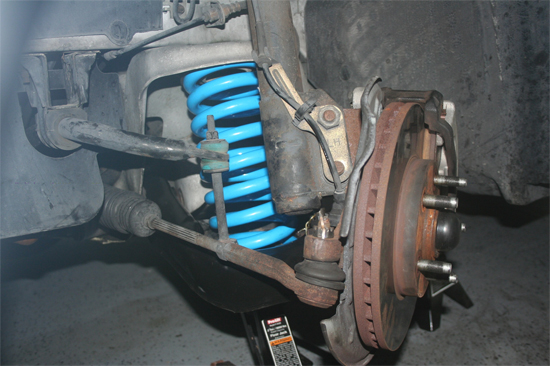
BBK Specific Rate Lowering Springs ('79-'04 V8) - Installation Instructions
Installation Time
4 hours
Tools Required
- Hydraulic jack
- 4 jack stands
- Needle nose pliers
- Large hammer or mallet (3lb. sledge used)
- Pry bar
- Ratchet Wrench
- 13/16 socket or tire iron from your trunk
- 13mm socket
- 15mm deep well socket
- 18mm deep well socket
- 21mm deep well socket
- 24mm wrench
Installation
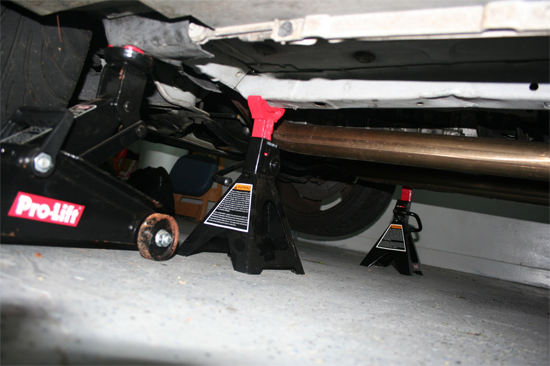
1. Start by jacking up the rear of the vehicle and place two jack stands under the axle. Next use the remaining two jack stands and place them under the rear sub frame.
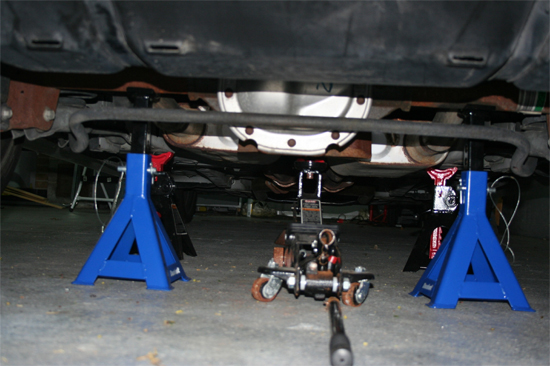
2. Remove the tires from the rear of the vehicle with a 13/16 socket and ratchet wrench or tire iron. This is done to gain access to the sway bar bolts and the control arm bolts.
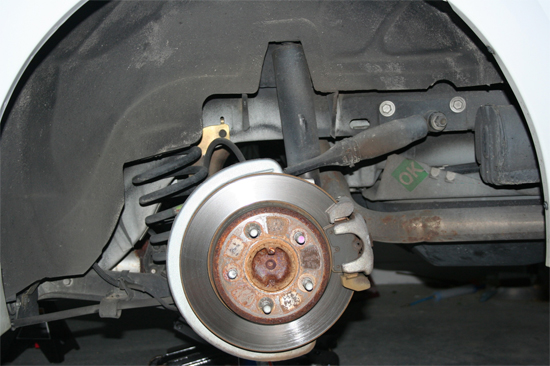
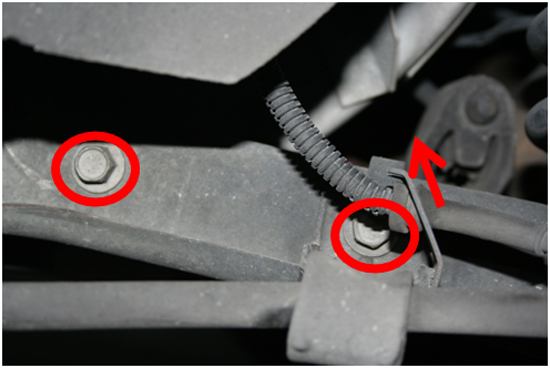
3. Next you will need to remove the harness from the bracket. Then remove the bolts with a 13mm socket and ratchet wrench. These bolts are what connect the sway bar to the control arm and are identical on both sides.
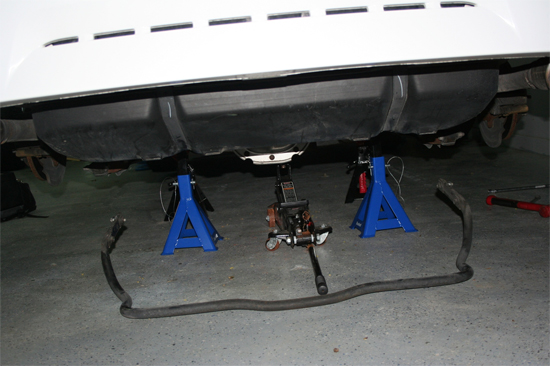
4. I did this on both sides of the vehicle and moved the sway out of the way. If you were planning on replacing your sway bar now would be a good time to do so.
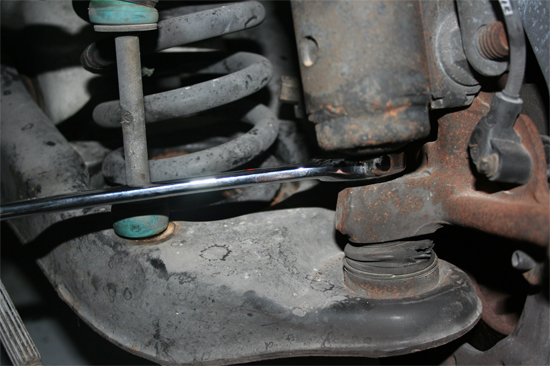
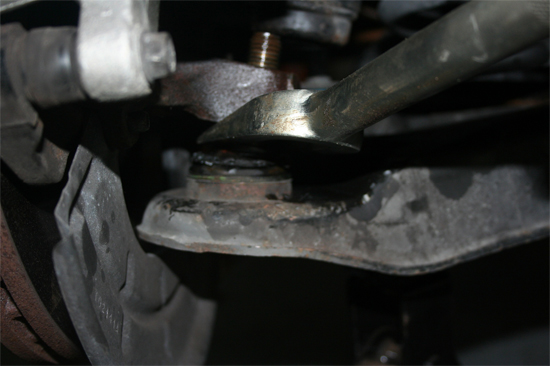
5. Now you will need to move the jack under the control arm and place slight pressure up to the control arm. Then remove the bolt with a 21mm socket and ratchet wrench. A 18mm back up wrench may also be needed.
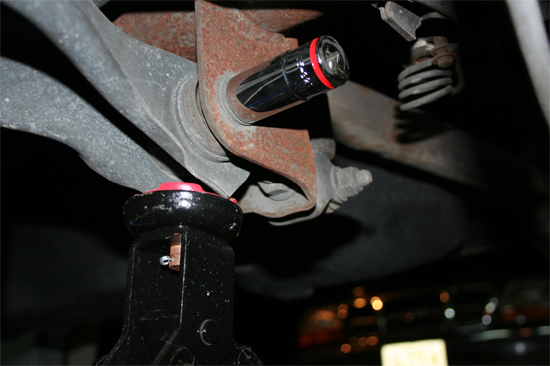
6. With the bolt removed slowly lower the jack down to release the tension on the spring. You should be able to move the spring. If not, reassemble the control arm and jack the vehicle up higher.
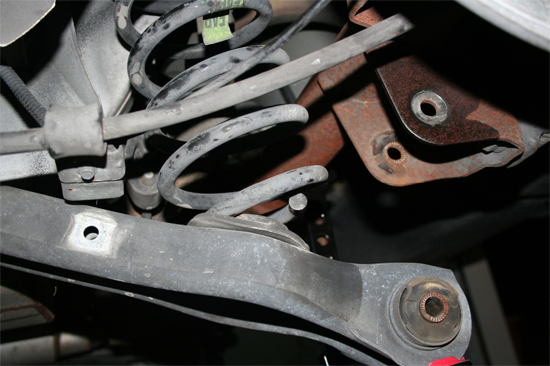
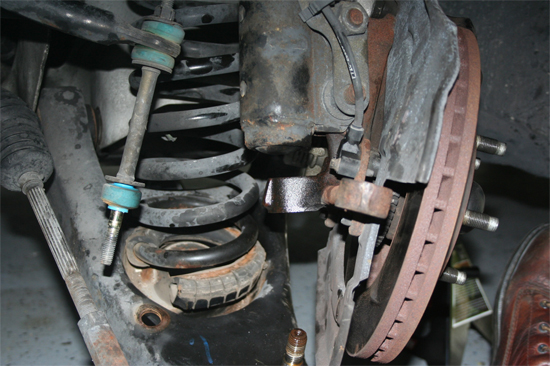
7. Now remove the old spring and place the isolator on to the new spring.
8. Insert the new spring and ensure that where the spring is cut on the bottom is facing toward the driver’s side of the vehicle. Jack the control arm back up into place and bolt it back together. Repeat for the other side with the same instructions and then reinstall the sway bar and tires.
9. Now move on to the front of the vehicle and place jack stands under the sub frame.
10. After you have removed the wheels you will see that there are three components that need to be disassembled, the sway bar link, the tie rod, and the ball joint.

11. First remove the nut from the sway bar link underneath the control arm with a 15mm deep well socket.
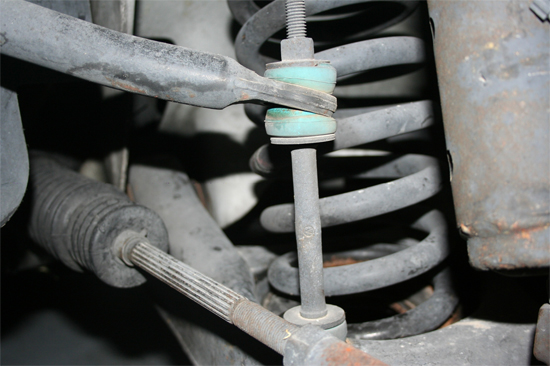
12. Next remove the cotter pin with needle nose pliers and loosen the castle nut with a 18mm deep well socket. Do not remove yet.
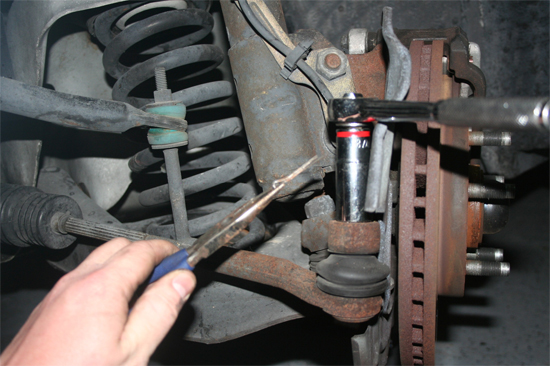
13. Now use a pry bar to apply slight pressure to the tie rod end. Then hit the spindle with a mallet and the tie rod end should come free. Now complete the removal of the castle nut to free the tie rod from the spindle.
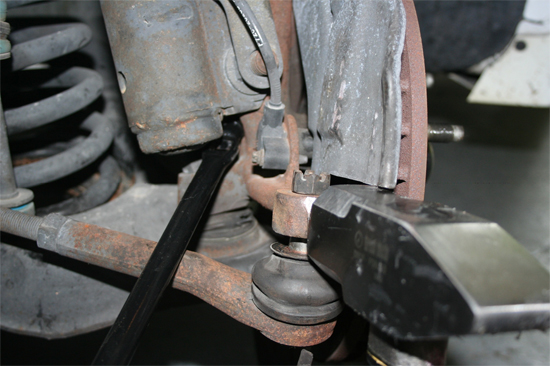
14. Next take the jack and use it to apply pressure to the spring by jacking up the control arm, then remove the nut securing the ball joint to the spindle with a 24mm wrench.
15. I replaced the ball joints also at this time, so I used a pickle fork to separate the ball joint from the spindle. However you may use you mallet again to break this joint. The use of a pickle fork does require the replace of the ball joints
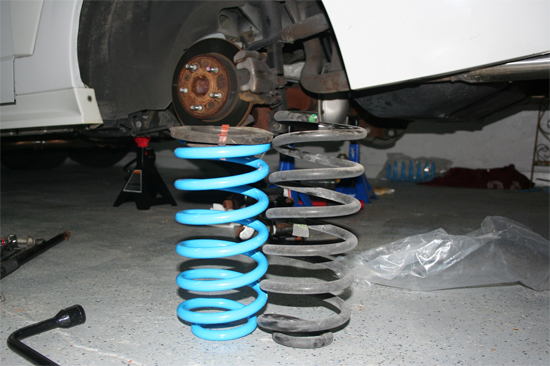
16. Now with these items removed and separated lower the jack to release tension off of the spring. Then use your foot for a little extra clearance and remove the stock spring.
17. Place the isolators on the new spring and install it in the control arm.

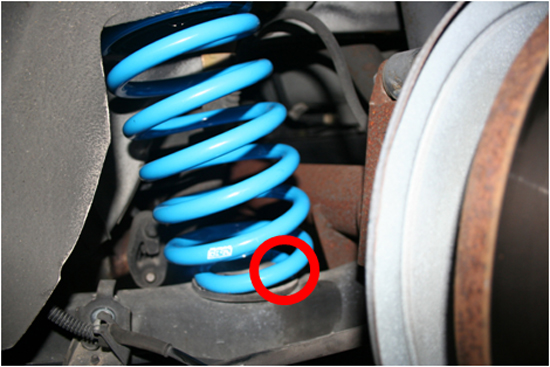
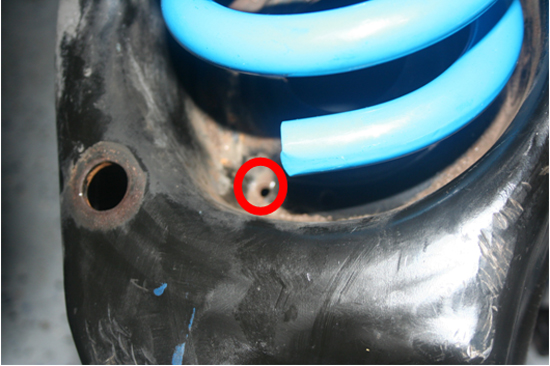
18. When installing the new front spring ensure that the front of the two drain holes is not covered by the new spring.
19. Now with the new spring installed jack the control arm back into place and reconnect the three components. Then repeat on the other side. Be sure to get the vehicle aligned after completion.
Installation instructions provided by AmericanMuscle customer Dru Kitterman 5.6.10
